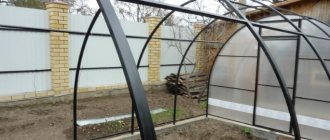
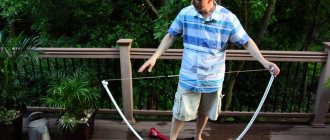
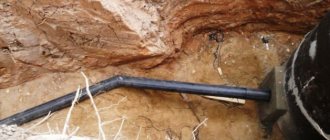
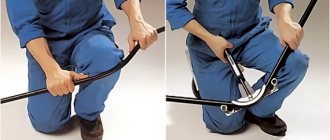
A greenhouse created with your own hands is not only a useful building for a summer cottage or garden plot, but also an excellent opportunity to apply your knowledge, experience and skills in working with various materials and tools in practice. The most important part of the greenhouse is the frame, the quality of which determines the strength and durability of the building. It consists of a set of straight and rounded elements connected by welding, bolts or self-tapping screws. Let's look at the most difficult elements to manufacture - arcs for a greenhouse.
Arcs for greenhouses
Metal arc for greenhouse
How to bend a profile pipe at home without a pipe bender
The average homeowner rarely has special equipment available. Therefore, you need to know how to correctly bend an aluminum or steel pipe yourself for a greenhouse, canopy (canopy) and other needs without a pipe bender. You can give a metal workpiece an arched appearance without using a pipe bender using a cold or hot method. With the cold bending option, soft but durable profiles are used. Their recommended diameter should not exceed 40 mm. They are soft and easy to work with. For profiles with a diameter of 40 mm and above, the hot method is suitable. It involves the use of a blowtorch, with the help of which the metal workpiece can be preheated. This makes it more flexible and pliable.
Before you start work, you need to draw up a drawing. It calculates the location of the bend and the radius of the corner. To do this, the following profile characteristics should be taken into account:
- Section shape. Can be square, oval, rectangular or flat. On the farm, a round pipeline is most often used.
- Sectional area and wall thickness. These parameters affect the softness and plasticity of the product.
- Profile height. The maximum corner radius depends on it.
- Only a correctly selected method and a well-calculated project guarantee the achievement of a high-quality result.
Photo - pipe bending without a pipe bender
Bend the pipe using a welding machine and a grinder
To be able to bend a profile pipe with your own hands, you need a vice, an angle grinder and a welding machine. Let's look at how to do this step by step:
- The fittings are securely fixed in a vice.
- Using a grinder, small cuts are made in the places where the bend is supposed to be.
- After this, the workpiece should be thoroughly cleaned of chips and you can begin to work.
- Next, use a welding machine to weld the resulting cracks. If the design is not complex and the errors are small, a soldering iron is used.
For the final step, the product is sanded and coated with an anti-corrosion substance. This is necessary to prevent premature rusting and destruction.
We use a spring for an even arc
A high-quality curved arc can be obtained using a spring. To do this, it must fit the size of the profile so that it can be easily placed inside and, upon completion, easily removed. Using a spring makes it possible to bend the workpiece in any circle. In addition, it protects the structure from deformation and rupture.
Sand is used to bend the pipe
To obtain a high-quality arc from a profile at home, sand is used. Let's see how this is done:
- Secure the workpiece in a vice. If they are absent, provide reliable support by resting the reinforcement against the corner of the wall or into the ground. The main thing is that the product does not move during operation.
- The lower edge of the pipe is plugged with a wooden cap.
- Sand is poured inside as a filler. It protects the workpiece from tearing and distortion.
- If the profile does not bend, it must be heated in the bending areas with a blowtorch.
How to make a coil Fine, well-screened sand is poured into the pipe for the coil, after which the outlet holes are plugged. The prepared workpiece is attached to a pin of suitable diameter and wound around it. Upon completion, the finished product is fixed for some time to secure the new shape.
Video training on how to bend a 20 mm pipe without a pipe bender using sand
During the winter season, water can be used. A pipe containing frozen liquid is softer and more pliable. After bending, it is necessary to leave the pipe in a fixed position for some time - this will help the material consolidate its new shape. If the work is carried out in winter, then the craftsmen expose it even to the cold.
Arch (canopy) without pipe bender
As you know, for a canopy, for example, in the shape of an arch, you need a curved profile pipe. It is important to make sure that the arcs are equally curved, otherwise the canopy will not work. Now we will look at how to do this without using a machine, pipe bender and other aids of this kind.
We will need:
- The support on which we will work, for example, a metal table;
- As a beam, you can take a pipe 80 by 60 or 50 by 50 mm, 3 meters long. But this method is universal - so it doesn’t matter what kind of support beam you end up with;
- A profile pipe 20 by 20 or 20 by 40 mm, which we will bend.
Procedure (step by step instructions):
- We divide the support into 6 equal parts. It is very important here - exactly into 6 parts, regardless of how long it is;
- At the dividing lines, it is necessary to weld the posts strictly at 90 degrees to the beam. The middle post is 250 mm, the closest post to the middle is 250 mm * 0.8888 = 222.22 mm, and the outermost (smallest post) is 250 mm * 0.5556 = 138.9 mm;
Photo: welded racks to the beam - We fix the beam itself to a metal table;
- We take the pipe that we will bend, place it on the racks and move it relative to the beam with an allowance of 10-15 cm, so that there is a lever that we can grab and bend it around the racks;
- We tie it to the beam with a rope (fix it);
Photo: we placed the profile pipe on the posts and tied it with a rope to the beam - Next, we carefully bend the pipe around the posts and weld it to the ends of the beam with a welding machine.
Photo: this is how we get a bent pipe for a canopy - Next, make the required number of such structures (arches), use polycarbonate sheets and your arched canopy is ready!
Important note from the expert:
The whole secret of bending corrugated pipes into an arch for your canopy lies in the length of the posts. The lengths of the two posts are determined from the length of the middle post (we have 250 mm - you can take a different length, but not more than 250 mm - otherwise the pipe may break when bent). Coefficients 0.8888 and 0.5556 are valid for any length of support and central post. To build a canopy, equally curved arcs are required. They are easy to make with your own hands. Before starting work, you need to choose a place where the rods will bend and the structure will be assembled. A metal table works well for this. A 40 by 40 mm pipe can be used as a beam. For arched rods, profile pipes 20 by 20 mm are suitable. The size of the support beam is selected individually. It is securely attached to the table and is divided into 6 equal parts. Stands are welded to the marking points at an angle of 90 degrees. The bending radius depends on the size of the posts. The recommended length of the stand at the center is 250 mm. The racks on the sides of it are reduced by a factor of 0.8888 and are 222 mm each. The outermost supports are reduced by a factor of 0.5556 relative to the central one and are 77 mm each. The coefficients are universal for any size of beam and main post. Next, the workpiece is fixed with a rope to the support with an allowance of 10-15 cm. Then it is bent around the racks and fixed by welding to the beam on the other side. The edge previously tied with rope is also welded to the support beam. The arc turns out to be evenly curved along the radius. The design can be used both with and without racks. To do this, you need to thoroughly scald the edges and knock out the metal rods.
For a better understanding of how to correctly bend a profile pipe to build a canopy without using a pipe bender, we suggest watching the video:
Video instructions on how to bend corrugated pipes for a canopy (arch) without a pipe bender
Making arcs from profiled pipes
Making arches from a greenhouse from a profiled pipe of square or rectangular cross-section requires some skill and craftsmanship - it is necessary to observe at least approximate dimensions in the absence or imperfection of special measuring instruments. In addition, you need to be careful and avoid the formation of dents on the inner wall of the arc, violation of the axial symmetry of the profile and divergence of the weld. In this section, we will consider two methods for making metal arcs that do not require heating of the workpieces - using a homemade or purchased pipe bending machine and manually, using a template.
Metal arcs for greenhouses (reinforced, that is, double)
A pipe bending machine is a mechanism consisting of two fixed elements and one movable one. The latter is lowered or raised using a jack or an adjusting screw. Due to this, the radius of curvature, which is given to the profiled pipe on the machine, changes. The latter is driven by a manual drive or an electric motor - the workpiece is pulled along the rollers several times until the desired shape is achieved.
Pipe bending machine with a central movable roller. To increase the accuracy of arc manufacturing, the mechanism is equipped with a ruler
Pipe bender with outermost movable roller
Drawing of a hydraulic installation using a jack
Advice! Operation of a manual pipe bender can be simplified using a toothed chain. It is pulled between large sprockets on fixed rollers and a small one on a manual drive. As a result, it is possible, with little effort, to impart significant torque to the machine mechanism.
Toothed chain in the design of a manual pipe bender
You can learn how to make your own pipe bending machine from the videos presented in the following sections of the article. Here we will look at how to use it and how to make strong arches for a greenhouse with an arched frame.
Step 1. Determine the length of the future arc and the radius of curvature. This can be done either using mathematical formulas, or by making a workpiece of the appropriate shape from wire. By the way, in the future it will be needed as a kind of pattern.
Example of an arc drawing
Drawing of an arc for a greenhouse
Step 2. Prepare the profiled pipes - cut the pieces to the required length, clean them from rust, if any.
Step 3. Prepare the pipe bending machine for operation, check its completeness and functionality.
First you need to prepare the pipes and machine
Step 4. Using the adjusting mechanism of the machine, select a slight bend, place the straight profiled pipe on the rollers and make one roll.
Bend adjustment
Next you need to do one rental
Step 5. Unfold and insert the workpiece into the machine with the other side, roll it on the rollers again.
The workpiece is inserted on the other side
Re-rolling of the workpiece
Step 6. Repeat steps 4 and 5 until the curvature of the profiled pipe no longer changes.
Step 7. Check the resulting product against the template. If the shape does not yet correspond to the desired one, set a larger radius of curvature on the control mechanism, insert a curved profiled pipe and repeat the three previous steps until the arc takes on the desired shape.
The arc is almost ready
Important! Please note that the first few arcs are trial ones, with their help you will gain the necessary experience and skills in working with the machine. Since the shaping of the profiled pipe into the desired shape occurs gradually, mark out intermediate values of curvature on the adjusting screw or jack using a pencil or chalk.
Industrial Pipe Bending Machine
Making an arc manually using a cold method is allowed only for profile pipes with small wall thickness and a cross-section of 20x20 mm or less.
Step 1. Determine the arc length and radius of curvature.
Step 2. Assemble a pattern from wood, plywood or corner profile. To do this, you will need a flat and large enough area or workbench.
Finished pattern
Step 3. Secure the pattern and one end of the pipe attached to it to the platform or workbench using clamps.
Step 4. Grab the other end of the profile pipe (for convenience, you can put another pipe of a larger diameter on it, which in this case plays the role of a lever) and slowly, carefully bend the workpiece along the pattern. Be prepared to put in a lot of effort.
Profile pipe bending process
Step 5. Upon completion of the bending process, compare the parameters of the resulting arc with the wire template and inspect for defects. If they are not serious or are completely absent, then the resulting part is suitable for the greenhouse frame.
Step 6: Repeat the previous steps to make the remaining arches.
For profile pipes with a large cross-section and thick walls, “hot” bending is often used, when the workpiece is filled with sand, plugged with plugs on both sides, heated at the bend point with a gas burner and then carefully bent. The problem is that this method is used to create individual bends and is not very suitable for making an arc for a greenhouse
Video - How to make a pipe bender at home
Video - Arc on a greenhouse in 2 minutes
Now let's look at how to bend a pipe using a pipe bender
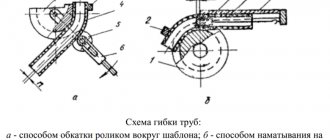
When constructing complex buildings, square and round profiles with thick walls are used. They are difficult to bend by hand, so a pipe bender is needed. There are two types of machines:
- Manual. The devices are of simple design and inexpensive. Quite suitable for use on the farm.
- Automatic. They are classified as professional and are used by specialists. They are expensive and therefore not suitable for home use.
Photo - mechanical profile bender
Also, the machines differ in operating principles and come in different models. Let's look at the most practical ones:
- Crossbow pipe bender.
- Spring pipe bender.
- Segmental pipe bender.
- Mandrel pipe bender.
Working with a pipe bender is convenient and easy. It holds the profile securely and exerts uniform pressure on it. The bending radius can be adjusted. The output is perfect arcs.
How to bend a profile pipe for a greenhouse
Photo - Greenhouse made of profile pipes
To build a greenhouse you need profiles curved in an arch. This can only be achieved using a pipe bender. It's easy to do it yourself. It consists of a working surface and several rollers.
To bend a profile pipe at home, you need to use a special device - a pipe bender or profile bender. Their feature is the ability to install communication into the device and fix it in a certain position. Due to the pressure that is applied equally to both the external and internal corners, an even bend is formed without sharp changes and cracks. Let's look at an example of how to bend a profile pipe for a greenhouse 3 meters wide into an arch:
- The recommended cross-section of the main profile is 20 by 40 mm, and for the auxiliary profile 25 by 25 mm.
- To get the shape in the form of an arch, it must be driven through a pipe bender 4 times.
- After each pass, the clamping thread should be tightened to increase the bending radius.
Such work is carried out with each workpiece intended for the structure. The result is perfect, equally curved profiles in the form of arches.
The first are a fairly simple device, which consists of a working surface (table) and a number of rollers. Due to the movement of the rollers, the pipe moves along the work table and changes its angle without distorting the desired semicircle.
Professional devices are more convenient to use, but their cost often exceeds 20,000 rubles. They are used for complex work, most often required for the production of complex decorative metal elements. The advantages of the model include the ideal radius, which will be accurate literally to the tenth. Of course, it is more convenient to work using a machine, but at home it is practically not needed, since it is designed for processing a large number of pipes per shift.
Photo - manual pipe bender Let's figure out how to bend pipes for a greenhouse with your own hands at home
Advantages of arched greenhouses
First, let's look at the advantages of the arched design of greenhouses, where those same arcs are used as the main element of the frame.
- Effective light diffusion at any time of the day and at any angle of the sun to the horizon is the main advantage.
- Reduced consumption of materials for cladding and frame - an arched greenhouse will cost much less than a gable one. This applies to both purchased options and various homemade products.
- The following follows from the previous advantage of arched structures: low weight , and, therefore, no need for a powerful and expensive foundation.
- Another advantage of light weight is the ease of moving the building to a new location.
- If necessary, the arched greenhouse can be extended without any problems by connecting new arches and horizontal ties to the previously installed frame.
- Due to their shape and height, greenhouses assembled from arcs and securely fastened to the foundation or soil are highly resistant to wind loads .
- The shape of the greenhouse allows it to be cleared of snow in winter without any problems.
Arched polycarbonate greenhouse
Important! If you do not have the opportunity or desire to regularly visit your summer cottage from December to March just to clear the greenhouse of snow, make the structure not semicircular, but pointed, as in the image below. In addition to the unusual appearance, construction of this form does not allow large snow masses to accumulate on the cladding.
Greenhouse in the shape of a pointed arch
But in addition to the advantages, a competent master should also know about the disadvantages of the design he will make. Firstly, glass cannot be used as cladding for greenhouses assembled from arcs - yes, theoretically it can be bent into semicircular sheets, but this is too complicated and expensive, and practically impossible at home. Secondly, for such a construction there is often a need to install additional supports and jibs - a lighter and cheaper structure is also weaker. Thirdly, the manufacture of arcs for a greenhouse itself is a complex and labor-intensive process.
Arcs for greenhouse
An arched greenhouse is an indispensable assistant for any gardener, both experienced and beginner. An arched structure (both factory-made and home-made) is assembled from arc-shaped elements, which you can make yourself if you wish. What types of greenhouse arcs are there, and what can you make them from with your own hands?
Prices for arcs for a greenhouse
arcs for greenhouse
How to bend a square pipe
To bend square reinforcement you need a bending machine. You can make it yourself. It does not have a complex configuration and is equipped with:
- profile fixed roller;
- wrapping roller;
- long lever.
This type of pipe bender is considered the simplest, yet very practical. To bend the profile, you must:
- insert the reinforcement between the rollers at the bend;
- Having provided the workpiece with a reliable stop, press the lever;
- the enveloping roller begins to press and bend the workpiece.
In this way, the reinforcement is bent at any necessary angle. Video: bending a square metal profile
