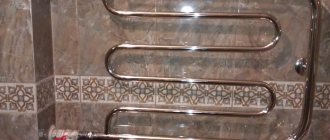
Step-by-step installation of a water heated towel rail
The technology for installing a water heated towel rail with your own hands is the same for different connection schemes. The step-by-step progress of work includes dismantling the worn-out device, supplying pipes from the riser, installing taps and fastening the coil.
Preparation of tools and materials
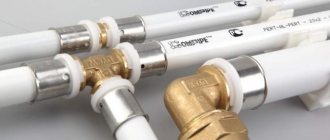
The set of tools required to install and replace a heated towel rail depends on the type of water pipes in the room. For installation through polypropylene pipes you will need: ball valves; mounting brackets; polypropylene pipes; soldering iron and knife for cutting PP pipes.
The standard equipment of the heated towel rail includes:
- transition corners;
- silicone gaskets;
- locking units;
- telescopic brackets;
- Mayevsky crane.
It is advisable to use components from the same metal in the system to avoid electrolytic corrosion.
All connections are sealed with gaskets, threaded detachable units are sealed with plumbing tape (+)
Dismantling of old equipment
Before dismantling the outdated coil, it is necessary to coordinate the actions with the house management organization. Disconnecting the riser from the water requires special permission.
Following actions:
- If the towel dryer is not integral with the hot main, then the threaded connections must simply be unscrewed.
- If the device is welded to the riser, then it should be cut off with a grinder. The remaining portion of the pipe connection should be sufficient for threading.
- Remove the used device from the brackets.
The height of the cutout in the riser must exceed the distance between the pipes of the new device by the length of the couplings and bends required for inserting the bypass jumper
The size of the dismantled area must be determined with maximum accuracy. It’s better not to cut a little, and after “trying on” the device to the installation site, adjust it according to the fact
Installation of bypass and ball valves
The coil can be mounted without installing a bypass, but experts recommend providing a jumper in advance. Ball valves are installed at the ends of the heated towel rail. If necessary, the coolant supply to the device can be shut off, while water will circulate freely through the riser.
The bypass is inserted into a riser made of PP pipe using tees and couplings (+)
To install valves on pipe sections, cut a new thread using a die of the required diameter. If after dismantling the old device the thread has survived, then it is enough to “drive” it with a die to improve the connection. Install shut-off valves on the prepared pipes.
Installation of the jumper in the steel pipeline is carried out by welding. The bypass diameter is equal to the cross-section of the riser pipe
Attaching the heated towel rail coil
The procedure for “hanging” and connecting the device is as follows:
Apply markings on the wall for the brackets - it is necessary to ensure that the placement of the coil is horizontal. Prepare the holes and insert dowels into them. Screw the brackets to the heated towel rail, place the device against the wall and secure with screws
It is important to adhere to the recommended distance between the radiator and the wall cladding. Connect the unit to the valves on the jumper using fittings, seal the connection with linen winding. Depending on the type of connection, straight or angled threaded fittings are used
Depending on the type of connection, straight or angled threaded fittings are used.
At the end of installation, inspect the tightness of the joints and smoothly open the taps to check the functionality of the device. There should be no leaks or drops
Installation of structures with bottom connection
Let's look at how to carefully and quickly install a heated towel rail with hidden wiring on a wall already finished with ceramic tiles:
Step 1. Remove the plugs from the taps using a wrench and remove dirt.
Step 2. Tighten all connections of the heated towel rail, tighten with a wrench to be secure. It is recommended to use gaskets made of paronite, which are not afraid of heat and high pressure and retain their elastic properties for a long time.
Step 3. Install decorative caps and adapters on the bends.
Step 4. Place the gaskets in the adapters, attach the heated towel rail to the outlets and secure with nuts.
Step 5. At this stage, the dryer is fixed to the wall using dowels. Since the finishing is already ready, you need to act very carefully. Remove the heated towel rail, drill holes, install fasteners.
Step 6. Hang the device on the wall again, check its position with a level and, if necessary, adjust vertically and horizontally.
Step 7. Tighten all the nuts completely. Start testing. If the heated towel rail heats up evenly as the coolant passes through, the work has been carried out correctly. Otherwise, you need to try to bleed the air using the Mayevsky tap (if available) or by slightly unscrewing the nuts in the upper corner.
GOST standards
The main document regulating the procedure for connecting the receiver to the hot water supply system is SNiP 2.04.01.85. Most of the standards were developed taking into account the old methods of manufacturing heated towel rails, but they are still in effect today. When installing devices, it is necessary to ensure:
- The distance from the axis of the pipe to the wall should be 35–55 mm (the norm is clearly outdated and does not take into account the size of modern devices).
- The direction of coolant circulation is from top to bottom.
- The diameter of the riser or supply pipeline must be less (at least equal) to the diameter of the heated towel rail pipe, so as not to create a narrowing of the clearance and a pressure drop in the system.
- Installation height: 120 cm from floor level. (This SNiP requirement also does not take into account the dimensions and design features of modern devices and is often ignored during installation).
- The connection between the device and the main pipe is made with one- or three-quarter-inch threaded couplings; special brackets are used for installation on walls.
The requirements of GOST and SNiP are aimed at ensuring efficient and economical operation of plumbing fixtures. They are often ignored at all levels - from professional builders to private home owners. The SNiP requirement to install shut-off valves that allow you to turn off the heated towel rail in the summer is extremely rarely observed. Owners consider the installation of taps or valves as a measure aimed at facilitating repair work in the event of leaks.
General installation requirements
Installation of a heated towel rail with a “water” operating principle is carried out subject to a number of conditions:
№1. The diameter of the pipes of the device must correspond to the diameter of the riser; narrowing from the installed fittings is unacceptable.
№2. A jumper must be provided between the drying outlets. The bypass performs a number of tasks:
- maintaining the speed of water circulation throughout the riser;
- separation of coolant flows allows you to save heat for subsequent water intake points;
A significant advantage of turning on the closing sections, bypasses, is the ability to turn off the heated towel rail for repairs without stopping the operation of the system as a whole.
№3. It is prohibited to install shut-off valves on the pipeline section up to the bypass and directly on the jumper.
Failure to comply with the requirement entails:
- slowdown of water circulation through the riser and drop in coolant temperature;
- deterioration of pressure in apartments located in the direction of water supply.
The closing sections can be equipped with the usual ball valves on the bypass and supply line or with more functional three-way valves that allow the coolant to be directed either to the bypass or to the radiator.
№4. The recommended height for placing towel dryers according to SNiP is 120 cm from the floor.
№5. Maximum distances between the heating device and wall cladding:
- 3.5-4 cm – if the coil diameter is 2.5 cm or less;
- 5-7 cm – for pipe cross-sections larger than 2.5 cm.
If a bypass is provided in the installation diagram, then it is permissible to install shut-off ball valves at the outlet and inlet of the device.
Using a bypass in a heating circuit allows you to divide the total coolant flow into two parts. One of the parts goes into the battery, the other is supplied to the following devices, due to which all radiators receive coolant at almost the same temperature as the first (+)
How to properly install a water heated towel rail with your own hands
The installation of water-type equipment differs from the installation of electric heated towel rails.
There are several schemes for inserting equipment.
Below is a detailed process for installing a water heated towel rail with your own hands.
Connection options
There are two ways to install the device:
- Connect to the heating system. In such a situation, after removing the old device, it is necessary to install special taps, bypasses, and American valves. The equipment is connected in parallel with the heating system.
- Connect to the hot water supply system. The dryer is connected to the water supply system, connected in series. This is done directly inside the apartment itself; no additional work is required. There is one caveat to this connection - it reduces the temperature of the hot water.
Dismantling the old
The first thing that needs to be done is to dismantle the old equipment, but it is important to coordinate your actions with the housing office so that you can turn off the riser. Dismantle the equipment as follows:
- If the device does not form a single structure with the hot water main and is connected using fixing elements, then they are unscrewed.
- If the coil is welded to the riser, then a grinder is used to cut it. This must be done in such a way that the remaining part of the pipe is sufficient for threading.
- In both cases, the last step is to remove the dryer from the brackets.
Reference! The height of the riser cutout must be greater than the distance between the pipes of the new device by the length of the used couplings and fittings, which will be required in the future for installing the bypass.
Pipe withdrawal and welding
To connect the device to the water supply system, it is recommended to use polypropylene pipes
In the process, it is important to carry out high-quality welding or soldering of pipes to the water supply
Certain skills will be required to carry out such work. The pipes are connected to the coupling immediately after working with a soldering iron. It is recommended to raise the temperature of the soldering device to 260 °C.
How to make a bypass in front of the device, installation of American valves and taps
To install a bypass, you will need to make threads at the end sections of the pipes. If after removing the previous device the threads remain, then they just need to be cleaned and driven out using a die. This will improve the connection. If there is no thread, it is cut using such a die. After preparing the pipes, stop valves are installed using welding. Any shut-off valves, American valves or bypasses are installed in the same way.
Installation on polypropylene pipes with all fittings
Installing the device and connecting it to the wall is the last thing you need to do. Work is carried out according to the following scheme:
apply markings under the brackets;
prepare holes and insert dowels and brackets into them, screw them to the dryer;
fix the dryer with screws;
Fittings are used to connect equipment to polypropylene pipes, and it is important to wrap a sealing flax wrap around the threaded connection for a reliable connection and to prevent leaks.
Important!
When attaching the coil to the wall, it is important to do it level and maintain the horizontal position of the device
Features of installation of electric models
Unlike water models, electric dryers can be installed anywhere, since they do not depend on the location of heating pipes and hot water supply. In this case, special attention should be paid to the quality of the electrical wiring.
Requirements for installation of electric heated towel rails:
- The installation location is selected taking into account the level of protection of the device from moisture. The distance to the bathroom or washbasin is at least 60 cm.
- The minimum distance to the floor is 20 cm, to the wall – 30 cm, to the surface of furniture – 75 cm.
- The heating device must not be placed directly under the outlet.
Connection to the electrical network is carried out in accordance with the international standard NFC-15-100.
The optimal location is zone No. 3. When installed in zone No. 2, protection of the device from splashes is required (+)
Electrical wiring under the heated towel rail is carried out in compliance with electrical safety standards in rooms with high humidity:
- connection via a three-wire cable with grounding;
- Only hidden electrical wiring is allowed;
- the socket must have a rubber seal and a cover covering the contact holes;
- Copper wires of the VVGng and VVGng-LS brands are used for the electrical network.
A prerequisite for the installation and operation of electrical devices is the use of an RCD that turns off the device when the current operating characteristics are exceeded.
Oil heated towel rails require rigid fixation, while cable radiators can be installed in any position
Installing a towel dryer with your own hands
Today, it is quite difficult to imagine a bathroom without a heated towel rail. This important attribute occupies a vital place in our homes and apartments. In addition to the fact that this device instantly dries our towels, it even regulates the air and climate in the room. Everyone knows that bathrooms are dominated by humidity, dampness, etc. And in order to avoid unpleasant odors, it is necessary to install a heated towel rail. We will find out in the article exactly how this is done.
Some people install this device themselves. But basically, it is recommended to invite professional plumbers who are quite well versed in every detail. Whatever decision you make, in this article you will read a clear description of connecting and installing a heated towel rail. This is done quite easily and simply. Step-by-step instructions will help anyone understand the simplest details.
By type of materials used
Installation of water supply systems using a coupling requires the use of homogeneous elements, primarily in order to avoid electrolytic corrosion, therefore fittings are produced in various designs:
- Steel - the main disadvantage of the material is its susceptibility to corrosion. The life cycle of such parts is also limited by the tendency for lime deposits to form from water on internal surfaces.
- Copper - less susceptible to corrosion, used only on pipelines made of the same material.
- Brass - the most popular in use, are resistant to oxidation, durability is at least 50 years.
- Polypropylene - in terms of strength characteristics and ease of use, they are increasingly competing with metal products.
- Polymer - have all the advantages of plastic products. For polypropylene pipes, American is the best type of connection.
- Combined - used as adapters when joining metal pipes with plastic pipes when partially replacing a pipeline. To make such fittings, a metal threaded part is pressed into a plastic body.
What designs are there?
Heated towel rails come in different shapes. When choosing them, people are often guided solely by aesthetics, which is not entirely justified. These devices work normally with good water circulation, but not all models provide such circulation. With some you have to spend a long time trying to find the right connection diagram, otherwise they simply refuse to work.
So, all heated towel rails can be divided into four groups:
- U-shaped or U-shaped. The simplest models, basic connection (lateral). Ideally, when replacing the old one, you find a model with the same center distance. Then, if you're lucky, you won't even have to redo the bends.
- Ladder. Modern designs with a certain number of crossbars. Also a good option from a hydraulic point of view. The connection can be bottom, side or diagonal. But it is not chosen arbitrarily, but according to a set of conditions (where the supply comes from, location relative to the riser).
- Snake. Another classic model with side connection. Installing a heated towel rail of this type, as a rule, does not present any problems.
- Complex shape. There are very unusual heated towel rails. They can even be an interior decoration, but their proper connection is a problem. As a rule, consultation with a competent specialist, a plumber who is well versed in hydraulics, is required. As you understand, finding one is not an easy task.
It often happens that after installing a heated towel rail it simply does not work. If the error is serious, the riser to which it is connected also stops working. Therefore, it is necessary to know and follow the connection rules.
Connection errors
If the heated towel rail does not heat up well or does not work at all, the selected circuit is ineffective. Here are examples of some incorrect choices.
If it is not possible to redo the connection, there is a way out - install a supply pump with a temperature sensor and idle protection. The coolant will circulate forcibly.
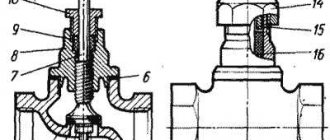
Cranes
To control the operation of the heated towel rail, two shut-off valves with a cross-section corresponding to the main pipes are installed in front of it. The design and arrangement of these valves is not particularly important - both two-position (open/closed) ball and multi-turn products are equally suitable. However, if an air lock accidentally forms in the towel dryer, leading to a sharp decrease in the efficiency of the heating device, it will not be possible to remove it using such taps. Initially, air can be released through the nuts, but if you twist them often, the seals will quickly become unusable.
The taps usually have a threaded connection - therefore, if there are no threads on the main pipes, it must be cut or a corresponding fitting must be welded.
We install the Mayevsky tap in this way if the system often airs out
Summing up
Analyze the old diagram: diameters, presence of a jumper, feed direction. Try to keep the pipe sections unchanged. When connecting the heated towel rail, follow the recommendations given and the manufacturer's instructions.
Check the functioning of the assembled circuit before finishing finishing work. The dryer is left connected for half a day. A test run will allow you to identify leaks, heating problems, and eliminate shortcomings while access to the wiring is free.
Advice! If you need bathroom renovation specialists, there is a very convenient service for selecting specialists from PROFI.RU. Just fill out the order details, the experts will respond and you can choose who to collaborate with. Each specialist in the system has a rating, reviews and examples of work, which will help with the choice. Looks like a mini tender. Placing an application is FREE and does not oblige you to anything. Works in almost all cities of Russia.
If you are a master, follow this link, register in the system and be able to accept orders.
We connect a classic heated towel rail (snake) to the hot water riser
The first heated towel rails in bathrooms were simply made from a piece of bent pipe and were part of a riser. Not the most aesthetic option, but effective and does not interfere with circulation. Later, instead of the ugly pipe, they began to insert a ready-made “towel” (pictured on the right).
The old pipe version and its correct replacement
One can argue about the aesthetics of such a replacement, but everything was done correctly. The device is part of the riser, has the same diameter, and does not affect circulation. It heats up great. This solution also has disadvantages:
- in case of damage/need for replacement, the entire riser must be closed;
- There is no way to regulate the temperature.
The photo below shows very similar other options, but they are incorrect. In the photo on the left, fittings are installed that will narrow the cross-section of the pipe. There are four of them and they greatly interfere with circulation. Everyone who is connected to this riser suffers. This heated towel rail connection scheme is ineffective for the owner, and it also harms all other subscribers.
Incorrect connection: circulation problem
In the photo on the right the situation is even worse. In addition to fittings, shut-off valves are also installed. There may also be a thermostat. By shutting off/adjusting the water in your heated towel rail, you shut off the water in the entire riser.
To correctly implement the ability to turn off a water heated towel rail, in the right diagram in front of the taps you need to add a bypass - a straight section of pipe through which water will flow, regardless of whether there is circulation through the heated towel rail or the water is shut off.
Types of bypass for connecting a water heated towel rail
Some people are sure that if the bypass is not narrowed and not shifted, the heated towel rail will not heat up. Will. Verified. There may be questions only if the heated towel rail is large, with numerous crossbars. In this case, perhaps an offset and narrowed bypass is needed. The rest work great with other connection methods. And to ensure good circulation, make the supply pipes with a slight slope. Moreover, the slope is small - a few degrees. The connection points on the riser should be spaced slightly wider than required for a direct connection.
How to make bends and how to change the riser
If the riser is metal and you are not going to change it, then installing a heated towel rail is possible with steel or polypropylene pipes. If you change the riser (the best option) and install polypropylene, there is no choice - PPR pipes are also used for bends. Use polypropylene for hot water, preferably reinforced with fiberglass.
Why is metal-plastic not suitable? Because its fittings have a very narrow clearance. This has a very bad effect on circulation. As a result, even 100% efficient circuits do not provide normal heating.
Installation of a heated towel rail with polypropylene pipes
A little about why to change the riser. It makes sense to do this in old houses when renovating a bathroom or bathroom (depending on where your riser is located). Firstly, the pipes are usually already old and worn out. Even welding an outlet to them can be problematic, the metal is so worn out. Secondly, modern renovations involve hidden installation of communications and you will also want to cover the riser. Hiding an old pipe and then destroying everything again a few years later... is not a good solution.
A little about how to change. You need to come to an agreement with the neighbors below and above, as well as with the housing office (DEZ, UK). With your neighbors that you will cut off their riser and install a new one on the thread. Why do they have it? Because leaving an old pipe in the ceiling is dangerous: it will collapse and leak. It will flood you or your neighbors below. Therefore, it is better to pass through the ceilings with a new pipe.
With this connection, the dryer is part of the riser and there cannot be any taps
Having agreed or not with your neighbors (their riser may already be closed), you go to the housing office and agree on the date of replacement and the time for which the riser will be turned off. The work can be done by “local” mechanics, you yourself (if you have welding qualifications) or people you hire. After the connection, the water is turned on, you check the functionality of the heated towel rail and the system as a whole. If it doesn’t start to cool within 30 minutes, it means it’s set correctly. This completes the replacement or installation of the heated towel rail.
Connection diagram options
One of the simplest schemes is when the device is part of a hot water supply riser. The flow and its direction do not in any way affect the functioning of the heated towel rail. This system is simple, reliable and allows you to easily replace your old device. During installation, the riser is often hidden in a decorative box.
With this scheme, it is more advisable to use a jumper (bypass) that connects the riser and the heated towel rail. Installing a shut-off element on the bypass is also unacceptable.
The following schemes can also be considered:
Diagonal or side connection. This is the most commonly used and reliable option. The system is good for a ladder type device with water supply from the top down. No bypass is required and there is no dependence on water pressure
When installing the device according to this scheme, it is important to observe certain conditions: the lower point of contact with the riser should be located below the pipe that connects to the heated towel rail;
the system should not contain bends - this spoils the circulation of water;
the main thing is that the diameter of the pipes is not less than DN 20:25 (polypropylene) and 0.75 inches (steel); permissible distance from the PPR material riser is 4.5 meters; For successful operation, it is necessary to apply thermal insulation material to the pipes.
A diagonal connection is no different in efficiency from a side connection. Only the pipe consumption is greater, and the installation process is the most labor-intensive.
Lateral connection with offset bypass. The scheme is rational while preserving the old outlet parts of the riser with a used loop-shaped model of the heated towel rail. It is not necessary to change the riser. Simply installing a bypass is enough. The direction of water should also be from above.
Connection from below. Many devices are designed specifically for this mount. The system allows you to hide pipes using accessories. This method is less effective than the previous ones.
For models with complex shapes, it is important to take into account the features of their design. Determine in which direction the water will flow better, and only then install
With or without bypass
Let's start with what a bypass is. This is a jumper between the input and output of the device, which ensures water circulation when the device fails or is turned off.
The jumper between the input and output of the heated towel rail is the bypass
If the circuit has a bypass, shut-off ball valves can be installed at the inlet and outlet of the device. This is convenient - you can turn it off if necessary (during repair or replacement) and not block the entire riser.
If there is no such jumper, no taps can be installed. In this case, the heated towel rail is part of the riser; by closing the taps, you completely shut off the riser.
When connected without bypass, no taps
The bypass can be direct (as in the first photo in the chapter) or offset (in the photo below). An offset jumper is installed at the top supply of coolant for better performance (circulation improves). With bottom feed, the offset only gets in the way. If you don't know where the water is coming from, it's better to do a direct bypass.
Offset bypass with upper coolant supply improves circulation
Bypasses (straight or offset) are also made narrower. Tapering, as well as displacement, improves circulation, but only in the case of top feed. The narrowing is made with a pipe that is one step smaller than the main one (if the riser is inch, the bottleneck is made 3/4″). You can't do less. The insert size is at least 10 cm.
Once again: an offset and/or narrowed bypass only works with top water supply. At the bottom, it interferes with circulation. If you are not sure, make the bypass straight and untapered.
It is strictly forbidden to install taps on the bypass. Each tap is a loss of pressure, which means it worsens the circulation of the entire riser, the water flows no longer so hot. For all neighbors above or below (depending on the direction of supply), the pressure deteriorates noticeably. Sometimes it also falls on the owner of the bypass with the tap. In addition, this is an absolutely unnecessary detail that only causes harm, and no noticeable improvement in circulation in the heated towel rail is observed. Well, and besides, this is a violation of SNiP 01/31/2003 (clause 10.6) - interference with public communications, for which a (considerable) fine may be issued.
How to install a heated towel rail
To understand how to connect, you first need to study the types of heated towel rails.
So, there are four main groups:
- U-shaped. They are the simplest (side connection).
- Snake. Also one of the simple models that has a side connection.
- Ladder. This design consists of several side bars.
- Complex shape. Such dryers will decorate your interior due to their unusual shape. Connecting this device is very labor-intensive, so you should seek help from a professional.
The following materials are used for the manufacture of PS:
- copper;
- brass;
- stainless steel;
- steel.
Also, all towel dryers are divided into three types:
- Mermen.
- Electrical.
- Combined.
What you need
For high-quality installation of the dryer you may need:
- The product itself.
- Brackets.
- PPR pipes.
- Knife for cutting PPR.
- Dowels.
- Bulgarian.
- Screwdriver.
- Screws.
- Two American women at 3⁄4.
- Screwdriver.
- Welding for PPR pipes.
- Two water sockets.
- Linen winding.
- Two taps.
- PPR elbow with internal thread.
- Twelve pieces of polypropylene elbows.
- Combined coupling with internal thread.
Bottom Connection Variations
This variation has both its pros and cons, let's talk about them.
The benefits include:
- The ability to hide pipes under the shower or bath, so there is no need to scratch the wall.
- This option will work in any direction of supply in the riser.
Minuses:
- Less effective when compared to side installation.
- It is necessary to bleed the air.
Necessary conditions for high-quality operation of the PS:
- The top of the riser should be lower than the connection points.
- The angle of inclination of all pipes must be observed. It must be at least 3 mm per meter. It is recommended that the slope be no less than 30 mm per meter.
- The presence of humps is unacceptable, since as a result air will accumulate inside and circulation will be disrupted.
- In order to ensure strong circulation, the diameter of the pipes should not be less than 3/4″. It is permissible to use pipes with a smaller cross-section only if the length of the pipes leading to the device is short, however, in this case, uneven heating may be noticeable.
- All supply pipes should be insulated to improve circulation.
Bypass installation
The basic rule is that it is strictly not recommended to install taps on the bypass, because a closed or excessively narrowed bypass can lead to a number of negative consequences:
- Riser circulation problems.
- The water pressure in all apartments will deteriorate.
- The quality of operation of a heated towel rail with a bottom connection will deteriorate.
The standard equipment of the devices includes:
- Mayevsky crane;
- silicone gaskets;
- locking units;
- transition corners;
- telescopic brackets.
Important! It is recommended to use components made from the same material. This approach will help avoid electrolytic corrosion.
Before proceeding with installation, you need to remove the old equipment. To do this, you need to disconnect the riser from the water supply. Then:
- If the device is welded to the riser, then it must be cut off with a grinder.
- In the event that the substation is not one piece with the hot line, you just need to unscrew the threads at the connection points.
- Remove the outdated dryer from its brackets.
Important! It is possible to mount the coil without installing a bypass, but professionals strongly recommend making a jumper. Ball valves must be installed at the ends of the device
If the need arises, you can shut off the supply of warm water while it continues to circulate through the riser.
To install the valves, you need to cut new threads on the remaining sections of pipe. Then, install a tap on the finished pipes.
Dryer mount
The operating procedure is as follows:
- Markings for brackets are applied to the wall.
- The holes into which the dowels are inserted are prepared.
- The brackets are screwed to the PS, the device is applied to the wall and fixed with screws.
- Using fittings, the unit must be connected to jumpers and valves. All connections must be reinforced with linen winding.
Types of fasteners
There are two ways to fix heated towel rails, which are practical, durable, and easy to install: using brackets and using supports.
Brackets
The manufacturer supplies the heated towel rail with the necessary brackets that can support the weight of the structure. Most often this is a chrome plated heated towel rail mount with a diameter of 25 mm.
Fasteners are:
- detachable;
- one-piece;
- telescopic.
The split bracket ring consists of two parts. The removable part is secured with two screws. The heated towel rail is simply inserted into the grooves, which greatly simplifies installation / disassembly.
Permanent fasteners - they are attached to the coil, and then the entire structure is fixed in the desired position on the wall. Installation and dismantling is inconvenient, since the entire structure will have to be kept suspended until it is completely fixed.
Telescopic brackets have a retractable tube with a fixing ring. They are dismountable, so they can be installed without outside help. Telescopic fasteners allow you to reduce or increase the distance from the heated towel rail to the wall during installation.
Removal of old heated towel rail, installation of bypass and taps
Direct plumbing work for installing a “towel” begins with dismantling the old structure, in most cases it is a U- or M-shaped pipe that belongs to the main riser and has a common diameter with it. Despite its simplicity and cheapness, such a heated towel rail does not have an attractive appearance.
The process of dismantling it is as follows.
Step 1.
First, turn off the hot water supply to the riser. To do this, contact the housing office or the association servicing your home, submit the appropriate application and, if necessary, pay a fee for the provision of services. The plumber who comes upon your call will temporarily shut off the riser.
Step 2.
Check if the hot water supply is turned off. To do this, you need to open the appropriate tap on the sink or bathtub.
Step 3.
If the old heated towel rail is connected to the riser with a threaded connection, unscrew it with a plumber's wrench.
Step 4.
Dismantling an old heated towel rail using a plumber's wrench is a matter of great luck - most often the “towel rail” is welded to the riser or the threaded connections have become “stuck” over many years. In this case, use a grinder. When working with it, do not cut off excess - the remaining part of the pipe should be enough to cut threads for future fittings.
Step 5.
After cutting or unscrewing the “towel” from the riser, remove it from its fasteners to the wall and put it somewhere away. The next stage of work is the creation of a bypass, installation of taps and connections to the future heated towel rail.
Bypass (or translated as “bypass”) is a section of pipe between the outlets on a heated towel rail, which gives the water in the riser the opportunity to go “past” the heated towel rail in cases where it is closed. Its presence solves several problems at once.
- The bypass allows you to install valves at the inlet and outlet of the heated towel rail to regulate the temperature. In addition, it can be used to completely shut off the water supply to the “towel” without turning off the riser, which is especially convenient in case of repair or replacement of such equipment.
- The bypass separates the flow of hot water in the riser - one goes to the heated towel rail, and the second further, to the neighbors, while maintaining its temperature unchanged.
- The bypass on the heated towel rail ensures normal circulation of hot water in the riser along its entire height.
Examples of various schemes for installing bypasses between taps are presented in the images below.
You can often find diagrams and photographs on the Internet where the bypass is equipped with a valve. The presence of this faucet is another point of contention among plumbers. From the point of view of building codes, unauthorized installation in the riser (and in this case the bypass is formally considered to be one) of such devices not provided for by the project is a gross violation. In addition, installing a bypass tap reduces the pressure and temperature of hot water in the following apartments. Therefore, its presence may be the subject of claims against you from the management company or neighbors.
Connection of a heated towel rail with a polypropylene pipe
Before buying a clothes dryer, you must decide on its immediate purpose. And only then will you decide on its shape: a coil, a ladder or another decorative look. A heated towel rail can perform extremely practical functions.
Polypropylene heated towel rail.
Then think about the material of manufacture, its color and the immediate installation location. It is best to prepare the location for the device in advance during repairs. Based on the intended space, choose a heated towel rail of the appropriate size.
Experts note that devices made of polypropylene pipes and stainless steel are the most trusted. Products made from such materials are distinguished by great practicality and a variety of designs.
Polypropylene heated towel rails are available in a wide range of sizes and shapes. This material is easy to paint, thereby matching its color to the design of the bathroom.
Among the variety of forms, the most popular among consumers are ladders, loops or coils. It is these forms that stand out for their attractiveness and practicality. They fit perfectly into the interior and are beneficial for daily drying of small laundry.
Coil made of polypropylene. This model is universal - suitable for both apartments and private houses. To install a heated towel rail in the form of a coil in an apartment, experts recommend purchasing a dryer with a diameter of at least 20 mm. This is the diameter of risers in apartment buildings.
To connect the dryer in a private home, purchase a device with a diameter of 25 mm. You may need a smaller diameter, so as not to make a mistake, find out in advance the dimensions of the pipes in the house.
Ladder made of polypropylene. Very often, consumers purchase a heated towel rail in the form of a ladder to heat the entire bathroom, choosing products with a large number of slats. Manufacturers also offer us special devices with increased power designed for heating the room.
For installation in an apartment, experts recommend choosing a diagonal connection, and for installation in a house - a bottom connection.
Installation of a heated towel rail.
What is needed to install a water heated towel rail?
Many clothes drying devices become unusable over time, and repairing does not make sense. They become less and less warm, and then stop heating altogether. The best solution is to connect a new heated towel rail.
To replace the old device and install a new one, you will need the following tools:
- new heated towel rail;
- polypropylene pipes;
- mount or special brackets for mounting the device;
- machine for welding polypropylene pipes;
- special knife for cutting pipes;
- connecting fittings and couplings, respectively, made of polypropylene;
- several ball valves: two or three.
If possible, prepare everything you need in advance to speed up the connection as quickly as possible and minimize any hiccups.
After all, the operational work will not keep you waiting for several days, and by the end of the evening you will be able to use the new device in the bathroom.
Connecting a heated towel rail made of polypropylene
Installing a drying device is a painstaking job that requires your attention and diligence, but the work is not so difficult, you can handle it yourself.
Step No. 1: dismantling the old heated towel rail.
Before any work in the bathroom, it is imperative to turn off the water and drain the remaining water into any container.
Remove everything unnecessary from the room, place a bucket or any other vessel under the heated towel rail (water may remain in the pipes). Now you can safely put away your old device.
Step No. 2: installation of jumper and ball valves.
A jumper or bypass is your help, the installation of which is optional, but desirable. It can save you in case of an unexpected leak or other problem. To avoid calling emergency services in the middle of the night, the jumper will be your insurance.
The jumper is a special polypropylene pipe that is installed in the ball valves at the ends of the heated towel rail. This polypropylene pipe promotes constant circulation of water in the riser, even when the device is turned off.
To remove air from the heated towel rail, it is necessary to install additional ball valves in the jumper. This trick will help ensure smooth circulation of hot water in the heated towel rail.
Step No. 3: preparation of polypropylene pipes - welding.
Experienced experts note that polypropylene pipes are the most reliable option for a heated towel rail.
Advantages of polypropylene:
- the material does not corrode;
- affordable price;
- are light in weight;
- durable;
- resistant to elevated temperatures due to special fiber reinforcement;
- easily connects to metal pipes due to various fasteners and fittings;
- ease and simplicity of installation.
To secure the heated towel rail pipes, or rather weld them, you will need a special welding machine. Don't be afraid, it is quite simple to operate and understanding its controls will not be difficult. In addition, these devices can be easily rented.
Apparatus for welding polypropylene pipes.
Step No. 4: connecting a new heated towel rail.
The main task at this stage: install a device for drying clothes and connect it to polypropylene pipes using a welding machine.
When installing a heated towel rail, be careful to maintain the slope of the supply pipe. Water must pass through the entire mechanism from top to bottom; accordingly, the riser must be connected to the upper socket of the drying device.
When fixing the heated towel rail to the bathroom wall, you must maintain certain distances:
- if the diameter of the pipes is 23 mm or less, the distance between them and the wall should be no more than 35 mm;
- if the pipe diameter is more than 23 mm or more, the distance between the wall and the heated towel rail should be 50 mm.
Experts recommend not fixing the device too rigidly; it is better to use the brackets that come with the mechanism. This way you will protect the walls from heavy loads and various deformations from high temperatures.
Correct connection of the heated towel rail.
Step #5: final stage.
At the last stage, you need to check all the connections to see how strong they are. Be sure to wipe them down and check for moisture and liquids. If everything is in order, turn on the water and check how securely everything is installed, check for tightness, if there are any leaks.
If the device works flawlessly, you can clean the bathroom and return all the furniture back. The heated towel rail connection was successful.
Why should you choose polypropylene material?
Domestic plumbers and craftsmen trust German materials most of all, and no wonder.
German-made polypropylene pipes differ:
- small thermal expansion;
- low pressure loss;
- pipes do not require stripping during welding;
- affordable cost of pipes;
- ease of installation;
- high service life.
As many years of experiments have shown, polypropylene pipes can function for up to 50 years at high temperatures reaching +700.
For the circulation of hot water, experts recommend reinforced pipes. Such polypropylene pipes are called “stabi pipes”. In all their technical characteristics, such pipes are close to aluminum products.
This unique material – polypropylene, cools quickly after welding and easily returns to working condition, so you won’t have to wait long.
When choosing the best option for a heated towel rail, carefully consider all possible options. Study reviews and quality of devices. And only then will you see that it is polypropylene that makes the drying mechanism work longer than any other device and with better quality than any other device.
If your “towel” is 15-20 years old, its appearance is probably depressing. And after getting acquainted with its modern counterparts, there is a desire to install this chrome-plated snake-like miracle in your bathroom.
Heated towel rail connection technology
The process of installing a towel dryer depends on the type of device. Water heated towel rails require a special approach to connection. Connecting electrical accessories is absolutely simple.
Materials and tools
Before connecting the heated towel rail, you must familiarize yourself with the connection diagram proposed by the manufacturer in the instructions. Also check the package contents of the purchased device.
To install the dryer you will need the following tools and materials:
- construction level;
- pencil;
- roulette;
- hammer;
- Adjustable wrench;
- screwdriver;
- soldering iron and knife for PVC pipes;
- Mayevsky crane;
- two tees;
- coupling;
- fasteners, brackets;
- PVC pipes with a diameter of 32 millimeters;
- tow or sealing tape;
- fitting.
If you plan to install a jumper, you should purchase two more ball valves.
Installation steps for a water heated towel rail
The towel dryer is most often connected to a hot water supply system. You can install the device yourself, following the selected connection diagram and step-by-step guide:
- shut off the water supply;
- using a building level, mark the drying fastening areas on the wall surface, maintaining the required distance from the riser and the supply slope of 5 - 10 millimeters;
- install and fix the heated towel rail;
- mount the jumper by installing tees and ball valves at the ends of the pipe;
- using corner and straight fittings, connect and adjust the direction of the coolant supply and return outlets;
- install the Mayevsky tap on the heated towel rail.
All connections are sealed with tow or special tape. Before supplying water to the system, as well as after starting the coolant, the tightness of the joints is checked.
Connecting an electric heated towel rail
This type of towel dryer can be installed in any room, regardless of the location of the hot or heating pipe. The installation process of the device consists of fixing the structure in the selected location and connecting it to the network.
Correctly connected electric heated towel rail
Installation of an electric heated towel rail in a bathroom or other room with high humidity is carried out taking into account compliance with safety standards:
- the connection must be made via a three-wire cable;
- Grounding must be present;
- installation of only hidden insulated wiring is permissible;
- it is necessary to use an RCD.
Requirements for installation of heated towel rails with electric heating:
- distance from the floor - at least 20 centimeters;
- Furniture should be placed maintaining a distance of 75 centimeters;
- there should be a space of 30 centimeters between the wall and the dryer;
- distance from the bathroom and washbasin is at least 60 centimeters.
The socket must be located a safe distance from the hot surface of the towel rail. Connecting a heated towel rail in a country house
To ensure the operation of a dryer for bath towels in a country house, various connection methods are used. If the dacha is heated, then an excellent option would be to insert it into the circuit of the heating system. But with such an installation, it should be taken into account that the device will function only in the cold season.
If you plan to use the heated towel rail regularly, then an electric design would be the best option. This drying can be turned on and off as needed.
Connecting water devices in a country house is carried out according to standard schemes. Most often, when connecting to a heating circuit, a side or diagonal insert is used.
Video description
From the video you can learn how to connect a dryer at a great distance from the riser:
How to properly connect a heated towel rail to a hot water riser using fittings:
- The taps are installed between the pipes and the dryer. If there is already a thread on them, then it is worth correcting it with a die to ensure a tight connection.
- It is important to secure the fittings correctly here. They are prefabricated, so there is a seam on the body. It should be directed in the direction of the flow.
- Flax is used for compaction.
- The final fixation after manual tightening is carried out with a key ¼-½ full turn.
If you violate these simple rules, a leak will soon appear, a seam will rupture, or a nut will burst.
The last thing you need to do before launching the system is testing. To do this, turn on the riser for a short period of time. This will be enough to determine the tightness of the structure. If everything is in order, then you can put the heated towel rail into operation. Otherwise, eliminate the deficiencies and repeat the test again.
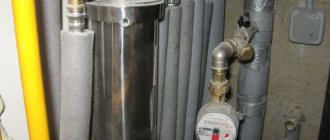
Leak detected during system testing Source www.tproekt.com
Connection methods for heated towel rails
Depending on the design of the water heated towel rail, the methods for connecting it to the system can be as follows:
- lower - the inlet and outlet pipes are located at the bottom of the heating device and in the same plane with it;
- lateral – the nozzles are located on the side of one side of the dryer and are rotated 90 degrees relative to its plane;
- central - connection is made to the pipes located in the middle of the lower part of the device;
- diagonal - “connectors” for connection to the system are located at diagonally opposite points of the heated towel rails; found in “ladder” models.
Side connection option for drying
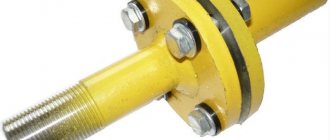
What is an American
The connecting part in this design consists of three parts:
- threaded fittings - attached to one part of the water supply at the connector;
- counter pipe with collar - installed on the other end;
- union nut - installed on a fitting with a collar before installing it in its location.
Next, when the nut is screwed in with pressure on the shoulder, the fittings are pulled one to one and these two parts are compressed. To ensure the tightness of the joint using a coupling, gaskets are used. And with a conical joint, it is not necessary.
If it is necessary to dismantle a section joined using an American connection, it is enough to unscrew the nut, while the mating elements of the pipeline remain motionless.
Types of docking points. The number of design solutions for installation corresponds to the number of varieties of molded products.
Why do you need a heated towel rail?
According to definitions from construction manuals, a heated towel rail is a heating device, which is a pipe with a coolant (hot water) passing through it and designed for drying towels and bathrobes. Old samples had the shape of a loop or coil of water pipe with a slightly larger diameter than the risers.
The additional function of the device is to heat and dry the room, preventing the formation of mold and the appearance of bad odors. Initially, only water heated towel rails were used, but recently designs with electric heaters have appeared that do not require connection to the coolant supply system, but require electricity. An electrical device is analogous to any convector or heater. These devices consume a large amount of energy, which increases the cost of paying bills, so they are used mainly in private homes that do not have a connection to the DHW or central heating system.
Older models of coils were connected to the return pipeline of the DHW system
Water (plumbing) heated towel rails have changed little in design since their appearance; the main progress has concerned their appearance. The only serious difference is the detachable connection with which the device is connected to the hot water pipes, whereas the old samples were hermetically welded and had to be cut off to dismantle them. Plumbing heated towel rails require expenses only for purchase and installation, after which they cost the owner practically free of charge. They are convenient, do not take up much space, and allow you to dry several towels or other things at the same time. In parallel with the main work, performed as needed, the devices do additional (and permanent) work - they dehumidify the air in the room and heat it.
Features of chrome parts
Chrome plating of metal parts is carried out by applying a thin layer of chromium to the surface. This layer protects the base metal from destruction.
Chrome plating serves several purposes:
- Improved appearance. Chrome plating of fittings transfers the connecting part from the category of plumbing to the category of interior design.
- Hide metal defects.
- Improve performance properties.
- Extend the life of fittings.
Chrome surfaces give the bathroom a special atmosphere of crystal-clear luxury. Their mirror-like shine and perfectly smooth surfaces are in harmony with tiles and sanitary ware and fit organically into the room.
We recommend that you read: Which fittings are best suited for drip irrigation
Installation options in the bathroom
Installing a heated towel rail in the bathroom is a responsible undertaking that is not particularly difficult, but requires care and thoroughness. Any mistakes made during the process lead to leaks and the need to redo the work again. If the finishing is completed by then, there will be additional costs and worries.
There are many options for installing and connecting a heated towel rail:
- Hidden installation. The device is installed on the wall without a visible connection to the hot water system. This option is preferred by most users, since it allows you to stylishly and attractively decorate the room, hide the wiring and pipes in a wall or gypsum plasterboard box, leaving only the heated towel rail itself visible. The disadvantage of this method is the lack of visual monitoring of the condition of the pipes and the need to destroy the decorative box when leaks occur.
- Open installation. The hot water riser and heated towel rail remain visible and accessible for repair work. The condition of all elements can be visually monitored at any time, allowing you to respond to the slightest manifestations of malfunctions at the earliest stages. The disadvantage of this option is the low level of design, poor decorative capabilities.
- Combined option. It is a kind of compromise between the first two methods. The wiring and connection units are decorated with removable panels, providing a stylish appearance, but allowing for quick dismantling, giving access to the necessary elements and assembly units.
In addition, different schemes are used for connecting devices to DHW or central heating risers.
Experts distinguish between closed and open methods of connecting the device to the riser
The closed version has a jumper that makes it possible to turn off the heated towel rail and pass the coolant directly. The open method involves installing the device in a pipeline gap, when a shutdown will cause a complete stop of circulation in the riser.
Preparing hidden wiring for installing a heated towel rail
Step 1. If the wiring is hidden in the wall under the finishing, grooves are prepared for it - shallow channels. To cut them, use a wall chaser or a hammer drill. The work is labor-intensive and dusty, so preliminary marking must be done very accurately. Step 2. Install bends and shut-off valves according to the accepted connection diagram. The threads must be wrapped with sealing materials. FUM tape is the most convenient and technologically advanced. It is made of elastic fluoroplastic and reliably fills all gaps in the joint.
Step 3. Water outlets need to be deepened into the wall to the protruding thread. To do this, use a hammer drill with a round nozzle. If the mounting socket is too deep, the sockets are secured with dowels in the correct position, and the gaps are filled with brick chips and mortar. To prevent debris from getting into the tubes, install plugs. Step 4. Fill the grooves with a waterproof solution and level the surface. After hardening, you can hang the heated towel rail.
Joining plastic components
The connection of components of pipelines made of composite materials has its own characteristics. Polypropylene pipes are joined by welding using special equipment. The process is very simple and is carried out on site during installation.
Widely used are designs where connections are made to a polypropylene pipe on American conical pipes, where devices with a sealing ring are used.
Connecting polypropylene pipes using an American method is the most reliable and perhaps the only method of joining using a detachable coupling, including connecting a heated towel rail.
Several types of connections for polypropylene pipes are used:
- coupling with external thread;
- coupling with internal thread;
- a device with the simultaneous use of internal and external threads;
- angular, produced at angles of 30, 45 and 90 degrees for installation in hard-to-reach places.
Installing a towel dryer
Installation of such a device in the bathroom can serve as an example of using a threaded connection for inserting additional equipment. The heated towel rail is connected either to a heating system or to a hot water supply circuit.
In the second case, you will have to use the services of a remote control service to turn off the hot water riser for several hours; in the first case, you will have to wait until the end of the heating season.
Work can be performed in the following order:
- Install the dryer in its permanent location.
- Make a connection into the hot water supply or heating riser and install threaded fittings for the inlet and outlet flows.
- Install corners with ball valves on them.
- The heated towel rail connection is made through plastic pipes. The critical temperature for them is 95 degrees; this temperature is not used in either system.
- Install a tap on the upper register to bleed air from the system, otherwise an air lock may prevent the coolant from circulating.
- Check for leaks in the dryer by opening the inlet and outlet ball valves. If there are leaks, you need to recheck the joints using additional seals on the threads. Linen tow and fluoroplastic sealing material (FUM) in the form of a tape or cord are suitable for this.
- Installing ball valves will allow you to carry out repair work without disconnecting the riser. It should be noted that connecting a heated towel rail to a polypropylene pipe requires careful handling, since the pressure ring cannot always be reused due to its deformation.
Connecting the heated towel rail to the riser with a polypropylene pipe using American cones allows you to avoid the use of pipe benders. This reduces the labor intensity of work and their adjustment in place.
An example of connecting a heated towel rail through a threaded connection is shown in the figure.
Dimensions of coupling elements
In domestic plumbing standards, American ones are classified as “coupled connections with a union nut.”
Naturally, their size range corresponds to that on the molded elements of water pipelines. What types there are depend on the method of docking to the main line or cantilever element.
So, when installing a tap or mixer as a plumbing element, American ones are used in sizes from 3/8 to ¾ inches with conical threads. This allows for reliable installation in just a few turns of the nut.
For water supply systems they are used within the range of 10 – 50 mm, the maximum value is typical for connection with a heated towel rail.
To connect pipes made of polymers, special couplings are used - American conical couplings, onto which the plastic shell is literally pulled by the force of a screwed nut through a thrust ring, ensuring a joint density that is several times higher than the pressure in the system.
Pipe sizes
For American plumbing, the thread can be selected based on the data given in Table 1.
Tips and tricks
When using plastic pipes, you need to take into account the properties of the material. Polypropylene is a material endowed with a number of specific properties, such as elasticity, plasticity and chemical resistance.
Therefore, for polypropylene products, American is practically the only connection method that ensures high-quality joining. Using them locally, you can assemble a pipeline of any configuration with a high degree of reliability.
For installation using American means, its dimensions must be adequate to the pipes used. For cold and hot water supply networks this is an inch or an inch and a quarter; for heating systems in a private home it is better to use one and a half inch products.
When using plastic products for drip irrigation systems, it is enough to use half-inch sizes.
Joining of metal components
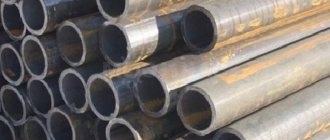
Metal pipelines for various purposes are still widely used in plumbing. Therefore, the installation of metal pipes is widely used in a wide variety of options.
For simple joining, you need to cut threads at the ends of the assembled elements using a standard thread-cutting tool. The American thread is screwed onto the prepared ends, and the threads need to be sealed by winding FUM tape or strands of flax fiber.
The final connection is made by tightening the nut and installing the gasket. When reusing the connecting assembly, the gasket must be replaced. The joint turns out to be reliable and repairable. What are the American types for metal components:
- direct connection of metal pipes;
- installation is carried out at right angles, as well as at angles of 30 and 45 degrees;
- installation of cantilever elements of a water supply system with a pipe, such as taps, mixers, air vents;
- threaded connection for changing to another diameter;
Key selection criteria
In addition to these features, when choosing a suitable coil, you should pay attention to the material, dimensions and shape of the heated towel rail.
Material
Coils are made from:
- Of stainless steel. Such heating devices are characterized by low resistance to the effects of particles found in water. Because of this, sediment will form inside the pipes over time.
- Copper, brass. Both materials are characterized by increased heat transfer and short service life. Galvanizing the pipes from the inside helps to prolong the latter. This circumstance must be clarified in the passport, which is attached to the heated towel rail.
- Black steel. Coils made of this material are sensitive to pressure changes. Therefore, it is recommended to connect heated towel rails of this type to private heating systems.
See also
TOP 10 ways to remove dents from furniture on linoleum at home
When choosing coils, you should also consider how the material from which the plumbing fixture is made reacts to hard water.
Dimensions and shape
Manufacturers produce heated towel rails in the form of a bracket (U-shaped) or a snake (M-shaped). There are also foxtrot, ladder and modern models. The first two belong to classic coils, and the latter are distinguished by their large dimensions. Therefore, U- and M-shaped heated towel rails are recommended to be installed in compact bathrooms, and the rest - in large ones.
By type of assembly method
In addition to differences in materials of manufacture, the threaded connection differs in the design of the docking units.
They are threaded, with different cutting directions, having internal or external threads on the sides. Samples with a conical joint are also used, with the help of which an American connection is made using a thrust ferrule under the nut.
Such a variety of fittings creates certain difficulties when choosing them for an inexperienced person, but gives real pleasure to professional performers.