In any residential premises, several valves are installed to enable emergency shutdown of the supply. Valves are present on plumbing, heating and gas systems. The valve of any system can be replaced independently or with the help of specialists. Read on to learn how to do the work yourself.
Fittings for various pipelines
How to replace a valve with your own hands
In any residential premises, several valves are installed to enable emergency shutdown of the supply. Valves are present on plumbing, heating and gas systems. The valve of any system can be replaced independently or with the help of specialists. Read on to learn how to do the work yourself.
Fittings for various pipelines
Replacing a valve on a gas pipeline
Replacement scheme
Replacing valves in an apartment on a gas supply pipe occurs in the following way:
- preparation of materials. To carry out the work you will need:
- new valve, selected according to all parameters;
- two adjustable wrenches;
- means for sealing joints (linen thread and graphite lubricant);
- plug (required if work is performed by one person);
- Before replacement, it is necessary to shut off the gas supply to the room. To do this, the old tap must be moved to the “closed” position, that is, perpendicular to the pipe. Then you need to remove the remaining gas from the pipeline (for example, burn it using a stove burner);
- The old valve is dismantled:
- if the valve is installed on a thread, then the fixing elements are unscrewed;
- if the valve is installed by welding, then the device is cut out of the gas pipeline;
How to cut threads on a pipe yourself
- A plug is installed at the end of the pipeline. If the work is done by two people, then the pipe can be plugged with a finger;
- the threads are treated with sealing materials. For the strength of the connection and smooth operation of the valve, graphite lubricant is applied over the flax thread;
Thread treatment with graphite lubricant
- A new faucet is being installed.
Installing a new valve on a gas pipe
Leak test
After installing the valve on the gas pipe, you need to check the tightness of the connections and the device itself. You can determine the presence of a gas leak as follows:
- a saturated soap solution is applied. To do this, the maximum amount of any soap needs to be diluted in water;
- The resulting solution is coated with a sponge on the joints and the valve.
Using Soapy Solution to Detect Gas Leaks
If the connection between the valve and the pipes is not airtight, soap bubbles will form.
The formation of a bubble indicates a violation of the tightness
If a leak is detected, it is recommended to perform all the work again and increase the sealing.
You can replace all the valves in your living space yourself. To carry out the work, minimal knowledge and a small set of tools are required.
Water shut-off valve: operating principle of the device
A water valve is necessary to regulate the flow of liquid that moves through the pipes by changing the flow area. Such structures are attached not only to the edges of plastic pipes, but also in places where filters, pumps and other devices are connected. The type, dimensions and modification of the part will depend on the area where the valve is mounted, as well as on the functions it performs.
Popular valve models
The installation of a water supply system made of plastic pipes to the main water supply cannot be done without the use of a valve tap. Experts distinguish three classification components of water fittings:
- design of the main cylinder (housing);
- type of hermetic separation of the pipeline system;
- a plan of how the mechanism is installed in the system.
Water taps and valves are able to withstand the same pressure that is applied to the pipes, so it is strictly not recommended to use structures with low strength in comparison with the entire system.
The manufacturer applies the factory parameters to the mechanism body, and its modification depends on what functions the product performs.
In order to connect the instrumentation, it is recommended to use an angle needle valve with a small through hole. A household water valve provides convenient, adjustable drainage of liquid. Today, ball and valve types of valves are popular, and due to their simplicity of design and ease of operation, such mechanisms have many positive reviews.
Due to their long service life and service plan, shut-off valves are used in both water supply and gas networks, and with the help of a unique design, you can easily regulate the flow of liquid or gas. The main disadvantage of a ball-type valve is that it cannot be repaired even if it breaks at the slightest level.
As for the valve fittings, they are shut-off and regulating, many use them to change the water flow within a wide range.
Key characteristics of this type of valve include its large size, as well as moving parts that are located in the locking mechanism . The disadvantages include a short service life, which is due to the design features of the valve valve. Since rubber or leather is used to make sealing elements, parts quickly fail. But they can be replaced and extend the life of the mechanism without deteriorating its operating parameters.
Depending on the method of fastening the water tap, the corresponding fasteners will be used. In a household system, preference should be given to coupling connections (American) or drives. Since the pipelines of industrial systems constantly have high pressure, which prevents liquid leakage, the water shut-off valve must be installed using a welding machine.
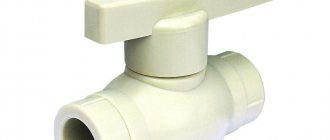
Polypropylene tap - a modern solution for your communications
Faucets made of polypropylene cause distrust among many buyers due to the fact that they consider the material to be unreliable and short-lived. Meanwhile, modern technologies ensure the highest quality manufacturing, thanks to which such cranes are not inferior in properties to metal products, and in some respects even surpass them. This article will discuss the main features of this type of product and the criteria for selecting quality models.
Taps and fittings for polypropylene pipes meet the highest quality standards if they are manufactured in accordance with the technology
Advantages of this product group
Taps for polypropylene pipes can be very different: steel, brass, or made of the same material as the main communications. It is the latter option that we will consider in more detail, especially since it has a number of undeniable advantages:
A polypropylene faucet is an excellent solution for most types of communications
Important! Another important advantage is the fact that the locking mechanism is made of high-quality stainless steel, this guarantees the durability of the structure and its resistance to adverse influences.
Features of polypropylene taps
First, you should understand the basic design features, this will allow you to better understand how the system functions.
Products can be made from different types of raw materials, most often the upper limit of heat resistance is limited to 95 degrees. It is best to choose designs from the PPRC brand of raw materials; the size range of products is quite wide, but the most common sizes are 20, 25, 32 and 50 mm, but other options can be found.
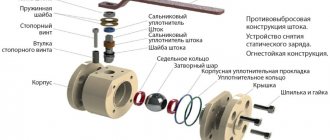
Regardless of size, the structure consists of the following components:
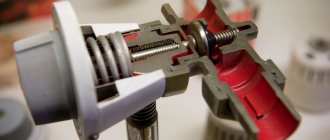
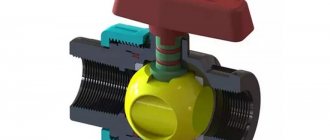
In the photo: this is what the structure looks like in cross-section
- Housing made of the highest strength polypropylene . It is very important that the assembly is cast with high quality, without any flaws or surface defects.
- The closing element is a ball with a hole for water flow . It is best if it is made of stainless steel and the surface is laser polished to ensure the tightest and most reliable fit.
- The rod is the axis on which the locking mechanism is attached ; it must be adjusted very precisely to prevent even minimal play.
- To prevent water from penetrating through the rod mounts, O-rings are used ; they must be made of high-quality rubber.
- To ensure a tight fit of the ball to the body, two rings are used , which can be used either from fluoroplastic or Teflon.
- The mechanism is adjusted using a handle, which is attached with a special screw..
Classic device design
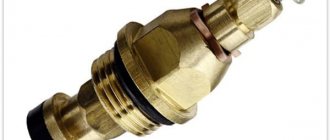
The design of a valve or classic valve includes a movable locking mechanism with a drive, as well as a cast two-chamber body. A straight-through or direct-flow valve must be installed on a straight section of the pipeline to be able to regulate and turn off the water flow. Due to the design features of the angle type valve, it can be installed in places where pipes will turn. The parts differ from each other only in the shape of the body, but their operating principle is the same.
Classic faucet.
In a straight-through water tap, the liquid enters the lower cavity, which is a pressure chamber, after which it penetrates into the upper chamber through a special hole and reaches the consumer through a pipe. The locking mechanism of the device consists of the following parts:
- spindle (rod) with thread;
- valve disc with sealing material;
- stuffing box;
- union nut and bolt.
As soon as the flywheel begins to rotate, the rod moves the plate to the lower hole, thereby reducing its cross-section. This process is accompanied by throttling of the liquid, as well as a decrease in pressure in the upper chamber, which, in turn, leads to a decrease in water consumption.
The unreliable place of the plumbing part is represented by the threaded block, since excessive force during the closing process often leads to thread breakage and damages the entire assembly. In order to seal the rod, you should use a stuffing box seal, and to eliminate leakage along the spindle, you need to tighten the union nut that presses the packing through the bottom bushing.
Starting the heating radiator
After the heating radiator is installed and connected, it is important to start it in the correct sequence. Otherwise, the radiator may become airy and it will not work efficiently.
Let's consider two possible starting options: starting the riser together with the radiator and starting the replaced radiator without draining the riser.
Starting the riser and radiator
To prevent air from entering the system, the riser and radiator are started in the following sequence. On the radiator, open the supply and return valves. Then open the so-called drain at the top of the riser, then open the tap at the bottom of the riser. Water begins to rise up the riser, filling all the radiators and squeezing air out of the system. As soon as all the air has come out through the valve at the top of the riser and water has flowed in, the system is filled and the air has been removed. Next, the drain is closed and the supply valve is opened. This completes the system startup.
Starting a radiator with a filled or working heating system
In this case the situation is like this. The system is filled with water, and the heating radiator is filled with air. If you simply open the taps on the battery, some of the air will escape into the system, possibly settling in the radiator of the neighbors below, and most of it will remain in the battery. As a result, the heating device will not perform its function.
To start the heating system in this case, an air valve on the radiator is required. This valve allows air to be released. The valve can be mechanical or automatic; this does not affect the process.
The valve is installed instead of the top plug on the radiator, because air usually collects at the top of the radiator on the opposite side of the supply pipe.
The procedure for starting the radiator is as follows. First, the return valve opens and the radiator begins to fill with water until the entire possible volume of the battery is filled. Next, the valve on the radiator opens and all the air is released. If the valve is automatic, then it will do everything on its own; if it is mechanical, then you need to wait until a stream of water comes out of the valve; this indicates that the air has been removed from the radiator. Next, close the valve and open the supply tap.
Features of ball valve
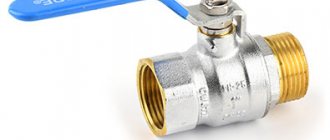
A valve with a spherical locking toggle switch is a simpler mechanism, since its body is non-separable. The functions that a locking mechanism performs in a classic device involve the operation of a metal ball or valve with a hole. Gaskets are installed between the cylinder and the spherical valve for tightness, for the manufacture of which rubber or fluoroplastic is used. In higher cost models, the gaskets can be made of wear-resistant Teflon seals.
Features of the ball valve.
To make the ball, most manufacturers use brass, which is coated with nickel or chromium. These materials and the processing of the shut-off parts contribute to the complete tightness of the water tap. The valve is controlled by a manual drive, represented by a rod, which is welded to the ball. To shut off the flow of water, the spherical valve must be rotated 90 degrees, and the circular rotation of the ball is prevented by protrusions located on the valve cylinder. These stops are also necessary to ensure maximum blocking of the water movement channel .
Sealing in the area where the rod exits the cylinder is achieved by installing gaskets that are pressed against a threaded bushing. The water valve drive is equipped with lowered petals that prevent the valve from turning more than ¼ of its entire circumference.
Which pipeline tap to choose
Therefore, when deciding which ball valve to choose, follow a few simple and useful rules:
Find out in advance which manufacturers' cranes are considered the most reliable and durable, and, if possible, purchase exactly these products. For example, ball valves from Bugatti have a deservedly high reputation all over the world. Of course, such products are not cheap, but the money spent will more than pay off due to its long service life. Try to purchase faucets with a brass body, as this is a durable and reliable material that is resistant to corrosion and can withstand heavy loads. You should not buy ball valves made of silumin (an alloy of aluminum with silicon), even in order to save money, since silumin is less durable and does not withstand sharp fluctuations in loads (and this often happens in water systems due to water hammer). Silumin can be easily distinguished from brass: it is much lighter and has a different color. Choose valves rated for high pressure
This will help extend their service life and avoid unpleasant consequences in the event of a water hammer. Make sure that the ball locking element is smooth, without signs of corrosion or damage, and that it rotates easily. It is better that the ball is not made of steel (you can check it with a magnet), because even “stainless steel” gradually deteriorates in a humid environment. It is advisable to purchase a faucet with metal handles, since plastic handles can easily break.
Recommendations for selection
Almost all companies supplying pipe components to the market are engaged in the production of valves for pipeline systems. Reliable manufacturers include the following companies:
- Valtec;
- Rehau;
- Lavita and AS Gruppe.
Since these brands have been on the market for a long period of time and have proven themselves well, their products are popular and do not raise questions regarding quality. But in the process of choosing a stopcock, you should definitely pay attention to the body of the product, which must be made of brass alloy.
To manufacture cheap Chinese products, in most cases, recycled (recycled) brass is used, which contains elements that pose a danger to the human body. It is strictly not recommended to neglect this factor and you should ask the seller for a document indicating the sanitary conformity of the product.
When purchasing a valve, you also need to carefully inspect the shut-off element, since in order to reduce the cost of the product, brass is often replaced with ordinary steel, which is susceptible to corrosion. In the process of using such a mechanism, the locking mechanism becomes covered with rust, which leads to a violation of the tightness, due to which the water supply may burst.
When choosing a ball valve, special attention should be paid to the surface of the shut-off ball, which should be perfectly smooth due to the fact that the walls of the part are processed using diamond grinding. If there is even the slightest roughness on the surface, the throughput of the valve fittings is disrupted, and the circulation of the liquid will be accompanied by characteristic sounds.
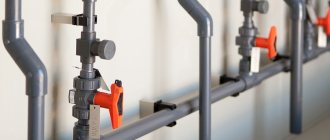
In order to regulate the water supply, the valve has red or black levers, but in any gas pipeline such a toggle switch is distinguished by a yellow tint. If the water supply will be laid in a limited space, it is recommended to opt for a compact butterfly-shaped handle.
Installing a valve into the system
Depending on the installation method used, the valves can be flanged, welded, union or coupling. Before installing a particular water tap, you should first acquire a minimum set of tools: a sealant and an adjustable wrench. Threaded valves often have internal or external threads (in rare cases, combined threads). In the process of selecting the necessary fittings, you need to take into account the diameter of the pipeline, and also take into account the fact that the valve and the pipe flange may have different threads.
Before proceeding with the installation of the tap, the water circulation in the pipeline must be completely shut off, and all liquid from the system must be drained. When replacing a valve, the old fittings are dismantled, and the threads on the pipe are cleaned of dirt and sealant residues. If defects are found on the thread (rotten 2-3 turns), the area that was damaged is cut off with a grinder, after which a new thread is cut. The tap must be screwed onto the pipe by 4-5 full turns, so the thread insertion depth must be checked without a sealant. Only after this can you wind the seal and tighten the valve on the pipe with an adjustable wrench.
The fum tape or sealant should be wound in accordance with where the thread is directed. As for the thickness of the seal, it should be no more than 2 mm, and after the pipe has been wrapped, the seal must be lubricated with investment paste.
Pros and cons of installation
From my point of view, there is only one plus - ease of installation. There are many disadvantages: unreliability of the connection, even when installed by a good craftsman; in hot water, the fittings either cool down or heat up, because of this, loosening occurs at the connection and, as a result, a breakthrough occurs.
If a connection starts to leak, then while you fix it in one place, the next one will definitely leak, etc.
Conclusion: if you decide to install metal-plastic pipes, then for reliability, do it only by crimping.
Features of repair work
When operating a water valve, the mechanism is often subject to various breakdowns. The faucet may leak because the sealing gasket has become unusable or the shut-off element has fallen off the stem. The low quality of the metal leads to the fact that the rod gradually bends, and due to the scale located between the walls of the cylinder and the shut-off unit, the valve is not able to shut off the water supply.
Carrying out repair work on the water supply system.
If the shut-off assembly has lost its shape, bent or fallen off the stem, the valve must be replaced completely, since you can only correct the tightness of the structure with your own hands. To replace the valve, you need to twist the valve head with an adjustable wrench, then remove the union nut, flywheel, rod and oil seal bushing. After the valve is completely disassembled, you should install a new gasket of the same diameter, then use a thick layer of flax to wrap the stem and compact it with a screwdriver.
You need to install a sleeve on the rod that will press the packing, and then screw everything in with a union nut. The repaired valve head must be assembled and screwed into the cylinder of the structure. After the union nut has been tightened, you need to check the tightness of the mechanism. If the repair work does not bring the desired results, it is recommended to replace the water valve with a new one.
Often, for the faucet to function normally, you only need to clear the mechanism of blockages that impede the normal pressure of water flow. To remove serious blockages, the valve must be removed completely, but small accumulations of dirt can be removed without special tools. It is strictly forbidden to use pliers to repair the device, as they can strip the threads, as a result of which the entire valve will need to be replaced. In the absence of a wrench or wrench, it is better not to start repair work at all.
There are many different models of water valves on the market today. Due to the variety of choices, you can easily choose a design that meets all the requirements and desires of the buyer.
Valve repair.
Hello dear subscribers and guests of the blog. In this article we will look at how to repair a water valve.
Previously, I wrote an article “How to shut off the water yourself,” in which I briefly discussed the issue of repairing the valve yourself if it is impossible to turn off the water supply. After some time, I noticed that people often came to this article from search engines using the queries: “how to fix a faucet”, “turned off the faucet and water flowed”, “the valve doesn’t hold, what should I do” and the like, but the essence came down to one thing — the average person doesn’t know how a valve or faucet works, doesn’t know whether it’s possible to restore the functionality of this important element of the water supply system, and when he came to my blog, he couldn’t find an answer to his question.
I decided to fill this gap and make a separate post on valve repair; plumbers call this an audit.
So, you are faced with the problem of turning off the water, I will try to help solve it.
Regardless of what material it is made of, be it bronze, cast iron, or polypropylene, the device is identical. If a ball valve fails, it is easier to replace it with a new one rather than bother with an inspection. But let's talk about everything in order. Here is a cross-section of the diagram (click the mouse to increase the size).
1 - body, 2.13 - nut, 3.12 - washer, 4 - rubber gasket, 5 - valve, 6 - sanitary flax or gasket, 7 - rod, 8 - rod bushing, 9.16 - stuffing box, 10 ,15 — sealing sleeve, 11 — flywheel, 14 — clamping nut.
Possible valve malfunctions:
As for the ball valve, we can limit ourselves to considering only three possible malfunctions:
- there is no way to turn the handle, - a leak from under the clamping nut, - a crack in the housing. The first reason arises mainly due to the fault of the owners, the fact is that the tap operates only in two positions - open or closed, it is not permissible to operate it in the so-called “quarter turn”, which some, out of ignorance or deliberately use to regulate the pressure .
The open surface of the ball is covered with various deposits, because it is no secret that the chemical state of our water leaves much to be desired. Because of these deposits, it is then impossible to move the ball from its place, and as a result, the valve is not working. In this case, there is only one way out - replacement with a new one.
You can, of course, try spraying anti-corrosion liquid VD-40 on the rod, or drop kerosene, but it is far from certain that the result will be positive. To prevent such an incident from happening, I can recommend observing the operating conditions, and it would not be a bad idea to occasionally, at least once every 2-3 months, turn the tap handle - close/open. The second possible problem can be easily resolved - you need to remove the handle and tighten the clamping nut. This should be done without much effort, and stop pulling as soon as the water stops flowing. Well, the third involves replacement.
Attention:
Before starting repair work, make sure to turn off the water supply to the element being repaired. Useful articles on the topic: How to turn off the water yourself? Which taps are reliable for running water?
If you have any questions or have anything to add, you are welcome to add them to the comments section. I recommend blog guests to subscribe to receive new articles; to do this, fill out the form that will open when you scroll to the bottom of the page, I assure you there will be more useful information. Good luck with the installation. With all respect, Andrew.
Click on the social network icon only if you think this information will be useful to your friends.
Valve repair
Detailed video tutorial - valve repair. Diagram of the valve device, we will find out how to repair the valve axle box. Faucet and valve malfunctions
Replacing a faucet without shutting off the riser
Is it possible to replace the shut-off valve without shutting off the water?
Do not practice on upper floors! Don't do this with hot water and heating!
One of the site’s readers under the nickname stefano asked a similar question:
Tell me what to do. The house has a riser and water drains from polypropylene pipes. The crane on one of the branches fell down. Is there any way to replace it without shutting off the water in the entire house? And what is better to put? We turn off the water every day before leaving for work.
The first thing to do is to secure the pipes on which the meters hang. Meters should not hang on pipes. To replace the faucets you will have to turn off the riser. You can, of course, install a backup one if this one also overlaps, but this is only as a last resort.
How to change the inlet tap in an apartment
I will describe a practical version of the stages of replacing the inlet tap in an apartment. The last case is the replacement of an inlet valve by a resident, carried out by an employee of the management company, house series P-44.
Firstly, the shut-off valves were purchased in advance. The choice fell on. They have a nickel-plated brass body and a chrome-plated brass locking ball. One faucet with a handle type, the second with a butterfly handle.
I note that the handle is more convenient than the butterfly handle, but there is often not enough space to turn the “handle,” so they buy valves with a “butterfly” handle.
Read: Distribution manifolds without taps
Secondly. The work was carried out by an employee of the management company, so there was no need to negotiate additionally with him about shutting off the water supply risers.
Thirdly, access to old cranes was provided for the work. Since the toilet, and the risers in the house of the P-44 series are located in the toilet in the plumbing closet, were being renovated, access to them was free. The closet was broken, the toilet was removed. The plumbing cabin was not demolished.
Fourthly, since there was no transfer of risers, replacing the inlet valves took about half an hour. Along with the valves, a bypass was installed on the heated towel rail, so I can’t say exactly the time of work.
Never do this with hot water or heating! It is very dangerous!
If you decide to change or install duplicate taps without interrupting the water supply, then there should not be a room on the floor below that can be flooded. Even if you are on the ground floor, this does not guarantee that there are no rooms below. The basement may contain warehouses or commercial premises.
If you are planning to do something like this in a basement or in a private house, then go ahead.
Find a large container or prepare a pile of water-absorbing material. For example, there are a lot of expensive and high-quality towels. If possible, place a large container in front of the faucet.
Look for an assistant who doesn't mind being doused with cold water. Hand him a large rag or the same expensive towel and let him catch all the water coming from the tap into this towel, like a bull motodor.
You need to prepare the faucet you are replacing in advance, seal its threads and open it. Then unscrew the non-working faucet or what is after the faucet if you are installing a duplicate one. Now you can screw in the new one.
As an example, I am attaching several images taken “in greenhouse conditions.” All the threads in the photo are not sealed because this is a simple example.
Here we have a threaded pipe or an old faucet that doesn’t shut off, and water flows from it.
We take a new faucet and open it completely. We seal the thread and pass water through it.
Tighten it about 2 turns, after which the tap can be turned off and tightened the remaining 1 or 2 turns.
You can also screw a flexible liner or hose onto a new faucet and lower the other end of the hose into a bucket or bathtub. Most of the water will go through the hose. But something will still spill on the floor.
I do not recommend performing this operation on taps larger than 3/4 inch in diameter.
Anyone who undertakes this must understand the full responsibility of the actions, must be confident in what he is doing and must be physically strong.
The pressure can be quite high and you need to be prepared for this. It is better to find out what kind of pressure you are dealing with first.
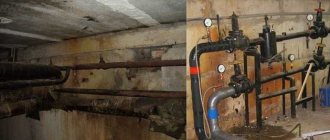
Elevator unit
In apartment buildings, valves are usually installed at the entrance and exit of the elevator unit of the heating system. Their body has two rings made of corrosion-resistant steel, which encircle the passage for the coolant (mirrors). Another pair of mirrors is located on the surface of the valve - its moving part.
When the damper is in the lower position and lowers, it blocks the movement of water, but if it moves to the upper position, it goes beyond the circulating flow. To close the valve, the consumer needs to rotate the handwheel, which drives the screw-threaded rod. A seal packed around the stem will help ensure tightness. For heating and hot water, the product must be graphite. There is no alternative to this device for pipe diameters of 50 millimeters or more. It is necessary to determine which taps are best for heating radiators.
If this parameter is lower, it is recommended to use modern plug valves, such as in the photo, since valves have serious disadvantages:
- it is necessary to periodically fill the oil seal, even when the valve is not in use, since the packing, in contact with water, is gradually destroyed;
- After a short period of time, the cheeks begin to become overgrown with deposits. If the valve sits for several years without being used, it will not be possible to close it completely;
- In the event of an emergency, every second can be decisive. If it takes literally a moment to close the plug valve, then it will take a long time to rotate the valve’s steering wheel, even when it is fully operational.
It should be noted that plug valves, which are a ball with a channel for water surrounded by a plastic shell, differ in:
- practicality;
- durability;
- reliable fluid retention;
- no need for maintenance.
Plumbing specialists do not recommend purchasing and installing a screw valve on a heating radiator or the same products of any other type.
They have significant design disadvantages:
- The seal will need to be filled periodically if there is no desire to put up with constant leakage along the rod. When it is difficult to replace the valve or fill the oil seal, then to eliminate the leak, the valve must be opened all the way with a little force. The leak will stop due to the fact that the thread on the rod will press the oil seal:
- Rubber gaskets for elements of heating structures have a limited shelf life. Heating radiator valves with flat brass valves do not hold water after a certain time due to the appearance of deposits on the valve and seat. These same locking elements with wedge-shaped valves made of brass, after closing them with force, often jam in the seat (about
How to replace a water tap under pressure: a simple life hack
Ball valves are good for everyone, but if they are not inspected regularly, they will fail. The turning elements become sour and it becomes impossible to turn them. As a result, we have a faulty faucet.
Replacing the latter is an ordinary event, if not one “but”. What to do when it is not possible to shut off the water supply riser? Changing a tap under pressure is a risky undertaking that few dare to undertake.
Location of inlet valves in apartments
There are two entrance taps to the apartment. One for cold water supply, the second for hot water supply (if it is provided in the house and there is no water heater).
Previously, the location of apartment inlet valves was only in the bathroom, and in rare cases in the kitchen. In new houses, inlet valves may be located outside the apartment.
According to regulations, free access to input valves must be provided. In practice, the location of the valves can be varied. However, if you are making repairs and changing valves, or perhaps moving water supply risers, you better make free and convenient access (if possible) to the inlet valves.
Inconvenient location of valves, locking them, or covering bathtub furniture or plumbing fixtures leads to a more severe flood in the event of an accident.
Read: Bathroom plumbing
The most convenient location of the apartment's inlet taps is in a specially equipped plumbing closet.
Behind the inlet tap there should be a sump pump, then a water meter, then other control and water withdrawal devices. Read Preparation, placement and installation of water meters.
Replacing a tap - instructions
We were leaving for the summer, turned off the water, and when we returned home we discovered that the tap was not opening.
Changing a tap that is under pressure is an extraordinary task, but not that uncommon. The order of work here is no different - the only difference is in the time allotted. The risk of flooding the neighbors below also increases, since unexpected difficulties may arise: for example, when unscrewing a faucet, it may burst, additional time will be needed for work, but there is none.
If you decide to take part in this event, you need to properly prepare for it.
- Stock up on numerous rags to collect water.
- Prepare the tool so that when replacing it you do not waste time searching for it
- Stock up on water containers and think about how to dispose of them
- Find out the emergency phone number. If the situation gets out of control, specialized help will be needed
Step No. 1 - preparing to replace the faucet
After the water containers have been prepared, the rags have been collected, the emergency service number has been stored in the phone’s memory, you need to prepare the adjustable wrenches, i.e. adjust them to size.
When replacing, you will need a sealing material: tow or fum tape. In such cases, it is better to use “old” types of seals to seal water joints, since errors may occur in “hurried” work, but tow is forgiving: it will not need to be rewound, they do not lose their properties with repeated use.
We prepare tow - about 20 cm long.
To prevent leakage in the future, you need to treat the prepared tow with a sealant.
Previously, tow was simply impregnated with paint
Step No. 2 - unscrew the tap
We unscrew it completely after we are sure that everything is ready for further action.
As with any screw connection, the threads can become stuck. You need to roll it carefully, smoothly - after turning the nut a little, you need to return it to its place.
As you unscrew, you need to remove the old sealant from the thread - this will save time in the future.
Step No. 3 - sealing the threads
Removing the old seal
After the tap has been unscrewed, water under pressure will flow into the previously prepared container. No need to fuss. There is enough time - a 10-liter container can be filled in about 1 minute. If necessary, drain the water into the sewer.
Remove the old sealant.
Carefully wind the tow braid around the thread. We roll clockwise, i.e. towards the direction of tightening the nut. This is done so that the flax does not unwind when installing the tap in place.
Wind in the direction of tightening the nut
Step No. 4 - installing a new faucet
Let's get under the stream
The faucet being installed must be open, otherwise it will not be installed. We run it under running water and bait it. You can close it after the tap is attached to 3-4 threads (Fig. 7,8).
We bait manually 3-4 turns and turn off the tap
Step No. 5 - tighten and check
Take an adjustable wrench and completely tighten the threaded connection. We check its tightness - wipe the connecting assembly with a rag and make sure that no drops form. Otherwise, a rework will be needed.
Feature video: Replacing a pressure ball valve
Replacing a pressure ball valve
How to replace a water tap under pressure: a simple life hack
Feedback from our readers is very important to us. Leave your rating in the comments with reasons for your choice. Your opinion will be useful to other users.
Pipe connection methods
According to the installation method, water valves are divided into two positions.
- Coupled or threaded. The connecting element is based on a thread, which can be internal or external. In household networks, valves of this particular type are used, especially for internal wiring. Fittings with such a connection are mainly installed in pipelines through which water moves with a pressure of no more than 1.6 MPa.
- Flanged. These are either cast iron or steel devices with flanges at the ends of the pipes. These are more powerful devices with greater weight and overall dimensions. They are mounted only on main or industrial pipelines in which water moves under a pressure of more than 10 MPa.
Coupling valves are installed in the water supply through threads, which must be cut at the ends of the connected pipes. This can be done with a special tool - a die. Its size is selected according to the valve diameter and thread size. The second option is to weld bends of the same diameter as the valve to the pipes, taking into account the thread number. When connecting the device to pipes, in order to create a complete seal at the joint, use FUM tape or thread.
