The kitchen faucet is the undisputed leader in frequency of use among other plumbing fixtures. No other taps or valves are used with such consistency, as a result, rapid wear, failure, and the need for replacement.
Installing a faucet in the kitchen is exactly what plumbers most often encounter. Yes, you can call a specialist, but it takes time and money, and you can do everything yourself. It’s not difficult, you just need to prepare the tool, material and boldly get down to business.
Tools and materials
You have to install a mixer in two cases: replacing a broken one or installing a new one in a recently purchased set. Actually, the work is the same, only in the first case you first need to dismantle the old mixer. Whatever the reason for the installation, you should start by preparing the tools and materials.
To work you will definitely need:
- new mixer with a set of parts for installation;
- open-end wrench 10;
- tubular wrench of the same size;
- plumbing sealing tape or tow;
- pliers;
- flat screwdriver;
- rags and a basin for collecting water;
- flashlight.
When purchasing a mixer, it is important to pay attention to the connecting hoses that come with it. Manufacturers often save on this useful detail by offering eyeliners no longer than 30 cm. In most cases, this is not enough, so before installation it would be a good idea to buy new ones of longer length.
Some models are equipped with rigid tubes. This is a controversial decision. On the one hand, such an assembly is stable and reliable, but difficulties may arise if it is necessary to move the sink. If possible, they should be replaced with hoses.
Regarding the length of the connectors. It is selected based on the distance between the installation location of the mixer and the water supply outlet so that they do not bend at a right angle, but create a smooth curve, but do not sag too much.
Step-by-step instruction
Prepare tools for installation:
- gas and adjustable wrenches;
- FUM tape (can be replaced with ordinary tow or linen thread);
- set of hex keys;
- pliers;
- Screwdriver Set;
- open-end wrenches.
Often, when installing inlet fittings, it is almost impossible to maintain a distance between them of 150 mm. If you made a small mistake, then it’s okay. Especially for this purpose, adapter eccentrics are included with the plumbing fixture.
Take your chosen sealing material and wrap it around the threads of the eccentrics, then screw them into the water main inlet fittings. Rotate the eccentrics to obtain a distance equal to or as close as possible to 150 mm. Check the horizontal installation using a building level.
Pre-screw the body of the new mixer and make sure it is horizontal. Check how the union fastening nuts are tightened. They should be fairly easy to tighten by hand over the entire thread of the nut. If it is quite tight, you will need to make fine adjustments by slightly turning the eccentrics, thereby achieving unhindered tightening. After this, you will need to screw on decorative cups that will hide the place where your new faucet connects to the main line.
Insert the sealing gaskets and install the product body in place. Take the wrench and tighten the mounting nuts. Be sure to place a piece of soft cloth under the jaws of the wrench so as not to spoil the coating of the nuts and the overall appearance of the product.
Just in case, you can apply pressure to the line and make sure there are no leaks. If it is present, you need to additionally tighten the nuts until the leak is completely eliminated.
Next you will need to install the gooseneck. Fit the nut and tighten it with a wrench through a piece of fabric. Insert the gasket and screw the watering can hose to the main body. Insert another gasket, only this time to connect the watering can with the hose. Mark the position and attachment points of the watering can holder.
Next, you will need to drill holes for the fasteners and attach the watering can holder bracket to the wall. After this, the process of installing a faucet in the bathroom yourself can be considered complete. Finally, you will need to open the shut-off valves, make sure the mixer is working properly and check the tightness of the connections.
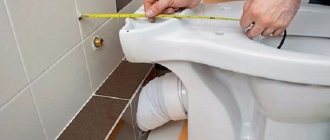
Let's look at the step-by-step installation of an undermount sink. Together we will assemble a drainage system under the sink and connect it to the water supply in the bathroom.
Preparatory work and dismantling
Before you begin repairing any plumbing fixtures, the faucet is no exception, you must turn off the cold and hot water supply. There is no need to shut off the riser in the entrance; it is enough to use the taps that regulate the water supply to the apartment. If there are valves that regulate the water supply only to the kitchen, you can limit yourself to them. Immediately after this, you need to open both mixer taps to balance the pressure.
After this, you can unscrew the supply hoses. The water accumulated in them is poured into a basin and allowed to drain completely. The time for the most difficult part comes - you need to unscrew the nuts holding the old device in place and dismantle it. At first glance this is simple, but in practice everything is far from so. Dismantling the mixer involves a number of difficulties:
- narrow space between the wall and the bowl;
- extremely uncomfortable position for working with a key;
- rust and plaque on the threads.
It is extremely inconvenient to work in tight spaces; you can’t get to the nuts with a wrench; if the threads are oxidized, it’s easy to “lick” the edges. This is a problem, but the mixer must be removed, therefore, you will have to look for a way out. In some cases, this will involve dismantling the sink. It can be easily removed, you just need to disconnect the sewer drain hose and walk around the perimeter with a sharp object, knife or screwdriver.
It is enough to remove and turn the sink over, and most of the inconvenience will go away by itself. You can slowly inspect the connection in the light and choose the optimal dismantling strategy.
Advice! It is easy to overcome rust and oxide layers using WD-40 or its analogues.
If everything is very bad, if the connection has “grown together,” you will have to take up the grinder. It is important to work with extreme caution to avoid damaging the thin metal.
Purpose of the design
A water tap is a necessary part of the water supply network, which serves to regulate the flow of water. Different sections of the water supply require taps with different purposes.
Taps with a special spout - spout - allow you to obtain water for household needs.
In places where a home pipeline is connected to a centralized network and at pipeline nodes, simple shut-off valves are required, the main task of which is to turn the water supply on and off; such taps do not have a spout.
If the house has a hot water supply, then you need a mixer - a tap that mixes the two streams in the required proportion.
Sequence of actions during installation
Before changing the faucet in the kitchen yourself, it would be useful to check the condition of the supply pipes, especially the threaded parts to which the hoses will be screwed. The pipe cut at the joint must be even and smooth, there should be no chips or cracks that would damage the seal. The same applies to carving.
Certain types of mixers must be assembled before installation. This applies to a greater extent to models with two valves. Single-lever products are ready for installation; there is no need to assemble them. Assembly is not particularly difficult; you just need to insert the drain tube into the housing and screw it until it stops. To ensure maximum tightness, the lower part of the thread is wrapped with several layers of FUM plumbing tape.
Next, the device is turned over and the supply hoses are screwed on. Twist it by hand, tighten it with a wrench, but it is important not to overdo it so as not to crush the gasket. After this, the installation studs are screwed on, and the o-ring is put on the body from below. The mixer is ready for installation.
Types of cranes
Cranes are distinguished by the type of body, valve and control mechanism, as well as the presence of additional elements in the device.
Type of shell
By type of case there are:
- direct - installed at key components of the pipeline and used to adjust the pressure or turn off the water supply in the area, for example, during repairs;
- corner – installed in corner nodes, perform the same tasks as straight ones;
- distribution - the body has the shape of a tee with one inlet and two outlets, such taps are needed to cut one flow into several or redirect the flow from one water circuit to another;
- water-folding - have a spout and are used to receive water from a water supply system, while the body can be solid with a fixed spout or assembled - with a movable spout that rotates in a horizontal plane;
- mixers - water taps, shaped like a tee, with two inlets and one outlet, used to mix flows from two water circuits in the required proportion.
We recommend that you read: What is the maximum pressure that a polypropylene pipe can withstand?
Locking mechanism type
Depending on the type of valve, ball valves and valves with a cone mechanism are distinguished.
- In a ball mechanism, the locking element has a spherical shape; the water flow is adjusted when the shutter is turned. If the valve hole is installed parallel to the water flow, the tap is open; if it is perpendicular, it is closed.
- In a faucet with a cone mechanism, the through hole has a curved shape. An O-ring is located horizontally at the bend. When the valve or lever moves, the cone-shaped valve moves vertically down or up through this ring. In the extreme upper position of the valve, the valve is open; in the extreme lower position, the ring and valve are hermetically connected and the valve is closed.
Control mechanism type
According to the type of mechanism, the crane can be:
- single valve,
- two-valve,
- single lever.
Each device differs in the way the locking mechanism is activated.
Single valve taps
Single-valve taps in a water supply system are used to regulate the flow in pipeline nodes or to obtain water from one water circuit, for example, drinking water or water for irrigation.
The control mechanism consists of the following parts:
- head - a thumb or handle, this is the external part of the mechanism, the impact of which sets the internal parts in motion;
- axlebox – a housing inside which the working parts of the control mechanism are located;
- a locking washer that secures the valve to the tap;
- a plug on the head that covers the washer;
- rod - a part that transmits force from a rotating thumb or handle to the bolt;
- oil seal - seal between the rod and axle box;
- coupling with guides;
- gasket between the valve and the valve body.
When the valve head is turned, the stem moves the valve. In this case, the cone valve moves progressively up or down, and the ball valve rotates around its axis. The valve control mechanism is simple and reliable, and since it is not part of the tap, in case of breakdown it can be repaired or can be completely replaced.
Double-valve taps
Two-valve taps are mixers that are used in houses with centralized hot water supply or in the presence of a water heating device.
The control mechanism has the same device as a single-valve faucet. One valve regulates the flow of cold water, the other – hot.
Single lever devices
Single-lever faucets, an alternative to single- or double-handle faucets, have become popular as faucets due to their ease of operation. To obtain the required pressure, simply lower or raise the lever, moving the lever left or right to adjust the temperature.
Design of single lever taps:
- lever arm;
- ball valve with three holes;
- control rod;
- pin or screw securing the lever;
- stub;
- valve body;
- cover in the form of a truncated hemisphere;
- seal between parts.
We recommend that you read: How to select, install and correctly use the Mayevsky valve
When the lever is applied appropriately, the ball valve is raised and lowered or rotated. In this case, the holes in the ball change their position relative to the outlet holes of the water supply pipes and the faucet spout, adjusting the water pressure from each pipe.
Cranes equipped with additional elements
Faucet manufacturers complement the device with a variety of elements:
- thermostats,
- touch panels,
- photocells,
- water opening sensors.
The faucet with thermostat has a screen that displays the temperature and water pressure, and two regulators. The first regulator is connected directly to the ball mechanism and changes the water pressure, the second, which serves to regulate the temperature, is connected through a thermocouple.
The touch panel built into the faucet allows you to regulate the water flow with a simple touch; there is no need to rotate the valve or turn the lever - the electronic system will automatically adjust the pressure and temperature.
The contactless faucet is equipped with a photocell that reacts to the appearance of any object under the spout. The photocell sends a signal to the regulating mechanism, which turns on the water. As soon as the reason for turning on disappears from the sensor’s field of view, the water turns off.
This control of the water supply allows for more economical use of resources and minimizes direct human contact with the tap, which makes such taps more hygienic compared to conventional valve and lever taps.
Installation of a faucet on a sink
The work is much easier if the sink was removed during dismantling. In this case, you won’t have to squeeze into the narrow space underneath and literally navigate by touch.
Often, replacing a faucet is combined with installing a new sink. Stainless steel sinks are available with or without a hole for the faucet. Manufacturers try not to limit users and give them the opportunity to choose the optimal location of the taps themselves. If you purchased a sink without a hole, you will have to do it yourself.
Making a round hole in stainless steel is easy. For these purposes, a special tool is put on sale, which operates on the principle of a screw press. It is enough to drill a central hole, insert a screw into it, clamp the device with a key, and you will get a hole of exactly the specified diameter. You can also use a drill attachment.
Work begins from the top of the sink. The ends of the hoses are inserted into the hole, followed by the pins. Press the body against the surface of the sink. It is advisable to ask someone to hold the faucet while you put the second o-ring on the bottom. The result is two rings, between which the sink is sandwiched.
A horseshoe washer is installed on the mounting studs, it is secured with nuts and securely holds the device. After this, all that remains is to put the sink back in place, if it was removed, and, of course, connect the hoses to the pipelines.
Selecting a thread sealant
Rewinding is only needed for eccentrics.
The quality of installation of the mixer depends on how reliably the threaded connections are waterproofed. For this purpose use:
- Plumbing linen.
- Plumbing thread.
- FUM tape.
Linen is a time-tested material. Despite the emergence of many other methods of waterproofing, it is still popular among professional plumbers and amateurs. The quality of the seal is at a high level. Correct linen winding does not move when screwed in and is not cut by thread. The external bushing with flax winding can be adjusted in space, but by no more than ¼ turn.
To wind the thread, flax is twisted into a braid. Then they are wound tightly in one layer, so as to hide the thread. The tail of the thread must be clamped with the first turn. The direction of the winding should be opposite to the direction in which the part will be screwed. Then the flax will remain in place when connecting the threaded pair.
The only disadvantage of flax is that it is not slippery enough. It is imperative to use special plumbing lubricants (pastes) with it. They prevent the fibers from being cut when screwed in and allow the flax to crumple tightly along the thread, making the connection as reliable as possible. In addition, it protects flax from destruction under the influence of moisture.
Plumbing thread is a less common material for waterproofing threaded pairs, as it is quite expensive and has specific uses. The thread is wound not along the thread, but crosswise. The tail is also clamped with the first turn. The material is reliable and easy to use, ideal for small jobs. Allows you to twist the connection in the opposite direction up to half a turn.
FUM tape is a popular material among amateurs and professionals, as it is very easy to use and fix on the thread. The tape is wound in several layers - from 3 to 10, depending on the diameter of the threaded pair, the density of the connection without winding and the thickness of the tape itself. The winding should be done from the base of the thread to the edge. The tape is wound along the thread, pulling slightly. The end must be cut, not torn off. FUM tape is quite smooth, so it does not require the use of additional lubricant.
Important! After twisting, the element with a winding made of FUM tape cannot be rotated in the opposite direction. To immediately install the eccentric correctly, you need to tighten it without winding and remember the number of turns and location in space.
Countertop installation
Often the faucet has to be placed not on the sink, but on the countertop of the kitchen unit. This simple technique allows you to create not just a functional kitchen, but also give it originality, because the mixer, by and large, can be installed almost anywhere on the table.
This installation method is not much different from the previous one, the only significant difference is that before installation you need to cut a hole for the device body. In most cases this is not difficult. The worktop, like most kitchen furniture, is made of wood or wood-based panels, so you can use an electric jigsaw or electric drill with attachments for drilling large holes.
Before making a hole, you need to choose the optimal location for it. The main requirements for it:
- water does not flood the countertop;
- easy access to controls;
- The center of the spout is located approximately in the center of the sink.
Using a pencil, ruler and compass, mark the installation location of the mixer. It is important not to miscalculate the size, otherwise you will not be able to fix the device. The walls of the hole are cleaned with sandpaper, shavings and sawdust are removed. Pass the hoses inside and fix the mixer.
Valve repair
The valve is a safety valve, so its reliability and tightness of locking require closer attention.
The condition of the valve gasket deserves special attention. The gasket rib has no protection from water pressure or hydraulic shocks, since the valves do not have recesses. This drawback is mitigated by the fact that the gaskets are attached with a nut and a threaded stud to the valve, and the pressure washer gives the gasket additional rigidity and strengthens it. The valve has neither a chrome-plated body nor a union nut, so replacing the gasket is easier than with taps and mixers. If necessary, you can also make a gasket for the valve yourself if you make a notch in advance. You can also place a workpiece cut from a piece of rubber, having previously pricked a hole in the center, onto a threaded rod near the valve, and secure the workpiece with a nut and washer in the same way as the finished gasket. Using a sharp cutting object, bring the contour of the workpiece to a perfectly even circle.
The requirements for the technical condition of the valve correspond to the requirements for the condition of water taps - for example, the valve seal must be tightly packed to avoid water leaks along the stem, since it is always under pressure.
Valves must be inspected regularly and their condition carefully monitored.
If a leak is detected, you must follow the same sequence of actions as when repairing a faucet - try to tighten the packing by tightening the union nut or, if that doesn’t work, add packing. To check the tightness of the connection, you need to tighten the flywheel all the way, open any tap installed after the valve - if water does not flow out, then the gasket is in order and you can start packing the oil seal.
Bring the valve to the closed position, unscrew the bushing or unscrew the union nut, remove the flywheel, leaving the stem motionless, put a seal in the gap between the stem and the body, tamp the seal with a screwdriver, thus eliminating the malfunction.
It should be remembered that if you remove the bushing, the pressure will squeeze out the seal, since the water is not blocked, and a flood will not be avoided. If the valve does not hold water in the closed position, it should be borne in mind that large foreign particles may have entered - in this case the valve must be closed and opened several times. If these actions do not lead to the expected result, you need to unscrew the valve head and understand the causes of the malfunction. In case of serious damage, for example, if there is a destruction of the ball joint between the stem and the valve, which can fit into the socket, the stem and valve must be replaced.
You should always remember that before any work related to the replacement of plumbing, it is necessary to shut off the valve at the inlet, but if it is impossible to fulfill this condition for some reason, shut off the entire riser, in order to avoid possible troubles associated with flooding of the room uncontrolled flow of water.
Installation, replacement of taps, mixers in Moscow, all districts 8 (925) 712-24-15
Features of wall mounting
It’s not difficult to create an original kitchen with your own hands; just a small touch is enough and its appearance will change dramatically. A similar touch, an addition to the interior, can be a simple-looking faucet, but installed on the wall. It looks really impressive, the pipes are hidden, only the drain and controls come out. This is an interesting design solution that will become the highlight of a modern designer kitchen.
Note! Ordinary faucets are not suitable for wall mounting; you need to buy special ones.
The range of wall-mounted kitchen faucets is very wide. There are models with two valves, with a lever, with a rigid or movable spout.
The method of attaching the mixer to the wall directly depends on its type and model. Famous manufacturers take care of customers and complete the product with everything necessary. As a rule, connectors, eccentrics, tees and brackets are included in the delivery package. The buyer is only required to follow the instructions, which describe the installation process step by step.
A wall-mounted mixer is beautiful and functional, but you need to understand that its installation is more labor-intensive than installing conventional devices. Most likely, you will have to hollow out the wall, lay pipes, fix them, and re-tile them. It’s easier to work with drywall or panels, but in any case, installing such a mixer will result in a small kitchen renovation.
If difficulties do not frighten you and you want to install a wall-mounted mixer, you need to start with markings. Mark the hot and cold water connection points directly on the wall and mark the route for laying the pipelines.