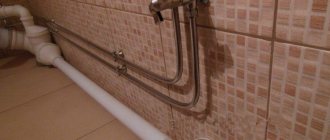
Any kitchen includes several types of pipelines: heating pipes and radiators, sewer, gas, water, and ventilation pipes. There are many ways to disguise these communications. Some of them are quite simple and do not require large financial and labor costs, while others are more complex. In any case, each owner can choose the appropriate method that will help disguise various communications in the kitchen.
You can disguise communications in the kitchen in different ways, using wall decoration and furniture
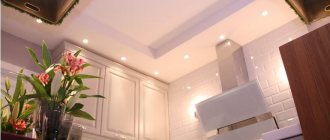
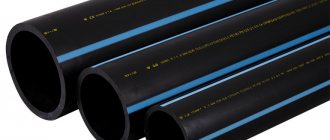
Kitchen interier
The owners pay a lot of attention to the interior of the kitchen, carefully selecting furniture, curtains and dishes. But don't forget about the pipes. To prevent them from spoiling the appearance of the kitchen, you need to disguise them.
While some pipes can be hidden in the wall, others cannot be hidden this way. You don't want to dismantle the wall to clean out the sewer pipe, do you?
There are many methods of camouflage. There are very simple ones, they do not require large expenses and the help of specialists. But there are also complex ones that only an experienced master can handle.
When choosing one of the camouflage methods, you should weigh all the pros and cons and choose the only correct option.
In this article we will present you with photo instructions on how to hide pipes in the kitchen and consider in detail the methods of camouflage.
Why is he bad?
Many people are accustomed to standard rooms with a strict rectangular shape, so such elements violate the aesthetics. Since the protrusion must be rounded, the overall concept of the design project may be disrupted.
The presence of a shaft/column imposes a number of restrictions on the choice of kitchen unit. For example, in such a case it will not be possible to use a standard headset. We'll have to look for another solution.
Finally, the ledge takes up extra space in the kitchen. You have to put up with it and look for the possibility of competent operation. Remember that any design flaw can be worked to your advantage. The main thing is to choose the most suitable solution.
Why hide pipes?
A large number of pipes in the kitchen greatly spoils the appearance and visually reduces the space. They will ruin even the most expensive repairs, and even if they place the furniture the way they wanted, it will cause harm.
That is why the owners are tormented by the question: how to disguise communications in the kitchen? This problem is quite common and very easy to solve. All you have to do is contact a special company and choose a masking method.
Hidden wiring
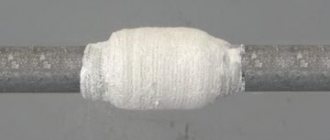
There is a radical way to hide communications - they are routed directly into the wall. The main advantages are space saving and aesthetics. There are also disadvantages. The first of them is the high complexity of the process, the second is that if a breakthrough occurs, you will have to break the wall. By choosing this camouflage option, you will have to completely change the pipes. Laying old ones is unacceptable (they have already exhausted their resource to some extent and could cause flooding of neighbors at any moment).
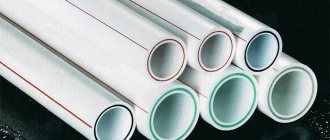
It is not allowed to chip thin-walled partitions and brick walls. When wiring is hidden, it is recommended to avoid detachable connections. Preference is given to polypropylene pipes and fittings. The hidden installation method is not suitable for gas communications.
Stages of work:
- dismantling old pipes, preparing new ones;
- drawing a wiring diagram on the wall;
- gating to the required depth/width (taking into account tolerances for thermal insulation and cement mortar);
- cleaning channels from dust;
- laying new pipes with fastening brackets and brackets (for hot water supply, compensators are provided for thermal expansion);
- testing the system to eliminate possible leaks;
- thermal insulation;
- sealing with cement mortar.
Instead of gating, you can make a false wall out of plasterboard and hide communications behind it. The downside of false walls is the loss of useful space, the plus is that in the event of an accident, you can get to the place of the leak without using a hammer drill.
How to hide a gas pipe in the kitchen: popular methods
Without gas pipes, a kitchen cannot exist. They run through the middle of the main wall and do not look aesthetically pleasing. To give the kitchen space beauty and not spoil the interior with pipes, you need to hide them.
The issue of masking gas pipes is the most pressing. We all understand perfectly well that putting them away in a wall or hiding them in an inaccessible place is strictly prohibited.
But today there are several simple methods of disguise that you will definitely like. So, the gas pipe can be hidden in
- Korobe . It can be made from a variety of materials;
- Decorate with various beautiful and unusual things;
- Closet . The simplest and most expensive method of disguise.
Corner furniture and ledge
If the ledge is deep, it is better to tear the furniture corner in this area. At the same time, the set does not look like a single whole, but the interior does not lose anything. The design of two components looks quite organic. In this case, the ledge is finished in the same way as the walls of the room or like an apron over the work area.
Design: Elvira Stankevich
Design: Natalia Sorokina
Design: U-project bureau
If the protrusion is shallow, there is no point in dividing the set into two parts. It is better to go around it with the lower level of furniture, that is, to combine the sides of the corner with a tabletop, creating a kind of bridge. This bridge can be very narrow, and the facade under it can be purely decorative.
Design: Ecole Bureau
As for the top row, it is usually torn. You can leave the upper cabinets on only one side of the working corner or abandon them altogether - this will make the kitchen lighter and visually lighter. The main thing is that there is no shortage of storage places. If there are not enough cabinets and cabinets, it is hardly advisable to abandon the top row of cabinets.
Design: Hot Walls studio
In an area without cabinets, you can place shelves the width of the protrusion - this will visually align the wall, making the protruding element less noticeable.
If you don’t want to tear the top row, you can use it to go around the ledge, partially hiding it. In principle, there is nothing complicated here. It’s just that one of the upper cabinets will have to be given a non-standard shape and/or size in accordance with the configuration of the box. To make the protrusion even less noticeable, you need to finish it to match the walls and apron.
How to hide the pipe from the hood in the kitchen easily and quickly
The hood has long become a necessary element of the kitchen. This functional item purifies the room air from unpleasant odors and eliminates excessive moisture.
There are several ways to hide the corrugation from prying eyes, but the most popular are: Plastic box; Metal box; Plasterboard box; Upper cabinets; Multi-level ceiling.
There are also pipes leading to the hood, which must be hidden so that they are not conspicuous and do not spoil the appearance of your favorite room.
Multi-level ceiling
Stretch ceilings look very beautiful in rooms of different sizes. If you have one in your kitchen or are planning to make one, then the corrugation can be hidden in the stretch ceiling.
The hood pipe can quickly become clogged and will have to be cleaned. In this case, the suspended ceiling will have to be disassembled to fix the problem. And only a master can restore the ceiling, and this is an additional cost.
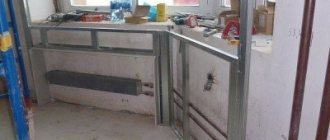
Instructions for constructing a plasterboard box
First of all, marking of the future cladding is carried out. To do this, measure the passage of pipes, marking the contours of the future box on the walls, floor and ceiling.
Required tools and material
To work you will need:
- laser level or plumb line;
- pencil or marker;
- roulette;
- square;
- electric drill;
- screwdriver
Before starting work, building materials and fasteners are purchased. To make the box you will need:
- metallic profile;
- plasterboard sheets;
- dowels;
- screws;
- paper perforated reinforcing tape;
- putty mixture for drywall.
The amount of material required is determined using accurate measurements and calculation of the dimensions of the future box.
Preparing the work site
In the area where the metal profile is installed, all interior decoration is removed: wallpaper, ceramic tiles, suspended and suspended ceilings. The surface of the base is carefully leveled, construction debris and dust are removed.
Calculation of box dimensions
The pipes should not be closely adjacent to the sheathing sheets, therefore, during installation, leave the necessary gaps, about 2 cm. The contours of the inner border of the box are applied using a laser level or plumb line. The final cross-sectional dimensions are determined depending on the width of the profile used and the thickness of the skin.
For example, the width of the box will be equal to the distance from the wall to the extreme border of the riser + a gap of 2 cm + profile width + thickness of the drywall sheet. Depth is measured in the same way. The height of the box is equal to the height of the room, since the installation of the profile is carried out not only on the walls and floor, but also on the ceiling (floor slabs).
Frame
The frame of the box is made of galvanized metal profile . A U-shaped guide profile (PN) is mounted along the floor and ceiling . Ceiling (PP) or more powerful C-shaped rack profile (PS) is used as racks.
The size of the profiles must correspond to each other, that is, a paired guide profile PN (28x27) is selected for the ceiling structure PP (60x27), and a guide PN (50x40) is selected for the rack-mount PS (50x50). The larger the profile size, the thicker the skin will be. Standard length is from 2750 to 4500 mm.
PN profiles serve as guides for racks, that is, PP or PS structures are inserted into the PN. The pitch of the racks is 600 mm. If the largest side of the box exceeds this size, install an additional stand. In the case of subsequent lining of the box with ceramic tiles, the pitch of the racks is made no more than 400 mm.
The height of the rack profiles is made 10 mm lower than the height of the room, and in earthquake-prone areas - 20 mm. To install hatches, lattice screens or ventilation grilles between the racks, jumpers are made from the PN profile.
Such structures are fastened to the load-bearing base using dowels, through a special sealing tape or sealant. For this purpose, ready-made holes with a diameter of 8 mm are provided in the guide profiles. The fastening pitch is no more than 1000 mm, but not less than 3 dowels per 1 profile.
Plasterboard sheathing
Drywall sheets are divided into 4 groups:
- GKL - ordinary, for rooms with dry and normal humidity conditions.
- GKLV - moisture resistant with low water absorption (less than 10%), for rooms with dry, normal, damp and wet humidity conditions.
- GKLO - with increased fire resistance, for fire hazardous premises.
- GKLVO - moisture resistant with increased fire resistance.
The cheapest are gypsum boards, so many people use these sheets. For the kitchen, especially for lining pipes, it is better to use moisture-resistant plasterboard GKLV. It is very easy to distinguish it from the usual one: such sheets are green instead of gray.
Standard sizes of plasterboard sheets: length - from 2000 to 4000 mm in increments of 50 mm, width - 600 or 1200 mm, thickness - from 6.5 mm to 24 mm. For the construction of boxes and wall cladding, sheets of medium thickness, 12.5 mm each, are usually used. They have different longitudinal edges, on which the reliability of the joint and the price depend. In the case of a small box, the type of edge does not matter much.
Plasterboard sheets are attached to the frame with screws at intervals of 250 mm. The distance from the screw to the longitudinal edge of the sheet is at least 10 mm, to the end edge - at least 15 mm. The vertical displacement of screws on two adjacent sheets must be at least 10 mm. The screws are tightened strictly at right angles, the cap is recessed to a depth of about 1 mm for further putty. On the inside of the box, the screw must protrude beyond the plane of the profile by at least 10 mm.
Vertical joining of sheets is carried out only along rack profiles. The lower border of the sheathing is not brought to the floor by 10 mm. This gap is sealed with putty or acrylic sealant. Where the plasterboard joins the walls, a separating tape is glued, the excess of which is then cut off during puttying.
In places where water supply and heating pipelines with a diameter of up to 60 mm pass through, sleeves made of fireproof materials are installed in the casing. For diameters greater than 60 mm, casings are used.
Seam processing, putty and finishing
In order to perform a high-quality finishing of the box (wallpapering, painting, etc.), the seams are treated and the surface of the sheathing is puttied.
Procedure:
- the joint is removed from dust;
- apply the first layer of putty by pressing perforated paper reinforcing tape into it using a spatula;
- after the first layer has dried, apply the second;
- After it dries, a finishing leveling layer is added.
The outer corner of the box is strengthened using a corner perforated profile made of galvanized steel (PU 31x31x0.4 mm), a protective aluminum profile (25x15x0.5 mm) or aluminized Alux tape. They are also pressed into the putty mixture, after which a leveling layer of putty is applied.
Important! When using moisture-resistant plasterboard sheets (GKLV), a moisture-resistant putty mixture is used.
Next, the finishing of the box is performed. Drywall sheets are painted with water-dispersion paints. The use of liquid glass or lime-based paints is prohibited. Any wallpaper is suitable.
Closet
A closet can be considered the easiest way to disguise. It is very convenient to use and does not spoil the appearance.
In addition, such cabinets can be used as additional compartments for storing dishes or kitchen textiles.
Recommendations for choosing material for masking
The masking material is wood or drywall. Which one to choose depends, first of all, on the interior. But in addition to the interior, you need to pay attention to the performance properties.
Wood is more environmentally friendly, but it needs to be looked after. Wipe regularly, sometimes sand and varnish. In the case of drywall, this is not required. In addition, it is lighter, you can hang a mosaic on it or decorate it with stained glass.
Therefore, plasterboard, despite being less environmentally friendly, is more popular than wood.
How to hide boiler pipes in the kitchen so that they are always visible
You can hide the pipes coming from the boiler and to the boiler in a closet or a special nightstand. They do not have a back wall and are easy to install. Furniture is made to order and strictly according to individual drawings. Therefore, the cost of such camouflage can cost a pretty penny.
This method is considered one of the most convenient. The owners will always be aware of the condition of the pipes and, if the need arises, they will promptly fix the breakdown.
Plastic panels
The material has a variety of colors/textures, so choosing an option that matches the general design idea is not difficult. The elements are interchangeable - in case of damage, repairs are easy. Maintenance is simple - dirt can be removed with a damp sponge or household chemicals can be used. The disadvantages of the material are insufficient resistance to mechanical stress and fire.
The plastic is mounted on the frame. A starter molding is pre-installed on it. The edges of the panels are tightly joined. Finally, the exterior molding is installed. Planks cover the joints.
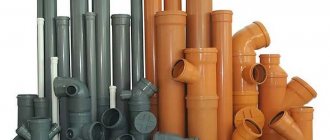
Photo example of options for hiding pipes in the kitchen
Did you like the article?