We welcome our regular reader and offer him a new article on heating devices.
Since the appearance of the first fire in a cave, people have been constantly looking for the most convenient, safe and economical methods of heating. We want the house to be warm, but the pipes and radiators are not visible. Engineers came up with the idea of hiding the heating pipes in the floor under the screed - this allows you to get a very comfortable, efficient and almost ideal heating system.
Fireplaces and stoves are not suitable for apartments and large houses, local heating is also not very comfortable; The traditional heating system using radiators or registers has some disadvantages:
- Warm air rises, and it becomes cool below the floor.
- Radiators and communications take up space and collect dust.
- Constant air convection increases the amount of suspended dust in the air.
- Wiring and radiators do not decorate our houses and apartments at all;
- Radiators covered with decorative screens and curtains provide worse heat.
When heating using underfloor heating, all these problems are solved; in addition, such heating is approximately 15-20% more economical compared to radiator or convection heating.
Therefore, the idea of creating a warm floor in housing is becoming increasingly widespread in both private houses and apartments.
Heating of the screed can be done using wires and electricity or using pipes and hot water. Heating with electricity is more expensive - gas or other types of fuel are cheaper. The cost of more expensive installation of a pipeline system pays off after several years of operation. If you weigh all the pros and cons of the “warm floor” system, the pros definitely outweigh.
Principle of operation
The principle of operation of a water heated floor system: a system of pipelines through which the coolant is supplied is laid in the screed. Warm pipelines heat the screed, the screed transfers heat to the floor covering, and the covering transfers heat to the room. The floor under the furniture is not heated.
Such a heating system creates a favorable temperature distribution over height and helps save the amount of heat consumed (and finances) compared to a radiator system. With a conventional heating scheme, warm air from the radiators rises to the ceiling, heats it, and only then heats the room - with the convection method, the energy loss for heating the ceiling, walls and windows (batteries are installed under them) is quite large.
It is especially effective to use lower heating in a house if there is second light or high ceilings - in this case, savings increase, according to some data, even up to 50%.
Finding out the heating scheme of the house (apartment)
There are two fundamentally different heating schemes: collector and pipe. Both are easy to identify by visual inspection.
With a manifold heating scheme, a separate pipeline connects to all radiators in the apartment. All heating pipes are brought together into a common distribution unit called a manifold. In large apartments there may be more than one such collector.
This is a very successful heating scheme and if it is done correctly, it adjusts and works perfectly. However, completely redoing such a heating scheme will be much more expensive.
The pipe circuit can be two-pipe or one-pipe. In new apartment buildings, a two-pipe heating system is used. With this scheme, heating radiators are divided into groups, each group has its own heating risers. The risers are clearly visible in the corners of the rooms.
This heating system is dependent, that is, in the absence of bypasses (jumpers) on the radiators, a heating failure in your neighbor will lead to a heating failure in yours. In addition, the quality and cleanliness of each of your radiators will affect the performance of the radiators of its group. Repairing or replacing such a heating system is easier and cheaper. Installing bypasses and high-quality radiators solves all heating problems in a new building.
Why do pipes in the floor need to be insulated?
Pipes in the floor must first of all be isolated from dynamic mechanical influences when people move and static loads from furniture standing on top. Although heating wiring is not installed under the furniture, there will still be chairs, dining tables, tables, ottomans, flowers and other easily movable pieces of furniture on top. Communications in the screed must be thermally insulated from below so that heat is not wasted on useless heating of the floor structures.
It is necessary to distinguish between the laying of a low-temperature underfloor heating pipeline in the floor and the laying of heating pipelines. Heating has a temperature of 70-80-90°C, communications with this temperature strongly heat the floor and screed, causing a temperature difference - this can cause cracking of the screed and concrete structures. Therefore, heating with high temperatures should be insulated.
We will determine whether the room is suitable or not for laying a water-heated floor
Water structures can be either the main heating system or an additional one. They are recommended more often for individual construction. In multi-storey buildings, such floors are rarely installed, as there is a risk of flooding of neighbors below. In addition, the structure is heavy and creates a large load on the floors.
The most optimal solution is to install a water structure during the construction phase of the building. Although in a finished house, during the renovation process, it is quite possible to install such a floor heating system if the room meets a number of requirements:
- sufficient ceiling height - after all, the thickness of the “pie” of the water floor reaches from 8 to 20 cm;
- the appropriate size of doorways is at least 210 cm in height;
- strong concrete base - so that it can withstand the weight of the cement-sand screed, wooden floors may not withstand such a load;
- smooth and clean concrete subfloor - differences of more than 5 mm are contraindicated, they can worsen the thermal output of the structure;
- the room must be plastered and windows installed;
- the level of heat loss is no more than 100 W/m2 - otherwise insulation will be required.
Advantages of closed installation
There are many advantages to a closed floor heating system:
- The main advantage is that a correctly installed and well-functioning system creates ideally comfortable conditions in the room: the air above the floor is very warm, the air near the head is warm, and cooler near the ceiling. Parents of small children will especially appreciate this method of heating their homes.
- The second advantage is efficiency - the coolant temperature is lower, heat is consumed more efficiently, the living area of the room is heated - windows, walls, ceilings, air under the ceiling, and the floor under the furniture do not heat up. With a ceiling height of 2.5 m, the savings are about 15-20%, with higher ceilings or second light – sometimes reaching 50%. Quite expensive installation of pipelines pays for itself in several years.
- Durability - a water heated floor system will last about 30-40-50 years (depending on the material. Copper structures will last 100 years). Floor heating operates at a low temperature and low pressure - therefore, all pipelines and collectors operate in a gentle mode and wear out less.
- Easy to install. The only difficulty is in the design work.
- Easy to use.
- The screed has a high thermal inertia - the room slowly cools down when the heating is turned off.
- Saves space indoors.
- Saves the housewife's cleaning efforts.
- The warm floor is not noticeable - and radiators with wiring usually disrupt the design of the room.
- The system is quite easy to combine with an existing radiator system.
- You can only heat floors in separate rooms - children's rooms, bathrooms.
- In the presence of radiators and constant convection, there is quite a lot of suspended dust in the air; when heated from below, such strong convection does not occur, there is less dust in the air - this is especially important for allergy sufferers and asthmatics.
Preparing the base
The purpose of the preliminary work is to level the surface of the base, lay a cushion and make a rough screed. The preparation of the soil base is carried out as follows:
- Level the ground along the entire floor plane and measure the height from the bottom of the pit to the top of the threshold. The recess should accommodate a layer of sand of 10 cm, a footing of 4-5 cm, thermal insulation of 80...200 mm (depending on the climate) and a full screed of 8...10 cm, minimum 60 mm. So, the minimum pit depth will be 10 + 4 + 8 + 6 = 28 cm, the optimal one is 32 cm.
- Dig a pit to the required depth and compact the soil. Place elevation marks on the walls and add 100 mm of sand, maybe mixed with gravel. Seal the pillow.
- Prepare M100 concrete by mixing 4.5 parts sand with one part M400 cement and adding 7 parts crushed stone.
- After installing the beacons, pour a 4-5 cm rough base and let the concrete harden for 4-7 days, depending on the ambient temperature.
Advice. If the height of the thresholds is not enough, sacrifice the subfloor 40 mm and reduce the thickness of the screed to 6 cm. As a last resort, add 6-7 cm of sand instead of ten, compact the cushion with a vibrating plate. The thermal insulation layer cannot be reduced.
Preparing the concrete floor involves removing dust and sealing the cracks between the slabs. If there is a clear difference in heights along the plane, prepare a garter - a leveling dry mixture of Portland cement with sand in a ratio of 1: 8. How to correctly lay the insulation on the garter, watch the video:
Disadvantages of placing heating pipes in the floor
Disadvantages of the "warm floor" heating system:
- The most serious drawback is the difficulty of repairing communications if they are damaged. The rule of laying only a single piece of pipeline in a screed should be strictly observed.
- Flooding of housing with warm water due to a leak creates considerable problems.
- Significant cost of the entire complex of work on installing the system.
- Significant cost of the pump, manifold with mixing unit.
- It is necessary to allocate space for a manifold cabinet - one cabinet for each floor in the house;
- Design complexity - it is advisable to involve specialists.
- Such a system cannot be installed in apartment buildings in which it was not provided for in the project (and this only happens in new buildings). The large weight of the screed creates a large load on the floor slabs and creates the risk of breaking the load-bearing structures of the house. The law prohibits connecting underfloor heating systems from central heating and hot water supply systems.
- The height of the entire screed + insulation structure reaches 110-120 mm, the weight of the screed is large - this should be taken into account when designing a house (both in terms of the height of the room and the strength of the floor structures).
- The heating system limits the choice of floor covering - carpet, parquet with good thermal insulation properties make the heating ineffective. Preferably tiles, stone, porcelain stoneware, laminate. Only high-quality linoleum can be used - in cheap varieties, when heated, substances with an unpleasant odor will be released.
- Significant thermal inertia - the screed warms up slowly.
- Water heating systems cannot be cooled below zero - it will not be possible to heat a porch, terrace, garage and paths or equip a “weekend” cottage with such a system. You can use antifreeze, but it is expensive, and antifreeze is very poisonous.
Is the installation legal?
Any unauthorized changes to the central heating scheme are prohibited. Such actions are punishable by significant fines. To obtain permission to install a transformer substations, you need to agree on the design of changes with the heat supply organization.
To maintain the thermal balance of the entire house, there are only three options for legally connecting the TP of a separate apartment to central heating:
- Initially, the project provided for a two-pipe connection scheme for heating radiators in each apartment. Then a resident of any floor can obtain permission.
- If the main pipeline is located in the basement, then for the first floor you can obtain permission to separately enter the supply and return pipes.
- If the house has upper wiring in the attic or technical floor, then residents of the last upper floor can obtain permission for an individual connection.
Only in these cases there is no likelihood of deterioration in the heating conditions of other apartments. Tapping into a single-pipe CO will definitely disrupt the hydraulic balance. Other residents of the house will be cold. Complaints will follow, the violator will be identified and fined.
If it is not possible to connect the indoor heating system directly to the main pipeline, then it is impossible to obtain legal permission to install heated floors.
The procedure for obtaining a permit consists of the following steps:
- Contact the heating supply organization with the appropriate application and obtain permission. Along with the document, technical specifications for the installation and connection project of floor heating circuits are issued.
- Develop and approve the project.
- Install, launch the system and commission it to a special commission from the heat supply organization.
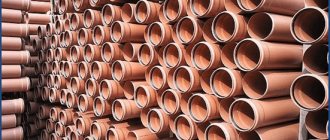
Types of floor pipes
Four types of pipes are used for heating installation: cross-linked polyethylene, metal-plastic polypropylene, corrugated steel, copper (and copper in a plastic sheath). Copper is very expensive, difficult to install, and requires equipment and a welding specialist. Therefore, despite their strength and durability, they are very rarely used in underfloor heating systems.
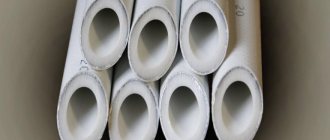
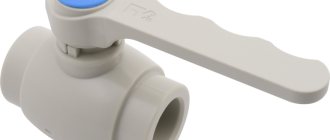
Metal-plastic polypropylene
Polypropylene is the most popular heating material. It is resistant to corrosion, quite durable, somewhat fragile (compared to other plastics), quite plastic, chemically inert, and can withstand hydraulic shocks. The big advantage is the low price and easy installation.
Can operate at high temperatures, but has a high coefficient of thermal expansion and elongates greatly as the temperature rises. Reinforcement with aluminum foil reduces this disadvantage. A pipe, especially a reinforced one, does not bend well - it is mounted using soldering/welding. Therefore, this is a budget and reliable, but not ideal material option for installing heated floors.
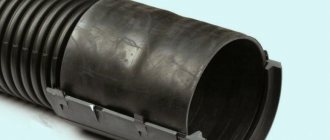
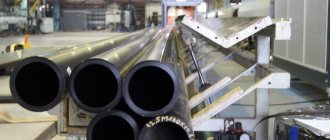
Corrugated stainless steel
Corrugated stainless steel pipes are also produced. The advantages of such a pipe:
- Strength.
- Long service life.
- Corrosion resistance.
- Chemical inertness - they practically do not become overgrown with calcium and magnesium salts from the inside.
- Flexibility over a very wide range.
- High resistance to mechanical loads.
- High temperature resistance.
The disadvantage of metal corrugation is its rather high cost. This variety has not become widespread only because of low consumer awareness.
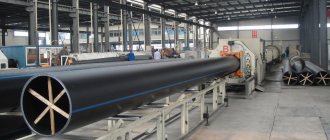
RE-X pipes
Cross-linked polyethylene has cross-links between its molecules, resulting in the formation of a three-dimensional cellular network with cross-linked molecules. Cross-linked polyethylene (PE-X) has significantly greater strength than low- and high-density polyethylenes, and greater strength compared to metal-plastic. The durability of cross-linked polyethylene is about 50 years.
PE-X is resistant to high temperatures - can withstand heating up to +95°C (for a short time - up to +110°C); has other advantages of plastics: not subject to corrosion, resistant to hydraulic shocks, plastic, not fragile, chemically inert, not overgrown with salts from the inside. Compared to polypropylene, it has a lower coefficient of thermal expansion.
The disadvantage of RE-X is its relatively high cost.
Tips for choosing
The choice of pipes for pouring into the screed depends primarily on your financial capabilities. But it’s not worth saving on structures that are poured into a screed for decades - it can be very expensive.
The best and most durable pipes are copper and plastic-coated copper. They can last 100 years or even more. But they are the most expensive, they have complex installation - you will need a specialist.
Stainless steel corrugation is very durable - you can count on 50 years. The price is lower and installation is easier. Cross-linked polyethylene will last approximately 40-50 years. Pipes made of polypropylene metal-plastic are less durable. In addition, it will not be possible to lay them in a screed without welding using couplings and angles - the pipes bend poorly and are supplied in 6 m sections. Any connection increases the risk of leakage.
In practice, pipes made from PE-X are chosen. It has almost optimal price-quality ratio. But more and more often they use stainless steel corrugation. In any case, the choice is yours.
approximate cost
The cost of cross-linked polyethylene pipes with an oxygen layer with a diameter of 16 mm is from 70 rubles; stainless corrugations with a diameter of 15 mm - from 150 rubles; copper products with a diameter of 15 mm - from 270 rubles per linear meter. Metal-plastic polypropylene products cost from 15 rubles per meter.
Installation methods
The pipeline is laid using two methods:
- Spiral laying - “snail”. This form of installation is suitable for large rooms and ensures a more uniform distribution of heat over the entire area of the room.
- Parallel laying - “snake”, “double snake” (or “meander”). This method is more often used in small rooms. Its disadvantage is uneven heat distribution. The pipes are positioned so that the beginning of the pipeline (the warmest slab) is located at the coldest wall - the outer one with windows.
When laying the system, the laying step (distance between pipes):
- In bathrooms, bathtubs, swimming pools - 100 mm.
- In living rooms - 150 mm.
- In auxiliary rooms - up to 300 mm.
The diameter of the pipes ranges from 12 to 20 mm, in very rare cases -25 mm (in public buildings).
For filling
Most often, pipes are filled with screed. This method is used if floor heating is installed in rooms with reinforced concrete floors. Thermal insulation is laid on the ceiling, then waterproofing, then pipes, then the screed is poured and the finished floor is laid.
Under wooden covering
Most often, a warm floor is installed in a screed, but what to do if both the house and the floor are wooden? In this case, you can also install a heated floor.
The layout of the pipeline and connection to the collector completely coincides with the installation of a heated floor when poured into the screed.
Logs are installed on the wooden floor. Cuts for pipes are made in the joists. Insulation is laid between the joists, and pipes are laid on top of the insulation. Then they cover it with boards or durable plywood and lay the finished floor - usually laminate or linoleum.
Another option for installing a heated floor on a wooden floor: insulation is laid between the joists, sheet material is laid on the joists - plywood, OSB, chipboard, plates 20 mm thick are cut from the same material, the width of the plates is equal to the distance between the pipes, the plates are screwed to the sheet material, in Foil and pipe are laid in the grooves, then laminate. A layer of galvanized or aluminum can be laid on top of the pipe for better heat transfer.
Filling the screed and adjusting the collector
To install heating monoliths of heated floors, a cement-sand mortar of grade 200 is made with the obligatory addition of a plasticizing composition. Proportions of components: cement M400 / sand - 1: 3, the amount of liquid plasticizer is indicated in the instructions on the package.
Recommendation. To ensure that the pipelines retain their working shape and do not float in the solution due to unsuccessful fastening, the system is not emptied after pressure testing - the loops remain filled with coolant.
Work order:
- Buy beacons - metal perforated slats, prepare 2-3 buckets of a thick solution without plasticizer. It is not recommended to make restrictive strips from wood.
- Using a trowel and a building level, install the beacons at the required height, as shown in the photo.
- Mix a portion of the main solution, pour it in the far corner on top of the “pie” and stretch along the beacons as a rule. If depressions with puddles form, add solution, and the next time you mix, reduce the volume of mixing water.
- Repeat mixing until you have filled the entire area of the room. It is allowed to walk on the monolith and carry out further work when the strength has reached 50%, and to start heating - at 75%. Below is a table of concrete hardness gain depending on time and air temperature.
The minimum strength values are highlighted in red, and the optimal strength for continuing work in green.
After hardening to 75% strength, you can start the boiler and begin to slowly warm up the heated floors at a minimum temperature. Open the flow meters or valves on the manifold 100%. Full heating of the screed will take 8-12 hours in the summer, and up to 24 hours in the fall.
The most convenient way to balance the loops is by calculation. If you know the required amount of heat for the room, determine the water flow in the circuit and set this value on the rotameter. The calculation formula is simple:
- G – amount of coolant flowing through the loop, l/hour;
- Δt – temperature difference between return and supply, take 10 °C;
- Q – thermal power of the circuit, W.
Note. The flowmeter scale is marked in liters per minute, so before setting, the resulting figure must be divided by 60 minutes.
The final adjustment is made after the fact, when the finishing coating is ready - epoxy self-leveling flooring, laminate, tiles, and so on. If you do not want to get involved with calculations, you will have to balance the contours of the heated floor using the “scientific poke” method. Methods for adjusting the manifold, including using the Valtec program, are described in the latest video:
DIY installation
Installation of a heated floor system is quite simple and can be done independently.
Required tools and materials
For installation you will need:
- A container and mixer for mixing the solution, buckets, shovels, a crowbar, usually a trowel, a long trowel.
- Drill, pliers, construction knife, glue, construction tape.
- Grinder, discs, calibrator, round file.
- Fittings, pipes, reinforcement mesh 50×50 mm, pipe fastenings, pipe cutter, insulation, cement mixture, waterproofing film, press pliers.
- For wooden floors - joists, saws, pipes, pipe cutters, fittings.
Leveling the surface
It is very important to level the surface of the ceiling. There are two reasons:
- Thermal insulation boards will not adhere firmly to the ceiling and may sag during operation - this will lead to cracking of the screed and may lead to a violation of the tightness of the pipes.
- If the difference in the base is more than half the height of the pipe, then there is a high probability of air pockets in the raised parts of the pipe, interfering with the movement of warm water and reducing the efficiency of the system.
Most often, the surface of the subfloor is quite flat, but in some cases it is necessary to repair the surface with mortar or install a new leveling screed.
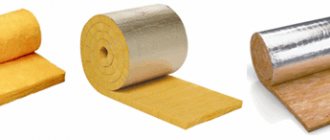
Preparation of the thermal insulation layer
Insulation must be installed under the heating pipelines - usually slabs of dense extruded polystyrene foam (not expanded polystyrene) of high density with a thickness of at least 35 mm (preferably 50 mm). Sometimes hard slabs of mineral wool are used, but this is not the best way. You can use a cork. It’s good if the insulation is foil. You can lay a foil waterproofing film. Do not lay penofol.
The thermal insulation is protected from above with a waterproofing film. There are films with markings, heat-insulating boards with clamps and markings.
A damper tape is fixed along the wall. Sometimes it is recommended to lay a strip of insulation along the wall.
Pipe laying and fastening
Pipes are laid on the waterproofing according to the design. The length of one circuit should not exceed 150 m - otherwise the hydraulic resistance of the pipes simply will not allow the pump to push water through the pipe. The contours should be approximately equal in length.
If pipes need to be bent, do it carefully, preferably using a template so that folds do not form on the pipes at the bending points. If there are no fasteners on the thermal insulation, then special plastic strips (mounting rails) with locks are installed to secure the pipes at the required distance from each other. You can secure pipes with U-shaped anchor brackets (clips). It is necessary to secure the pipe so that it does not “float” when pouring the screed.
Rules for assembling heated floors
After laying, the pipes are connected to the collector using fittings. Each circuit must be able to be switched off using taps at the inlet and outlet.
Then the system is tested, filled with water and heated. Test technology: pressure and temperature are gradually increased over several hours. If possible, the pressure is adjusted to 0.6 MPa (6 bar, 6 atmospheres). Test the system for at least 24 hours, bleeding the air several times.
Then the temperature and pressure are reduced, but the system is left filled with water - the screed is poured when the system is filled.
Creating a reinforcement mesh
Then the reinforcing mesh is laid - for this, a mesh with a cell of 50x50 mm is used.
Installing reinforcing mesh and pouring screed
The system is then filled with solution. The pipeline should be filled with water at room temperature - 20-23°C, the pressure should be 0.3 MPa. It is better to use a ready-made cement dry mixture marked “for water-heated floors.” You can add plasticizers for heated floors to ordinary cement mortar.
The screed is poured from the walls. It’s a good idea to cover it with polyethylene - this improves the maturation process of the solution and improves its quality. Drying out the surface for the solution is undesirable, and it is impossible to moisten a large area. The screed completely hardens after 20 days, but you can walk on it a couple of times after 10 days, not earlier.
Wiring types
According to clause 6.3.3 of SP 60.13330, pipelines made of polymer materials are allowed in apartment heating systems when the coolant parameters should not exceed: temperature - +90 0C, pressure - 1.0 MPa.
Important! The method of laying pipelines should ensure easy replacement during repairs.
According to the paragraph, it is recommended to install heating under the floor made of polymers hidden in a corrugated pipe. Open installation is allowed behind baseboards and screens where mechanical damage and direct exposure to ultraviolet radiation are excluded.
It is recommended to use the following types of wiring:
- double-tube beam;
- two-pipe perimeter;
- mixed.
Radial
Two-pipe radial wiring involves connecting a separately located device to the apartment's distribution cabinet. Filling of the floor is carried out only after installing the corrugation, installing fastenings to the floor, installing a compensation loop, and testing it to the permissible pressure.
According to building codes, heating under the floor in an apartment is laid without joints. Products of the PE-X line are produced by enterprises in coils; it is recommended to calculate the required footage in advance.
system for distributing pipes along the floor from the comb
The best option is radial wiring, in which each device is connected to the distribution manifold individually. There are no intermediate connections on the path from the collector to the device, which ensures high reliability. In addition, changing the flow rate through one of the devices has virtually no effect on the operation of the others.
Perimeter, mixed
When radial wiring in the middle of the floor is undesirable for any reason, two-pipe perimeter wiring is used. It is laid along the baseboards under the floor or openly, but surrounded by screens.
When installing the plinth, take into account the location of the perimeter wiring so as not to damage the heat pipe. When several individual radiators are located along the wall farthest from the distribution cabinet, radial wiring is used to the nearest device, then perimeter wiring between the remaining devices.
Laying a heating pipe under the floor in an apartment is invisible, does not affect the appearance of the room, and does not require opening when repairing or replacing the pipeline.