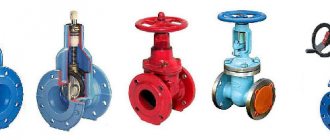
Repair of shut-off valves
We carry out stationary repairs of shut-off valves at the production sites of the enterprise using modern diagnostic and repair equipment with the issuance of documentation.
Let us immediately make a reservation that we do not carry out initial minor repairs, which can be performed on site without dismantling the pipeline fittings. Services are provided in factory conditions in relation to dismountable - repairable shut-off valves of a classical design and check-type protective valves with a nominal bore of up to 600 mm. The shut-off valve repair service is a comprehensive offer consisting of several phased services:
- Shut-off valve inspection service – pre-repair check for functionality, including external inspection, assessment of faults and leak testing.
- Diagnostic service for shut-off valves - disassembly and detailed inspection of all parts of the pipeline device, as a result, identification of the causes of malfunction and damage to structural parts.
- Repair of shut-off valves - disassembling and troubleshooting, restoring the operational properties of damaged parts using special equipment.
Categories of repair of shut-off valves (RPA)
Types and categories of repair of shut-off valves
| Repair category of shut-off valves | Description of repair | What is included in the repair work * | Possibility of repairs |
| RZA-1 | Mobile current repairs with on-site visits to the customer. | To restore tightness without removing fittings from the line and equipment. | We do not carry out |
| RZA-2 | Stationary repair in detail in the factory. | Inspection, diagnostics and restoration of the functionality of shut-off valves - replacement of seals, packing, restoration of flange surfaces, adjustment of valve and spindle parts, grinding and lapping of valve and seat, anti-corrosion painting. | We carry out and accept for scheduled maintenance. |
| RZA-3 | Overhaul, unit-by-unit and complete factory restoration. | Inspection and diagnostics of faults in shut-off valves, repair work in category RZA-2, plus restoration with complete replacement of parts and assemblies. The work is agreed upon with the customer (we do not perform metal surfacing on seat and valve seals). | We carry out work as agreed with the customer |
| *The main types of work are presented | |||
To perform repair work of category RZA-2 and RZA-3, the pipeline fittings are dismantled by the customer and delivered to the repair mechanical shop (RMS) of our enterprise in Kazan.
Types of pipeline fittings for inspection, diagnostics and repair.
| Pipeline accessories | Nominal diameter, DN (mm) | Versions U1, HL1 according to GOST 15150-69 | Type of valve and seat sealing surfaces | General industrial designation of the type of pipeline fittings according to the classifier |
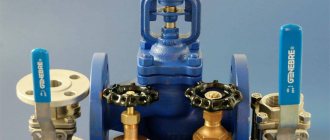
| Wedge valves | Repair (DN15 – DN600) (Diagnostics - tests up to DN1000) | C – Carbon steel LS – alloy steel NZh – stainless steel (coordination on steel grade required) | BC - without rings (metal-to-metal); NJ – stainless steel | 30, 31 |
| Shut-off valves | 13, 14, 15 | |||
| Rotary and lift check valves | 16, 19 | |||
| WE DO NOT REPAIR – Pipeline fittings made of cast iron, non-ferrous metals, polymers | ||||
Secondary and major repairs of shut-off valves (RZA-2 and RZA-3) are carried out after inspection and diagnosis of product problems, which include a step-by-step check of the functionality of the pipeline device.
There are a number of reasons why pipeline fittings fail. All of them can be divided into three groups:
- Production;
- Structural;
- Operational.
Production causes and types of malfunctions of shut-off valves are associated with the insufficient technical level of technological processes used at the enterprise producing individual parts and assembling valves. Technical control of all production stages and widespread technological discipline make it possible to reduce the number of defective shut-off valves. Industrial safety services are the prevention of dangerous emergency situations at an enterprise of absolutely any type of activity and the key to confident work.
The use of standard components and parts also has a positive effect: oil seals, electric drives, gearboxes, fasteners, rods, etc.
Structural (structural) causes of failures and malfunctions of shut-off valves are directly related to the design of the valve itself. The timeliness and speed of repair work depends on how well it is executed and how well its design is thought out for maintenance.
Operational reasons for the failure of shut-off valves are related to the ability of the valve to maintain its performance characteristics during operation within the limits specified in the technical documentation. The operational parameters of the fittings are:
- flywheel torque, or force on the control handle;
- tightness of gaskets, seals, valves;
- safety valve capacity;
- other characteristics;
If one of the parameters begins to fail to meet the norm defined for it, then a parametric failure occurs. Hydraulic testing of shut-off valves and stands for testing shut-off valves can prevent and reduce the risk of further failure of shut-off valves during its operation at the enterprise.
Shut-off valve failure is its failure due to the breakdown of one or an entire group of elements. The failure can be partial, in which further operation is possible, or complete, in which urgent repair work is required.
A complete refusal may be of the following nature:
1) in shut-off valves. Inability to lift or release the locking organ to open or close it. In this regard, it becomes impossible to regulate the flow of the working medium and refuse to operate the equipment on which the shut-off valves are installed.
Liquid leakage through joint leaks or fistulas in the housing. In this case, equipment wear increases significantly and there is a danger of injury to service personnel.
2) in safety fittings. The shut-off valve does not work: does not operate when the pressure increases or decreases within the established limits. As a result, there is a danger of damage to the main equipment due to the lack of proper protection from negative factors. Increased wear occurs and operating personnel are at risk of injury.
3) in control valves. Any malfunction leading to the impossibility of making adjustments, corresponding to a complete loss of control over flow characteristics. Loss of tightness due to destruction of sealing materials and the appearance of fistulas on the body.
Partial failure of shut-off valves may be of the following nature:
In safety and shut-off valves, there is a partial passage of the working medium through the shut-off device, which allows the operation of the equipment, but leads to a decrease in the efficiency and quality of operation of the facilities.
In adjustable valves - any malfunctions that lead to a partial change in the control parameters. Loss of smoothness and the occurrence of play at joints cause a decrease in operating efficiency.
Typical malfunctions that occur in pipeline fittings and electric drives can be found in the following table.
TABLE. MAIN FAULTS OF ELECTRIC DRIVES AND PIPELINE FITTINGS. METHODS OF THEIR ELIMINATION.
| Malfunction | Possible reason | Remedy |
| The working medium flows despite the shut-off valve being completely lowered | Loss of tightness due to wear of the sealing surfaces of the housing: the appearance of cracks, dents and scuffing. or damage to the locking organ (disc, wedge, plate. | Carry out disassembly, cleaning, washing and defect detection. Various mechanical damage (scores, dents) should be sanded and rubbed in. More serious defects (delaminations, cracks, deep scuffs) can be corrected by surfacing a new sealing layer followed by grinding. Replace the sealing rings with lapping. |
| Too little force applied to the flywheel. | Strengthen the force on the flywheel to the calculated value. | |
| The electric drive of the shut-off element develops insufficient torque. | Inspect and adjust the torque coupling. Check the operation of the electric motor. | |
| The working medium flows through the oil seal | The oil seal is not packed tightly enough | Loosen the bolts, perform additional packing, followed by uniform tightening of the bolts |
| The oil seal is worn out | Remove old packing and fill with new one | |
| Corrosive wear on the spindle surface | Grind the cylindrical surface followed by nitriding and grinding. | |
| There is sweating or leakage through housing parts | The case has defects that occurred during the casting process. On its surface there are voids, pores, cavities, and fistulas. Cracks are possible where the body radius changes. | By grinding, remove the metal layer at the leak site until a defect is detected. If there are cracks, to prevent their further spreading, drill at the ends. Clean all defective areas and weld. |
| The working medium is leaking at the interface between the cover and the body. | Insufficient tightening of the stud connection | Tighten the nuts evenly in a sequence that prevents distortion of the cover flange relative to the body. |
| The gasket is worn out | Replace the gasket. | |
| There is damage on the sealing surfaces of the cover and housing flange. | Grind the damaged areas and deposit a new sealing layer, followed by grooving and grinding. | |
| The constipating organ moves with significant delays. | Worn guide wedges | Dismantle the guide wedges and then replace or repair them. |
| The trapezoidal threads in the threaded bushing or spindle are damaged. | Dismantle and replace the defective bushing and or spindle. | |
| Resin or particulate matter has accumulated on the surface of the guides. | Disassemble the valve body and clean it. | |
| It is impossible to move the closure organ in any direction. | A part or group of parts of the control drive has failed: running nut, spindle, gear, etc. | Disassemble the housing, inspect parts and replace defective ones. |
| The working medium passes through the bellows assembly | The bellows is damaged | Disassemble the valve or valve and replace the bellows assembly. |
| Changes are observed in the hydraulic characteristics of the control valve. | There is erosive wear in the regulator. | Disassemble the valve and replace the gate (plunger). If the seat is worn out, it must be replaced with another one, followed by grinding. |
| The safety valve operates under normal operating conditions. | The pulse valve has a leak. | 1. Make sure the weight is positioned correctly on the lever. 2. Disassemble the pulse valve and eliminate any detected defects in the sealing surfaces. If necessary, grind in body defects. 3. Make sure that the solenoid valve is working properly. If its core sticks, then it is necessary to replace the electromagnet, spring, and core. Inspect the handwheel. |
| The seal in the main safety valve is broken. | 1. Inspect the spring for defects and correct location. 2. Grind in the sealing surfaces. | |
| The main safety valve does not close | The rod broke. Chassis jammed | Replace the stem. Disassemble the valve with subsequent inspection and check the quality of mating of all parts. When reassembling, disassemble the valve. Check the connections of the main parts of the chassis. During assembly, special attention should be paid to the assembly of the piston and rod packings so as not to make these seals excessively tight. |
| The spring safety valve does not close. | Spring breakage | Disassemble the valve and replace the spring. |
| The flywheel rotates idle when switching to manual control mode. | The coupling cams do not engage as a result of breakage. | Inspect the manual control unit and eliminate the malfunction. |
| The force on the flywheel is so great that it is impossible to completely close or open the valve | It jams moving parts in an electric drive or valve. | Try to correct the problem by rotating in the opposite direction. If the problem cannot be solved, then disassemble the unit and reassemble it. |
| The pointer arrow does not rotate during travel. | The transmission between the drive shaft and the camshaft of the limit switch is faulty. | Inspect the transmission and eliminate the malfunction |
| The screw that stops the arrow disc is loose | Disassemble the pointer and tighten the screw responsible for the arrow stopper. | |
| After pressing the start button, the engine starts running in idle mode. | Remote control mode is not enabled | Switch the electric drive to remote control. |
| The shaft or worm key on the electric motor is worn out | Examine the contents of the electric drive and eliminate the malfunction | |
| The electric drive remains in place. | As a result of loosening the locking screw, the motor coupling moved. | Remove the electric motor, put the coupling in place and secure it with a screw. Dismantle the electric motor, install the coupling in the operating position and tighten with the screw. |
| The electric motor does not start after pressing one of the control buttons | Malfunctions in the power circuit The starter is faulty. There is no voltage on the control panel. | Inspect the power circuit for defects and correct them Repair or replace the starter Diagnose the power system and fix the problem |
All about gas transport
INTRODUCTION
General information about shut-off valves
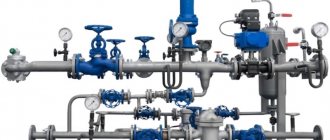
Pipeline fittings are devices that are mounted on pipelines, boilers, tanks and other devices under pressure to turn on and off individual sections of the pipeline, regulate the flow and pressure of the medium, indicate and regulate the levels of liquids, change the direction of movement of the medium transported through pipelines and etc. The most common type of valve is shut-off valve.
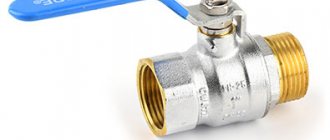
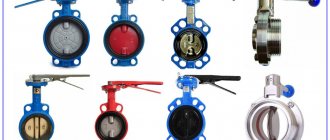
Ball valve repair
The restoration procedure depends on the type of part, and is therefore determined by the technician during inspection. Breakdowns are often associated with manufacturing defects, clogging of structural parts or damage to seals.
During the work, we assess the general condition of the components and identify the causes of failure. After disassembly, we test the parts for compliance with the requirements and restore damaged components. To prevent future malfunctions, we provide consultations on equipping the pipeline with additional filters.
How to check valves for faults
Every year, pipeline networks are inspected for the purpose of prevention or preparation for the heating season. In industrial sectors, testing is carried out according to standards, and the frequency depends on the aggressiveness of the environment in which the pipes are used.
Parts tests are carried out:
- the breeder at the final stage of production;
- before installation into the pipeline system;
- after installation;
- after the accidents have been eliminated;
- for a routine inspection.
Classification of faults that led to system failure:
- production Defects during the manufacture and assembly of parts resulting from poor technical control;
- structural. When designing a pipeline system. The safety parameters of the fittings during installation are regulated by GOST R 63672-2009;
- operational. The part must be used strictly according to the technical rules specified in the documentation.
There are several points that allow you to check the shut-off valves. After completing all stages, an audit report is drawn up.
Defects go through the following stages:
- the reinforcement is visually inspected for scratches, chips, cracks, and thread quality;
- the smoothness of the ride is checked. Make marks with chalk, then turn the shutter 1/4 turn. If everything works fine, the chalk should lubricate evenly;
- check the presence of all parts of the structure according to specifications and drawings;
- if the fittings are new, the grease is wiped off;
- pollution is eliminated;
- carry out hydraulic tests in different positions.
Do-it-yourself fittings repair
In order for the devices to serve for a longer period of time, it is necessary to periodically maintain and repair the shut-off valves.
The most common causes of leakage are:
- wear of sealing gaskets;
- Insufficient packing of the stuffing box.
To replace the gaskets, perform the following steps:
- partial disassembly of the device. Using an adjustable wrench, remove the crane-axlebox, which secures the spindle;
- remove the worn gasket. In some devices, the gasket is attached with a bolt, while in others it is simply placed on the rod;
- install a new gasket and assemble the faucet;
- check the device for leaks.
Elimination of leaking shut-off valves
Repair of shut-off valves if it is necessary to seal the stuffing box is carried out in the following way:
- the flow in the pipeline is blocked;
- the union nut is unscrewed. In order to carry out the operations correctly and loosen exactly the right nut, you need to fix the rod in one position;
- To remove the flywheel and oil seal bushing, it is necessary to loosen the fixing screw;
- the stuffing box packing is removed (if a complete replacement of the material is required) or the required amount of packing is added (if there is slight wear);
- The fittings are assembled in the reverse order and the leakage is checked.
Description of the technological process
Partial disassembly of the valve for the purpose of repair, replacement of the spindle or wedge is carried out without dismantling the valve from the pipeline in the absence of pressure from the working medium. Disassemble in the following order:
— set the wedge to the upper position OPEN and remove the casing and indicator (for the electric drive of JSC Tulaelectroprivod);
— set the wedge to the middle position, lowering it by 3/4 full stroke if the valve is in the OPEN position or raising it by ½ full stroke if the valve is in the CLOSED position;
— remove the electric drive;
— unscrew the plug 2-3 turns and make sure there is no medium pressure in the pipeline;
— remove the cover fasteners;
— lift the assembly until it exits the housing. Move the assembly to the side and place the wedge in a vertical position on the pads;
— remove the spindle head from mating with the upper groove of the wedge, after which install the unit in a horizontal position on the pads. If necessary, the removed unit can be completely disassembled.
After inspecting and repairing parts and assemblies, assemble the valve in the following order:
— lubricate and place the O-ring in the groove at the end of the housing;
— strap the cover assembly with the spindle and stand in a vertical position, carefully insert the spindle head into the corresponding groove of the wedge and lower the assembled assembly into the body cavity. Lower the assembly slowly, guiding the wedge along the guides between the body pipes
The wedge must be installed in the same orientation relative to the body pipes;
— install the cover fasteners and tighten them evenly using a diametrically cross pattern:
Mkr.=(70±7) kgf. m - for DN 500;
Micro = (120±12) kgf. m - for DN 600;
Micro = (140±14) kgf. m - for DN 700,800;
Microdistrict =(190±19) kgf. m - for DN 1000,1200;
Next, install the electric drive of the valve and check the functionality of the valve.
Complete disassembly of the valve for repair of the seal assembly is carried out only after dismantling the valve from the pipeline.
After assembly, the valve must be pressurized with pressure Pn = 12.0 MPa with the valve open in accordance with the rules in force at the facility being operated. The number of test pressure tests is no more than 10 for the full designated service life of the body parts.
A button gets stuck or stuck: what to do?
To the listed malfunctions of the flush tank, you can add sticking or sticking of the button. This is when you press the button, release it, and it remains in the socket, so the draining does not stop. You have to press the button mechanism several times to return the button to its original position. The problem is solved by cleaning the buttons themselves from rust and dirt. Monthly use of cleaning products to maintain the sanitary condition of the buttons allows you to get rid of this problem once and for all. Some people simply pour a small amount of detergent directly into the push-button mechanism. Under the influence of special means, all dirt dissolves and the buttons do not stick.
As you can see, it is quite possible to independently repair a toilet cistern with a button. By spending a little time studying the structure and operating principle of the valve mechanisms, you can repair the cistern without outside help. Of course, if plumbing work does not bring you any pleasure, then you should turn to professional craftsmen who will cope with any malfunction of the tank and toilet in a matter of minutes. Real professionals only need to take one look at the toilet to understand the nature of the problem. To troubleshoot a problem, plumbers usually always have everything they need with them.
Crane repair
The main breakdowns of a water tap are:
— wear of the sealing gasket;
— spindle thread alignment.
But there is one part of the water tap that most often fails - the gasket. It must be resilient to securely lock the valve seat, and at the same time flexible and durable.
Running water very often contains various foreign bodies that penetrate between the gasket and the valve seat. This means that if you tighten the tap too much, it is very easy to damage the gasket.
Since gaskets wear out quite quickly, valve designs usually allow them to be easily replaced and securely fixed.
Factory-made gaskets have standard sizes depending on the diameter of a certain type of valve.
To replace the gasket, you need to unscrew the valve head assembly, then remove the valve from the spindle protrusion along with the worn gasket and install a new gasket.
It should also be remembered that before repairing the tap, it is necessary to shut off the water supply with the control valve and unscrew the flywheel.
It is somewhat more difficult to replace a gasket secured with a washer and nut, since as a result of metal corrosion, the nut can become fused with the iron washer and steel threaded rod.
If this has already happened, then it is necessary to replace the rod and iron or brass nut with a nickel-plated steel one. This will prevent rust from forming in the future.
Water leaking down the stem indicates a poor packing seal or insufficient packing. In this case, it is usually sufficient to lightly tighten the union nut to seal the packing. We also recommend reading - Installation of plumbing fixtures.
We recommend watching a useful video called:
Repair and replacement of shut-off valves
Shut-off valves are an essential element of water supply, heating and sewerage pipelines, which allows you to quickly shut off the water supply in a separate area. This is especially true if the apartment is undergoing renovations and replacing the plumbing requires shutting off the water. That is why shut-off valves must always be in good condition.
The main signs of wear on shut-off valves:
- Loosening of gaskets and packing
- Loss of tightness that cannot be corrected by tightening
- Jamming of moving parts
- Drip leaks at tapping points
- Deep rust damage
Attempts at self-repair often lead to disastrous consequences with damage to expensive equipment and flooding of premises, so it is better to entrust them to trusted specialists. has been successfully repairing and replacing shut-off valves in Yekaterinburg for a long time, so you can safely entrust us with any, even the most complex, work.
Our valve repair services:
- Routine inspection and performance check
- Cleaning of seals, grinding in and finishing of elements
- Complete dismantling and installation of shut-off valves
- Replacing locking mechanisms
- Spindle Troubleshooting
- Insertion into a polyethylene pipe
- Pressure testing of shut-off valves
Prices and guarantees
Our prices for repairs and replacement of shut-off valves correspond to average prices in Yekaterinburg, but the quality is significantly above average! We provide a guarantee for all work performed by our employees, and manufacturers - for equipment installed during repairs.
We are interested in long-term cooperation, so we are ready to meet halfway when agreeing on payment, and if necessary, we will provide an installment plan for the final payment of up to 6 months.
Contact us, we are always ready to offer the best conditions:
Types of wear of shut-off valves and ways to minimize it
Reinforcement parts can be subject to various types of wear:
- Mechanical
- Erosive
- Thermal
- Chemical, etc.
Mechanical wear of valves is the result of mutual friction of parts, for example, sealing rings of valves, a spindle and a running nut in their threaded connection, shafts in sliding bearings, etc. The degree of change in parts depends on the number of operation cycles of the valve, the strength and hardness of the metal, the wear resistance of the rubbing parts surfaces. A decisive role in the intensity of mechanical wear can be played by oxidative processes occurring in the surface layer of the metal (oxidative wear), microcutting by abrasive particles (abrasive wear), metal setting, etc.
Mechanical wear of parts can be reduced by increasing the hardness of the material from which they are made. For this purpose, various methods are used: surface hardening with high-frequency currents, chemical-thermal treatment (cementation), nitriding, diffusion chromium plating, etc.
To protect against damage and corrosion, the threaded elements of shut-off valves are galvanized or coated with special antifriction materials based on solid lubricants.
Anti-friction coatings are becoming increasingly popular today, since, compared to galvanic ones, they are more resistant to wear and continue to function after multiple cycles of installation and dismantling of fittings.
In Russia, antifriction solid lubricant coatings (ATSC) are produced under the MODENGY brand. For threaded fastening of shut-off valves, the ATSP line with the addition of polytetrafluoroethylene is used - MODENGY 1010, MODENGY 1011 and MODENGY 1014 (the latter coating also contains molybdenum disulfide). These materials help protect the metal from corrosion and wear, stabilize the torque coefficient, and avoid “biting” the thread.
The coatings have successfully passed chemical resistance tests, so they can be used in conditions of aggressive pumped media.
The valve parts that throttle the liquid are subject to erosive wear: plungers and seats of control valves.
There are crevice and impact erosion, as well as the process of cavitation destruction of metal. With crevice erosion, the surfaces of parts are washed away under the action of a jet of wet steam passing at high speed through the gap between the seat and the plunger. In impact erosion, the material is destroyed due to the impact of water droplets on the surface of the part. During the cavitation mode of motion, bubbles (voids) form in the medium flow. When they collapse, they create local hydraulic shocks that destroy metal surfaces.
The intensity of erosive wear can be reduced by changing the operating modes of the reinforcement and using erosion-resistant materials.
Thermal wear (aging) of a material is the result of a change in its structure when heated. Aging is most characteristic of rubber - it loses elasticity, becomes brittle and brittle. The stuffing box burns out and hardens under the influence of high temperature.
Chemical wear is nothing more than corrosion to which shut-off valve parts are exposed under the influence of working media.
Corrosion can be general (over the entire surface of the metal), crevice, intercrystalline, pitting (point). The greatest danger is caused by corrosion cracking of steel, which occurs under simultaneous exposure to the environment and mechanical stress.
Steel and its alloys are most susceptible to corrosion cracking.
The intensity of chemical wear can be reduced by using alloy steels and corrosion-resistant metal and non-metallic coatings. Some of them - for example, already mentioned above MODENGY - have very high anti-corrosion properties and are at the same time easy to use.
Unlike passivation, electrochemical protection and other processes that require specialized equipment, working with ASTP involves the use of standard painting tools.
When do you need to change window fittings?
The technician can replace broken or outdated parts right on the spot, but the window will need to be disassembled. After replacing old elements with new or more improved ones, a specialist must adjust the sash and check whether all functions are working correctly. The customer has the opportunity to install functions that were not initially in the window, but a need arose for them.
Replacement of elements occurs in different situations. For example:
- Physical deterioration . Any fittings for plastic windows or doors have their own expiration date. With active use, parts wear out faster, lose their properties, and become more fragile.
- Not satisfied with the operation of mechanisms or functions . In this case, elements are selected that fully satisfy the customer’s needs.
- We need to replace parts from one brand with another . This is explained by the fact that the same intended products from different manufacturing plants differ from each other in quality, functionality, and appearance.
Which manufacturer should you choose? Where to buy accessories in Samara? You can find answers to these questions by calling us. The most famous manufacturers of window parts are the Austrian company Maco, the German brands Roto and Siegenia, and the Turkish company Kale. Our specialists will help you choose a specific manufacturer, who will tell you about the advantages of a particular company and offer the best option. You can install fittings in Samara quickly and efficiently by contacting the Window Repair 63 company.