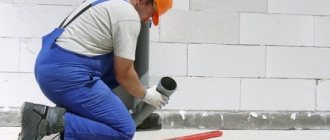
The cottage has been built or renovated, all that remains is to build a wastewater drainage system and a water supply system. Call a plumbing expert; not everyone can be trusted. Do the installation of sewerage from plastic pipes and water supply yourself, enjoy the work done, and save money.
Carrying out plumbing work on your own without experience is scary. You need to know the rules and tricks to build a working structure. It will be useful for home craftsmen to learn about the stages of work and where to pay attention.
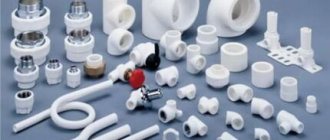
Selection of materials for sewerage
Almost all modern wastewater disposal systems are made from polymers. Pipes and fittings made from them attract a number of advantages that affect operation and installation.
This is the following:
- The inner surface is smooth, which does not contribute to the accumulation of dirt and the formation of blockages.
- The material is inert to the aggressive effects of chemical and biological substances contained in wastewater.
- Light weight for easy installation.
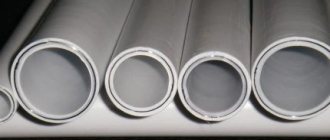
The most widespread are polyvinyl chloride (PVC) products. They are used in free-flow sewers, with orange pipes intended for external areas, gray ones for internal areas. The material is somewhat fragile in the cold, but this factor is absent in the house.
Polyethylene (PE) can withstand high pressure and is used in pressure sewage systems indoors and outdoors. Operating temperature range -40…+40°С. If the drains are hot, it is not recommended to use.
Polypropylene (PP) is the most resistant to alkalis and acids. If the drainage is from washing machines and dishwashers, it is recommended to install PP pipes. In addition, they do not lose their properties at wastewater temperatures up to +100°C.
Arrangement rules
The main element that drains wastewater is considered to be a riser. This detail can be one for all rooms. However, there are a number of important nuances:
- If the area of the residential complex is large, or the toilet rooms are located at a distance, then the owner will have to think about arranging several risers at once. This element consists of pipes installed in a vertical position, starting from the basement and ending on the roof.
- In the basement, the riser must be connected to a pipe of an identical or larger size, located at a certain angle. Such a pipe must discharge accumulated wastewater into a special container or to a treatment station.
- Part of the riser on the roof must be open or equipped with a back pressure valve. It is important to remember that the riser must rise above the roof to a height of at least 50 centimeters.
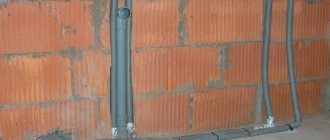
Sewer riser
Features of internal wiring
Internal sewerage wiring is carried out using an open or hidden method.
In the first case, the pipes are fixed to the wall with clamps; if the diameter is small, then with clips. It is convenient to install a hidden system simultaneously with finishing walls and laying floors during renovation or construction of a house. In order not to violate the integrity of the surfaces, they make false panels, boxes, and hide them in niches, behind partitions.
In a hidden system, access for maintenance must be provided. They install doors, hatches, and make removable structures.
Selection of pipe diameter
One of the conditions for reliable operation of the sewage system is the correctly selected diameter of the products.
Guided by several criteria:
- type of household plumbing fixtures, their performance;
- how many drain points are connected;
- types of waste: homogeneous or with impurities.
Recommended pipe diameters for connecting 1 device:
- washbasin, kitchen sink, bidet: 32-40 mm;
- shower, bath: from 50 mm;
- washing machine, dishwasher: 63 mm;
- sink with grinder, toilet when connected with corrugation: 70-85 mm;
- riser, drain pipe: 100-150 mm.
If you plan to connect 2 or more devices, collect wastewater from several branches, a diameter of 75-90 mm is required.
The use of products of different sections causes installation difficulties. In practice, specialists make internal wiring with pipes of maximum diameter (75 mm or even 50 mm), when the number of points is small. The method does not apply to the riser: minimum 100 mm.
Design nuances
To avoid mistakes with the wiring, draw a diagram. It reflects the key components: riser, markings with corners and turns, instrument connection points. They try to simplify the project as much as possible so that later there are no difficulties with maintenance and repairs.
Sewerage design.
At the design stage, the following nuances are taken into account:
- The sections are laid with a slope towards the exit. Optimal value: 3 cm per 1 linear. m for products up to 50 mm and 2 cm for diameters greater than 85 mm.
- Appliances with grinders and toilets are connected closer to the riser: the distance is no more than 1 m.
- It is unacceptable to install pipes of different sections on horizontal sections. There may be an outflow to the plumbing; a non-return valve will be needed.
- The number of connections is minimized - the system becomes more reliable.
- In places where there is a risk of blockages, inspection hatches are installed.
- A common drain for several points simplifies the circuit and saves money. Only the toilet is connected separately.
If you plan to install additional plumbing, it is wise to provide for its connection. An outlet is left in the system and temporarily closed with a plug to subsequently avoid work on dismantling and replacing the section.
Rules of hydrodynamics for the arrangement and installation of a sewer system
Failure to use the laws of hydrodynamics can cause the most common mistakes when arranging a drainage system.
The first lies in ignoring the provision of reliable ventilation. The drain pipe leading to the attic from the riser is intended not only to remove the smelly aroma of wastewater, but also acts as a pressure compensator. In the absence of such an important part, the reduced level of pressure generated above the water piston will remove liquid from the siphons. This will lead to a lack of air and the penetration of sewer aroma into the house.
ventilation - vent pipe
Installation of plumbing fixtures
Another mistake lies in the fact that each plumbing fixture is connected to a riser located below the toilet using supply pipes. Such installation is unacceptable, because it will certainly lead to the appearance of uncleanness in the bathroom or sink after each flush. A similar situation will arise when the length of the supply pipe is greater than that established by the rules.
To avoid troubles during daily use of the sewer system, you should familiarize yourself with and follow the important rules for installing sewer pipes.
Preparatory work
According to the diagram, the length of the pipes, diameter, number of fittings, fasteners are calculated, and the purchase is carried out. At the preparation stage, elements are adjusted in size and connections. Check compliance with angles and slopes. You may have to make changes to the project or improve places that make it difficult to follow the diagram: widen the hole, rearrange equipment, etc.
Preparation for installation.
How to cut and strip PVC pipes
It is not recommended to cut all the pipes at once - you can make a mistake with the dimensions. It is better to carry out the work sequentially: measure the area, cut it off. The cut is made in a circle to maintain an angle of 90° and get a smooth edge.
Cut with your own hands using the following methods:
- On a cutting machine, the highest quality edges are obtained. Free space is required to accommodate equipment and pipes.
- Using a special saw, a high-quality result is achieved. It’s convenient to work, you don’t need a lot of space.
- A hacksaw is a common tool at home. A small burr is formed, because the teeth are small. It is difficult to obtain an even cut; the ends will have to be processed additionally.
It is difficult to cut straightly with a grinder; the edges melt and it is difficult to process them.
PVC pipe cutting.
Burrs interfere with the installation of sewerage from plastic pipes and violate the tightness. A poorly cleaned interior surface can cause blockages.
Debris clings to the protruding plastic, gradually accumulating. The flow rate slows down.
Burrs are removed with a knife: scraped off, placing the blade at an angle. The edges are treated especially carefully from the inside. Additionally, you can use fine sandpaper.
Conclusions and useful video on the topic
Installing a sewer system in an apartment is a labor-intensive process, but knowing the intricacies will help you complete a competent installation. Use video tips to expand your knowledge and watch professionals at work.
Now you know how to plan and install sewerage in an apartment. The process of dismantling and installing equipment is accompanied by many professional nuances, so if necessary, it is better to contact specialists.
Do you have experience in solving similar problems? Or do you still have questions about arranging sewerage in your apartment? Please share your opinion and leave comments. The communication block is located below.
Rules for installing plastic pipes for water supply
High-quality operation of the system in a private home is only possible if the installation rules are followed:
- The properties of the material in the mixing units are taken into account. To connect corrugated pipes, a different technology is used than when working with smooth-walled elements.
- The sockets are directed against the flow. Then the inside surface will provide minimal resistance to drainage.
- To connect with metal pipes of old sewerage, plastic parts of the same cross-section are used.
- Horizontal sections and the riser are fixed on the wall every 1 m. If the sections are small, near each socket.
- Fan ventilation in the scheme eliminates odors coming from a septic tank or well. It also prevents the suction of water seals from siphons when discharging a large volume of water.
Make as few joints as possible - this is a potential threat of leakage. A large number of turns threatens to clog the system.
Adjusting workpieces to size
Installation is carried out after preliminary assembly. Prepare the pipes and fittings by removing the seals from them.
Starting from the riser, installation is carried out in the following sequence:
- Place elbows at corners and tees at plumbing connections. Pipes are put into them.
- If the length of the pipe is much longer than necessary, the element is cut off and chamfered. To reduce waste, purchase products of different lengths.
- After assembling the straight section, mark the attachment points. Draw a line on the wall, checking the angle of inclination with a level. The pipes are then placed along it during final installation.
- If there is a turn, continue to collect dry from this place.
- Having completed the preliminary installation, the parts are numbered. This will help install each element in its place.
It is recommended to cut the workpieces sequentially, from one fitting to another. If the pipe size exceeds the required one by several centimeters, it is better to move the angle or tee further. This will save you from stripping the ends.
Joint in socket
Sewer pipes made of polymers have a socket for connection. Pipelines are assembled (including installation of fittings) in 2 ways: with a rubber sealing ring or with glue.
An example of a bell joint.
Using seals, detachable joints are obtained, which, if necessary, can be disassembled and repaired. Build quality is ensured by gaskets.
The simplest ones are single-feather ones; installation is easy with them and no lubrication is required. With two feathers it is more difficult, especially if there is an additional plastic ring. The pipes are difficult to insert even with lubricant.
It is a mistake when, instead of achieving a tight joint, defects are corrected with silicone sealant. It closes the seam only at the top, making the connection unreliable.
Much depends on how the gasket is inserted: no distortions are allowed. Deformed rubber bands are immediately thrown away and replaced with new ones. If the seal is crooked, a leak will appear.
Slippery rubber makes it easier for the pipe to enter. They use detergents, shampoo, soap, and mineral oils without thinking about how they affect the rubber. It can harden and collapse (from detergents). The soap dries, leaving a gap. The only product that does not have a harmful effect on rubber is silicone grease. Pure silicone is even more aggressive than household chemicals.
The most difficult thing to connect is cut pipes. The factory ends have a correct chamfer, with which the products are easily connected. A self-made chamfer is often rough, making assembly difficult.
By connecting with glue, complete tightness is achieved, but it is impossible to disassemble the system.
Sequence of work:
- remove burrs and chamfer;
- degrease the socket from the inside and the end of the pipe from the outside;
- apply glue and connect the parts.
It is recommended to cover the outside of the seam with glue - this will eliminate possible flaws.
Details
Rules for installing plastic sewerage with your own hands
After the sewerage system is connected, the water supply should be connected. To do this, it is worth drawing a diagram for connecting the elements, and for hot water supply you should leave a technological gap of 1 cm, because plastic expands when heated. Then, when calculating the total length of the line, it is worth calculating how many fastening and locking elements are required. For further addition of new devices, it is recommended to leave several outlets with plugs.
When planning a water supply, you should know that plastic pipes are always gray. They have different markings:
РN25 – heating.- РN20 – hot water and heating.
- РN16 – cold and hot.
- РN10 – only for cold water.
Where the water temperature is less than +600 degrees, PN10 and PN16 are suitable, and if higher, then the rest, since they are reinforced. To save time and also ensure control over the condition of the water supply network, it is better to use an open connection method. Pipes should be installed at floor level, in the corners of the rooms.
The typical (and most simple option) option is a consistent water supply to all consumers. To carry out repairs without shutting them all down, you need to install a shut-off valve in front of each one. When the elements have been purchased and the tools have been prepared, all that remains is to decide on the installation of plastic sewerage with your own hands. According to the diagram, it is worth cutting sections of the pipe with special scissors.
They are fastened together by welding or fittings, and the technology is simple:
- Cleaning is carried out, and then the ends need to be degreased.
- It is worth choosing nozzles of the required diameter for the soldering iron, and also heating it.
- Insert the elements for connection and wait (the time is determined by the cross section of the products).
- After the welding process, the elements should be fixed until they cool completely.
Structural elements are fixed to the walls with clips. The risers are secured with a rubber gasket and a clamp. Additional elements, such as meters and valves, have a metal threaded connection, and it is also sealed with tow. Professional craftsmen prefer to use fluoroplastic sealing material. With a little experimentation, each master will be able to independently connect a plumbing system that will work like a clock.
Process Features
There is a relatively new device that was able to combine the properties of polymer and metal pipes. In some ways it resembles a layer cake - glue, polyethylene, aluminum, more glue and polyethylene. The performance properties are excellent - at a pressure of 9.8 atm they can withstand temperatures of +960 degrees, and with short-term overheating up to +1350 degrees. Such pipes are resistant to frost, easily retain their given shapes and can even be bent by hand. They are used in the transportation system of gases, liquids, heating systems, as well as in heated floors and air conditioning systems. The connection diagram is the same as for polypropylene pipes. But due to the fact that they are more susceptible to mechanical stress and the influence of ultraviolet radiation, it is important to install them inside special boxes, floors and walls. Special fittings are produced for fastening:
- Compression (for clamping).
- Detachable.
- Press fittings (for press jaws).
Installation does not require expensive equipment or special education. When assembling the water supply system with your own hands, you should know that the connection with press fittings is permanent, and it can also be “packed” inside the walls or floor. The first two types can be placed in special boxes so that there is access in the event of an emergency.
Installation of heating pipes
The main problem that the master solves when installing a new heating system is connecting plastic pipes to metal ones.
Industry makes it possible to do this:
- Section up to 4 cm (fittings with threaded connections are available).
- From 4 to 30 cm (flange).
The working instructions are similar to connecting polypropylene pipes.
How to prevent blockages
Pipelines mostly become clogged due to installation errors:
- Poorly cleaned internal surfaces of pipes, to which debris clings.
- Incorrect slope - both insufficient and excessive. In the latter case, the liquid runs away without having time to capture solid particles.
- Right angles on horizontal sections. Turns must be made smooth: instead of one 90° corner, they are assembled from two 45° corners.
Blockages also occur when the sewer system is used as a garbage disposal.
To facilitate their elimination, inspection hatches are installed. For external sewerage every 15 m, for internal sewerage - at the place where the pipe is connected to the riser.
Professional secrets
Assembling a sewer system is not a difficult task, however, there are some nuances here:
- installation is carried out from the riser in the direction of plumbing fixtures;
- the pipe sockets should be directed from the riser to the plumbing fixtures - in this case, the likelihood of leakage will be minimal;
- turning the line 90 degrees is carried out using two 45-degree bends - this will reduce the risk of blockages;
- for each of the plumbing fixtures it is advisable to use a siphon with a water seal;
- connection to the pipeline of drain hoses and sections with a smaller diameter of pipes is made through rubber cuffs that ensure the tightness of the connection;
- when assembling a pipeline from several materials:
- When connecting a plastic line to a cast iron riser, it is necessary to use transition elements specially designed for this purpose.
The dimensions of plumbing hatches for hidden installation must provide access to all connections of the system.
How to properly install sewer pipes with your own hands, watch in the video filmed while the plumbers were working.
Errors regarding connecting siphons
Connecting a toilet or any other plumbing fixture to the drain is carried out using a siphon made in the shape of the letter U. This appearance of the product contributes to the constant presence of water in it, which, in turn, leads to the formation of a water barrier and does not allow unpleasant odors to enter the room. If the following shortcomings are not taken into account, the system will not be able to perform its functions:
- lack of ventilation. In such a situation, the vacuum will simply suck out the water, and the smell will freely flow into the rooms.
- Odor may also appear if water evaporates. This situation occurs when the toilet is rarely used for its intended purpose.
Recommendations for the arrangement of sewerage systems, which are strictly prohibited from being violated
Before reading these recommendations, it is important to understand that ignoring such simple rules may cause complete failure of the sewage system. The rules in question are easy to follow.
- The toilet should be connected to the riser separately from the rest of the plumbing.
- Each subsequent device must be connected to the waste system above the toilet connection point. It is important to understand that no more than three devices should be located on one liner, the performance of which is allowed by such placement.
Distance and diameter
- The diameter of each supply pipe must not be inferior to the largest circumference of the plumbing connections.
- The circumference of the toilet outlet is 10 centimeters. Accordingly, the riser cannot be thinner.
- The distance from the central riser to the plumbing fixtures (specifically the toilet) cannot exceed one meter. At the same time, any other plumbing fixtures can be installed at a distance of no more than three meters.
- If the installation of internal sewerage is carried out using a supply pipe with a size exceeding three meters, then the internal circumference parameter must be greater than 7 centimeters. The liner, the length of which is 5 meters or more, is mounted from pipes with a diameter of 100 millimeters.
You may also like: Sewer pipe diameters - table and dimensions
When it is not possible to increase the size of the inner circle of the eyeliner, then there is one option that allows you to circumvent this rule. It will be enough to bring one end of the pipe to the roof and install a vacuum valve in it. You can also simply loop the upper end onto the riser above any device in the system.