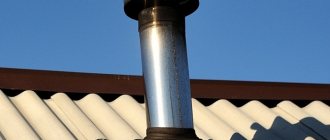
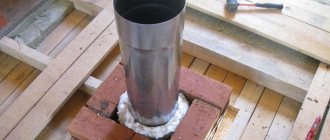
Good afternoon, dear reader! To vent the mixture of gas and fuel combustion products outside, stoves, fireplaces and boilers must be equipped with smoke exhaust ducts. Their head is covered with a special visor or umbrella. At first glance, these products seem to be only decorative elements. But in fact, the cap on the chimney pipe performs a very important function in the chimney system. It can significantly increase the energy efficiency of the heating system as a whole, and also eliminate any risk of smoke in the home.
Cap device
The classic cap model is assembled from several parts:
- protective umbrella - in the shape of a pyramid, cone, mushroom, hemisphere or other, more complex configuration. It performs the function of protecting the pipe from moisture and foreign objects;
- apron - drip. This part of the cap serves to protect the head of the chimney from drops flying from the umbrella. It helps to increase the service life of the chimney, prevents the destruction of brickwork, corrosion of metal parts, the appearance of dampness and fungal deposits on the surface of the pipes;
- brackets - metal plates used to connect the canopy to the apron. Their number is selected depending on the size of the chimney and the weight of the umbrella. The welding method is used to fasten products.
Varieties
Heads are classified according to three criteria : by material of manufacture, by the shape of the product and by the presence of additional functional elements.
The main materials for the production of heads are copper, steel and zinc-titanium alloy.
The simplest and cheapest option is a steel cap . The disadvantage of the material is its short service life of 8-10 years. Stainless steel products can last 20-30 years.
Copper heads are more durable (service life is up to 50 years), but difficulties may arise during their installation, since all fasteners must also be copper to avoid metal oxidation.
Zinc-titanium heads are relatively expensive, but they are the most reliable and durable product option.
NOTE!
Painted steel is not used as a head material in wood-heated homes . Under the influence of soot, it changes its color.
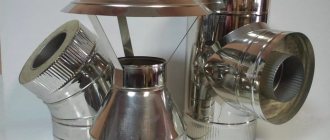
Differences in product shapes are determined by the design of the roof cap. She may be:
- Gable . The simplest option, such a product is easy to make with your own hands.
- Four-slope . It is similar in shape to a hip roof and is used for arranging rectangular pipes.
- Flat . It is easy to install and fits well with the minimalist roofing style. But the absence of slopes complicates the removal of moisture and snow from the cap.
- Cone-shaped umbrella. The heads of round pipes are equipped with a roof of this shape. The main advantage of the design is that there is no need to install a drip.
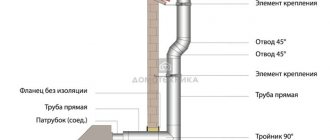
Sectional view of the device
Additional functional elements are presented:
- Diffuser (deflector).
- Weather vane (weathervane).
- A folding roof that allows you to regularly clean the inside of the head without dismantling it.
- Double roof (for decoration and improved air exchange).
- Metal mesh (protection against sparks and dirt).
- Other decorative elements.
Principle of operation
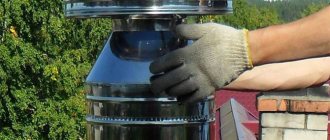
Installing a cap on the chimney will not only protect against water and debris getting into the chimney pipe, but also allows you to optimize the draft in the heating device. This happens as follows:
- the air flow rests against the wall of the upper cylinder and is forced to go around it from all sides;
- sliding along the surface of the cylinder, the air stream turns upward, at this time the smoke coming out of the channel is sucked in;
- the air movement inside the chimney becomes more intense, a zone with reduced pressure is created at the top of the chimney, where smoke from the combustion chamber rushes;
- if the wind jets are directed vertically or at an angle, they penetrate into the upper cylinder through the gap and suck gaseous combustion products into the pipe.
Advantages and disadvantages
The advantage of installing a cap on the chimney is:
- more aesthetic appearance of the chimney duct;
- protection of the internal space of pipes from foreign objects and various debris;
- protection of the chimney material from the effects of precipitation;
- the chimney covers part of the mouth, preventing the wind from overturning the draft.
There are not many disadvantages to installing an umbrella on a chimney, but they are quite significant:
- the product is installed in the path of combustion products exiting and serves as some obstacle to their free outflow. An incorrectly selected and installed model can reduce draft and lead to smoke in the room;
- The water vapor generated during fuel combustion exits along with the smoke through the pipe to the street and condenses, coming into contact with the cold metal of the cap, and then freezes when the temperature drops below 0º. As a result, icicles freeze on the chimney, blocking the passage opening of the pipe and preventing the smoke removal process.
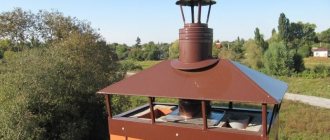
Chimney umbrella
A chimney hood can be installed for several reasons:
- it is capable of partially closing the mouths from blowing wind, due to which the draft is prevented from overturning;
- the chimney prevents small debris from getting inside;
- mesh design provides protection from nesting birds;
- such a product extends the service life of the head of a brick pipe, which can be destroyed under the influence of precipitation;
- A weather vane of this type has good decorative qualities, and therefore is able to complement the architectural appearance of the building.
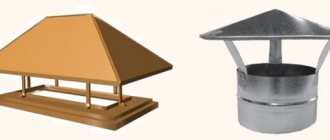
Types and designs of caps
The variety of shapes and types of smoke exhaust ducts forces manufacturers to develop hoods of any size, configuration, and appearance. In specialized stores you can buy a chimney of the following shapes:
- gable;
- hip;
- tent;
- spire-shaped;
- with a flat lid.
Photos of different types of chimney caps:
For the manufacture of caps, one of the following materials is used:
- stainless steel;
- copper alloy;
- roofing galvanized sheet;
- galvanized steel with powder coating;
- titanium and zinc alloy.
The chimney design may have:
- an opening lid, which greatly simplifies chimney maintenance;
- ventilation hole providing free exit for combustion products;
- spark arrester - designed for solid fuel stoves that heat houses with roofing made of flammable materials.
Often smokehouses are equipped with weather vanes in the form of heraldic symbols or stylized as images of animals, birds, heroes of fairy tales, myths, and decorated with forging and carvings.
Deflector shapes
The shapes of the deflector or head can be striking in their diversity.
Therefore, you need to decide which shape of the deflector will be ideal for the ventilation pipe, while still looking neat.
- round,
- square;
- hip;
- conical;
- tent;
- standard hipped;
- with a flat umbrella;
- with a semicircular umbrella;
- gabled with four slopes and a high roof;
- with weather vanes.
Make it yourself or buy it
You can make a standard weather vane, which looks like a house with a hipped roof, from galvanized steel yourself. It is easy to cut and bend using simple tools.
If you do not have any skills and tools for the manufacture of such metal structures, then you can buy a ready-made device that is in harmony in style with the overall appearance of the roof.
The approximate price of the simplest cap model starts from 1100 rubles. The cost of TsAGI, Volpert-Grigorovich or Khanzhenkov galvanized deflectors does not exceed 3,500 rubles.
A rotating model made of stainless steel will cost much more - from 8,000 rubles. Well, the most expensive ones are exclusive forged products.
How to make a weather vane at home?
To make a cap with your own hands, you need to correctly measure the chimney and draw a drawing. To measure, the diameters of the outer and inner walls of the chimney are taken. You can take a ready-made drawing and first construct a chimney from ordinary cardboard. If you are satisfied with the work, you can transfer the drawings to the metal that is used for the structure. Blanks are cut from the marked metal, which are subsequently fastened together with stainless steel fasteners. After assembly is completed, the structure is attached to the smoker.
Tips and tricks for choosing
When choosing a hood design, you should take into account what material the chimney pipe is made of and the type of fuel used to operate the heating device.
This is due to different flue gas temperatures and heater efficiency:
- For a brick stove with a chimney of square or rectangular cross-section, also made of brick, a special cap is suitable - a deflector. A feature of chimneys of this shape is the danger of the formation of vortices, which impair draft. In addition, more soot, soot and dust are deposited on the rough surfaces of the brickwork, narrowing the lumen of the pipe, which can greatly impair traction, even to a complete stop. The deflector will protect the chimney walls from excess moisture, thereby reducing the adhesion of combustion products and acting as a draft amplifier. It will create a vacuum in the upper part of the channel and promote the outflow of air from the firebox;
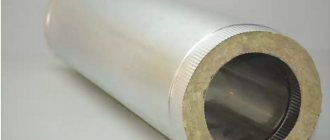
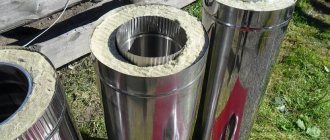
- Solid fuel boilers are usually equipped with ceramic pipes or chimneys made of “sandwich” pipes with a double wall. They have a smoother surface than brick structures and are equipped with a condensate collector into which condensate and precipitation drain, so they have much less soot deposits on the inner walls. The draft stability of such boilers depends on the height of the chimney. If you do not organize forced draft, then you need to install a very high pipe (up to 8 m). When installing a deflector, the height of the chimney can be reduced by 15-25%, while the stability and draft force will remain at the same level, and installation of the reduced pipe structure will be less complicated. If you have a boiler whose operation is based on the principle of pyrolysis, it is better to install a cap with an open nozzle on the chimney pipe. It will be able to protect the channel from debris and precipitation, but will not become a barrier to the exit of low-temperature smoke;
- For gas and diesel boilers, it is also recommended to use a hood with an open nozzle. In them, the draft is forced, so there is no need to increase the draft using a chimney - deflector.
Making and installing a hood with your own hands
When assembling a simple model of a cap at home, you can do without special rolling machines, just simple tools and devices.
Required tools and materials
The set of necessary tools for the manufacture and installation of a weather vane should consist of:
- metal ruler;
- marker;
- wedge-shaped mallet;
- metal scissors;
- electric drill;
- special clamp;
- sheet bender;
- mandrels;
- small hammer.
Materials you will need:
- sheet of cardboard;
- sheet metal;
- metal plate;
- screws;
- primer for metal;
- dye.
Drawings and diagrams
A simple cap made of galvanized sheet metal 0.6 - 0.8 mm thick for a square or rectangular brick pipe can be easily made with your own hands. It has a pyramid-shaped lid and is cut using a pattern from a single sheet of metal.
For chimneys and ventilation shafts of circular cross-section, a TsAGI deflector is used. It is called so because it is an invention of the Central Aerodynamic Institute. It can be made from a sheet of thin stainless steel or galvanized steel.
You can also install a Grigorovich deflector on a round chimney.
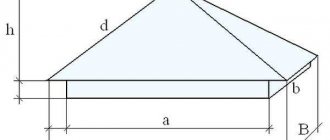
Size calculation
The chimney must cover all planes at the end of the pipe, and if the design includes a head, then the cap must also cover its horizontal surfaces.
The future product should be quite easy to put on the pipe, so each of its length and width needs to be increased by 4-5 mm.
The wings must be of such a size that they cover the horizontal surfaces of the head.
Work progress
The process of assembling and installing the hood consists of the following steps:
- Making a pattern from cardboard according to the calculated dimensions.
- Transferring its contours to a sheet of metal and cutting out the umbrella blank using metal scissors.
- Place the workpiece on the workbench with the markings facing up, so that it is more convenient to bend first the lines marked with a dotted line in the drawing to a right angle, and then the lines marked with the letter “d”.
- Rolling a cone. The connection point must be secured with rivets.
- Making a dropper. The contours of the apron-drip parts are drawn according to the pattern on a sheet of metal and cut out. Bends along the edges of the elements are made using a sheet bender. Rivets are also used to connect parts.
- Attaching the brackets. They must first be cut from metal plates, and then welded at one end to the apron and umbrella. To treat welding areas, use a metal primer.
- Cap finishing. All surfaces of the chimney are covered with 2 layers of paint, which will protect the metal from corrosion and give the product a more aesthetic appearance.
- Installation of the cap on the head of the smoke exhaust pipe. The mounting option for the product is selected depending on the type of pipe. In some cases, screws are used or an additional clamp is installed.
Installation technology
The main requirement of building codes is that the cap should not impede the exit of flue gases from the pipe .
To comply with it, you need to follow a number of principles:
- When the pipe is removed from the roof ridge by 1.5 meters or less, the top of the cap should rise above the ridge by at least 50 centimeters .
- When the pipe is removed from the ridge by 1.5-3 meters, the head should be on the same horizontal line .
- When the pipe is 3 meters or more away from the ridge, the head should not be below a straight line drawn from the top of the roof at an angle of 10 degrees .
- If the height of the external chimney masonry is 1.2 meters or more, then before installing the cap you need to secure the pipe with roof braces .
Most head models are prefabricated, which simplifies their installation. The general installation algorithm is standard for all additional elements: first, the main product and its additional parts are fastened, then all joints are sealed.
The head should not impede the exit of flue gases from the pipe
The lower part of the cap is installed first; it must be attached to the top of the chimney. Screws or rivets are used as fastening elements.
Next, intermediate elements and the top of the structure are installed, which are connected to each other using brackets. Rubber or silicone-based compounds are used to seal joints. Particular attention should be paid to insulating the joints of the head and chimney.
Expert advice
- When there is a low wind, vortex phenomena are formed under the hood, which impair traction. If you install a reverse cone under it, it will reflect the air flow, cut it and lead it out;
- if a round cross-section device is installed on a brick pipe, then the installation of a corresponding adapter is additionally required;
- the chimney must be located no lower than the roof ridge, ventilation exhaust pipes and other structures, if they are located close to the chimney.
How to install a chimney cap
It would not be superfluous to coat the parts with a primer before assembly and direct installation on the base. To assemble the structure, you will need to make several holes and connect the main components using rivets for a tight fit.
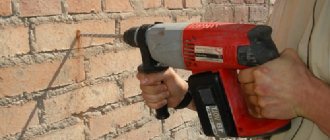
If the material is made of pure metal, all components can be welded using a welding machine, but when this is not possible, then rivets will come to the rescue; similar excesses often occur with galvanization and copper; specialized equipment is needed for the work. Installation is carried out after sealing the seams, the element is attached tightly to the chimney using a hammer drill.
Installation dimensions