Installation of water supply during cottage construction
How to lay water supply pipes in a private house and what pipeline diameters should be used when installing hot and cold water supply systems? What materials can be used for cold water supply and hot water supply? Today we will try to find answers to these and some other questions.
Technology for laying utility networks
Before installing external engineering systems underground, it is necessary to develop a project that reflects the main parameters of communications. The following should be taken into account:
- soil characteristics;
- area of the territory where the networks will be laid.
The technology for laying a pipeline depends on its purpose, and one of the main characteristics is its depth. It is regulated by the provisions of SNiP, and is determined by:
- purpose of the utility network;
- , which depends on geographic location;
- the presence of hard rocks in the soil.
Installation of HDPE pipes for water supply should be carried out at a depth that is at least 20 cm below soil freezing, since a location higher can lead to damage to the network due to low temperatures. If it is not possible to lay water supply networks at this level, then they should be insulated. Sewage systems should not be buried more than 2.5-3 m.
When laying HDPE pipes in hard and dense soils, at the bottom of the trench, which has been previously leveled and cleared of stones, it is necessary to lay a sand cushion, the thickness of which should be at least 10 cm. Very loose soil needs to be strengthened.
Algorithm for laying water supply and sewerage
Work on the installation of water supply and sewerage networks begins with marking their location on the site, which is carried out using pegs and twine. Then perform the following operations:
Excavation. Depending on the volume of excavation work and the capabilities of the site owner, it can be carried out manually or using special equipment. In this case, it is necessary to provide a slope for sewer pipes equal to 1-2 cm for each meter of length.
Preparing the bottom of the trench. After removing excess soil, arrange a sand cushion and compact it using a tamper at the junction with the inlet pipe and at a distance of 2 m from the inspection well. In addition to sand, you can also use fine gravel. Laying HDPE pipes on such a base will avoid its deformation during further operation.
Pipeline installation. It is performed depending on the chosen method of connecting individual elements using the necessary equipment and components.
- Pipeline insulation.
If pipes had to be laid higher than the depth to which the soil freezes, then it is necessary to carry out work to insulate them. To protect the sewer system, you can use insulation in rolls that are wrapped around the pipeline. Polyurethane foam is widely used, forming a protective shell around HDPE pipes and reliably protecting them from freezing. - Backfilling of soil.
Laying the HDPE pipe in the trench is completed by closing it. To do this, you can use excavated soil, but you must first remove large stones from it and loosen dense earthen blocks so that they cannot damage the communication network. The thickness of the layers of earth with which the trench is filled should not be more than 5 cm. Tamping is carried out between the pipe and the walls of the pit, and soil compaction over communications is prohibited.
Cabling
Another underground option is trenchless technology, which uses deep drilling equipment. This method is used when installing power systems and communications. The HDPE pipe in this case serves as a protective case.
Installation of water supply system components
A typical wiring diagram for a water supply system with a well or well can be used for sequential pipeline wiring.
It consists of the following nodes:
- Pump equipment. For a deep well of more than 8 meters or a well, only a submersible pump is suitable. For shallow sources, assembled pumping stations or surface pumps can be used.
- Transition nipple. Needed for connection with the following elements of the system, which in most cases have a diameter different from the outlet of the pump.
- Check valve . Prevents water from flowing out of the system when the pump is idle or the water pressure drops.
- Pipe. Pipes made of polypropylene, steel, metal-plastic or other materials are used. The choice depends on the wiring (external or internal, hidden or open), the price of the material itself, and ease of installation. The pipeline supplying water to the house is equipped with a thermal insulation layer.
- Water fittings. It is used for connecting pipes, shutting off the water supply, installing a pipeline at an angle, etc. It includes: fittings, taps, water sockets, tees, etc.
- Filter group. Designed to protect equipment from the ingress of solid and abrasive particles, it will reduce the iron content in water and soften it.
- Hydraulic accumulator tank. Required to create and maintain stable water pressure and prevent frequent pump operation.
- Security group. Necessary for monitoring the pressure in the system - a pressure switch, a pressure gauge and a dry running relay. Automatic control devices help maintain stable pressure in the system and extend the life of the equipment.
All elements of the system are connected in a certain sequence. The sequence can be seen in more detail in the diagram. Next, the installation of the system is described using the example of collector wiring, which is more complex.
A simple diagram of a water supply system makes it possible to imagine how the wiring should be done from the source to the extreme point of consumption (+)
The collector unit in a private house is installed in special rooms - boiler rooms or boiler rooms - specially designated rooms of a residential building, in basements and semi-basements.
In multi-storey buildings, collectors are installed on each floor. In small houses, the system can be placed behind the flush cistern in the toilet or hidden in a special cabinet. To save water pipes, the collector is located closer to more plumbing fixtures, at approximately the same distance from them.
Installation of the collector unit, if you follow the direction of the water, is carried out in the following order:
- A shut-off valve is installed at the junction of the collector with the main water supply pipe to shut off the entire system if necessary.
- Next, a sediment filter is installed, which traps large mechanical suspensions that can lead to equipment failure.
- Then another filter is installed, which will remove smaller inclusions from the water (depending on the model - particles from 10 to 150 microns).
- The next one in the installation diagram is a check valve. It stops the reverse flow of water when pressure drops.
After installing the above equipment, a collector with the number of outlets corresponding to the number of water consumption points in the house is connected to the water supply pipe. If not all plumbing fixtures in the house are connected yet, then plugs are placed on the unused terminals of the collector unit.
Installation of water supply branches of hot and cold water supply systems is the same for central water supply. The installation in the house is a little different: one of the cold water outlets of the collector is connected to a water heater, from where hot water is directed to a separate collector unit
—
CONDITION 1
ROOM 1 — ROOM RESULTS °Ð¿ÑеÑаеÑÑÑ. â
ROOM 1 ROOM › › ASSURANCE °ÐµÑÑÑ. â
ROOM 1 — ROOM ÑегоÑии ÑовмеÑÑно Ñ Ð¿ÑодÑкÑо-пÑоводамн з RESULTS. â
RESULTS ASSURANCE, ASSURANCE, ASSURANCE. RESULTS, RESEARCH, RESEARCH ASSURANCE, RESULTS °Ñ — — внÑÑÑиÑеÑовÑе, и межÑеÑовÑе, в ÑанÑеÑÑ — мРµÐ¶ÑеÑовÑе. â
RESULTS °Ð·Ð´ÐµÐ»ÑеÑÑÑ Ð½Ð° пÑокладк в ÑоннеР»ÑÑ ( пÑоÑоднÑÑ ÐºÐ°Ð½Ð°Ð»Ð°Ñ), непÑоÑоднÑÑ ÐºÐ°Ð½Ð°Ð»Ð°Ñ Ð ¸ дкÑ. â
ROOM 1 — ROOM SMALLERY °Ð¼Ð¸ Ð ·response. â
RESULTS °Ð·Ð´ÐµÐ»ÑеÑÑÑ Ð½Ð° пÑокладк в кР°Ð½Ð°Ð»Ð°Ñ пÑоÑоднÑÑ Ð¸ непÑоÑоднÑÑ Ð¸ пÑокладк RESULTS. â
RESULTS ° RESEARCH RESULTS. RESULTS ( ASSURANCE, CONDITION, RESULTS 0 5 м) ¸Ðµ ÑÑенок ÑÑÑб или Ñ¿µÑиалÑнÑÑ Ð·Ð°ÑÐ¸Ñ ÑÑÑб Ð¾Ñ Ð½Ð °Ð³ÑÑзок. RESPONSIBILITY, CONNECTION RESULTS ·Ð°Ð·Ð¾Ñом Ð¼ÐµÐ¶Ð´Ñ Ð½Ð¸Ð¼Ð¸ не менее 20 мм. â
RESULTS s °: каналÑÐ½Ð°Ñ Ð¸ беÑканалѽаÑ. RESULTS ¾Ð»ÑÑÐ¸Ð¾Ð½Ð½Ð°Ñ ÐºÐ¾Ð½ÑÑÑÑкÑÐ¸Ñ Ð²Ð¾ÑпÑинима RESULTS ²Ð°ÐµÐ¼Ñе гÑÑнÑом. â
ROOM 1 — ROOM RESULTS Ð ¿ÑеÑаеÑÑÑ. â
| RESULTS гоÑÑÑей водÑ. â |
ROOM 1 — ROOM RESULTS °Ð¿ÑеÑаеÑÑÑ. 2 - 4 - 4 - ROCK OUT RESULTS ASSURANCE, ASSURANCE, ASSURANCE ¾Ð²Ð¾Ð´Ð¾Ð² Ñ ÑимиѵÑки едкими, ÑдовиÑÑмР¸ воÑпламенÑÑÑимиÑÑ Ð²ÐµÑеÑÑвами. â
ROOM 1 — ROOM SMALLERY °Ð¼Ð¸ Ð ·response. â
| registry, registry RESULTS .| RESULTS одаÑ. â |
ROOM 1 — ROOM RESULTS °Ð¿ÑеÑаеÑÑÑ. â
Snood with checkerboard pattern
Knitting gives you the opportunity to choose different patterns, both embossed and openwork. The pipe, photo attached, looks beautiful, made with a “checkerboard” pattern.
Make a fabric with a height of 25 cm and a circumference of 180 cm. Purchase 3 skeins of medium-thick yarn, circular knitting needles No. 5.5, and a marker to mark boundaries.
How to do the job:
- Cast on 320 stitches and mark the edge of the knitting with a marker. Knit in the round.
- From 1st to 3rd round: P4, k3. - this is from the edge of the row, then knit with rapport * purl 7, knit 3 *, purl the remaining 3 loops.
- Knit row 4 with knit stitches.
- From 5 to 7 rows: knit 2, purl 7 * knit 3, purl 7 *, knit the last one.
- Knit the 8th row.
Repeat 8 rows in this way until the height is 25 cm. Finish fabric 7 next to each other and bind off all the loops.
Methods for installing HDPE pipes
The main methods of fixing HDPE pipes during trench installation include:
- butt welding;
- electrofusion welding.
If it is required that the connection be detachable, then the socket method or compression fittings are used. For turns, welded or cast fittings, tees, bushings for flanges and other shaped products are used. How to install HDPE pipes depends on their location and purpose.
It is one of the most popular methods of fixing HDPE pipes to each other and is used in cases where there is enough space to accommodate equipment and perform work. In addition, it is indispensable when installing large-diameter pipelines. The principle of butt welding is to heat the ends of the pipe and then fix them together. To melt the polymer, special equipment is used, and the following should be controlled:
- heating time and temperature;
- HDPE melting height;
- the amount of pressure during operation.
Electrofusion
It is carried out using special structures with a low-temperature electric spiral located inside. After applying voltage, it is heated and the pipes are connected to the shaped elements. Electrofusion welding allows for high tightness and fixation strength, and is indispensable if the installation of HDPE pipes is carried out in cramped conditions: wells, chambers and narrow trenches.
Connection with compression fittings
With their help, detachable pipe connections are obtained, the diameter of which does not exceed 63 mm. Therefore, compression fittings are most often used when laying internal communications. However, shaped elements with a split ring make it possible to fix pipes of larger diameter.
Installation of fittings does not require complex equipment and can be done by hand; you only need to control the applied mechanical force to avoid damage to pipeline parts. In addition, shaped elements should be positioned so that they are easily accessible.
Socket connection
It is used when installing external free-flow sewerage from HDPE pipes, which are equipped with a rubber O-ring to improve the tightness. To ensure strong fixation, it is necessary to clean the plastic from dirt and lubricate the surfaces to be joined with liquid soap or silicone.
For additional protection from moisture, the joints are treated with sealant.
Compliance with the technology for laying HDPE pipes in the ground will ensure long-term and efficient operation of engineering systems without repair work. This will reduce the labor intensity of pipeline maintenance and will reduce the cost of its operation.
Features of installation of the pipeline system
If you decide to install the pipes yourself, then at the first stage you need to install arcs, which are plastic strips for mixers. They should be fixed to the main wall using dowels. When fixing, it is necessary to take into account the thickness of the finish, for example, tiles or plaster.
The next step is to assemble the pipeline sections.
The most accessible technology is assembly on a table and further installation of pipes. However, in this case, the question may arise about how to route the pipes through the walls. If you use metal-plastic, then there will be no special problems, since it is assembled using detachable fittings, while for soldered pipes you can use one of the methods below.
It is recommended to use adapters and metal-plastic inserts.
For an apartment, this method will be quite reliable, and in the corners above the pipes it is necessary to make removable hatches for repairing threaded connections and inspection. However, you can install the pipeline system locally; a compact soldering iron is used for this. It costs more, and you need to work with it in cotton gloves to avoid getting burned.
Afterwards, you can cut the pipes, but you cannot saw them, which is especially true for metal-plastic materials. You need to cut with a pipe cutter; for metal-plastic and plastic, such a tool has different characteristics.
The next step is soldering; one of them requires 15 mm of pipe. There can be one meter between two fittings; to do this, cut off 1030 mm. If there is 0.6 m between them, then you need to cut a workpiece of 630 mm.
When installing water supply pipes, the next step is to bend them; the minimum permissible radius is 5 outer diameters. You should not use sand for this, which supposedly helps bend products to any angle. In this case, the internal coating deteriorates, the residual stress exceeds the permissible values.
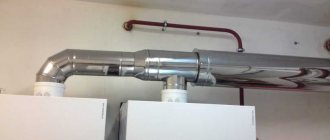
After the water supply system is put into operation, you should install a boiler, if one is present in your apartment. The pipes for it must be made in advance, but the valves are opened immediately after the pipe is installed, and the pipes are additionally plugged.
Pipe selection
Experience shows that polypropylene pipes are best suited for these purposes, which:
- dampen water hammer well;
- have little resistance to water movement;
- do not need thermal insulation;
- cheap and durable;
- easy to install.
However, they also have disadvantages:
- reinforced polyethylene cannot be used in networks with a coolant temperature greater than 95 °C;
- PPS plastic can withstand temperatures up to 110 °C, but is expensive.
Photo 3. Polypropylene pipes in the heating system, they do not require insulation and are easy to install.
Metal-plastic pipes work well at high temperatures. But their connection is made using metal fittings, which greatly reduce the effective clearance of the pipes. As a result, resistance to water movement in the system increases.
Attention! Pipe and fitting joints are very vulnerable to leakage and must be inspected periodically. Steel ones withstand high temperatures well, but for installation they require the use of welding and a powerful pipe bender, which is not always available when doing the work on your own
In addition, steel is easily susceptible to corrosion, which over time leads to a decrease in the bore diameter of the system and a decrease in its efficiency.
Steel ones withstand high temperatures well, but for installation they require the use of welding and a powerful pipe bender, which is not always available when doing the work on your own. In addition, steel is easily susceptible to corrosion, which over time leads to a decrease in the bore diameter of the system and a decrease in its efficiency.
Copper pipes do not have this drawback, but are very expensive, which has led to their rare use for creating heating systems.
Stainless steel
The use of alloy steel makes the pipes almost eternal. They do not gain mass popularity due to the high cost and difficulty of processing.
Corrugated stainless steel products are increasingly being used. 1 m of such pipe costs about 170 rubles. Working pressure – 12 atmospheres at 100°C.
Corrugated Stainless Steel Pipe
Cast iron
High carbon steel, or cast iron, is used for sewerage. Such products are fragile, very heavy, and if they are not covered with a protective layer, they become overgrown with deposits. The service life of cast iron pipes is more than 80 years.
Structure of cast iron pipe
Beam wiring
For two-story buildings, as well as houses with many floors, if laying pipes along the walls is not possible, it is better to use radiant heating.
If radial wiring of the heating system is performed, the coolant is evenly distributed throughout all the batteries. It does not matter how close to the room the boiler is located. All rooms are heated equally well. The system can be repaired without shutting it down.
For these reasons, many users choose radial heating systems. It is especially often installed in houses with two floors. Such systems also have another drawback - they are always made with two pipes. Therefore, their installation is quite expensive and requires more material.
This type of wiring is a collector type, since the main element in it is the collector. Thanks to this element, the coolant is distributed along the circuits, starting from the main line.
As you can see, heating wiring in a house is carried out in different ways. When choosing the most suitable system, you should understand the circuit that is most suitable for a particular home.
Pipeline installation: drawing up a wiring diagram
Installation of pipes can be carried out according to one of two water collection schemes; it can be parallel or sequential.
In the latter case, the disassembly points must be connected to a common pipe using tees. This scheme is considered the most economical, but with an impressive number of analysis points or low pressure it is unsuitable, since it greatly reduces the pressure. In this case, you can use a parallel circuit in which valves regulate the pressure point by point.
One-pipe method
When creating a single-pipe heating distribution, all its components are connected to each other. They are connected in series into one network. The result is one long pipe.
Typically single-pipe systems are filled with water. The final point where the liquid enters is the radiators. Subsequently, the heat from the heated water is transferred to the premises through the radiators.
The water in the boiler is heated. It then moves through the pipes to enter the radiator. This heating system has several disadvantages. The main disadvantage is that the final radiator is located at a great distance from the boiler, due to which the water in it heats up weakly. This drawback can be eliminated with a small modification of the battery. It should be made with many sections. If you follow these tips, a single-pipe type system becomes much more efficient.
This heating layout for a private house works great if installed in a building with two floors. It's quite simple to explain. If such wiring was installed in a one-story building, we would have to look for a suitable location for the collector. Such an element is necessary for the proper operation of the entire system.
An accelerating manifold is required to speed up the transfer of heat to the radiators. The device allows you to maintain the water temperature at the desired level and reduces the noise level.
The efficiency of operation is directly dependent on the location of the collector. The higher it is, the better. If you have a house with two floors, such problems do not arise - the collector will cope with the task of maintaining heat without creating unnecessary noise.
Other advantages of single-pipe wiring:
- When choosing a single-pipe wiring, you do not have to spend a lot of money. Low cost is ensured due to the small number of pipes.
- Another advantage of this method of heating is the possibility of installation even in the most inaccessible places.
- Simple installation and aesthetics can also be considered among the advantages of installing such a system.
However, this wiring method also has its disadvantages. For example, if you need to replace broken elements, the heating in the house will have to be turned off completely. In addition, heating occurs unevenly. This depends on the distance between the boiler and the distant battery.
However, if the design is modernized and installed correctly, it will turn out to be quite effective. Such a system can be installed in several stages. You can do the work yourself.
Heating system wiring options
Any type of heating system, be it a system with natural or forced circulation of coolant, differs in the type of supply implementation: a system with a vertical supply and a horizontal system.
In turn, vertical systems are divided into two subtypes:
- systems with bottom wiring, in which the supply main pipeline runs along the floor of the first floor (or in the ground in the basement), from which vertical supply risers are implemented;
- in a system with overhead distribution, the coolant is supplied, first of all, to the attic of the building (or under the ceiling of the upper floor, in a wooden house), passes through the main risers, then through heating radiators the waste liquid is returned to the heating boiler.
In each case, the heating boiler is installed at the lowest point of the system, on the ground floor or in the basement. Installing the boiler directly on the ground is prohibited; the installation surface must be fire-safe, especially in a wooden house. Laying heating pipes in the ground is used if other installation options are impossible.
In multi-storey buildings, a vertical heating system is often created
The horizontal system is divided into three subtypes, each of which operates on the principle of forced coolant circulation.
The dead-end wiring diagram of the horizontal system is implemented on the principle of connecting the input of each radiator to a single supply system, the return outlet of the waste coolant is also connected to a common circuit;
A system with associated circulation differs in that the coolant supply is provided as in the first case, from a single system, and the waste liquid is discharged first into a common collector for all radiators, which is connected to the return coolant circulation branch;
The most optimal option is a scheme with collector distribution, where each branch of heat supply and removal is carried out through a common collector group, separate for the heated coolant and for the cooled coolant. The laying of heating pipes is selected according to the optimal option.
The main advantage of your own heating system implemented in a private building is the ability to choose the optimal temperature maintained in the house.
Complex heat supply systems are characterized by a large number of control elements that allow maintaining the required temperature in each individual room. In a small private building, simple systems with natural coolant circulation, determined by the laws of thermodynamics and gravity, are most often used. The use of simple systems in a house is justified if the heated area of the premises is small and the overall construction budget is limited.
Laying underground gas pipelines
This type of installation involves laying a gas pipeline underground. As a rule, such installation requires pre-prepared dug trenches. In this case, the depth of the dug canal and communication wiring should be taken into account according to the project; it should be at least 0.8 m. When choosing a location, it is necessary to take into account the distance to buildings, structures and other communications (sewage, heating network). It is undesirable to lay an underground gas pipeline near trees, since their root system can complicate its repair and operation. When laying pipes and assembling a gas device in this way, the following points should be taken into account:
Layout of underground gas pipeline
- the gap between the gas pipeline and other underground utilities must be at least 0.2 m;
- at intersections with communication collectors, gas pipes must be pulled in cases;
- the gas main is located above other utility networks;
- cases must be placed beyond the intersection at a distance of at least 0.2 m;
- The ends of the cases are treated using waterproofing materials.
Types of trenchless pipe laying
Another method of underground installation is the trenchless installation option. This option is the least expensive. The advantages of the trenchless method of laying a gas pipeline are as follows:
- reduces the financial costs of installing a gas pipeline;
- reduces installation time.
The underground method of laying a gas pipeline is the safest, but such installation is more expensive.
In-house installation of sewer pipes
Installation of an internal sewerage pipeline begins with the calculation and determination of the pipe material. Having calculated the required diameter for various sections of the pipeline, counted the number and types of elements, and selected plastic, you can begin laying the internal sewerage system.
How to properly lay sewer pipes? The angle of inclination of the pipes must be observed.
Slope of sewer pipes
Preparatory stage
Pipes and fittings are carefully inspected for damage and differences in wall thickness. Then the pipeline parts are stored on a flat surface, preventing deformation during storage.
Laying sewer pipes requires cutting the sewer pipe into pieces of the required length using a special pipe cutter or a regular hacksaw. When using a hacksaw, the cutting line must be cleared of burrs with a file and chamfered so as not to damage the rubber seal during installation.
Cutting a pipe using a hacksaw or professional tool
Pipeline installation
To make it easier to connect pipeline elements, silicone grease is applied to the smooth end of the pipe or fitting. The sealant extends the service life of rubber O-rings, prevents elements from sticking together, and reduces stress and friction inside the system.
The use of lubricants (sealants) not intended for sewer systems is not permitted. Internal surfaces are not lubricated.
Chamfering and applying sealant
Pipes and fittings of the sewerage system are assembled according to the diagram, inserting the smooth end of the element with the applied sealant into the socket of the next part. This leaves a compensation gap of 10 mm.
Compensation gap
This gap compensates for changes in the length of the sewer pipe due to temperature changes, prevents warping and relieves internal stress.
After connecting all parts of the pipeline, the sewer pipe is fixed in the floor and to the walls. Fastening is carried out with clamps, installing them under the socket to eliminate slipping.
When installing a domestic sewage system in a room without heating, it is necessary to use pipe insulation.
Scarf hat trumpet with air braids pattern
This is not only a headdress, but also a cozy scarf around the neck. In cold weather, it will protect against colds, and will also give the girl charm and charm. This is not only a warm, but also a stylish accessory that only girls with delicate taste can gracefully display.
You need to purchase mixed yarn: acrylic and wool in equal parts, and tools with a diameter of No. 4. The size of the product must correspond to the circumference of the head.
Performance:
- In total you need to cast on 63 loops and continue knitting with the main pattern, you must remember to remove the edge loop.
- From rows 1 to 7: 4 sts in knit stitch, then 15 in knit stitch too, but this will be the width of the “braid”. Knit the entire row in this way.
- From 2 to 8 p.m. we knit: 4 stitches in knit stitch, and 15 stitches in purl stitch. Do this for the entire row.
- 9 p.: 4 knit stitches, 10 cross to the left - slip 5 stitches onto a separate needle, knit 5 pieces, then knit the loops with a separate one, knit the remaining loops.
- From 10 to 18 p.m. knit as 2-8.
- From 11 to 17 p.m. do as 1-7.
- 19 rubles: knit 4 stitches, then 5 more loops from the “braid”, and cross 10 loops to the right - remove 5 pieces onto a spare knitting needle and leave it at work, knit 5 loops and then those on the spare one.
After this, you need to repeat the pattern from the first row. Knit the fabric to the desired length, moisten and dry flat. Then sew the end sides of the product.
Advantages of using polyethylene pipes
Gas in the systems can be supplied through steel or polyethylene lines. Steel pipes are used for all types of gas pipelines, polyethylene pipes are used only for underground installation. Polyethylene pipes are in great demand for gasification in the construction market, as they provide a lower budget for the costs required for the construction, maintenance and repair of the gas pipeline.
Polyethylene pipes have a number of advantages compared to other materials, namely:
Types of polyethylene pipes
- Not exposed to aggressive environments, temperature changes, or corrosion.
- Provide ease of installation (if necessary, pipe fitting, cutting).
- There is no need to create additional protection against the occurrence of a chemical reaction with any substances.
- The polymer is not a conductor of electric current, therefore, it protects against “stray” current in the soil, which can cause an accident.
- The inner walls of polyethylene pipes are absolutely smooth, which increases the throughput of the gas pipeline, preventing clogging.
- They have an affordable price, lower compared to analogues.
- The weight of polymer pipes is much less, which simplifies the process of transportation, storage and installation.
- They have a long service life, up to 50 years.
Pipe laying
The laying of pipelines at chemical plants can be underground - in through channels (tunnels), in non-through channels, and channelless - directly in the ground; ground - on supports and above ground - on overpasses, racks, brackets, along columns and walls of buildings.
The most commonly used are ground and above-ground installation, since the service life of pipelines with such installation is approximately 2.5 times longer than with underground installation. In addition, with ground and above-ground installation, capital costs and operating costs are reduced, the possibility of constant monitoring of the condition of pipelines is ensured, and their installation and repair are facilitated.
Laying pipelines in the ground intended for transporting extremely dangerous and highly hazardous hazardous substances and fuming acids is prohibited by current standards and regulations.
In exceptional cases, pipelines with flammable (including liquefied) gases, flammable and combustible liquids are allowed to be laid underground only in passage channels equipped with reliable ventilation and hatches. In some branches of the chemical industry (for example, in the nitrogen industry), underground installation of such pipelines is prohibited in all cases.
When laying pipelines above ground, depending on their characteristics and operating conditions, the following types of supports are used: fixed and movable (sliding, roller and suspended). Movable supports allow the pipeline to move during temperature deformations.
Pipelines are laid on supports, the distance between which is determined by the diameter and material of the pipes, as well as the weight of the pipeline (together with the transported medium and insulation). For steel pipes with a nominal diameter of up to 250 mm, the distance between supports is 3–6 m.
To fasten pipelines that do not require compensating devices, simple hangers, clamps and brackets are used.
Pipelines made of fragile and plastic materials are laid in solid trays or on solid foundations to protect them from sagging and destruction.
The design of supports for pipelines with compensation must be especially reliable: “dead” supports must firmly hold the pipeline, and movable ones must allow axial, and in case of self-compensation, transverse movement of the pipeline. The designs of these supports are very diverse and often very complex.
The minimum height for laying overhead pipelines is no less than 2.2 m, and at intersections with internal factory roads and driveways - no less than 4.5 m.
Drawings for this chapter:
| Anti-freeze drain valve |
Similar chapters in other documents:
| See further:Pipelaying |
| See further:Pipelaying |
| See further:Pipelaying |
Arrangement of technological communications
The configuration of technical systems is sometimes very complex.
Technological networks are divided into:
- operating under high, medium and low vacuum;
- non-pressure analogues;
- under low pressure (up to 10 MPa);
- pressure systems - under pressure over 10 MPa.
Based on the operating temperature, pipelines are distinguished:
- cold, working with negative temperatures of substances;
- normal analogues – temperature of transported media 0/100°;
- hot networks – substances heated to 100/300°;
- overheated - the environment is more than 300°.
The design of process pipelines and their installation should be carried out in accordance with SNiP Sh-G No. 9/62. The document defines the implementation and acceptance of the assembly of technological networks operated at a pressure (absolute) of 30 mm Hg. Art. up to 700 kgf per cm2.
It is also important to comply with the provisions of SNiP No. 3.05.05/84 “Technological equipment and pipelines”.
Preconditions for work
The materials of the systems can be:
- alloy and carbon steels;
- non-ferrous alloys and metals;
- cast iron;
- different types of plastics;
- special glass.
Note! Most of the technical pipelines are laid in cramped areas, at different heights, in multi-storey buildings, on overpasses, open areas, in tunnels, and trays. Therefore, intra-shop networks have a large number of used sizes, elements, fasteners, shut-off and control valves.
Below is a table of the number of fittings and additional elements needed for such networks.
| Product | % by weight of pipes | Number in pieces per 100 meters of pipes |
| Flanges | 5.47 | 25 |
| Bends | 3.72 | 23 |
| Tees | 1.84 | 8 |
| Transitions | 0.34 | 0.6 |
| Stubs | 0.15 | 0.3 |
| Suspensions and supports | 2.41 | 12 |
| Armature | 27 | 10 |
To complete an in-shop system with your own hands, you should add up to 42% of the mass of pipes of various fittings, fasteners and fittings. The complex design of technical networks leads to the need to carry out a large number of joints of network elements: 60/80 welds per 100 m of construction.
If you use ready-made sections, elements and assemblies produced in a pipe workshop during assembly, this will significantly simplify the work and reduce the number of welding operations by 5/6 times. The price of network installation will also decrease.
Preparatory work
Working drawing of a technical network.
Before assembling the pipeline, such preparation is carried out.
- The foreman, foreman, and foremen study the PPR and the project.
- Assemblies, parts and elements of the system are accepted. Their compliance with the project itself and technical specifications is carefully checked.
- The level of readiness of buildings, structures, structures for assembly is determined, and related acts are created. Compliance with design marks for network fastening is especially closely studied.
- Equipment and devices for the work are accepted, their correctness is checked and their compliance with the working drawings.
- Areas for enlarged assembly, scaffolding and other equipment for working at height are prepared and equipped. Power is supplied for welding stations, tools, winches, and work site lighting.
- The teams are issued work orders and conditions for installation are created in accordance with safety precautions and labor protection standards.
Assembly technology
Supports used for systems.
The installation of a pipeline made of steel pipes for technical substances consists of the following stages.
- Network route marking.
- Installation of hangers and supports.
- Integrated assembly of blocks, sections and units.
- Laying, assembly, welding of pipes.
- Installation of fittings, compensators, automation and control devices.
- System testing.
- Delivery to the customer.
Main components of the gas pipeline
Blue fuel is supplied through gas pipelines through special distribution stations, where automatic regulator valves must reduce the pressure and ensure its stable required level.
Gas pipeline networks consist of:
Gas pipeline diagram
- internal highway;
- external highways of populated areas;
- automated control systems;
- electrochemical protection means;
- regulatory points.
There may be several options for installing a gas pipeline. The choice of installation method depends on many parameters and the specific case. Climatic conditions, site development and other parameters are taken into account.
Knitting in the round
How to knit a pipe without a single seam? This is done with circular knitting needles or on five knitting needles, like mittens.
Start working on five knitting needles, according to the diagram and description:
- Buy Troitskaya yarn, which is half wool and acrylic. It requires a set of tools with a diameter of No. 5. The main pattern is faceted elastic. Pattern diagram: even rows – 2 knits/2 purls, similar odd rows – 2 knits/2 purls. Knit the edges of the fabric in garter stitch.
- Having calculated the number of loops for your hood size, dial the number that is divisible by 4 and divide equally into 4 knitting needles.
- Use the suggested pattern to knit the pipe to the desired length, and then switch to garter stitch.
- In order for the pipe to be neat and keep its shape, its top needs to be tucked and stitched with a hidden seam.
The pipe can be tied without a seam using circular tools. To do this, you need to connect the cast-on loops into a ring and knit in the round. You can knit with any other pattern.
Two-pipe wiring
Such systems can be no less efficient than single-pipe ones. This method is suitable for heating houses with one and two floors. Its difference is that you can independently change the temperature in any room.
Another feature of the two-pipe type system is the fact that the forward and return circuits are separated from each other.
The heated liquid is supplied to the system through supply channels. Water begins to flow through the inlet pipes to the batteries. It can also be applied to heated floors. After the liquid has cooled, it is automatically withdrawn. Such systems have one positive feature - how water flows to certain batteries can be adjusted manually.
The overhead wiring can be invisible if you install the pipes above the doorways and cover them with decorative elements. In this case, the pipes will be camouflaged as much as possible.
A disadvantage of the top wiring can be considered the fact that, in addition to installing pipes, it is necessary to install a membrane expansion tank. This kind of work is easy to do, but it will require more money.
If the system is installed in a building with two floors, an open tank can be installed. However, it can only be placed in the attic. With lower wiring, the pipes will be located below the window sill.
This method is a little more difficult to implement, since, in addition to installing pipes, you will have to install an open expansion tank. It must be installed above the placement of straight pipes.
Vertical scheme with top wiring
When choosing this model, the coolant will go to the attic from the heating device. The liquid then goes to all the batteries in the house.
Such schemes are more effective for lower wiring. This is due to the high pressure supplied through the risers.
Bottom wiring of vertical type
A two-pipe heating system with bottom wiring is created sequentially:
- A main pipeline must be laid along the floor of the basement or first floor. It will originate from the boiler.
- It is necessary to run vertical pipes along the main pipe, which will ensure the movement of coolant to the batteries.
When designing a two-pipe heating system with bottom wiring, it is necessary to decide how air will be removed from the pipeline. This requirement can be satisfied by installing an air pipe and an expansion tank.
Horizontal system
The horizontal wiring option, in which the coolant circulates forcibly, is quite popular. There are several schemes:
- Dead end. The advantages of these systems include savings in pipe consumption. The disadvantages include too long a contour. Due to this, it becomes significantly more difficult to regulate the operation of the system as a whole.
- Associated movement of coolant. Each circulation circuit is of equal length, making system adjustment simple and easy. The disadvantage of such a system is that the pipe flow is too high. In addition, the interior of the rooms deteriorates when such a system is installed.
- Radiation or collector distribution of heating pipes in a private house. Each battery is connected to a central collector. Due to this, heat distribution is uniform.
When installing a beam system, you will have to spend money on pipes.