Hello, dear guest!
Sit back and forget about your pressing problems for a moment. The topic of today’s article is one of the favorite vacation spots of Russian people. A place where people have long washed themselves, treated illnesses, met with friends, and simply hid for a while from life’s hardships.
Have you already guessed what I mean? Right! Today we will talk about the Russian bathhouse. About a classic bathhouse, but made in modern solutions, comfortable and safe. We will take a detailed look at the tank on a bath pipe, find out why it is needed, in which cases this option for heating water is optimal, and find out the dangers of choosing the wrong bath containers.
Why do you need a tank on a pipe?
Strong hot steam, invigorating tart aroma of wood, birch and juniper brooms, the special spirit of a Russian bath... Not a single sauna with scalding air can replace real light steam! Even in our time, a bathhouse is a favorite place to relax for a person tired of the everyday hustle and bustle. And no entertainment and shopping centers will replace it.
And now I’ll add a little horror to the beautiful picture.
Imagine - you have decided to build or renovate a bathhouse. And so, the walls are covered with new lining, fresh brooms are waiting for hot steam, and the simplest thing remains - to buy a tank for the sauna stove. It would seem, what could be simpler?
Modern stores are overflowing with bath accessories and there are a great variety of containers for heating water. Most are tanks for sauna stoves of various shapes, shiny, smooth to the touch, with high-quality and beautiful welds. It would seem, what else is needed?
Now let's take a closer look at the material of manufacture.
In 80% of cases it is stainless steel with the incomprehensible name AISI430. And few people know that the stainless steel in this AISI is only a shiny surface and a little chrome. And a sheet of such material burns out under the influence of direct fire in 3-4 months. It’s no wonder that the manufacturer’s warranty for such tanks is no more than 3 months. Moreover, the sheet thickness is rarely more than one and a half millimeters.
And this is where the fun begins. Imagine, you bought a tank for 10, 15, or even 30 thousand rubles and happily installed it on the stove in the bathhouse. And six months later a hole burned in the bottom. Scary?
So I'm scared.
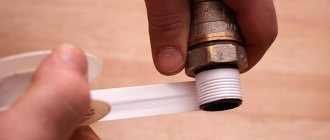
But there is a great way to avoid all such troubles, even using products made from Chinese stainless steel. And one of them is installing a water tank directly on the sauna pipe.
Fonts
The font is a wooden bowl, which is made from elite types of wood, most often oak. This is health, aesthetics and a very presentable appearance. A wooden hot tub is a traditional swimming pool alternative that is completely environmentally friendly.
When heated, wood releases special substances that are extremely beneficial to human health. However, these are not all the advantages of wooden hot tubs:
- they take up little space, so they can be installed even in limited space;
- it is very pleasant to sit in them, which is due to the characteristics of the wood;
- they fit perfectly into the design concept of all baths and saunas, as they are decorated with wood.
From us you can buy any elements for your bath or steam room.
The principle of operation of a tank on a pipe
The first Russian baths were heated “black”; smoke filled the room, leaving traces of soot and soot on the walls. This technology has long been a thing of the past; modern stoves are equipped with chimneys.
Vapors and gases leaving the stove through the chimney heat it up greatly. And this temperature can be used to heat water.
To do this, a tank is installed on the pipe. It encircles the pipe and the water in it is heated by hot gases. This solves two problems at once - heating water and thermal insulation of pipes.
This is interesting: This system works on the principle of a samovar, which is why the tank on the pipe is called a samovar.
Commissioning
The chimney must be inspected, paying special attention to the quality and tightness of the joints. Clean the inside of the structure with a dry cloth.
All unnecessary items are removed from the chimney and firebox. Test ignition is carried out using a small amount of fuel. At this stage, the efficiency of draft, the presence of smoke at the joints, and its drawing into the room are determined.
After testing, after a few hours the oven is fully heated. You should not cram the combustible materials used into the firebox to capacity; this can lead to failure of the chimney and a fire. All flammable elements and partitions near the pipe must be insulated, the distance between them and the exhaust structure must be at least half a meter. Visual inspection and preventive cleaning are carried out once every six months.
About the installation of fire-fighting fluff in the following video:
Pros and cons of this design
The main advantages of installing a sauna tank on a pipe:
- The reservoir can be placed along the entire length of the pipe, which allows you to obtain a large volume of hot water. At the same time, increasing the volume of the container will not affect the heating time;
- The temperature of the gases in the pipe is high (up to 500 degrees), so heating is carried out quickly and evenly;
- Installing the tank is easy to do with your own hands;
- Hot smoke is not just discharged into the street, but heats the water, so the efficiency of the stove increases;
- The service life of the chimney increases;
- The water maintains its temperature for a long time while the pipe cools;
- No additional heating elements are required;
- The samovar tank can be installed not in the steam room itself, but at the attic level. In this case, hoses are connected to the heat exchanger to input cold water and output hot water.
Design disadvantages:
- Large tanks are difficult to install due to weight. If it is necessary to install a large container, it is necessary to use a fastening system, and the load should not fall on the stove, but on the walls or foundation;
- The water temperature cannot be controlled;
- The liquid boils away faster;
- The design is not suitable for every chimney. For example, if the pipe in the bathhouse is brick or asbestos, you will have to choose another option;
- If the heat exchanger is located high, it is difficult to fill it with water.
Important! In the cold season, the liquid from the tank must be drained, otherwise the entire system will freeze.
Chimney installation rules
Places where pipes pass through the ceiling and other building structures should be considered taking into account the fact that the inside is lined with wood, that is, combustible material
In this case, it does not matter what material the wall or ceiling itself is built from, it is enough that there is a flammable cladding. In general, the postulates for laying chimney ducts sound like this:
Before installing a metal or brick stove, you need to choose a place well so that the future chimney of the bathhouse does not fall on the load-bearing structures of the roof. There is no point in making unnecessary turns of the pipe later, but it is impossible to turn a brick channel. The total number of pipe turns should not exceed 3; the horizontal section from the stove to the insert into the vertical channel should not exceed 1 m in length. The exception is a gas duct inclined at an angle of 45°, sometimes used instead of a horizontal one. But you shouldn’t get carried away here either, make this segment as short as possible; a single-walled metal chimney should be separated from unprotected combustible floor materials at a distance of 0.5 m. If the combustible surfaces are covered with a non-combustible screen, the gap can be reduced to 38 cm. All requirements of fire safety standards are shown in detail in the figure below; the same figure shows how to correctly install the chimney in height so that its cut does not fall into the leeward zone. Then the force of natural traction will decrease significantly; the vertical gas duct must be equipped with a system for cleaning and draining condensate.
Starting from the attic floor, it is strongly recommended to protect the single-wall pipe with a heat-insulating layer of fireproof insulation; the best option is basalt fiber. On the outside, the insulation is wrapped in a galvanized steel casing. Then condensation will not appear outside the pipe, and the attic space will be protected from fire. When installing a chimney through a wall, the same distances are observed as for passing through the ceiling.
Types of factory tanks and average prices
Factory tanks have different configurations. Main parameters:
- Type of material;
- Design;
The most common materials are galvanized, steel, stainless steel, less common are products made of cast iron.
The most popular factory shape is a rectangle and a cylinder with a circular cross-section.
Average cost of a rectangular tank with a volume of 50 liters:
- Steel - 1000 rubles;
- Galvanizing - 1500-2000 rubles;
- Stainless steel - from 3000 rubles.
Water heating columns
The columns offered by our store are used to heat water and use it for domestic purposes. For this, any type of solid fuel, as well as electrical energy, can be used. Depending on the design and volume, the material of manufacture may also change, but the most practical is still stainless steel.
Equipping the column with heating elements makes it possible to maintain a comfortable water temperature using electricity without additional heating using wood.
How to choose?
To begin with, you need to decide where the tank will be located - directly above the pipe, or it will be a remote structure located in the attic.
Installing a container in the attic is convenient, but not always possible - it all depends on the design of the roof and the possibility of supplying and discharging water.
Calculating the volume
The required volume of liquid is calculated from the norm of 15-20 liters per person plus 10-15 liters in reserve. For example, if a family of 2 people periodically washes in a bathhouse, then a tank of 50 liters will be enough. A family of 4 people will need a capacity of 80-100 liters.
Type of material
Pros and cons of steel, cast iron, stainless steel:
- Cast iron
Cast iron containers are heavy, they are inconvenient to install, the water in them heats up slowly, but remains hot for a long time;
- Galvanized iron
Containers made from it last longer than steel ones, but over time they rust and burn out;
- Steel
Due to their high thermal conductivity, steel tanks heat up quickly and cool down just as quickly. The main advantage is the price, the main disadvantage is the low service life;
- Stainless steel
They combine all the advantages of iron products with high corrosion resistance.
Enameled products are found in stores. They are more durable than uncoated steel tanks, but are susceptible to chips, in place of which pockets of corrosion form.
Material for container
In the old days, the most popular material was cast iron. Of course, it will take a little longer to heat up, but the temperature will be maintained better. An important factor is the resistance of cast iron to corrosion and its long service life. But cast iron is a heavy material and such a container will need powerful support.
Cast iron stove with tank.
Ferrous metal is now practically not used for these purposes due to its tendency to corrosion and the high probability of deformation due to sudden temperature changes.
Stainless steel is deservedly considered a universal material. This metal is not afraid of corrosion and is relatively lightweight. In order to weld a large-capacity tank, a sheet 1.5 - 2 mm thick is enough. During temperature changes, such containers do not deform.
Important: during operation, any heating system for a bath must be constantly filled to avoid overheating. In winter, the water is drained to prevent frost from breaking the pipes.
The video in this article shows the opinion of a specialist.
Assortment of tanks.
Features of installation and connection step by step
It is not difficult to install a water tank with your own hands.
Let's look at each stage separately:
- If the stove is already installed, remove the section of pipe extending from the stove into the ceiling;
- We weld a piece of pipe 8-10cm long to the outlet of the furnace.
- If the pipe built into the tank does not match the diameter of the chimney, an adapter is mounted on the installed section of the pipe;
- We install the tank. The distance between the top cover and the ceiling should be 20-25cm;
- If necessary, an adapter is also installed in the upper part;
Important! Pipe connections are made using crimp clamps, but the joints should be additionally treated with a special sealant. Otherwise, if gases penetrate through cracks in pipe joints and there is insufficient ventilation, a person may suffocate.
A few important operating rules:
- The bathhouse is not only a recreation area, but also a place of increased danger, especially for children. Therefore, if possible, it is better to install the tank on the pipe as high as possible, optimally in the attic. You need to pour boiling water extremely carefully.
- The system should be filled with water until it is flooded; heat without water will destroy the welds.
- Do not leave water in cold weather. If the water in the system freezes, deformation is inevitable.
Safety precautions when installing a chimney
It is imperative to ensure the high fire safety of the chimney for a bath.
To do this, as mentioned above, pay special attention to the tightness of the connections of individual parts of the pipe, as well as to the cutting when the chimney passes through the ceilings and roof
In places where the pipe will pass through the ceiling, it is necessary to insulate it from wooden elements with heat-resistant material - this can be asbestos, mineral wool, sand or expanded clay.
- To do this, a metal panel with a hole through which the pipe will pass is fixed to the ceiling where the chimney passes.
- A kind of box is installed on the attic side, which should be 10-15 centimeters higher than the attic floor. An insulating material is placed or poured into it, which will protect the wooden floor from the high temperatures of the chimney pipe. The pipe must be at least 25 centimeters from combustible floor materials.
Pipe passage through the ceiling
It is very important to arrange thermal insulation protection not only in the ceiling, but also on the wooden wall of the bathhouse. Basically, bathhouse buildings are built from pine, and its wood is quite resinous and can easily overheat and even burn from the high temperatures of a nearby chimney
Therefore, the wall must be protected using non-combustible material - this can be special drywall, asbestos, masonry, foil-lined mineral wool, or a combination.
It is very important to protect not only the ceiling, but also the walls.
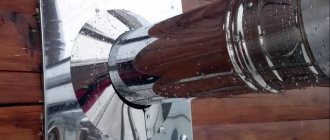
- After passing through the attic, the smoke exhaust duct is discharged through the roof and rises above it by at least one and a half meters.
- Around the chimney, when passing through the roofing, waterproofing is installed, which will protect the roof sheathing from moisture, and therefore from the appearance of mold and destruction.
The passage through the roof needs waterproofing
A special protective mushroom is placed on top of the pipe head and a spark arrester is installed.
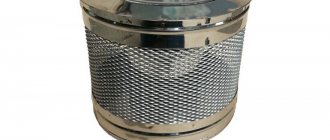
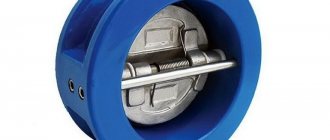
Water tank
Sometimes a metal tank for heating water is built into the chimney system of a bathhouse, built from metal sandwich pipes, inside which there is an uninsulated part of the chimney. Tanks can have different volumes - this will primarily depend on the power of the selected furnace.
When choosing this chimney accessory, it is best to pay attention to a stainless steel product that will serve for a long time. Naturally, you need to focus on the diameter of the chimney pipe to which the tank will be attached
It is better to purchase the entire set as a set so that you do not have to disassemble an already assembled structure.
Finished chimney section with water tank
The water tank has pipes onto which sections of the chimney pipes are placed. They must fit tightly together, otherwise the draft will decrease and carbon monoxide may enter the room.
A metal water tank is also built into the structure of a brick chimney. In this case, hot air from the furnace passing next to it heats the water poured into the tank. When building a container, you need to provide a place in the chimney wall where there will be a tap and a pipe with a tap for filling the tank.
Diagram of a sauna chimney
This diagram clearly shows all the above-described sections of the smoke exhaust system of a sauna stove.
Approximate general diagram of a sauna chimney
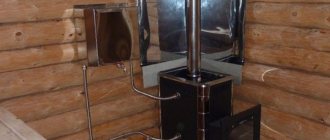
It is worth noting that a sauna stove with its firebox usually opens into another room - the dressing room. This is provided so that there is no risk of getting burned during washing, and so that the bathhouse attendant has the opportunity to constantly add firewood to the firebox.
The stove itself is located directly in the bathhouse with a metal sheathing, which encloses the hot walls and is 10-15 centimeters away from them. Pebble stones are placed at this distance, which, when heated, give off heat to the room, and if you want to get steam, they are splashed with ordinary water or an infusion of fragrant herbs. In this embodiment, the chimney and the tank installed on it are also located in the bathhouse.
Cast iron stove with fence, metal chimney and water tank
The figure also shows how the chimney should pass through the ceilings and roof and how to ensure complete safety of its operation.
Based on this diagram, you can easily build a chimney yourself if you strictly follow all the norms, rules, sizes and volumes of insulating materials.
And a little about scale in boilers
If a summer house or cottage with a bathhouse is located in a region with hard tap water, scale will form in the boilers. It is deposited in the place of extreme temperature heating, reduces the rate of heating of water, and significantly reduces the conductivity of heat in the pipes. Scale from hard water constantly builds up in an uneven layer and has a high coefficient of heat resistance.
The appearance of scale inside the pipes reduces the strength of the samovar sections of the chimney, reduces the service life of the entire structure, and deteriorates the samovar-type heat exchanger. If pipes and boilers are not cleaned of scale in a timely manner, water floods the fuel compartment of the stove.
Recipes for folk remedies against scale
- Baking soda. In the tank, bring the water to a boil, pour a pack of soda into it. Then let the water cool and bring it to a boil again. Drain the water and soda, fill the tank with clean water, pour half a glass of vinegar essence into it. Bring to a boil, leave to cool. Bring to a boil again and pour out after half an hour. The influence of soda and acid loosens the scale; it is removed with a hard sponge or brush.
- Lemon acid. Not sparing the bags of lemon, pour it into a tank of cold water, then bring to a boil. Let it sit for a while, drain the water with citric acid, fill the tank with clean water, and bring to a boil. The acid breaks down all the scale deposits, the tank is rinsed with clean water. The method is cheap, fast-acting, but has a significant drawback: the acid, acting on scale, affects the metal material, its surface will be rough, and fresh scale will quickly appear again. It will become more and more difficult to clean the boilers with lemon each time.
- Vinegar. Pour a glass of vinegar into the filled tank and boil for 20 minutes. The acid acts effectively, its disadvantage is the residual odor. You need to clean the boiler with the windows open, then rinse the system thoroughly and ventilate the room for a long time.
Today, all methods of heating water in home baths are widely used. The designs of the various systems are well thought out, easy to use and safe.
It is important to fulfill all installation conditions efficiently.
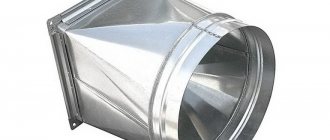
Air tank
You can improve an ordinary potbelly stove or sauna stove with a direct chimney by installing it on an air heat exchanger on the chimney .
It is a cylindrical body through which several hollow pipes pass. Air is sucked in from below, heated in the pipe, it leaves the heat exchanger, increasing the efficiency of the furnace by 15-20%. The air ducts can be routed to an adjacent room, thus heating several rooms or sections of the garage from one furnace. Video: how to make an air heat exchanger for a chimney
Another original design of a stove with an air heat exchanger on a chimney for heating a garage is shown in the video. With the help of such a stove you can heat not only a garage, but also any utility room, including agricultural buildings and greenhouses.
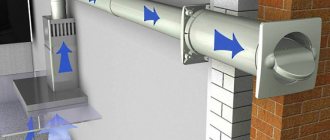
From corrugated pipe
A cheap and simple way to install an air heat exchanger is to use corrugated ventilation pipes for this purpose . They are wrapped around the uninsulated part of the chimney, as a result the air in the corrugation warms up and, due to thermal convection, enters the neighboring rooms. To make the corrugated pipe heat up more efficiently, you can wrap it together with the chimney in several layers of foil.
A system with a corrugated pipe is convenient for heating a garage in which a simple potbelly stove made of rough metal is installed. Such a stove quickly heats the air, but it rises to the ceiling, which is why the temperature at floor level remains low. If you move the air ducts closer to the floor, you can create natural circulation of heated air, and the temperature throughout the garage will become approximately the same.
Bell-type heat exchanger
Heat exchangers in the form of a bell are usually used for heating the attic or second floor . The principle of its operation is that the air heated from the chimney rises to the ceiling, where it is retained by the hood and, gradually cooling, falls down into the room.
The cap can be made of either galvanized metal or fire-resistant plasterboard and lead the air ducts to the desired location. Sometimes the cap is decorated with stones, which, when heated, serve as an additional heat accumulator.
Simple design: coil
Installing a heat exchanger tank on a chimney involves welding work, which not everyone can do. A simpler design is a coil wrapped in a spiral around the chimney. The coil can be made from a copper or aluminum tube - these metals are easy to bend, have high thermal conductivity and are not subject to corrosion.
The diameter of the tube is chosen so that it is convenient to connect it to the fittings of the water storage tank. For bending, pipes with a diameter of no more than 28 mm are more convenient. In any case, the length should not exceed 3 meters - this is a prerequisite for natural coolant circulation . To connect the heating coil to the tank, use a flexible hot water line.
This heat exchanger design can be used to produce hot water, or less often for heating small rooms. Maximum heating efficiency is achieved if the coil is installed on the chimney of a simple stove such as a potbelly stove with a high temperature of the flue gases.
DIY chimney coil
A pipe heat exchanger is usually installed on the chimney of a metal stove installed in a garage or workshop to produce warm water or heating. It is also possible to install a coil on a sauna stove.
Necessary materials:
- pipe made of copper, aluminum or steel - about 3 meters;
- flexible hose for hot water supply with a diameter of ¾ inches - 2 pieces of the required length;
- a storage tank equipped with a float valve for water supply and a drain valve for its consumption;
- ball valve for draining the system.
Sequence of work:
- The most difficult thing when making such a heat exchanger is to bend the pipe into a spiral without reducing its cross-section. Copper pipes with a diameter less than 28 mm can be bent using a pipe bender without heating. Steel and aluminum, as well as larger diameter pipes, must be heated with a blowtorch before forming.
- You can also use this method: fill the pipe with dry sand and tightly plug its ends with wooden plugs. The pipe is bent according to the template - a pipe having the diameter of the chimney, after which the plugs are removed and sand is poured out, the pipe is washed under high pressure of water.
- Threads are cut at the ends of the pipe and adapters are installed for connection to the system.
- The pipe is installed on the chimney. To improve heat transfer, you can solder the coil onto the chimney with tin, having previously degreased the soldering areas and removed oxides with phosphoric acid.
- The tank is hung on the wall or placed on a support above the level of the coil. Connect the heater to the tank using flexible hoses. A drain valve is installed at the lowest point of the system.
When using a coil heat exchanger in closed heating systems, it is necessary to install a circulation pump!
The coolant may boil, and if circulation is poor, water hammer can occur, destroying the system elements! Video: receiving hot water from a coil heat exchanger installed on the chimney
How to clean a chimney in a bathhouse?
Brick or stainless steel chimneys serving sauna stoves should be cleaned as needed. Practice shows that with year-round use of a bathhouse, such a need occurs at least 2 times a year. For this purpose, there are special pipe cleaners that are tied to a rope with a load so that they can be lowered from top to bottom.
You should drain the condensate through the tap at the bottom of the pipe, climb onto the roof and lower the brush inside. Before doing this, you will need to remove the umbrella or deflector. It is very convenient when a chimney with a hole (revision) is installed in the bathhouse, through which access is provided from below. Then cleaning can be done on both sides, and then the spilled soot can be removed through the hatch.
In addition to the mechanical method, there is also chemical cleaning of the chimney. There is a commercially available product called “Chimney Sweeper log”, which is placed in the firebox of the stove and burned there in accordance with the instructions. The product is quite universal, suitable for any solid fuel heaters and has been tested in practice more than once.
Mounted
This design option is hung on a standard metal sauna stove. The presence of metal walls of the furnace is mandatory, since heat is transferred through one of them to the water in the tank. This design is not widely used due to low efficiency, but its main advantage is maximum simplicity.
A hanging tank for a bathhouse is usually made of thin stainless steel. It is placed outside the stove and located in a visible place in the bathhouse. Stainless steel is not only an ideal material for water tanks, but also has a beautiful appearance.
When you need the simplest tank for hot water in a bathhouse, wall-mounted installation is best. With it, you don’t even need to do pipe routing. The tank is delivered completely ready.
The bath tap for hot water is also included with the tank upon purchase. The spigot is located at the center of the lowest point, and the bottom is usually flat or has a conical stamping.
The inconvenience of this location of the tap is the small distance from the floor. In addition, the stove is often placed in the corner of the bathhouse. One side of it is occupied by the door, and the other by the tank. Thus, it turns out that the tap is in a very inconvenient place. This problem is solved by installing a pump.
Information. For a wall-mounted tank, the sauna stove should be standard. This is either a ready-made structure, or a home-made one, but having at least one flat metal wall of the appropriate size for the tank.
Wall-mounted tanks have either a removable lid or a filler neck with a diameter of at least 10 cm. A filler neck is much more common. It makes cleaning and processing the internal space somewhat more difficult, but makes the structure more durable.
The cheapest designs of hanging tanks are welded from sheet steel and galvanized. The service life of such structures is short. Stainless steel thin-walled structures are gaining popularity.
Due to their small wall thickness, they are affordable. Steel enameled tanks are rarely used as hinged tanks on the stove.
Chimney pipes for baths
Modern versions of the bathhouse are equipped with chimneys for economic reasons - soot quickly destroys finishing materials, and to meet fire safety requirements. Of the chimney pipes existing today, only a few are used, as increased demands are placed on them.
- Brick - the material is fireproof, has excellent heat transfer, that is, it accelerates the heating of the room and maintains the temperature. However, it is quite difficult to install and requires periodic cleaning. This option excludes the installation of a water heater on a pipe; only remote modifications can be used.
- Ceramic - resistant to high temperatures, durable, but has a significant cost.
- Asbestos - unsuitable for chimneys in a bathhouse, as they do not tolerate temperature changes well.
- Metal - products made of ferrous metal are not recommended, since under the required operating conditions they quickly burn out and are also heavy. A stainless steel product is much more resistant to temperature changes and has a very attractive price. Today this is the most popular option.
The metal has low thermal conductivity, meaning it heats up quickly and does not retain heat. But it is precisely this property that can be used to quickly heat water, thereby reducing costs.
Types of water heaters for baths
Today, the Russian market of climate control equipment offers a wide range of boilers, which can be divided into two groups:
Important! All types of boilers can operate in a water supply system with an excess pressure of at least 1 kg/cm2. This is easily achieved in a central water supply system. If water is drawn from a well (well, reservoir), then to ensure the necessary pressure in the water circuit, a hydrophore (membrane accumulator) should be provided.
Water can be heated by open fire (in geysers) or combustion products (in wood heaters).
But there are several problems here:
- Installation of a geyser requires approval from the local gas utility.
- When using a solid fuel water heater, difficulties arise in regulating and maintaining a certain water temperature.
If you do not have the opportunity (or desire) to deal with all the difficulties of obtaining permission to use a “gas pipe,” then there is only one option left - an electric boiler.
Tank capacity: how to calculate correctly
Now about the sizes of containers for heating water. Most often this value is 20-100 liters, and volumes of 150 and 200 liters are also common.
Taking into account the standard indicator of 8-10 liters of boiling water per person, for domestic needs a tank with a capacity of more than 100 liters is rarely needed.
Larger tanks are made individually.
Before we move on to discussing the choice of a sauna tank, let us repent: we did not talk about other, less important, but also significant parameters - the shape of the tank, the thickness of its walls and much more. So it’s better not to limit yourself to reading just this article, but ideally to resort to expert advice.
Installation of internal metal chimneys
After the installation of the heaters is completed, they begin to arrange the chimney structure, performing work from the sauna stove pipe. This can be either the beginning of a metal chimney or a section of the smoke exhaust structure connecting the heating unit to a brick pipe.
Since chimneys come in two types, their installation is different. When the pipe is placed inside a bathhouse building, almost the entire structure is located vertically. The installation of individual elements is carried out in such a way that each part located above is placed on the one below. This method is called “smoke” installation.
When using sandwich pipes shown in the photo, they are installed differently, using the “condensate” method. Its essence is that to arrange the internal part of the system, the upper pipe is placed in the socket of the lower element. For the outer part of the structure, the “smoke” method is used.
Thanks to this chimney arrangement, the moisture accumulated in the pipe can freely flow down and enter the condensate collector, without touching the heat-insulating material, which, if there is an excess of moisture in it, loses its inherent properties.
The joints of the elements should be located so that the connection is not at the roof level, and also does not fall on the attic and interfloor ceilings. If the heating unit is planned to be installed in close proximity to wooden walls, they must be protected from fire or overheating. For this, heat-resistant materials are used, such as asbestos boards, which are fixed in two layers.
When installing samovar-type water heating tanks, they should be located near the combustion chamber, directly above it or in the attic, if hot water will need to be distributed not to one room, but to two - a washing room and a shower room.
Before you begin installing the pipes, their joints should be coated with heat-resistant sealant and, after completion of the work, additionally secured with special wide clamps.
When, when connecting individual parts of the chimney, significant gaps remain between them, the part that needs to be inserted is sealed. To do this, an asbestos cord is used to wrap the pipe.
The first section of the structure, attached to the unit’s branch pipe, cannot be made multilayer; it must be made of a single-walled metal pipe with special connections, in which there is a valve. This chimney adjustment element (damper) is used to create and maintain the required draft level while the bathhouse is warming up. After the combustion is completed, the valve allows the heating unit to retain thermal energy for a long time.
The installation procedure for this element is as follows:
- A square hole is cut in the ceiling so that a box fits into it, the lower part of which is fixed to the ceiling.
- Through a hole made in the bottom, the smoke exhaust pipe is led into the attic.
- Then the box is filled completely to the very top with heat-resistant material that is light in weight, for example, mineral wool or expanded clay of the middle fraction. The insulation must be laid as tightly as possible.
- In the attic, the box is covered with a metal lid equipped with a round hole. It is placed on the protruding part of the pipe.
As a rule, chimney elements are placed vertically in the attic, but sometimes they can get on the sheathing bars. In this case, a slight bend is made in the structure using bends.