When laying water pipes in a country house or in a private house, you cannot do without digging a trench - a deep narrow trench in which the water supply system will be hidden. The comfort of living after completion of construction and finishing will largely depend on how carefully the excavation work is carried out.
When developing a water trench, the following parameters should be taken into account:
- soil properties;
- soil freezing depth;
- features of the water supply system;
- the presence of existing communications on the site and the depth of their occurrence.
General excavation work when laying a water pipeline is regulated by SNiP 2.04.02-84 with clarifications for systems made of polymer materials reflected in SP 40-102-2000.
Methods of how and what to dig a trench with
There are two basic options for excavation digging: manual and mechanized. The first method, as a rule, can be used when installation is on a budget and it is impossible to use the equipment in a narrow area. This method is particularly time-consuming and labor-intensive.
Manual
This type of laying is mainly used in compact municipal buildings. A very labor-intensive and expensive option for developing a water supply trench, the performance of which directly comes from the properties of the soil.
The price of manual work ranges from 1000 to 2000 per m3 and depends on:
- weather conditions,
- width,
- length of excavation and degree of soil complexity.
Digging a trench on your own will be much more economical for the project owner, but at the same time, the entire burden, both physical and monetary, will fall on him.
Read more here.
Mechanized
The mechanized option involves the use of repair and construction equipment. This method of digging soil for water supply is popular and practically applicable in all industries and housing and communal services. The work process is planned according to the existing vehicle fleet.
The following technique is usually used:
- An excavator with a modification of a backhoe is used to produce not very large trenches up to 1 m.
- The “dragline” technique is an excavator with one bucket and a special rope system that provides soil digging below the equipment’s location up to 10-12 m and an impressive grip radius of up to 10 m.
- The grab has a bucket, which differs from the typical one in that it consists of 2 halves, tightly connected to each other with a rope.
- Soil cutters or trenchers are devices that first loosen the soil and then move it to the surface with a specially installed auger-type conveyor.
- The mini excavator with rubber tracks has great maneuverability and is suitable for trenches up to 2.5 m deep.
- An earthmoving machine develops soil and loads it into a vehicle or sends it to a dump. A very popular technique with a excavation depth of 2.5 m. Its only drawback is its impassability in rocky soils and forested areas.
Advantages and disadvantages
There are several positive and negative aspects to the construction of trenches during sewer installation.
| Advantages | Flaws |
| Compared to the trenchless installation method, this method is cheaper | It is impossible to carry out work without opening the soil: you will have to remove fertile soil and uproot vegetation on the site |
| The sewerage system will be covered with a layer of soil and will not be damaged. | Material and time costs for digging a trench increase |
| Self-execution | Work cannot be performed in the winter season |
If you choose how best to lay a sewer system, then laying it underground provides more opportunities than the above-ground option. It is in this way that you can correctly organize the slope and comply with all the norms and requirements.
Choosing the optimal cross-section of a trench for water supply
Before you start digging a trench for water supply, you need to decide on the geometric parameters of the future trench.
They can be:
- Rectangular section.
- Trapezoidal.
- Mixed type.
The choice of a specific configuration depends on a number of conditions:
- The type of soil in which the water supply is installed.
- Depths.
- Width.
The rectangular shape is used when the width and depth of the ditch is small. SNiP standards recommend constructing rectangular ditches with a depth of no more than 1.5 m. The soil should be relatively dense to avoid crumbling of the vertical walls. This is the simplest form, requiring a minimum of time and effort.
The trapezoidal shape is used when it is necessary to dig trenches with a depth of more than 1.5 m. This sectional shape, with flat walls, prevents the possibility of soil collapse.
When constructing vertical walls near a ditch, more than 1.5-2 meters deep, there is a high risk of causing injuries and even death if they collapse. Also, a trapezoidal shape is the only possible type of section when laying ditches in soft soils - loose sandstone, sandy loam. Vertical walls in such soils will naturally slide to the bottom, taking on a flat shape.
The mixed view is a combination of trapezoidal and rectangular sections. They are used for laying pipes in areas with high groundwater levels. In this case, up to the level of subsoil water, the trench is dug in the form of a truncated cone, with flat walls. After reaching the aquifer, a pit with vertical walls is laid along the bottom of the ditch. It is used to collect and pump out water, as well as backfill the drainage mixture (coarse sandstone, gravel, crushed stone).
Do-it-yourself trench digging for water pipes
A trench for water supply is necessary when laying a pipeline from a well or other source of water. Laying pipes above the ground entails a number of associated problems:
- There is a high probability of water pipes freezing in winter frosts.
- Inconvenient for moving around the local area.
- Danger of mechanical damage to pipes.
- Water pipes sticking out give the area an unsightly appearance.
For the above reasons, the most rational solution would be to remove the water pipes underground. To many homeowners who are uninitiated in the intricacies of construction skills, it seems that laying a ditch does not require special intelligence.
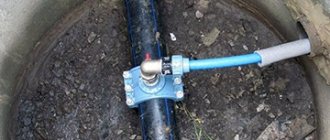
Laying a water pipeline
Current methods
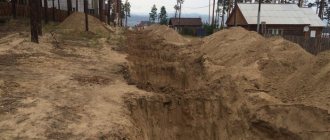
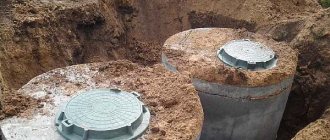
The photo shows the most common method of laying a water pipe using a trench.
Modern construction technologies suggest two main methods for underground installation of water pipes:
- Laying a water pipe in a trench. With this method, before installing the pipeline, the soil is excavated to the calculated depth, the foundation is prepared, and the trench walls are strengthened. After installation is completed, backfilling is carried out, and the area above the work area is improved;
- Trenchless water pipe installation. This method is more progressive and involves puncturing the soil between two technological wells and then laying a pipe into the resulting hole. Soil development, backfilling and landscaping work are not required in this case.
The use of lightweight modern technology can significantly speed up and facilitate the task.
The open (trench) installation method allows you to handle small amounts of work with your own hands using simple tools:
- shovels,
- scrap,
- hammer drill, etc.
It is well suited for suburban farms, since the soil is not covered with asphalt, buildings are sparse, there are practically no competitive communications and infrastructure, therefore, damage and subsequent restoration will be minimal.
Open ditch mining is best suited for rural areas.
Trenchless water pipe replacement, as well as its installation, require special equipment and trained workers. The method is based on horizontal directional drilling or soil puncture using special tips and a jet of water under pressure.
Excellent for urban areas with dense buildings and developed infrastructure, where the open method is sometimes unavailable.
It is enough to dig two wells at the beginning and at the end of the straight section.
Trench development rules
Usually the pipe is led from a well or borehole.
So, for work outside the city, you can use the open method of laying pipes. So we'll need a trench.
To build it correctly, you will need the instructions, where we have collected the basic requirements and useful clarifications on a number of issues:
- It is advisable to lay the ditch along the shortest direct route. If this is not possible, it is divided into straight sections with 90˚ turns; sometimes other turning angles are acceptable;
- The depth of the trench is a very important characteristic. According to SNiP, the minimum laying depth, taking into account possible dynamic loads, should be at least one meter, but the climatic conditions of our country impose a different limitation: the ditch should be approximately 30 cm deeper than the freezing depth of the soil in your region (for the middle zone - approximately 2 – 3 m, for southern regions – 1.2 – 1.3 m);
- The width of the trench when laying a water pipeline according to SNiP should not be less than 70 cm. However, in practice, such strict standards are applied when working with professional services, and in the garden you can be guided by the diameter of the pipe and the ease of work. Usually they dig to the width of a shovel - 45 - 50 cm;
- When laying water pipes, it is necessary to maintain a slope of 0.002 - 0.005 towards the well if there is a drain valve in it to empty the system in case of repair or preservation for the winter;
- Water supply and sewerage in one trench are not laid in accordance with all norms and rules. However, this requirement is often ignored when using plastic pipes in thermowells. We would not recommend doing this;
- Cable and water supply can be laid in one trench subject to the following conditions: the cable (up to 35 kV) is laid in a plastic pipe above the water supply, the distance between them is at least 25 cm, above the cable is at least a meter of soil;
- The bottom of the trench should be dense and compacted; it is desirable that the pipe lies on the ground with the body completely adjacent.
The width should be convenient for work with minimal labor costs.
In addition to the listed rules, you will need a number of tips. So, in the northern regions and in the middle zone it is better to cover the pipe with a layer of foam plastic or mineral wool. Sometimes extreme cold occurs, and this measure can protect you from an accident.
When filling a ditch, especially at the initial stage (the first 25 - 30 cm), throw the earth carefully into the corner of the trench. Avoid caked lumps, bricks, stones and other heavy debris, otherwise the pipe may be damaged.
It is better to insulate the pipe with foam plastic.
Storm drain
The main purpose is to remove liquid precipitation, as well as moisture generated from human economic activity. For example, when washing a car, or from a summer garden pool.
In the cold season, in the main part of the country, there is no need for rainfall. Therefore, the depth of the storm sewer is determined:
- requirements of SNiP 2.04.03-85 “Sewerage. External networks and structures";
- local climatic and geological conditions.
According to SNiP recommendations, the depth of storm drainage is the lowest freezing point of the soil plus 20–30 cm. But it is often difficult to meet such conditions:
- the average freezing depth is in the range of 0.7–1.2 meters; digging a deep trench in a relatively small area is simply not practical;
- another limitation is the structure and composition of the soil; It is difficult to cultivate rocky or sticky clay soil.
An important factor is economic. It is sometimes simply not profitable to build a drainage system that operates sporadically during the warm season according to all the rules. But precipitation must be removed. Practical options have been created:
- Laying pipes in trays, buried in the ground and covered with decorative slabs. In order to save land space, the structure is laid along pedestrian paths. Main advantages:
- simplified installation;
- saving time and material resources;
- quick and convenient access for maintenance or repair work.
Trench parameters
The trench width indicator is defined in SNIPs. Moreover, if artificial foundations are used for collector systems and pipelines, and the width of the foundation exceeds the corresponding indicator of the pit, as well as when installing foundations associated with the laying of non-passable and through channels, the width of the pit is determined as the width of the base multiplied by a factor of 0.2.
If specialized equipment is used when digging a trench, then it is allowed to increase the width of the trench by such a distance that the leveling and compacting machines will work without any obstacles. If it is intended to use labor, then the distance between the reinforced vertical walls of the trench and the side of the structure should not be less than 70 cm.
If trenches are dug in clay soils or loams using trench or rotary excavators, then the depth of laying pipes without fastenings using braids is allowed to a depth of no more than 3 meters.
Stages of horizontal drilling:
- Drilling with a drill head is carried out using a locator, which tracks the position of the head and fully controls the process. The puncture trajectory is fed to the monitor, which allows you to make adjustments and prevent distortions in the work.
- The necessary expansion of the well diameter is carried out with special knives. As a rule, the diameter of the well exceeds the circumference of the pipeline by 20-30 percent, which ensures unhindered installation.
- The pipeline through the well is pulled by a special rotating expander. This expander moves along the well like a screw, dragging the pipe along with it to the desired location.
How to dig a trench for water supply or laying cables with your own hands
Very often in a garden plot or vegetable garden there is a need to lay a water supply or cable.
Digging a trench manually with a shovel is difficult and time-consuming; ordering an excavator is expensive and troublesome. We offer readers an original solution to this problem.
DIY trench
First, we drill holes (diameter 12-15 cm, depth depends on the specific case) at a distance of 3-5 m from each other along the line of the future trench.
When drilling, add water to the well. We lower metal containers into the wells that have longitudinal cuts approximately equal to the width of the trench. The diameter of the tanks is slightly smaller than the diameter of the wells. Then, using a narrow hoe with a strong and long handle, we rake the earth along the line of the trench and dump it into containers. We periodically lift the containers up to free them from the soil (Fig. 1).
In sandy soil, working on a trench (excluding time for drilling wells) 5 m long and 10 cm wide at a depth of 60-80 cm takes 30 minutes, drilling a well 1.3 m deep takes 20-30 minutes.
DIY trench tools
We make the tools to perform this work with our own hands.
First of all, we make a drill.
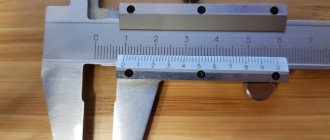
For this we will need: a steel pipe 50 cm long and 12-15 cm in diameter, a metal rod 70 cm long and 14 mm in diameter, a 1/2 inch water tee, a steel plate 20 x 20 cm and 3 mm thick (Fig. 2) .
In the steel plate and tee we drill holes with a diameter of 16 and 14.5 mm, respectively. We cut the pipe in the lower part at an angle of 50° to half the diameter, and in the upper part we make recesses for installing a tee with a rod.
Next, we hammer the steel plate into the pipe slot so that the hole in the plate coincides with the axis.
We insert the rod into the hole in the plate, put a tee on it, and place the tee itself in the recesses of the pipe. Using welding, we connect the structure into one whole.
After this, we cut off the protruding parts of the plate and the part of the pipe below it. And on the reverse side we cut out a technological window in the pipe (about three-quarters of the length and half the diameter of the pipe) and get the design of the drill.
Then we add a rod to our design, which we screw into the tee. And we screw a cross with collars onto the bar. This design allows you to add additional rods.
We make a hoe from a pipe with a diameter of 50 mm, cutting it along the axis. The length of the hoe handle should be more than 2 m.
Do it yourself - How to do it yourself
How to dig a trench for water supply or cable laying with your own hands Very often
Sewer installation procedure
The first stage of pipe laying work is considered to be excavation of a trench. To complete the task, it is best to involve large-sized equipment, for example, an excavator (for a septic tank). Naturally, in order to reduce construction costs, or to reduce the amount of work required, you can make a hole manually. It is important to remember that compliance with the dimensions of the pit, according to the documentation, must be carried out regardless of the excavation method.
Pipe laying
Laying of sewer pipes according to regulatory acts is carried out with pipes having a standard outer diameter (110 mm). The width of the trench when laying SNiP sewerage in this case will be at least 0.6 meters. If the pipe is taken with a large circumference, then the width of the trench when laying a sewer system increases proportionally.
If the owner wants to install a sewage system according to all standards, then the following should be taken into account:
- Laying sewer pipes in the ground technology involves installation from the foundation of the house.
- It is possible that there will be no outlet hole in the foundation. In this situation, you will have to cut it out and connect the highway to it.
- When the design of the house provides for an outlet, all that remains is to simply put the socket on the end of the pipe. It is important to align both ends of the drainage system.
Meaning of angles
It is extremely rare to find a perfectly level sewer system. Often such an engineering structure receives many bends and turns, which negatively affect the period of operation. It is in the places of bends that problems associated with the accumulation of sediments and runoff first appear.
Laying pipes and avoiding the above problems will not be difficult for an experienced craftsman. The main advice from experts in this matter is that the laying of sewer pipes should be carried out using bends with angles ranging from 15 to 90 degrees
. To ensure free access to probable places where blockages may occur, it is recommended to install an inspection over all bends of the system.
At the work stage, when the outlet from the house has already been equipped, you can install the pipes in the dug trench and connect them to each other.
It is important to remember that the parts are laid with the sockets down. To connect, coat the edges of the pipe with a special solution and install the part as deeply as possible into the socket.
Pipe connection
The work of connecting plastic parts involves the use of one simple technique. It lies in the preliminary application of a mark to the part, which determines the depth of its insertion into the socket. It is along these marks that the final connection of the parts must be made. As soon as this stage of work is completed, all elements are securely connected. You can begin the procedure for insulating the waste system. Such work is necessary when the depth of the pipeline equipment lies in a layer of soil that freezes during the onset of winter.
The final stage of sewer installation will be backfilling the trench. According to the operating technology, it is necessary to check the slope, because when connecting parts to each other, this parameter may change.
Having no skills in how to lay sewer pipes. Most owners of private houses ignore the recommendations and rules of such work. For example, when compacting a sand layer, they try to press the embankment on top of the pipes. Such actions are categorically unacceptable. They can lead to damage to the sewer system even before it is used.
Digging a trench by hand - how the price per linear meter is determined
Nowadays, when mechanization has reached a high level of development, when machines and mechanisms are actively used, the need for manual labor still exists.
Manual excavation work is still in demand, and there are objective reasons for this.
Dig by hand
The work of a digger is not easy. Work such as trench digging is considered unskilled and primitive, but there are often cases when manual labor is indispensable. Manual digging is recognized as the most effective for the following tasks:
- laying trenches in places hard to reach for equipment,
- digging wells,
- laying communications in the constructed building,
- installation of a subfloor in a private house.
It is also believed that wells need to be dug only by hand. This is explained by several reasons. Here are some:
- precisely stop at the aquifer,
- do not get into the sand so that the water does not drain away later,
- stones and dense clay are dug only by hand,
- It is unacceptable for engine oil to enter the well barrel.
In a word, digging a well is not easy; in addition to having specific knowledge, it requires attentiveness and accuracy. There is no automatic or mechanical way to dig a well.
What determines the cost of 1m³
Analysis of the earthworks market indicates that the ratio of the costs of manual and mechanized labor is the same. How much it costs to dig up 1m³ of land depends on several factors:
- soil type,
- urgency of the order,
- volume of work,
- seasonality,
- terrain,
- trench parameters.
It is also taken into account whether backfilling of the soil is necessary. Pricing takes into account all factors, plus the qualifications and experience of the team.
Pricing depending on a separate factor
It’s clear why the prices of different teams vary - the training and dexterity of workers has its price. Prices are formed differently in the capital region and in the periphery.
The cost of the work is determined after a direct study of the location of the work to be done and its features. They evaluate the location and how convenient it is to dig a hole, for example, for a cellar.
They are looking at how to lay a ditch for the sewer system. They decide how to calculate the cost of work more correctly, taking into account a linear meter or a square meter. Determine the volume of the trench, depth and width, add to this the length of the object and how hard the soil is.
In winter, prices are higher, which is understandable. Frozen ground requires more effort, the creation of additional conditions for workers, and special delivery of people.
Price per meter
Moscow and the Moscow region have the highest prices; on average, a cube costs from 1000 rubles. Wholesale prices, which come into force for large volumes of work, will reduce the price by about 100 rubles, no more. Winter doubles the cost.
The price for a trench, 100 cm deep, for a cable, for example, will be 300 rubles per meter in the Moscow region. In a small regional center, for example, Lipetsk region, the same work will cost 140 rubles.
Rocky terrain with complex terrain has its own higher prices; digging there can only be done by hand, because equipment cannot approach there. This circumstance increases the cost of manual labor.
The cost of manual labor on land work and payment for special equipment are approximately the same. Therefore, whether to hire a team of excavators to dig a foundation pit, whether to rent drilling rigs, excavators for laying water pipes or laying cables must be decided according to the situation. And cost is far from the main factor here.
Digging a trench by hand - how the price per linear meter is determined
Nowadays, when mechanization has reached a high level of development, when machines and mechanisms are actively used, the need for manual labor still exists. Manual excavation work is still in demand, and there are objective reasons for this.
Laying sewerage using the HDD method
The installation of sewerage without a trench using the HDD method is becoming increasingly widespread.
The horizontal directional drilling method has many advantages. Among them: reducing the cost of work, reducing the time required to complete a task, preserving the livability of the landscape, as well as routes, buildings and structures unchanged. In addition, the installation is easy to control and safe for the operator.
Quite often there are comments that, despite their advantages, special HDD equipment is too heavy and massive. To transport it, it is necessary to use trailers and trawls, which prevents the installation from entering areas with limited space. This applies to cottage villages, areas with dense urban development, and areas with an abundance of communication lines.
However, this obstacle has long ceased to be significant, since there is HDD technology with minimal dimensions. The installation is moved using a car tow truck. Sewer installation using the HDD method in cramped conditions is carried out using modern super-precise locating equipment. Laying of sewer pipes occurs in accordance with all established rules, observing the required slope and without any harm to communications already laid in the neighborhood.
Using technology
In addition, using technology can help you. Nowadays, a whole host of lightweight mini-excavators, walk-behind tractors and other similar equipment are available on the construction market. Usually, renting a device is not that expensive, and the work is done in a matter of hours, and you won’t have time to get bored.
If there is a road or other similar obstacle in the way of the trench, it is possible to use the method of puncturing the soil. To do this, wells are dug on both sides of the barrier, half a meter deep below the laying depth, and the length of the well should be one and a half to two meters. Width approximately 1 – 1.2 m.
The steel pipe is cut into 1 m sections, the ends of which are threaded. In addition, couplings will be useful. A conical tip is made from one piece using a sledgehammer, at the end of which a small hole is left.
After this, take a water pump and put the hose into the well. Then a tip is driven into the ground towards the second well, a piece of pipe is screwed onto its end using a coupling, the hose is inserted into the pipe and water is supplied.
A clamp or wrench is attached to the body of the pipe, and using a crowbar the pipe is pushed into the ground (it must be emphasized that with good water pressure it flows like clockwork).
At the time when the pipe is completely inserted, the next section is attached to it and continues without that until the section is completely punctured.
Note! It will take a couple of hours to overcome a simple two-lane highway, and you will not need to restore the asphalt and block traffic
Plastic products
Plastic products, in addition to the already mentioned advantage of low weight, have a number of undeniable advantages:
Laying a sewer pipe in the ground is not possible without the indicated advantages of plastic, as they affect the service life of the entire system.
The following properties can be added to the listed advantages:
- They are not a conductor of electricity. This property is of particular relevance because modern private houses, as well as apartments, are equipped with a large number of household electrical appliances;
- Does not emit a toxic odor;
- Low cost of pipes;
- Ability to lay highways of various configurations.
However, without understanding and knowledge about drain installation, it is impossible to rationally take advantage of the benefits of plastic products.
Backfilling trenches
Before filling the soil, the pit is cleared of snow and debris that has fallen into it. The lower part of the ditch to a height of 40-50 cm is filled with thawed earth, regardless of the time of year. Tamping is carried out immediately. When laying a route outside of highways, it is allowed to use no more than 15% of frozen soil.
https://youtube.com/watch?v=lAfNG7EotlE
Loading of soil is carried out in such a way as to prevent stones and other solid objects from getting on the pipes. When loading soil into deep objects, the pipeline is covered with boards, which are then removed. The soil is distributed evenly on both sides of the pipe to prevent it from bending. Final compaction can be done with heavy equipment using a blade, bucket, tracks and wheels.
Laying sewerage: trench and trenchless methods
The smallest trench width when laying a sewer system when constructing artificial foundations for sewer networks, as well as when installing pass-through and non-pass-through channels is equal to the width of the base increased by 20 centimeters.
Design of utility networks - in this article. Read more about sewer construction in this section.
If the trench is developed by earth-moving machines, then the minimum width is taken according to the width of the cutting edge of the functioning part of the mechanism with the addition of 15 centimeters in sandy soils, and 10 cm in loams.
When using a mechanized method of backfilling soil, it is allowed to increase the trench to limits that allow the equipment to operate unhindered.
When people work in a trench with vertical walls, the lowest distance between the walls and the fastening can be 70 cm.
Distance from water supply to foundation and sewerage - requirements and standards
The functionality of a residential building and the convenience of living in it are ensured by the connection of water supply and sewerage networks to the building. Depending on the ownership of the sources of water supply and wastewater disposal, utility networks can be classified as centralized or autonomous systems. But their specificity in no way affects the permissible distance of the pipes being laid from the foundation of the building, which the regulatory documentation requires to maintain. In particular, SP 42.13330.2011, which is an updated version of SNiP 2.07.01-89*, provides the minimum setbacks for external water supply and sewerage systems from the side walls of the foundation of both the house and various fences, as well as power poles. Of course, these rules have nothing to do with releases.
Composition of the external communications system
Before deciding at what depth to bury the sewer pipe, you need to decide on the design of the external drainage system.
A device for discharging domestic wastewater and draining storm water is being installed in a suburban area. In the latter case, special measures are carried out with a significant area of the land plot itself and the size of the roof of above-ground buildings. These requirements are met by plots of more than 10–15 acres with building structures from 100–150 m².
How is the external branch of the water pipeline laid?
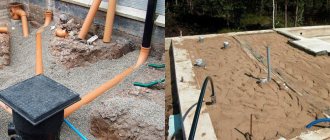
We have already discussed how to dig a trench for a water supply system, so further in the text we will look at the technology for installing an external pipeline connecting the source and your house. This process can be divided into three stages - preparation, laying pipes and backfilling the trench.
Preparation involves the following actions:
- A 20-centimeter sand cushion is added to the bottom of the trench, which is generously moistened and trampled down. Usually, with the help of such a “cushion”, the supporting capacity of the soil is increased, but in this case we are simply leveling out the unevenness at the bottom of the trench, so the selected soil can be used for backfilling.
- Having finished with the “pillow”, you can work on the foundation of the building - you will have to cut a through hole in it through which the water pipe will pass. To do this, use a hammer drill and a drill with a carbide tip. At the pass point, draw a square into which the outer diameter of the pipe can be entered. Next, you need to drill a whole chain of holes along the perimeter of the square, breaking out pieces of concrete or bricks with a hammer and chisel.
- After “breaking through” the foundation, you need to move on to the shaft of the well or well. A hole is drilled in its wall with a special crown, the diameter of which must be larger than the external dimensions of the adapter, which ensures the joining of the external section of the water supply system and the pump intake pipe.
When connecting the water supply to the main line, the last point becomes irrelevant.
Pipeline installation is carried out as follows:
- The measured section of pipe is cut off from the coil and laid on a sandy “cushion”. Moreover, the length of the segment is selected based on the expected dimensions of the pipe section located in the basement (behind the foundation) of the house. However, at this stage there is a high probability of error in choosing the length. Therefore, it is better for you to bring the entire bay into the house and push the free end through the hole in the floor and foundation, stretching it all the way to the well.
- Next, you lower the pump or pipe with the ejector into the well and mount the adapter. The free end of the pipe is soldered to the external fitting of the adapter or mounted on a collet coupling (if there is a thread at the outlet of the adapter).
Finally, you cut the pipe and take the coil out of the house. Moreover, it is better to leave a 30-centimeter outlet above the floor level, which can be shortened before installing the central shut-off valve.
The third stage - filling the trench - requires only physical effort. You simply transfer the soil from the storage area to the trench, laying it in 25-centimeter layers, which are carefully trampled down. And do not rush to dispose of the remaining soil - in the spring the backfill will “fail” and you will lay the remains on top of the sagging soil.
Well, that's all - now you know how to dig trenches and lay the external branch of the water pipeline. All that remains is to apply the acquired knowledge in practice.
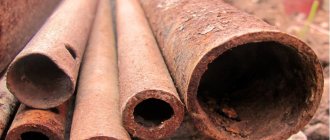
What pipes are used?
To lay a sewer system on a site, pipes made of different materials are used.
| Pipe type | Features of use |
| Cast iron | Strong and durable pipes, affordable and easy to install. Difficulties may arise when connecting joints. Cast iron corrodes over time and is heavy. The inner surface of cast iron will not be smooth, which will make it difficult to transport waste to the drainage pit |
| Asbestos-cement | They have a smooth surface, so blockages do not form. They are easily mounted using couplings, have less weight, but are fragile and can break during transportation |
| Polymer | They have high strength and low weight. Laying such sewer pipes can be done by one person. Easy to connect and seals well. Available in PVC, HDPE and polypropylene |
| Corrugated | They withstand dynamic loads well and are resistant to freezing, but can become deformed at too low temperatures. |
Experts recommend using plastic pipes for laying sewers. In this case, the diameter of their cross-section is selected based on the number of bathrooms in the house. For 2 toilets a pipe with a diameter of 110 mm is suitable; for 3 or more bathrooms you need to install a pipe with a diameter of 160 mm.
Preparatory work
Before you start digging a trench, you need to calculate its depth and width, prepare all the necessary tools and materials, and mark the boundaries.
Depending on the type of soil at the site where the trench is laid, the cross-section may have the following shape:
- Trapezoidal - has side walls beveled at an angle of 45-60 degrees. Well suited for trenches on all types of soil, but most justified when digging a ditch on light sandy soils. A trench with such a cross-section is more labor-intensive, takes up a significant area and takes a lot of time.
- Rectangular - used when digging trenches on cohesive sandy loams, loams, and clays. It is characterized by steep walls and a small width. When digging in sandy loam, the walls of the ditch are reinforced with boards and cross braces to prevent soil from falling away.
- Combined (mixed) - has beveled side walls and a small section of the bottom with a rectangular cross-section, starting from the upper level of perched water or groundwater. A trench with this cross-sectional shape is suitable for light soils, underlying heavy clay or loam from a certain depth; for places with high groundwater levels (GWL).
The width of the trench depends, first of all, on the method of digging it:
- When digging by hand, the trench is made of such a width that it is convenient to work in it with a shovel, pickaxe and other tools, while the hand holding the tool does not scratch the walls of the ditch. The optimal width of the ditch with this method is at least 70-80 cm.
- When digging using various techniques, the width of the ditch is determined by a similar indicator of the working body of an excavator, a trencher.
Estimated soil freezing depth for various regions of Russia.
| Region/city | Soil freezing depth according to SNiP, cm | ||
| Loamy and clayey soils | Fine-grained (silty) sand, sandy loam | Coarse and gravelly sand | |
| Middle lane | |||
| Vologda | 143 | 174 | 186 |
| Ekaterinburg | 157 | 191 | 204 |
| Kazan | 143 | 175 | 187 |
| Moscow | 110 | 134 | 144 |
| Nizhny Novgorod | 145 | 176 | 189 |
| Saint Petersburg | 98 | 120 | 128 |
| Saratov | 119 | 144 | 155 |
| Eagle | 110 | 134 | 144 |
| Ryazan | 136 | 165 | 177 |
| Samara | 154 | 188 | 201 |
| Yaroslavl | 143 | 174 | 186 |
| Average value | 133 | 161 | 173 |
| Siberia | |||
| Novosibirsk | 183 | 223 | 239 |
| Surgut | 222 | 270 | 290 |
| Tyumen | 173 | 210 | 225 |
| Chelyabinsk | 173 | 211 | 226 |
| Average value | 188 | 229 | 245 |
| Southern regions | |||
| Rostov-on-Don | 66 | 80 | 86 |
You can more accurately calculate the depth of soil freezing using the following formula:
Soil freezing depth map
Hpr=√∑т×K
where, Hpr – depth of soil freezing,
∑т – sum of average monthly temperatures for winter without taking into account the minus sign,
K is a correction factor that takes the following values depending on the granulometric composition of the soil:
- Clayey and loamy soils – 0.23;
- Fine-grained sands and sandy loams – 0.28;
- Coarse sand – 0.3;
- Rocky soil – 0.34.
Distance from other communications
When digging a ditch to lay a water pipe, you should make the following indentation from nearby communications:
- gas pipeline – 1 m;
- telephone cable – 0.5 m;
- power electrical cable -0.5 m;
- sewer pipe – 0.2 m.
Marking
The contours of the trench on the ground are determined as follows:
- From the source of water supply to the point where the water pipe enters the house, a minimum path is laid using a measuring tape or cord.
- In the place where the trench will be dug, all bushes, flower beds, stone paths are removed, and entrances are cleared for wheelbarrows or small-sized construction equipment: a mini-tractor, an excavator, a trencher. Also at this stage, places are provided where the soil removed when digging the trench will go.
- The center line of the future trenches is marked using stakes driven into the ground and a nylon cord stretched between them.
Materials and tools
Bayonet drainage shovel
To dig a water trench you need the following tools:
- bayonet shovel,
- scrap,
- pick,
- wheelbarrow,
- hammer,
- stakes,
- nylon cord,
- measuring bar with ruler.
Where to get constant values?
There are a number of mandatory requirements for excavation work that are taken into account when designing construction.
All main parameters are given in industry SNiPs and SPs. They are designed taking into account construction safety requirements.
For example, SP 45.13330.2012 on earthworks provides a table of the minimum width of trenches, calculated based on the method of soil development and the method of connecting pipes:
| Pipeline laying method | Welded Width | Width for coupling, flange connection |
In separate sections if the outer diameter of the pipes:
|
| |
| Also with the narrow trench method (Ø up to 219 mm) without lowering people into the trenches | Ø + 0.2 | |
Individual pipes with diameter:
|
|
|
Here is a table of the minimum dimensions of pits, taking into account the type of pipes, method of connections, sealant, and nominal diameter of the pipeline.
Planning and calculation of a trench for a water supply system
The easiest and fastest way to lay a pipeline from a water source to a home is to seek help from employees of specialized companies with the appropriate experience and equipment. But this option is not always suitable.
In some cases, the internal space of the site and the location of outbuildings do not allow the use of heavy earth-moving equipment. In other situations, hiring a professional team can be financially expensive. Then the only acceptable solution would be a trench for the water supply, laid on your own.
Preparation
Calculation of the volume of excavation work
Before starting digging, it is necessary to prepare for the work. The main preparatory activities are drawing up a plan for the passage of the future pipeline and making the necessary calculations. When choosing a route for laying a water pipeline, you should take into account the possible presence of other communications along its route that were laid earlier: electrical and telephone cables, gas and sewer pipes. Search for underground communications.
If you do not have design and technical documentation indicating the location of communications, carry out excavation work as carefully as possible to avoid accidental damage. The pits should be laid in a straight line, from the source of water supply to the entrance to the house. If this is not possible, then it is recommended to make pipeline turns at right angles. This way, in the future, it will be easier to join the pipes.
Nuances of digging and laying
When you know the location of other communication networks on your site, you should comply with SNiP standards for laying a pipeline near them.
The indentation values when digging a trench for the water supply network from other communications look like this:
- The distance to gas pipes is at least 1 m.
- To sewer systems - 20 cm.
- To heating pipelines - 1.5 m.
- To power supply cables – 0.5 m.
At the same time, laying sewer and water pipes in the same trench is prohibited by SanPiN (sanitary standards). In exceptional cases, it is possible to lay water and heating pipes together, as well as electrical cables, but only if the rules for their mutual insulation are observed.
The next step is collecting the necessary permits. If the trench for the water supply is laid from an autonomous water source - a well or a well - then no permission will be required for this.
An exception is if excavation work will be carried out outside your land plot. So, when passing a trench for a water supply through a neighbor’s property, of course, you will need to ask the neighbors’ permission for this. If the underground utilities you are laying will pass through public lands, it is recommended that you notify local authorities.
Even if your ditch does not bother anyone, municipal officials have the right to initiate an administrative case against you and impose a fine for such arbitrariness. To insert into the central water supply network, you will need to obtain permission from the local resource supply organization.
Unauthorized entry into the highway is fraught with the creation of an emergency situation, and may lead to prosecution, including criminal punishment. How to escape punishment.
Problems and errors
There are several mistakes during construction that can lead to negative consequences during the operation of the sewer system:
No soil compaction . If this is not done, then in the future there may be erosion by groundwater, as well as a violation of the integrity of communications due to heavy rainfall.- No slope. If the slope has not been completed, then wastewater will not flow into the septic tank. The slope should be 1-2 cm per meter of pipeline. If there is no slope, sewage will quickly clog the system.
- Lack of a well . It is definitely recommended to install an inspection well for cleaning and repairing the system.
Another mistake occurs when laying wastewater and water pipes in the same trench. Here it is important to follow the technology and rules - make the distance between the pipes 150 cm.
Conditions for laying pipes using the trench method
Laying sewer pipes in a trench requires adherence to a certain technology:
- The pipes must be installed twenty centimeters below the freezing point of the soil.
- The upper wall of the pipes can be located at a depth of 1 meter, and it is necessary to provide for the danger of violating the integrity of the pipes by temporary load.
- When digging a trench, it is correct to throw soil only on one side. On the other hand, auxiliary, installation, and other types of work can be carried out.
- You need to fill the trench carefully, especially if plastic pipes were used and the soil is rocky.
- Having dug a trench, the earthen surface is carefully compacted.