Connecting to a centralized water supply does not require much effort, but under one condition: the water can be turned off during the work.
If the valve is rusty or has simply been dismantled, it must be connected if there is pressure in the pipe.
How is pressure tapping into a water supply system carried out, what fittings should be used for this and how much will this activity cost?
Where does the sidebar begin?
Any centralized water supply has a balance holder - an organization that operates and is responsible for the condition of this facility.
Any connection work should be carried out only with the consent of this organization, for which you should apply there.
Based on the application, the balance holder issues technical conditions for connection.
Before starting work, it is necessary to check the pressure in the line. If it is more than 5 atm, you will have to invite specialists to connect under pressure.
If work is to be carried out in a pedestrian area or near a highway, it is necessary to notify the local administration of the date and time of its implementation.
Illegal tapping into a water supply and its consequences
Until recently, penalties for unauthorized connection to a water supply system were not specified in the laws. But as of September 1, 2014, articles appeared in the Administrative Code providing for liability for such violations in the form of a fine. The fine for illegal tapping into a water supply can be 1,500 rubles.
Thus, tapping into a water supply system under pressure with your own hands is prohibited. The unauthorized tap will, of course, be dismantled and the unlucky homeowner will be left without water and with wasted money.
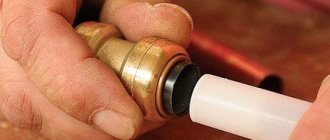
Sealing
Before all work, it is necessary to prepare the wound tow and wrap it around the threaded parts of the outlet in a clockwise direction. So, when installing the tap, the seal will not unwind. For the best effect, it is advisable to rub it in place with your hands.
Check it out here too!
Low and high pass filter: making frequency filters and how to create high-end circuitry (95 photos + video)Do-it-yourself electric bike: how to build an inexpensive and powerful electric bike from scratch (100 photos)
How to choose a gas boiler - the best models and manufacturers. Review of modern boilers and options for their application (145 photos and videos)
Do-it-yourself tapping technology
Let us consider step by step the process of connecting to a pipeline under pressure:
Excavation
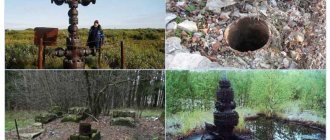
It is most profitable to make a tie-in in an already existing well - then the excavation work will be limited to constructing a trench leading to the house.
If this is not possible, you will have to build the well yourself. At the site of the future tie-in, it is necessary to dig a recess with plan dimensions of 1.5 x 1.5 m and such a depth that the bottom is 50 cm below the highway.
At first, you can use earth-moving equipment, but upon reaching the warning tape, which is usually buried 30-50 cm above the pipe, excavation will need to be done manually - using a regular shovel.
The depth of the trench between the insertion point and the house should be such that the pipe laid on a 15-centimeter sand cushion is below the freezing depth of the soil. The optimal width is 50 cm. It is necessary to provide for the possibility of draining this section of the pipeline: usually a trench is dug with a slight slope towards the main line, and a tee with a drain valve is installed in the well immediately after the shut-off valve.
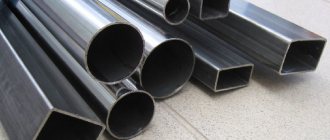
It is better to use polyethylene pipes - they are cheap, have a smoother wall than steel and are not afraid of corrosion.
Pipeline tapping
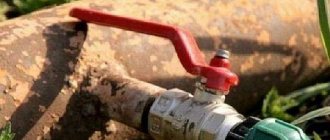
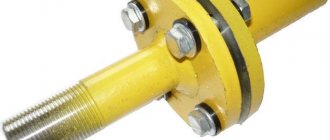
To connect to an existing water supply, a special collapsible clamp is used - the so-called saddle.
It consists of a pair of half-cylinders with eyes for bolts and a seal. A pipe with a thread or flange for installing a shut-off valve is welded to one of the half-cylinders.
The saddle can be installed on a polymer pipe without any preparatory operations.
The steel pipe must first be cleaned of paint and treated with sandpaper.
On a cast iron pipe at the drilling site, it is necessary to first remove the top layer using a grinder, which is strengthened by heat treatment (hardening).
Next, a seal is placed on the pipe and a saddle is installed, tightening both halves with bolts.
All that remains is to attach a ball valve to the saddle pipe, the handle of which is set to the “open” position, drill a hole in the pipe through it using a crown and quickly close this valve.
A carbide bit is used to drill a cast iron pipe, but any bit will do for a polymer pipe. One crown is not enough to pierce a cast iron wall - usually the tool has to be changed 3 or 4 times.
To prevent water splashing from the pipe from getting onto the electric drill, the latter must be covered with a rubber or cardboard screen.
Construction of a well (caisson)
In principle, the insert can simply be covered with soil. But a more correct solution would be to install a caisson around it - in the future this will simplify the operation and maintenance of the pipeline.
The construction of the caisson is carried out in the following order:
- The bottom of the excavation is lowered another 50–70 cm, after which a crushed stone or gravel cushion 20 cm thick is placed on it with a sheet of roofing material laid on top.
- A 100 mm thick concrete gravy is placed on top of the roofing material, for reinforcement of which a mesh of 4 mm reinforcing wire is used.
- After 4 days (by this time the concrete has gained 70% strength), the walls of the well are built on a concrete slab from foundation blocks, coating them on the outside with a waterproofing compound.
- The top of the well is covered with a slab with a hole wide enough to penetrate inside, after which they begin to backfill the excavation.
After the tests, the pipe leading to the house is also backfilled. First - with sand (about 100 mm), then - with a layer of soil of 20 - 40 cm and laying a warning plastic or metal tape on top of it. After this, the trench is finally backfilled.
Ready caisson
Dismantling
As already mentioned, there is a high degree of risk in this process, since the base of the faucet may crack or even burst when unscrewed. This occurs due to strong water pressure.
The valve handle can be removed by unscrewing the fastening nut. Then you need to adjust the gas or adjustable wrench to the size of the faucet edges.
After adjusting the tool, you need to unscrew the tap in the opposite direction clockwise, while holding the riser outlet. The final turns of the thread can be unscrewed by hand, because further the unscrewing resistance will become easier.
Clamps and saddles - overview of popular models
In addition to the usual saddle for inserting into the water supply system, described above, the following fittings are used:
- Drilling clamp for tapping into a water supply system: has the same design as a regular saddle, only the pipe additionally has a mechanism for rotating the crown.
- Plastic clamp for electric welding: used for inserting into a plastic water supply system. It consists of two halves, but there are no eyelets for bolts: resistive elements are embedded in the plastic, which, when an electric current is passed through them, heat up and melt it. As a result, both halves of the saddle are welded together and welded to the pipe - the need for a seal and fasteners completely disappears. Plastic weld clamps are usually also equipped with a drill drive.
- Saddle for pipes with a large diameter: the principle of the device is the same, only the back part of the saddle is already equipped with studs, so you don’t have to mess with bolts. The studs are threaded into the holes in the second part of the clamp (it, as usual, is equipped with a pipe), then the nuts are screwed onto them. The device is designed in such a way that one model can be used on pipes of several diameters.
The most popular are models equipped with a drilling mechanism.
Basement flooding is a serious problem, because constant erosion of the foundation can lead to its destruction. A pump for pumping water out of the basement will help solve the problem.
Read on to learn how the thermal insulation of a heating system works.
You will learn how to properly install plastic pipes with your own hands by following this link: https://aquacomm.ru/vodosnabzenie/zagorodnyie-doma-v/avtonomnoe-vodosnabzhenie/trubyi/plastikovyie/montazh/svoimi-rukami.html. Detailed information on the installation of PVC, polypropylene and other types of pipes.
How much does it cost to install a water pipe?
The price of a saddle depends on its material and size.
Thus, an ordinary plastic clamp for a pipe with a diameter of 32 mm costs about 100 rubles, and a product made of the same material for a pipe with a diameter of up to 75 mm costs about 250 rubles. A stainless steel clamp with a flange and 6 studs included will cost 9 – 10.5 thousand rubles.
The price level for plastic prefabricated clamps for electric welding can be judged by the products of the Eurostandard SPA company. A product with a diameter of 40 mm costs 25 euros, for 250 mm – 80 euros.
Invited specialists charge an average of 2 – 2.5 thousand rubles for pressure tapping.
To avoid freezing of water in the water supply in winter, it is advisable to build a caisson for the well. We will discuss types of caissons and do-it-yourself installation in the next topic.
You will find instructions for making a pipe bender with your own hands in this article. Product drawing and review of models.
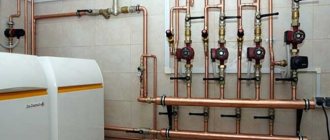
Installation
Next, you need to screw on the new faucet by hand, making sure that the valve is open. After making a couple of turns, the joint can be pulled together using a key.
Then you need to close the valve all the way, aligning its location in relation to the rest of the structure, and turn the valve handle. The quality of the connection will be assessed by the absence of drops on the threaded joints.