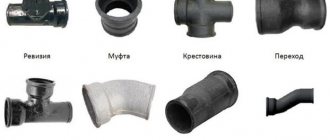
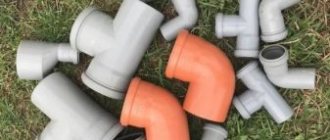
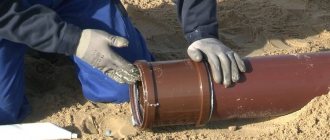
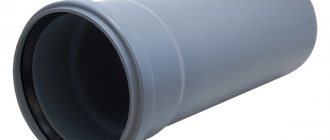
A pipe with a socket is used to connect pipelines to each other.
Connecting pipes using a socket.
The meaning of the device is that the surfaces to be connected are made of a conical shape and are provided with an adhesive layer, and the split retaining ring is combined with the conical part of the socket. A socket connection of pipes is used when installing corrosion-resistant pipelines made of plastic, metal (steel, cast iron, etc.) and fiberglass materials.
Use of glue in installation
Connecting a pipe to a tee using glue.
One of the options for such installation is a connection using glue, when the end of one pipe is placed in the socket of another, and the alignment occurs along conical surfaces. The reliability and tightness of this interface completely depends on the adhesive base, which is the main disadvantage. Long-term exposure and the influence of tensile forces of the moving working medium leads to a weakening of the adhesive resistance of the adhesive layer to the substrate, since over time the process of diffusion of this medium into the polymer base of the adhesive occurs.
Another feature is that in the process of installing steel pipes with conical mating surfaces with an adhesive component, a clamping device is required, which will create the necessary pressure in the adhesive layer and fix the connection of the pipes until the glue reaches the required hardness and strength. This point negatively affects labor productivity during pipeline installation.
Preparatory work
To lay a pipeline for drainage, you will need special equipment to lay a channel of the desired configuration in floors, walls and furniture.
It is necessary to use the following tools and devices:
- oil or diamond level;
- a hammer drill with a set of drills, impact bits and a diamond bit;
- roulette;
- hammer;
- chisel
- marker;
- Silicone Grease.
Preparation for sewer installation begins with drawing a horizontal line from the entrance of the tee to the riser to all water consumers. After this, marks are made every 50 cm corresponding to the required slope. To avoid mistakes, during assembly, supports are placed on which the pipes will be laid. Holes are drilled in the walls into which clamps with a diameter corresponding to the pipes are installed. Finally, holes are drilled, the bed is cleared and construction debris is removed.
Application of retaining ring
A similar concept (prototype) is the option when bell-shaped pipes with smooth ends, a retaining ring and a clamping element made in the form of a union nut are connected. The reliability of this installation is due to the alignment of the smooth end of the pipe with the protrusion in the socket.
The smooth end must be forcefully inserted into the socket and secured using a locking ring, which in turn is pressed against the socket with a union nut. As a result, the retaining ring, with the outer surface of the cone, comes into contact with the surface of the bell cone at the inlet on one side, and on the other, with the inner surface of the union nut cone.
Under the action of axial compression on the conical surfaces, the locking ring is subjected to deformation, as a result of which the protrusions on the inner surface of the locking ring from the socket side cut into the surface of the pipe and secure its smooth end with the socket. Also, during the process of radial deformation, the smooth end of the pipe is secured to the other end of the locking ring, where specially designed slots are made.
The connection in question has its negative sides:
- complexity;
- insufficient strength under the influence of longitudinal forces and internal pressure of the working environment;
- In addition, the retaining ring is a complex configuration, which adds complexity to installation. Based on the tolerances on the outer diameters of the pipeline fittings, the retaining ring is placed on the smooth end of the pipe with a gap, which means that in order to secure the smooth end when screwing on the union nut, plastic deformation of the ring is required both in the area of the protrusions on the inner surface and along the cross-section.
In order to ensure tightness in the socket joint, as noted earlier, the smooth end is inserted into the socket with an applied force, which results in deformation of the pipe along the contacting surfaces, but the locking ring will press the end of the pipe when screwing the nut only when it is deformed in the radial direction , for which it is necessary to apply very great efforts, which are practically unrealistic, especially when installing pipes of large diameters.
The main types of autonomous sewerage for a country house
Despite the fact that many consider cesspools to be a thing of the past, this type of autonomous sewage system is the easiest to build with your own hands.
An equally important argument in defense of cesspools is the fact that their internal arrangement has now changed.
Before you make a sewer system in your house like a cesspool, you need to find out the engineering and geological features of your site.
The easiest way to build the walls of a cesspool is from brickwork, with red ceramic brick being the most acceptable option.
If it is possible to use additional equipment, then you can build a cesspool from reinforced concrete rings. Experts recommend concreting the bottom of the cesspool, covering the pit with a slab with ventilation and a special inspection hatch.
Are you still undecided on how to make a sewer system in a private house yourself?
We recommend installing a local autonomous sewage system, for example, a septic tank.
This type of sewage system is especially relevant in those houses where people constantly live, and has gained particular popularity among Russians.
The septic tank is quite simple and reliable to use; it can be easily installed on your own by following the step-by-step installation guide (it is included when purchasing a septic tank, for example, their polypropylene).
In addition, septic tanks do not require frequent cleaning, so you will spend less money on calling a sewer truck.
Modern septic tanks are even three-chamber; they have a very high degree of purification of wastewater and domestic water thanks to elements of the aeration system and biofilters.
Sewerage in a private house video will help you decide which type of autonomous sewer system is most suitable for your home and site.
Sequence of actions during the construction of an individual sewer system
Before making a sewer system in the house, you need to decide on the initial steps:
Determine the area where the sewer well (cesspool or septic tank) will be located.
Important: the drainage well must be located below the level of the house. Determine where the sewer exits the house. Carefully inspect the exit point of the collector pipe. Please note that at this point all drains and used water from all plumbing fixtures in your home will accumulate (kitchen sink, toilet, bathtub, boiler). Inspection of the place where water enters from the entire house is necessary in order to to ensure that the collector is installed correctly (there should be no distortions or deviations). Only after a preliminary inspection has been carried out can a preliminary design for the sewer system of a private house be drawn up. Please note: the external sewer system is usually straight, the internal sewer system usually has many bends and angles. Therefore, when drawing up its project, it is very important to calculate all the dimensions of the pipes, their bends, and so on. Only after everything has been thought out and calculated can you begin to purchase the necessary materials. We begin the installation of external and internal sewerage systems.
Connection and its features
The purpose of studying and developing the socket connection system is to simplify and increase reliability under the influence of longitudinal forces and internal pressure of the working environment.
The technical result is due to the fact that in the pipeline connection under consideration, a slip-on flange with a cone-shaped surface located at the smooth end, and a locking element with corresponding projections and slots, as well as the contacting surfaces of the pipes, are made of a conical shape and equipped with an adhesive layer. The locking element, in turn, on the side of the slots, mates with the conical part of the bell and is made in split form.
The specified socket connection is distinguished by the fact that all contacting surfaces are made in the form of a cone and are equipped with an adhesive layer, as well as the function and design of a locking element.
A socket connection with a rubber sealing ring is used as the main type when installing internal sewer systems. Tightness, as in previous cases, is determined by clamping the sealing element between the surfaces of the socket and the smooth end.
Socket connection of sewer pipes directed against the movement of wastewater.
Rubber seals with or without specially designed liners facilitate the installation of durable and airtight connections.
A rubber ring allows you to compensate for the mismatch of parts and their connection, however, if the sealing ring is deformed unevenly, leaks can form. That is why, when installing hidden pipes, in particular under a screed, special attention should be paid to ensure that the curvature of the axis in the component sections of the pipeline is no greater than the thickness of the pipe wall for each m of sewer systems.
Many manufacturers produce tees and elbows with an angle of 87° instead of 90°, which avoids ring distortion. To ensure that the ring is not damaged during installation, a chamfer is made on the inserted end and lubricated with a specially designed silicone lubricant (at worst, soap or glycerin, but in no case with oils).
Before connecting sewer pipes, you should make sure that the edge of the pipe is equipped with a chamfer, and the cast iron socket pipes are equipped with an O-ring, which must first be cleaned of contaminants. Lubricant is applied to the smooth end or shaped part. Then the smooth edge is placed into the socket until it stops; at this stage it is necessary to mark the place of contact between the smooth edge and the socket. The pipe is pulled back 0.9 - 1.1 cm in relation to the position of the mark. This gap will make it possible to compensate for changes in the length of the cast iron socket pipe as a result of temperature influences, and, accordingly, prevent internal stresses in sewer systems.
Purpose
Looking at the socket of a sewer pipe, you can see not only the expansion in the form of a funnel. The extended part of modern products has a rubber seal with a metal retaining ring. The socket connection is designed for the following:
- Simple and fast assembly of pipelines.
- Hermetic connection of individual sections.
- Joining products from different materials.
- Simple replacement of outdated elements of the sewer system.
- Easy dismantling.
- Increasing the strength of the pipeline at joints.
Resistance socket welding
Connecting sewer steel pipes using resistance socket welding involves preheating the products in a bath or electric furnace and forming a socket using a specially designed mandrel.
Socket resistance welding.
In this situation, the internal diameter of the completed socket should be less than the external one.
Socket welding is carried out using a heating element consisting of a mandrel and serves to melt the inner surface of the socket, and a sleeve, which contributes to the melting of the outer area of the end of the pipeline fittings. For pipes and parts of each diameter, a separate special element or a set of mandrels and sleeves is required.
The working surface of the heating element must be covered with a fluoroplastic film or other composition that can prevent the adhesion of molten materials.
Socket sizes
Communications are divided into groups according to their intended purpose. Accordingly, they differ in size and main characteristics.
The dimensions of a sewer pipe with a socket for internal systems are presented in the table:
| Pipe diameter, or DN (internal diameter), mm | Internal diameter of the socket, mm |
| 32 | 32,3 |
| 40 | 40,3 |
| 50 | 50,3 |
| 75 | 75,4 |
| 100 | 100,4 |
Dimensions of communications for external systems:
| Pipe internal diameter, mm | Internal diameter of the socket, mm |
| 110 | 110,4 |
| 160 | 160,5 |
| 200 | 200,6 |
| 250 | 250,8 |
| 315 | 316 |
| 400 | 401,2 |
| 500 | 501,5 |
| 300 | 631,9 |
The most common designs: sewer pipe 32 mm (white), 50 mm (gray). These options are used for laying internal systems. For external drainage - PP sewer pipe bell-shaped 110 mm, and another 160, 200, 250 mm.
A common manufacturer of sewer pipes is Wavin Asto.
Installation of sewer pipes
The connection of sewer pipes using the socket welding method is carried out as follows.
- The element is heated by electric current, a gas burner or a blowtorch to the temperature required in a particular case (for steel, cast iron, plastic and other pipes).
- Temperature regulation is carried out using a thermal pencil, thermostat or pipe material (in the process of mating with the heated surface of the element, it melts, but does not burn, i.e. there is no smoke).
- At the ends of the pipeline fittings, a chamfer is removed, amounting to 1/3 of the pipe wall thickness, at an angle of 45 °.
- A restrictive clamp is installed on the smooth end at a distance equal to the depth of the socket, plus 2 mm.
- The heater mandrel is inserted into the socket, and the sleeve is pushed onto the smooth edge until it stops. The heating period depends on the material and wall thickness of the pipeline fittings.
- The molten parts are simultaneously removed from the sleeve and mandrel and connected to each other within 2-3 seconds.
- The parts are kept under load for about 30 seconds until the material completely hardens.
At the end of the process, the parts must under no circumstances be rotated relative to each other.
Installation locations
Depending on the size of the socket, the installation location is determined:
- For connections to bathtubs, sinks, and shower cabins, sockets with a diameter of 50 mm are used.
- The supply pipe elements to the toilets must have an extension of 90 mm.
- The sewer outlet pipe has an expansion diameter of 110 mm.
- The external network for draining domestic wastewater is assembled from elements with an expansion of 250-300 mm.
Also read: How to hide sewer pipes in the kitchen - 6 steps
External sewerage
Sewage system diagram
External sewerage elements include settling tanks, wells and supply pipes. The creation time and operating features directly depend on the type of system you choose.
The placement of any of the selected options is influenced by the following factors:
- at what depth is wastewater
- relief of the local area
- How much does the soil freeze in winter?
- presence of wells on site
- soil structure
- passage of other communications along the site
Installation of a drain well
Sewage well
Installation of a drain well
The simplest option for external sewerage is a drain well. How to make it yourself?
- Determine the place where to dig a hole for the well. The well should be located slightly lower than the house
- Dig a supply channel from the house to the pit and the pit itself Select material for lining the walls of the tank
- Assemble a well, run a pipe from the house
- Fill the ditch and install a lid for the tank
The most common materials for tank walls:
- ready-made concrete rings or blocks. Lifting equipment is required for installation of such structures.
- monolithic structures. In this case, the prepared pit is filled with concrete using metal reinforcement. Monolithic septic compartments emerge.
The drain well can be sealed and screened. If you choose a sealed one, then the bottom of the pit will also need to be sealed. As a rule, crushed stone or pebbles are poured into the bottom of sifting wells so that they allow part of the wastewater to pass into the soil.
Septic tank installation
Septic tank installation
Septic tank installation
Before starting the construction of a septic tank, you need to prepare its design. The project must take into account the volume of the future structure and take into account construction and sanitary standards. Those who encounter a similar problem for the first time are advised to seek help in drawing up a project from specialists. But you can try to make the project yourself
The most important part of the preparation is calculating the volume of the septic tank compartments. In order for wastewater treatment to be carried out as efficiently as possible, the wastewater must remain in the drain chamber for 3 days. You need to calculate the volume of liquid drained according to the number of people living in the house
Preparation of pits and ditches. Digging a pit for cameras and a ditch from the house for a pipe
We determine the material for septic chambers
Assembly of cameras. We install cameras in the pit
Pay special attention to the tightness of the compartments, the joints must be sealed and sealed well
Connection. At the final stage, we connect the pipes to the septic tank and conduct a test. It is necessary to take into account the standards for placing wastewater structures on a personal plot
The most common materials for septic chambers:
- ready-made concrete rings or blocks. Lifting equipment is required for installation of such structures.
- monolithic structures. In this case, the prepared pit is filled with concrete using metal reinforcement. Monolithic septic compartments are coming out
Water filter for the dacha: flow, main and other filters (Photo & Video) + Reviews
Ceramic
Ceramic pipes used in non-pressure sewage systems are connected into a socket or using a coupling. Product parameters:
- length - up to 1,500 mm;
- wall thickness - 20–40 mm;
- diameter - 100–600 mm;
- load resistance - 240–350 MPa;
- moisture absorption - 7.5–8%;
- resistance to aggressive environments - 90–95%.
Standards: GOST 286-82. The inner surface of the products is coated with a special glaze that ensures resistance to chemicals. 5 notches are made on the inner surface of the socket, and the same notches are made on the smooth end of the pipe.
Ceramic
Low water absorption, high resistance to corrosion, chemically active substances, and mechanical loads ensure the possibility of using products in adverse conditions:
- in sewer networks laid in places with high levels of aggressive groundwater;
- in production networks transporting chemically active wastewater;
- in the construction of sewer networks laid near highways.
Flaws:
- short length - complicates and increases the cost of installation;
- heavy weight - complicates and increases the cost of installation (requires the installation of a cushion and the use of equipment) and transportation;
- fragility;
- high cost;
- low frost resistance - requires additional thermal insulation work.
Ceramic is very difficult to cut, which again complicates installation. The length of the elements must be calculated at the design stage to avoid cutting.
Installation of joints of ceramic pipes
The use of ceramic pipes in the sewage system of a private house is in the vast majority of cases impractical.
