- Label information
- Elements of smoke exhaust systems
- Types of installation
To prevent carbon monoxide from accumulating in the steam room, it is necessary to consider smoke removal for the bath complex during the construction stage. Correctly selected and installed chimneys determine the level of comfort in the steam room even more than the structure itself. In this article we will tell you which pipe is best for a stove chimney in a bathhouse and what to look for when choosing materials and installation method.
Chimney design features
A properly constructed chimney for a bath will remove combustion products, ensure heat preservation and fire safety. It can be of two types - external and internal.
External
External chimneys were invented in America. Their main advantage is the high degree of design safety.
In this option, the pipe is connected to the stove, and the chimney exits through the wall to the street. Disadvantages of this system:
- higher fuel consumption;
- the need for insulation of pipes located on the street.
Interior
Internal chimneys are located vertically, therefore, good draft is ensured. The advantage of this design is the rapid heating of the bath, maintaining heat in the room, as well as low fuel consumption. The disadvantages will be:
- complexity of installation;
- poor fire protection of the steam room;
- difficulties in repair and maintenance;
- danger of internal smoke.
Often combined chimneys are built - brickwork with a metal pipe mounted inside.
Types of stove chimneys
Chimneys for baths are different:
- according to the material of manufacture;
- according to design features and installation location.
For many years, sauna stove chimneys were traditionally made from baked bricks. Nowadays, metal products are becoming increasingly popular.
Depending on their location and design, they come in two types:
- chimneys installed indoors and passing through the ceiling and roof;
- structures brought out through the wall and rising along it from the outside of the building (read: “How to make a chimney in a bathhouse through a wall - device options”).
The best option is selected taking into account the advantages and disadvantages of each type of smoke exhaust pipe.
Elements of the chimney system
The main part of the chimney system is the stove pipe. There are 3 types with different sizes - 250, 500, 1000 mm in diameter.
The next element of the system is the throttle valve. It is used to adjust traction. It is a pipe with a built-in butterfly valve and an outward handle.
For installation you will also need tees, a cover, thermal insulation, a condensate collector, connections, an ash pan, special adapters, and various protective elements. Some of them are mandatory, while others serve as an addition to the combustion product removal system.
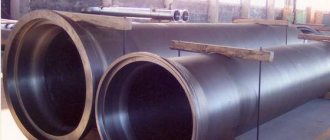
Ferrous metal pipes
Ferrous metal is used extremely often in the manufacture of pipes. The main advantage is its low cost. It should be borne in mind that compared to brickwork, ferrous metal pipes are approximately 80% cheaper. However, it is worth considering a fairly large number of disadvantages:
- Heavy weight. Ferrous metal pipes, as a rule, are quite heavy. Therefore, the work of attaching it becomes significantly more complicated.
- High fire hazard. The walls of steel pipes heat up in a short time to a fairly high temperature. As a result, surrounding materials may heat up and catch fire.
- Fragility of the structure due to corrosion instability. As is well known, metals are susceptible to water, resulting in corrosion on the surface. Because of this, the metal begins to rot and the strength is significantly reduced.
In addition, do not forget that when the furnace heats up, a fairly large amount of condensate can form on the pipe. Such a system has many more disadvantages than advantages. However, one positive side often becomes decisive - if you need to save money, then ferrous metal pipes are more suitable than other materials.
Design safety
The bathhouse is an object of increased fire hazard. Therefore, when designing it, you need to select the right materials and equip the smoke exhaust system in accordance with all technical standards. The following can lead to trouble:
- improper arrangement of the passage of the chimney through the roof and ceiling;
- clogging with combustion waste (if cleaning was not done in a timely manner or if the hole was not provided for this);
- oven overheating.
The most reliable is the three-layer chimney design. The draft in it is created by heating the air between the middle and outer pipes. Thanks to this, the smoke from the burner moves upward and is replaced by fresh air. The outer shell in a multilayer pipe is most often made of lightweight concrete.
The pipe joints should not fall into the space between the ceiling and the roof. They are fastened with clamps and coated with sealant.
The outer pipe must exactly match the calculated size, otherwise the draft will be poor, and this will threaten the lives of bathhouse visitors.
Installation of internal metal chimneys
After the installation of the heaters is completed, they begin to arrange the chimney structure, performing work from the sauna stove pipe. This can be either the beginning of a metal chimney or a section of the smoke exhaust structure connecting the heating unit to a brick pipe.
Since chimneys come in two types, their installation is different. When the pipe is placed inside a bathhouse building, almost the entire structure is located vertically. The installation of individual elements is carried out in such a way that each part located above is placed on the one below. This method is called “smoke” installation.
When using sandwich pipes shown in the photo, they are installed differently, using the “condensate” method. Its essence is that to arrange the internal part of the system, the upper pipe is placed in the socket of the lower element. For the outer part of the structure, the “smoke” method is used.
Thanks to this chimney arrangement, the moisture accumulated in the pipe can freely flow down and enter the condensate collector, without touching the heat-insulating material, which, if there is an excess of moisture in it, loses its inherent properties.
The joints of the elements should be located so that the connection is not at the roof level, and also does not fall on the attic and interfloor ceilings. If the heating unit is planned to be installed in close proximity to wooden walls, they must be protected from fire or overheating. For this, heat-resistant materials are used, such as asbestos boards, which are fixed in two layers.
When installing samovar-type water heating tanks, they should be located near the combustion chamber, directly above it or in the attic, if hot water will need to be distributed not to one room, but to two - a washing room and a shower room.
Before you begin installing the pipes, their joints should be coated with heat-resistant sealant and, after completion of the work, additionally secured with special wide clamps.
When, when connecting individual parts of the chimney, significant gaps remain between them, the part that needs to be inserted is sealed. To do this, an asbestos cord is used to wrap the pipe.
The first section of the structure, attached to the unit’s branch pipe, cannot be made multilayer; it must be made of a single-walled metal pipe with special connections, in which there is a valve. This chimney adjustment element (damper) is used to create and maintain the required draft level while the bathhouse is warming up. After the combustion is completed, the valve allows the heating unit to retain thermal energy for a long time.
To make it easier to lay the pipe through the ceiling, it is advisable to use a box. The height of its walls should exceed the thickness of the barrier by 30–40 centimeters. A distance of at least 18–20 centimeters is left between the walls of the box and the pipe.
The installation procedure for this element is as follows:
- A square hole is cut in the ceiling so that a box fits into it, the lower part of which is fixed to the ceiling.
- Through a hole made in the bottom, the smoke exhaust pipe is led into the attic.
- Then the box is filled completely to the very top with heat-resistant material that is light in weight, for example, mineral wool or expanded clay of the middle fraction. The insulation must be laid as tightly as possible.
- In the attic, the box is covered with a metal lid equipped with a round hole. It is placed on the protruding part of the pipe.
As a rule, chimney elements are placed vertically in the attic, but sometimes they can get on the sheathing bars. In this case, a slight bend is made in the structure using bends.
When a pipe is laid through the roof of a building, a sheet of metal or asbestos is attached to the attic side. It should have a round or oval hole - it depends on the angle of the roof. Around the pipe, in order to protect the elements of the rafter system from possible fire, heat-resistant insulation should be laid using asbestos boards or mineral wool (read also: “How to insulate a pipe in a bathhouse - proven insulation methods”).
After the roofing material is laid, waterproofing measures are carried out, since moisture can sometimes get into the gaps between the roofing of the building and the pipe. An elastic element is placed on the pipe. It is fixed to the roof surface using moisture-resistant sealant, and then securely fastened using roofing fasteners. A protective umbrella is installed on top of the pipe - it will prevent various debris, dry leaves, branches, dust and precipitation from getting inside the structure.
Water tank on a pipe for a bath
When building a bathhouse, it is worth considering where hot water for washing will be supplied from. It is more advisable to install the water tank next to the air duct. The container will heat up as hot air passes through the pipe. Heat exchangers are made of cast iron, enameled and stainless steel. The most popular is the last option.
It can be installed near the stove and on a pipe passing through the attic of the bathhouse. The arrangement is similar, but in the attic it is easier to fill the tank with water. Since the heat exchanger is not located in the steam compartment, it is possible to connect a water supply with a tap from the pump. Water will be supplied to the tank automatically.
Rules for laying a brick chimney
Laying should begin at the top of the stove. A pre-installed pipe is installed on the stove. Brick laying is carried out as in the construction of walls, but there are a number of nuances:
- In order for the stove to provide heat properly and for the smoke to escape through the channels, you need to carefully monitor the level of the structure. You need to use a measuring device after each laid row.
- When building a brick chimney, just like a stove, it is necessary to use not the standard solution, which includes cement and sand, but add clay to the mixture. The proportions of the solution are: 2: 5: 1.
- The thickness of the solution layer should vary from 5 to 10 mm. An indicator equal to a centimeter is critical. If you exceed it, the masonry will collapse quite quickly;
- The joints between bricks must be carefully sealed. If this procedure is neglected, sparks may enter the room.
- Installation should be made exclusively from whole bricks. The use of quarters and halves may lead to the need to increase the solution consumption, which is unacceptable.
From the above, the following conclusion should be drawn: a brick chimney has a lot of undoubted advantages, but its installation is complicated by many factors. Therefore, it is unlikely that you will be able to install it yourself without having the appropriate experience.
Chimney materials
Before figuring out how to install a pipe in a bathhouse, it is important to find out which option will be preferable. The choice of materials for smoke exhaust depends on financial capabilities, technical conditions, fire safety requirements, as well as the aesthetic taste of the owners of the premises.
Brick
This material has been used in construction for a long time, and today it is as popular as before. Its advantages are:
- wide choice (it’s easy to choose the option that suits your design);
- attractive appearance;
- excellent heat transfer qualities;
- resistance to high temperatures;
- relatively low price, although there are cheaper options.
This material has a number of disadvantages: the risk of condensation accumulation, fragility, and the need to build a foundation.
Steel
When choosing a chimney for a bathhouse, many people prefer metal structures. They come in black iron or stainless steel. This option is the optimal solution due to the following advantages:
- aesthetic appearance;
- long service life;
- ease of installation;
- different prices for any wallet;
- light weight (no need to build a foundation);
- variety of designs.
They are also often used to line brick chimneys.
Ceramics
Ceramic pipes tolerate high temperatures well, are not exposed to alkalis, acids, and are not afraid of corrosion.
Soot and dust do not accumulate on the smooth outer and inner contours. However, this is a very expensive material, so it is not widespread in our country.
Glass
This is quite exotic and unusual, but the most effective option for a sauna stove. Glass is not afraid of corrosion, it is not only easy to clean, but also does not collect soot and dirt on the walls. It is not afraid of moisture, so a glass chimney is the safest and most reliable. Its installation is complex and requires professionalism. Another disadvantage is the extremely high cost of the system.
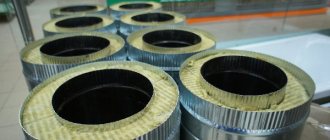
Sandwich pipe for sauna stove
The design consists of two pipes of different diameters, placed one inside the other, and the gap between them is filled with insulation that can withstand high temperatures. If you plan to install the structure yourself, then it is better to choose expanded clay, asbestos or mineral (basalt) wool as a thermal insulation material.
If you purchase ready-made sandwich pipes for a bathhouse, the work can be done much faster and easier.
External chimney type: advantages
If your steam room is not in the Far North, then the option of arranging a bathhouse with an external chimney has undoubted advantages over a bulky, expensive, difficult-to-install internal smoke exhaust channel.
The external type of chimney is so called because the pipe goes outside the room. The outlet is carried out from the stove horizontally through the wall. The vertical part is located on the street.
Advantages of the external type of chimney:
- High fire safety. The short length of the chimney in the room, one technological hole in the wall for exhaust, reduces the risk of fire by several times, in comparison with the installation of an internal chimney.
- Ease of installation. All components are assembled in stages and are sold ready-made. Installing an external pipe with your own hands does not require special skills in handling metal and does not require special tools.
- Small sizes. Since the main part of the pipe runs along the street, the room remains completely at the disposal of the steamer.
- Easy to select the desired pipe diameter and length. Pre-fabricated pipes are designed for use with specific stoves. A heating equipment consultant will help you choose the optimal diameter of the chimney pipe for your stove.
- Simplicity of installation of heat and waterproofing of wall openings. You can purchase a ready-made kit for arranging a technological hole in accordance with all rules and safety requirements. The kit includes a horizontal pipe section, two fittings (external, internal), a package with thermal insulation of the required type in the required quantity. The cost of a simple adapter of small diameter starts from 1000 rubles. The price of a branded stainless steel set reaches 3,500 rubles.
We recommend that you read: How to build a plasterboard box yourself to disguise pipes in a toilet?
Ready-made chimney kits are sold both completely and in separate segments. It is convenient to use ready-made sandwich pipes (with thermal insulation).
It is recommended to purchase mineral wool with a characteristic of at least 800 degrees. Mineral wool with a heat resistance of 200-300 degrees in a humid environment quickly becomes unusable, losing its thermal insulation properties.
Correct design of external and internal chimneys
How to properly make a smoke exhaust system.
Modern modules made of stainless steel or ceramics allow you to carry out the installation process yourself. The main thing is to comply with the necessary requirements:
- good draft in the system (if the design is not hermetically sealed and incorrect, a reverse draft will be created, which is dangerous to life and health);
- ensuring the safe operation of the chimney, all nuances must be taken into account during installation;
- aesthetic appearance (although this is not a matter of primary importance, the external and internal appearance of the house depends on it);
- durability of operation
In a proper air duct, soot and condensation should not accumulate on the outer and inner surfaces. A good chimney has low thermal conductivity. There are also requirements for the shape and cross-section of the system. It should not be less than that of the boiler or furnace.
The round channel is considered the best. It is easy to clean, the air escapes freely. An apron is mounted on the roof, serving as protection against precipitation.
Ceiling-passage unit for a bath
It's no secret that wooden, frame and even stone bathhouse buildings are often prone to fires. They burn primarily due to homemade chimneys. Chimneys for bathhouses, and most often the roof and ceiling passages, remain the main threat, regardless of what material was chosen for the manufacture of the pipe.
When choosing a chimney for a stove in a bathhouse, you should take into account the equipment features of the transition units in the ceiling slab:
- Brick pipe. It is used everywhere for stone stoves of large mass and size, usually Russian, Finnish and Dutch models. The transition unit is assembled in the form of a reinforcing belt during the process of laying the chimney box. With professional brick laying and good materials, the correct chimney for a bathhouse can outlast the stove and bathhouse building itself;
- Stainless steel chimneys in sandwich design and conventional single-body metal pipes made of alloy metal. To construct the transition unit, an additional belt made of basalt fiber is used, placed in a wooden box;
- Industrial ceramic pipes. They are easy to install and connect to the sauna stove, and do not require as frequent cleaning as in the case of brick pipes. The floor passage unit is made in the form of overhead couplings.
Any other options for making chimneys are considered either insufficiently effective or unsafe in a bathhouse. For example, the scheme of making a composite chimney made of brick and asbestos-cement pipe, which was popular 20-25 years ago, is today considered unsafe.
Important! If there is a choice, then it is best to make chimney pipes for wood-burning and briquette sauna stoves in the form of an integral structure without seals or joints. Any, even a very small crack or gap can cause a leak of hot carbon monoxide and, as a result, lead to a fire.
For example, a brick chimney in a bathhouse, the heaviest and most complex of all existing structures, can rightfully be considered the safest, if, of course, the pipe is laid according to all the rules of stove science. The roof or ceiling passage unit is reliably protected by a collar; if you have not skimped on bricks and mortar, then the risk of leakage of combustion products is minimal. For the same reason, composite structures should be abandoned when an asbestos-cement pipe is added to the brick base for the chimney in the bathhouse.
Economical and correct ways to arrange a passage in a bathhouse
In addition, when choosing a specific chimney design, you must remember that you will have to clean it regularly, especially if the stove firebox is made of ordinary red brick and is designed only for wood fuel. Especially if, to speed up the process of heating the bathhouse, the owners, without thinking, use resinous firewood. Deposited soot is the cause of most problems with poor draft, prolonged heating and the formation of black soot streams that appear as black spots on the ceiling of the bathhouse.
Passage device
Structurally, the installation scheme for passage units, whether for brick or metal or ceramic chimneys, is approximately the same. The nuances of the device may depend on the nature of the ceiling and the materials used.
The passage unit consists of three main parts:
- Supporting box made of metal;
- Thermal insulation that closes the gap between the ceiling parts and the surface of the chimney pipe;
- The insulating liner in the bathhouse most often uses a two-layer version, the inner sublayer is made with a stripe of basalt cardboard, for the outer layer lining or wooden panels are used.
The box can also be made of wood if the chimney pipe is made according to a “sandwich” design with a thermally insulating fiber layer at least 80 mm thick. In this case, the maximum temperature of the outer surface should not be higher than 180°C. This is the most important chimney parameter regarding the safety of the bathhouse.
Even a sandwich requires compressed fiber insulation
How to choose
The degree of heating of a chimney at maximum heat load is a rather arbitrary thing. For example, for a metal and ceramic pipe, the surface temperature of the chimney can easily reach 400-600°C.
The chimney at the bathhouse stove is -700°C, on the ceiling – 550-600°C
It all depends on the design of the sauna stove, the height and level of draft in the channel, so it is impossible to guess how hot the outer surface will be. Therefore, the heating of the chimney is checked with a torch during a full “run” of the bathhouse stove, loading the firebox with the driest birch firewood. If a chip smokes on contact, it means more than 200°C; if it catches fire, then it’s 350-400°C. You can measure it more accurately and safely with a household IR non-contact thermometer, but why is this needed at all?
Firstly, there are restrictions SNiP No. 2.04.05-91, which generally prohibit the operation of stoves in a bathhouse, the chimneys of which overheat at the passage points up to 400 ° C. Secondly, the size of the box and the distance from the pipe surface to the bathhouse ceiling parts depend on the chimney material and operating temperature.
For example, for a brick pipe, combustible elements must be located at a distance of at least 130 mm. If the channel size is 150x150 mm, then the size of the wooden box must be at least 55x55 cm.
For a ceramic pipe, the distance from the surface of the chimney must be at least 25 cm; without insulation, the distance can be reduced to 13 cm when using thermal insulation and lining made of chimney profile bricks. Similar conditions exist for stainless steel chimneys.
For example, for a standard 15 kW sauna stove, the recommended internal diameter of the chimney for a sauna stove will be 15x15 cm or 200 cm2.
It is clear that for a wooden ceiling in a bathhouse it would be more convenient to install a wooden box; it is easier to manufacture and attach to the ceiling. In addition, it is possible to precisely adjust the box body to the size of the bathhouse ceiling without additional costs or alterations.
Box with backfill thermal insulation
Thermal insulation inside the box
The simplest option for thermal insulation is basalt fiber; it does not burn and can withstand prolonged heating at high pipe temperatures. The material is produced in the form of thick panels or thinner corrugated panels, which are most often used for thermal insulation of ceramic and brick chimneys.
Bath chimney with expanded clay protection
All other types of artificial fiber are either unsuitable in terms of water absorption or phenol content. For example, mineral fiber can easily fail after absorbing condensation. Household insulation used for roofs and walls of frame bathhouses is also not suitable for thermal insulation. Due to overheating, such material quickly loses its fiber strength and gradually turns into dust.
Granular vermiculite can be offered as a fill-in thermal insulator. Expanded clay or baked clay holds heat less well, but is quite suitable for thermal insulation of chimneys in bathhouses with a concrete floor.
System design
Before presenting a step-by-step guide to equipping a chimney with your own hands in a bathhouse, let’s note the main points of the device:
- correct choice of pipe diameter and design shape;
- optimal placement location (closer to the inner wall of the bathhouse, this will ensure good thermal insulation);
- chimney height (at least 4.5 meters);
- the pipe must rise above the roof by at least 50 cm;
- the junction with the roof is carefully insulated;
- a valve (gate) must be installed in the system, which will allow you to regulate the draft;
- the wall next to the chimney is protected with non-combustible materials;
- the outer part of the structure is whitened or painted, then if the seal is broken in the places where smoke passes through, the paint will become darker.
How to vent a chimney through the ceiling
Arrangement of the passage of the chimney through the ceiling is a crucial moment. Fires often occur due to improper installation. According to safety regulations, direct contact of a hot pipe with flammable materials must be avoided. For this purpose, a special unit is constructed in the form of a box made of non-flammable galvanized or stainless metal.
All work must be performed in accordance with regulations.
You can make such a unit yourself. The dimensions of the iron sheet must exceed the size of the cutout for the pipe.
How to mount a wall crossing
If the outer wall of the bathhouse is made of brick or other non-combustible material, then installation of the passage hole is easy. A round through hole is cut out, into which a metal sleeve is then inserted.
You can do without it if the opening is drilled perfectly round to the outer size of the sandwich. It will also not be possible to install a sleeve when the chimney passes through the wall at an angle other than 90°.
There should be no joints in the thickness of the wall. A pipe is inserted into the hole, and the space around it is filled with a fire-resistant seal. All that remains is to install and attach it to the vertical section. If the bathhouse is built of wood, then you should follow the same rules as when installing a ceiling-passage assembly.
How to choose the size and shape of a chimney
The most optimal pipe configuration for a chimney is a cylinder. This shape will not create obstacles for smoke to escape and less soot will be deposited on the walls.
The external design, in addition to practical, has a decorative value. It is done in such a way as not to disrupt the overall design of the structure.
Pipe diameter
The cross-section of the chimney depends on the power of the stove and is strictly specified in SNiPs. Below are written the main dimensions of the exhaust vent depending on the power of the oven:
- 140×140 mm for furnaces up to 3.5 kW;
- 140×200 mm for furnaces 3.5 - 5.2 kW;
- 140x270 mm for furnaces 5.2 - 7.2 kW.
The diameter should not be less than the outlet of the furnace or boiler.
Pipe height
The height of the chimney is calculated taking into account the height of the building, the type of roof, and the size of neighboring buildings. When designing, it is especially important to take into account the height of the pipe located above the roof of the building. So, according to SNiPs, it should rise above the roof no less than:
- 0.5 m above the ridge when the pipe is located at a distance of up to 1.5 m from the ridge below;
- level or slightly above the ridge, if it is located at a distance of 1.5 - 3 m from the ridge downwards;
- at a distance of more than 3 m from the ridge, the chimney pipe should be at the same level or slightly higher than a line drawn down from the ridge, at an angle of 10° to the horizontal;
- the height of the ventilation duct for flat roofs is 1 m;
- if the pipe is 1.5 m above the roof level, it must be additionally secured with guy wires.
The pipe joints should not fall into the space between the ceiling and the roof. They are fastened with clamps and coated with sealant. The outer pipe must exactly match the design size, otherwise the draft will be poor.
Basic rules and regulations
Before insulating a pipe in a bathhouse from the ceiling, you should study the following SNiP requirements:
- To ensure optimal draft force, a chimney pipe with a height of at least 5 m should be erected;
- A minimum distance of 250 mm must be maintained between the chimney pipe and the nearest combustible elements;
- If materials with insufficient fire protection are used for roofing, a spark arrester must be installed;
- A certain distance must be maintained between the upper stove ceiling and the ceiling: for metal pipes - more than 1.5 m, for brick chimneys - 0.5 m.
Do-it-yourself smoke exhaust device
How to make a chimney without the help of specialists? Before taking on such a complex job, consider all the pros and cons of such an installation. After all, the safety of bathhouse visitors will depend on the correct operation of the system!
When starting to install a pipe in a bathhouse, first of all you need to buy or make all the elements of the chimney structure yourself. You can make a pipe with your own hands only with a special tool and experience in this matter. It is much easier to buy ready-made parts and assemble the entire system from them. This type of work is within the capabilities of anyone who knows how and likes to do all the construction work themselves.
What tools and materials will be needed
For installation, prepare the following tool:
- jigsaw;
- chisel;
- Bulgarian;
- screwdriver;
- screwdriver;
- level;
- roulette.
Before assembling the structure, you will need the following materials:
- clamps for securing joints;
- a head that serves as protection from precipitation;
- elements for creating a transition through the ceiling and roof structure;
- insulation materials;
- tees and adapters necessary to organize corners in the smoke path.
Before leading the bathhouse pipe through the roof or wall, also prepare in advance metal protective sheets that cover part of the wall and ceiling from exposure to high temperatures.
Chimney installation sequence
Think over the installation diagram in advance. It will take place in several stages. First of all, holes are made in the ceiling and roof equal to the size of the pipe plus ten centimeters.
If the distance between the attic floor and the roof is more than 1.5 meters, then a unloading unit is installed on the attic floor.
Preparing holes for passage
The types of chimney passages can be as follows: through a wall, ceiling, roof. When installing metal, ceramic or sandwich pipes, first prepare a passage hole. The place where it should pass through the roof will be determined. The size corresponding to the installation of the roof trim is marked, and an opening is cut in the ceiling from the inside of the roof.
If necessary, beams are laid that will strengthen the structure and support the ceiling as well as the roof. Then the passage units are installed outside (box in the ceiling).
Chimney protection box
This unit is designed to lead the chimney through the roof or ceiling. Most often, galvanized iron, stainless steel, copper and profiled sheets are used to make boxes.
These materials have properties such as resistance to increased moisture, temperature changes and the absence of corrosive processes, as well as a long service life. A protective box is made according to dimensions that are removed from the finished chimney or according to pre-prepared drawings.
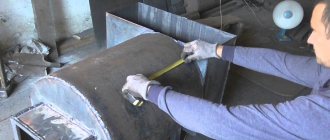
Assembly Tips
After constructing the chimney, as well as some time of use, it is important to take care of regular cleaning of the system. The most proven way to clean a chimney is to use mechanical tools.
Special brushes, weights, and in some cases a crowbar and a sledgehammer are suitable for this.
Working as a chimney sweep is a dirty job, so everything is taken out of the bathhouse in advance, the surfaces are covered with newspapers or film:
The simplest method is to use a special brush that can be used to clean the chimney. Simply insert the brush into the pipe, then gently push it upward until the resistance due to accumulated soot disappears. It should not be rotated around its axis, otherwise there is a risk that it will get stuck in the pipe and will have to be removed in parts. Another effective method of cleaning a chimney is burning aspen wood. The method will help with a small amount of soot on the surface of the pipe. When burning aspen logs, a better traction force is created, which is capable of removing soot from the chimney.
- Potato skins have similar properties. But to prepare the required amount of material, you will have to get serious about cleaning more than one kilogram of vegetables.
- Modern methods of protecting pipes from soot using chemicals have become common in use. Modern preparations include special components that, when burned, carry away soot. The components can act as a soot separator; as a result, it will fall off the pipe walls itself.
It is believed that the best time to clean a chimney is after rain. In a humid environment it is easier to maintain the pipe. Timely cleaning of pipes will be the key to high-quality combustion of firewood. This will keep the bath warm. To learn how to make the right chimney for a bathhouse, watch the video below.
First, about brick structures, which are a continuation of the furnace masonry. The passage unit, called cutting, is performed by expanding the masonry to standard dimensions, as shown in the diagram above. It turns out that when crossing the ceiling, it is necessary to maintain a wall thickness of one and a half bricks (380 mm), and a roofing thickness of 1 brick (250 mm).
Steel pipes for exhaust gases are usually assembled from sections inserted one into the other. Moreover, the chimney must be installed in such a way that the condensate inside the flue can flow down without hindrance. That is, the upper section is inserted into the lower one, this is called a “condensate” assembly. As for modular sandwiches, the inner pipe of the inserted upper section should fit into the lower one, and the outer one should wrap around the casing of the lower one from the outside. In this way, sediments are removed and quietly flow to the ground.
- Be sure to use a ceiling passage box, even if you are using a sandwich. Fill it with expanded clay, foam glass or mineral wool. Do not fill the space around the pipe with earth, especially sand. Sand tends to get very hot and retain heat for a long time.
- The most optimal chimney height is 4.5-5 meters. Try to stick to these parameters.
- The upper edge of the pipe should rise above the ridge by at least 50 centimeters. But, if the roof is flat, then the height here should be at least a meter. For large chimney heights, special guy wires are installed.
- In a steam room, if the pipe passes near a wall or partition, then a protective screen must be installed on the wall. It can be in the form of stainless steel or basalt cardboard.
- When installing a flash drive, it is recommended to use a special thermal and weather-resistant sealant. He copes well with the task assigned to him. By the way, during the assembly of a chimney sandwich, the same thermal sealant, and sometimes crimp clamps, are often used.
- If flammable roofing material is used, a spark arrestor is required. You can do it yourself by using a used KAMAZ air filter.
- Try to avoid sandwich pipe joints in the ceiling passage. At this point the smoke channel must be solid.
We invite you to familiarize yourself with: Ventilation in the bathhouse diagram and device
Wisdom Quote: If you want the world to change, be the change.
How to clean a chimney
After answering the questions about how to properly install a smoke exhaust structure and what materials are available, we will figure out how to care for the chimney. If your bathhouse or sauna is supplied with firewood, fuel briquettes, coal or other types of solid fuel, you will need to clean the chimney from time to time. There are two effective ways to remove scale from pipes.
- Mechanical cleaning with a brush is an old and reliable method. It requires certain knowledge, time, strength and special tools. For a brick chimney, it is better to take a steel brush, and for a metal chimney, a plastic one.
- Cleaning with chemicals. There are two types of substances - for prevention (powdered additive to firewood) and “chimney sweep” logs. It contains a large dose of active substances, which, when burned, remove all accumulated soot.
Distance from chimney to ridge
Errors and inaccuracies in calculating the height of the chimney can lead to serious problems. Due to unsuccessful calculations, the traction force will significantly decrease. The stove is difficult and sometimes impossible to light.
The more severe result of misses will turn into turbulence in the chimney. The result of turbulence and the reverse movement of combustion products is smoke in the premises with all the attendant threats and serious consequences.
The wind, colliding with the outer section of the chimney, changes the direction of its own movement. Simply put, having encountered the pipe wall, the horizontal air flow tries to bypass it and turns upward. “Change of course” creates a rarefaction of air in the area of the attacked wall, due to which the smoke seems to be sucked out of the outlet of the chimney.
It is clear that for good draft in the chimney, exposure to wind is necessary. If the horizontal movement of air flows is hampered by insurmountable obstacles, then the removal of flue gases will not be able to occur normally.
The ridge edge of a pitched roof can become such an obstacle if the dictates of the ratio of height and distance between it and the chimney are not followed.
Clear technological regulations
The rules for optimal selection of the height of the chimney relative to the roof ridge are regulated by the SNiP 2.04.05-91 collection in the subsection devoted to stove heating. According to technical specifications:
- The total length of the smoke channel from the grate to the outlet must be at least 5 m. In houses with a roofless roof structure, a chimney height of less than 5 m is allowed, provided there is stable draft.
- The height of the chimney section above the flat roof structure must be at least 0.5 m.
- The chimney must rise above the ridge by 0.5 m or more if the horizontal distance between it and the ridge ridge does not exceed 1.5 m.
- The mouth of the chimney should be level with the ridge ridge in height or slightly higher than it, if the horizontal distance between the pipe and the ridge line is in the range of 1.5 - 3.0 m.
- The outlet of the chimney must be no lower than the line laid from the ridge towards the eaves overhang at a slope of 10º relative to the horizon.
The height of the ventilation and exhaust pipes located next to the chimney is assumed to be equal to the height of the heating unit pipe.
The most rational location for the chimney of pitched roofs is considered to be as close as possible to the ridge ridge, because:
- In any design option for a house with a pitched roof, the location next to the ridge will ensure the maximum distance from the bottom of the grate to the mouth of the chimney.
- The influence of air flows on the chimney will not be prevented by a ridge barrier.
- The closest proximity to the ridge guarantees the lowest costs for the construction of a smoke channel.
If there is no more than 1.5 m between the ridge rib and the pipe, then it is not difficult to determine the height using the usual method of constructing a house model. To implement it we will proceed as follows:
- On a house diagram drawn to a convenient scale, draw a straight line parallel to the surface of the earth.
- From it, at the intersection of the roof with the chimney, we put half a meter upward on the same scale.
- At the resulting point we draw a new horizontal line. It will indicate the minimum height at which the mouth of the chimney has the right to be.
Using a similar method, we find the chimney height limit if the horizontal distance between the ridge fin and the pipe is more than 1.5 m, but less than 3.0 m. We only perform fewer actions. From the top of the roof we simply lay out a horizontal line, which will indicate the minimum height of the outer section of the smoke duct.
The most difficult process of calculating the height of the pipe above the ridge of a pitched roof is typical for situations where there is more than three meters between the chimney and the ridge ridge. Then you need to move forward in determining the parameters of the chimney either mathematically or graphically.
It should be remembered that it is strictly not recommended to overestimate the size of the section of the chimney that extends beyond the roof structure. If the wind pressure is too strong, a tall chimney may topple over. In situations where, for technical reasons, the formation of a high section of pipe above the roof could not be avoided, its position is strengthened with guy wires.
Graphic and mathematical methods
Let's look at the most complex option for determining the height of a chimney that is more than 3.0 m away from the ridge ridge. A striking example of such design solutions for a house with large, usable extensions. The heating unit is usually installed so that it can treat all living spaces.
It often happens that a stove with a chimney located almost in the center of a complex structure intersects the roof structure in the area of the extension or close to the edge of the main slope, i.e. at a point significantly removed from the ridge. If the distance from the expected level of the grate to the planned outlet of the chimney is 5 meters or more, then its installation is possible.
This means that you only need to calculate the height of the chimney section in relation to the ridge of a gable, sloping or hip roof. To find the minimum height limit for a chimney removed from the ridge, two methods are used:
- Graphic. According to it, the height of the outer section of the chimney is determined by geometric constructions.
- Mathematical. According to it, the size of the outer section of the pipe is determined using trigonometric formulas known from school.
The principle of graphical construction is similar to the methods described above for obtaining the value of the maximum height of the chimney. A diagram of the house is drawn on a scale convenient for work, with exact dimensions and proportions.
A horizontal line is drawn at the top of the roof, from which an angle of 10º is laid down using a protractor. The intersection of the expected axis of symmetry of the chimney and the line drawn at a deferred angle will ultimately give the desired value. The segment cut off by the lines should be measured and the height converted to a real value according to the scale instructions.
If necessary, the house design can be adjusted by moving the chimney axis horizontally. Simple steps will help you find the optimal channel position.
Do not forget that there must be at least 0.5 m between the roofing covering and the short side of the chimney. And if the stove runs on solid fuel, then another 15 cm is added to half a meter for arranging an otter or organizing metal protection for the roof assembly made of corrugated sheets or metal tiles.
The mathematical method is based on the use of trigonometric formulas. The science learned in class helps you quickly and accurately determine the minimum chimney height using just two known values.
Mathematical calculation algorithm:
- We will use a laser level to measure the width of the house and its height at the ridge, including the height of the walls and roof structure. In the absence of an expensive device, the width of the house can be measured with a regular tape measure. Do the same with the height of the wall and pediment, which will then need to be folded.
- Let's measure the distance between the central axis of the house and the central axis of the planned chimney.
- We draw a diagram of the house from the pediment side on a scale convenient for further work. The most suitable scale for beginning designers is 1:100. It means that 1 cm of the drawing will reflect a distance of 1 m of the real building. Using a convenient scale will prevent mistakes and mistakes when converting sizes.
- We mark the central axis of the chimney on the drawing.
- Through the top of the house, aka. skate, draw an auxiliary horizontal line. It and the central axis of the chimney must be extended to the intersection.
- Using a protractor, we lay down 10º at the point indicating the ridge edge. We draw a line according to the obtained direction until it intersects with the central axis of the chimney.
- We have obtained a right triangle, one of the legs of which can be determined by the formula a = b × tanα.
In the formula: a is the value by which the pipe should be below the ridge ridge; b – distance from the central axis of the house to the central axis of the chimney; α = 10º (slope set from the horizon, regulated by building rules).
After intensive calculations, we obtain a value that must be subtracted from the total height of the house, measured along the ridge. Do not forget that the total height of the chimney from the grate to the outlet should be 5 m, and the minimum distance from the roofing to the mouth should be at least 0.5 m.
If, after taking measurements and converting the dimensions into natural format, the diagram meets the construction requirements, then the option is successful and allows you to build a chimney at the planned location. If not, you will have to look for a suitable solution experimentally, moving the central axis of the pipe closer to the ridge or in the opposite direction.
Sandwich pipes
A modern building material can be called sandwich pipes. Their features are as follows:
- The structure is multilayer, which determines the greater thickness. It became possible to produce this type of material only with the advent of modern technologies.
- Each layer is responsible for specific functions. An example is that there are insulating materials on the outside, stronger ones on the inside that can withstand significant loads.
- The cost of sandwich panels is very high. This is due to the high complexity of production of sandwich panels, as well as the use of a fairly large amount of expensive materials.
- When creating a chimney, technology must be followed, otherwise the design will not have the proper performance qualities.
In addition, you should take into account the durability of the chimney - many manufacturers guarantee a service life of more than 10 years.
Mistakes during chimney construction
It is worth paying attention to a number of mistakes that are made when building chimneys by non-professionals:
- Use of unsuitable materials such as asbestos and aluminum. This may cause a fire.
- An unauthorized change in the diameter of the chimney can reduce efficiency or destroy the structure of the bathhouse.
- Combining several chimney systems into one.
Several more typical mistakes in chimney construction are shown in the video presented.
Sometimes it seems that you can quickly build a chimney in a bathhouse with your own hands, without anyone’s advice.
But the construction of a chimney is quite a responsible procedure, requiring compliance with the rules, the availability of skills and the study of modern techniques. This will save you from mistakes, and the chimney you built in the bathhouse will serve reliably and for a long time. We also recommend:
Features of installation work
There are quite a few features regarding installation work that need to be taken into account. An example is the information below:
- To begin with, a hole is created for the chimney of the appropriate diameter.
- A metal apron is being installed.
- After completing the preparatory stage, the installation of the chimney itself is carried out. To begin with, the fastenings are prepared in increments of about 20 centimeters.
- The structure is assembled, after which the pipe is connected to the furnace.
- The damper is installed.
- The last structural element to be installed is the outer part of the pipe, rising above the roof.
- Experts recommend securing protective bends that will prevent precipitation from getting inside the oven.
In general, we can say that there are no special problems when performing this work. When carrying out installation work, attention should be paid to insulating the pipe from external materials, which ignite when heated strongly.
In conclusion, we note that before carrying out the work, the development of an appropriate project should be carried out. Also, to implement the project you will need a variety of tools, as well as assistance, since lifting the pipe and other work is difficult to do alone.
❌ Do not violate the rules on chimney height
Whether in a bathhouse or in a house, the chimney works the same way, and its height is of fundamental importance. The draft in the pipe, and therefore the normal safe operation of the furnace, depends on it.
Otherwise, you can end up in the same situation as Johnny Stass. This is the comment he left:
Today we had a gusty wind, almost a fire in the bathhouse. It turned out that the pipe was half a meter below the ridge.
We have already written on this topic in previous publications. Links at the end of the article.
How to avoid problems
Even if the chimney installation is carried out correctly and it is operated according to all the rules, problems may arise, the most important of which is clogging of the pipe.
Along with the smoke, soot, soot, and grains of ash come out through it. Some of them gradually settle on the inner surface of the pipe, reducing its diameter and reducing draft.
If this is not dealt with, then over time the heat transfer of the stove will decrease, the load on the chimney will increase, which can lead to its premature wear. In addition, the resulting thick layer of soot can ignite and cause a fire.
You can identify a clogged pipe by the following signs:
- Smoke color. When the chimney is working normally, it is transparent, but if dark clouds appear, it’s time to clean the chimney.
- Flame color. His tongue should be light orange rather than bright red.