8179 0 0
Michel July 7, 2016Specialization: plumber with 10 years of experience, computer repair specialist, powerlifting coach. I have extensive experience in construction, interior decoration, and making homemade furniture. Hobbies: sports
I'm going to devote this article to how to cut into a sewer pipe. We will analyze both the best methods, which I can recommend with a light heart to everyone, and crisis solutions that can be resorted to in the absence of alternatives.
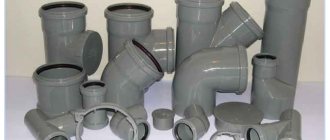
Polyethylene insert into cast iron sewer. Honestly, not the best solution.
When you need it
There are several typical reasons for creating an unplanned cut-in:
- Connecting a new plumbing fixture or household appliance (washbasin, washing machine or dishwasher);
- Connecting a new bathroom or kitchen (say, when adding a second floor to a house, a new room, or moving a toilet in an apartment);
- Insertion of a newly built house into the sewer network of a village or city.
If the first case involves connecting to the local sewer system of a house or apartment, then the third and, less often, the second - to risers or a drainage pipe (horizontal sewer line) connecting several apartments, or even houses. Accordingly, during the work we will not be able to control the absence of wastewater. Be prepared for the job to be quite messy.
Permitting documents
Tapping into a water supply system on your own property does not require obtaining any permits. In this case, it is quite enough to make appropriate changes to the water supply system plan. The situation is completely different if you want to make a connection into a centralized water supply pipe. If you do this on your own initiative without obtaining permission from the competent authorities, this may lead to penalties against you. Such actions must be carried out only legally.
Also, such work requires a certain amount of care, since damage to the water supply system can cause a serious accident, which will lead to the need for restoration work, the cost of which, as well as fines, will have to be paid by the person responsible for the event. Tapping into the main highway for the purpose of organizing a diversion must be consistent with precautions at each stage of the work.
General principles
There are not many of them.
- All horizontal sections of the sewer system must have a constant slope in the direction of flow of waste . The size of the slope is determined by the diameter of the pipe and for the most common sizes is:
| Nominal diameter, mm | Optimal slope, % |
| 50 | 3,5 |
| 110 | 2 |
| 160 | 1 |
Counter-slopes are strictly prohibited: silt and fatty deposits will accumulate there, narrowing the lumen of the pipe;
Recommended and minimum slopes.
- It is better to cut into horizontal pipes so that the drains flow from above . In this case, during the insertion process, the surgical field will be less flooded with wastewater. In addition, there is less chance of leaks (including due to blockages): your tie-in will not be constantly filled with someone else’s wastewater. Of course, the insertion device should not contradict the first recommendation;
It is better to cut into a horizontal pipe from above.
- It is advisable to use oblique tees, in which the lateral outlet is directed in the direction of movement of the common drains . They will greatly facilitate cleaning when clogged;
- If possible, the sockets should be oriented against the direction of flow of wastewater . Each connection assembled “against the grain” is a potential place for blockages to occur;
- The same applies to all kinds of protrusions and burrs inside the sewer . Over time, any unevenness will become overgrown with wool, hair, grease, and trap rags and other debris.
Insertion into a plastic pipe
Work process:
- We take a piece of pipe with a pipe of the required diameter.
- We prepare the workpiece - we cut out the pipe and part of the pipe so that it reliably covers the insertion point (you can simply cut it lengthwise).
- In the pipe into which we are cutting, we drill a hole, the diameter of which coincides with the pipe.
- Apply sealant to the inner surface of the workpiece and the pipe.
- We apply the workpiece and tighten it with clamps until the sealant appears.
This method can be used for both plastic pipes and any others.
Methods
Now it's time to get down to specifics.
Insertion of a plumbing fixture
The simplest instructions are for inserting into a sewer comb (indoor sewerage distribution).
Connection algorithm inside the apartment.
Let me explain each point:
- Near the intended installation site there are almost always other plumbing fixtures - a bathtub, washbasin or sink. The piping of such a device is connected to the socket of the comb (usually a rubber sealing collar). You need to carefully remove the elbow or corrugated hose and cuff from the socket;
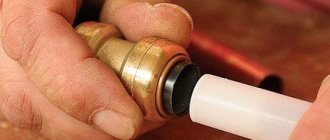
The hard plastic elbow will have to be disconnected from the siphon first. Don't lose the O-ring underneath; you'll need it to reseal the joint.
- Then an oblique or straight tee of the appropriate diameter (usually 50 mm) is installed in the socket. A straight tee is used only if an oblique one does not allow connecting a new device at a convenient angle.
The installation method of the tee is determined by the sewerage material: for plastic, an assembly with ring seals is used; cast iron is minted with a heel (or, which is much more reliable, with a graphite gland) and sealed with cement diluted to the consistency of thick sour cream without adding sand;
A plastic tee can be used with a cast iron comb. It is connected to it with a rubber sealing coupling. Be sure to thoroughly clean the cast iron flare of deposits and rust before assembly. It is advisable to seal the connection with a sealant: it compensates for unevenness of the socket and will prevent the connection from leaking when the rubber seal dries.
Connection of a plastic tee with a cast iron socket. The cuff is sealed.
- The old and new plumbing fixtures are connected to the tee. The connections are sealed whenever possible: in this case, you will be guaranteed to be free from sewer odors.
Connecting the washing machine through a tee installed under the washbasin.
In houses of modern construction, plastic prefabricated intra-apartment sewerage with rubber seals is used. To make the connection of a new washing machine or washbasin more accurate, you can install a tee in any collapsible connection.
To ensure that the connection points of the following devices do not move, the branch pipe closest to the tee, located opposite the flow of the drains, is shortened by the length of the tee minus the socket. For cutting, it is better to use a grinder with any cutting wheel, but a garden hacksaw will also work. Don't forget to clean off any burrs and remove the outer chamfer.
The external chamfer will significantly simplify the assembly of the connection.
Connection to the riser
How to cut into a sewer riser with a pipe of equal diameter?
For all more or less modern houses, a 110 mm sewer connection is relevant. It is with this diameter that risers have been installed for many years, connecting 5, 9, 14 or more floors. In my extensive plumbing practice, I have encountered only two exceptions:
- In a small-family house built in 1971, the kitchens were combined with a separate riser with a diameter of 50 mm;
- In Stalinist buildings built in 1951, the risers were mounted with a 160 mm pipe.
For insertion, the following shaped parts are needed:
- A tee to the central outlet of which you will connect your internal sewer;
Oblique tee.
- A compensating pipe is a product with an elongated socket that allows it to be pulled onto a pipe of the corresponding diameter by approximately 200 mm;
Compensating pipe.
- If the insert is not adjacent to the socket of the riser, you will additionally need a sewer coupling.
Coupling diameter 110 mm.
The plastic fitting is compatible with cast iron pipes. However, the latter will have to be cleaned of layers of paint and rust. For this purpose, you can use a regular sharp knife.
Preparatory activities
Let me remind you: tapping into a riser means that you will have to completely open the pipe through which other people's waste flows. Including from the toilet. Therefore, the work begins with several preparatory activities.
- Go around all your neighbors up the riser and ask them not to use the sewer for 1 - 2 hours. For those who are not at home, leave notes indicating the time;
- Prepare a large bucket or deep basin. Believe me, with a large number of apartments on the rise, someone will definitely forget about your request;
- Remove all unnecessary items from the bathroom. Even if you place a basin under the disassembled riser in time, splashes will fly in all directions;
- Put on work clothes. At best, you will have to wash it, at worst, throw it away.
Inset
An insert into the sewer riser adjacent to the socket.
Let me explain each point of the above diagram.
- We mark the length of the compensating pipe on the pipe, setting it aside from the socket;
- Cut the pipe according to the mark. For cutting cast iron, it is most convenient to use a grinder with a metal cutting wheel; plastic can be sawed off with an ordinary garden hacksaw or the same grinder;
- We take out the cut fragment from the socket. Be prepared for the fact that to do this you will have to make another cut in an arbitrary place closer to the bell. The plastic pipe is simply rotated and removed from the seal; in the case of cast iron, you will have to first remove part of the caulking and caulking using a chisel or a screwdriver and a hammer;
- We clean the burrs from the inside of the cut pipe using a sharp knife. We remove the chamfer from the outside: it will help to avoid unnecessary effort when pulling the compensator;
- We wet the pipe and the compensator seal with liquid or regular soap moistened with water, cosmetic Vaseline, cream or any other non-aggressive lubricant. Again, it will noticeably reduce the effort when pulling and settling the compensator;
Do not use machine oils, diesel fuel or other fuels and lubricants. Rubber seals are not made from oil- and petrol-resistant rubber; they may crack and leak.
- Pull the compensator onto the chamfered pipe until it stops;
- We insert a tee into the socket;
- We seat the compensator into its socket.
The photo captures exactly this moment.
The insertion is complete. After assembling it, it is highly advisable to fix the neck of the socket of the compensating pipe to the wall with a clamp. This will eliminate the possibility of it moving in any direction.
If the tap is made far from the socket, the pipe is cut in two places. After deburring and chamfering, a coupling is put on one of the ends. Further operations are identical to those described above.
Connection to the bed
Do-it-yourself connection to a sewer drain - laid in a tray, soil, or a horizontal pipe hung in the basement - has one feature. There is no way you can completely stop the flow of wastewater through it. Accordingly, it is extremely undesirable to completely disassemble the pipe: several cubic meters of fetid wastewater will end up in the basement or flood the tray.
When carrying out repair work to replace a sewer section, housing residents and Vodokanal employees completely turn off the water supply to the house or neighborhood. However, this method is most likely not applicable for you: if one of the residents demands a recalculation for water supply services, the organization has the right to issue you an invoice.
The shaped part that is used in such cases is called a sewer insert. It is a branch with a wide clamp covering the entire pipe, or a simple plastic latch with a rubber seal. The price of the simplest inserts starts from 300 - 400 rubles.
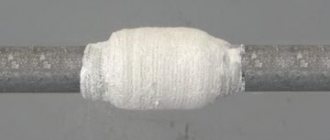
Insertion into a cast iron sewer pipe using a cut elbow 50x110. The outlet is mounted on sealant and secured with aluminum clamps.
Depending on the device, the insert can be mounted in two ways:
- In the first case, the hole is drilled with a crown of the appropriate diameter, after which the burrs are cleared and the shaped part is forcefully inserted into the hole. When the nut is tightened, the conical latch on it compresses the rubber seal and presses the part to the pipe;
The crown leaves burrs. Be sure to clean them thoroughly.
Installed shaped part.
- In the second method, the operations are carried out in reverse order:
- The insert is attached to the pipe using its own fasteners (several bolts) or a pair of clamps;
- A hole is drilled directly through the outlet using a crown.
Conclusion
Now we have seen with illustrative examples how to crash into a sewer riser. Moreover, we figured out how to work with pipes that are made of completely different materials. We hope that all the instructions and advice provided will be useful to you not in theory, but in practice.
And if you want to learn even more, be sure to watch the additional video in this article.
Did you like the article? Subscribe to our Yandex.Zen channel