May 29, 2021 Specialization: philological education. 20 years of experience as a builder. Of these, for the last 15 years he led a team as a foreman. I know everything about construction - from design and zero cycle to interior design. Hobbies: Vocals, psychology, quail breeding. Greetings, my dear readers. The other day I had a free day, and I wanted to benefit the family hearth. In other words, earn the praise of your other half by putting things in order somewhere.
I opened the pantry and the first thing I did was hit in the head, it’s good that it wasn’t a knockout. I was attacked by a linoleum pipe left after the renovation just in case. Next, a second one rolled out, followed by another bunch of items stored for unknown reasons.
This was a subtle hint at heavy circumstances, which means that I am destined to make something useful today. I describe the whole process in order to direct your creative potential in the right direction.
Nurturing an Idea
My ingenuity has often helped me through life; I have often used ideas I had seen, but here I am turning a pipe in my hands and can’t figure out where to use it. And on TV there is a program about renovation, the final stage is decor. And vases, many vases of original shapes. That’s when it hit again, I’ll make a vase, I thought.
How a muse comes to a creative person
- At first I wanted to make two or three crafts from a linoleum pipe, cutting it into pieces. Then I changed my mind and wanted to build a large floor flowerpot. “What’s beautiful will be brighter,” more presentable, and more flowers will fit.
- I was puzzled by the material – pressed paper. You can’t pour water in there; you only have to insert a dry bouquet or branches. But here an idea was born, about which a little later.
Since the material is paper, it means that ordinary office glue or PVA will be suitable for processing it. At worst, you can cook homemade paste.
- Pour the cheapest flour with water, stir until smooth and bring to a boil. Which is what I did, because I was too lazy to go to the store.
- Then memories of childhood surfaced, how my mother and I made papier-mâché from scraps of newspapers and paste. As far as I remember, the products were durable and easy to paint.
- So I did. I picked up old newspapers, soaked the pieces in a basin of water and went to have breakfast, because the excitement that had arisen in the morning began to brazenly interrupt thoughts of a culinary nature.
Preparation of materials
With a full stomach and the matter being resolved, I went back to the pantry for extras. I came across children's sandbox molds in the shape of starfish and octopuses. Yeah, if so, then my future vases from linoleum pipes should be made in a marine theme.
Well, if not all, then let at least one “smell of the sea.”
- I prepared an old twisted rope from hemp, pulled out real shells brought from vacation from the depths of the chest of drawers.
- There were only watercolors and gouache in the house; I wouldn’t want to see a smear vase in the near future; apparently, I’ll have to go to the store. The construction site is far away, but stationery is literally right next to the window.
- I bought a set of acrylic paints, brushes, and at the same time PVA in a small container (and you won’t need a lot).
- While the other half is not at home, I literally stole glitter for manicure, a spool of Lurex and a bag of rhinestones from her supplies. If I get caught stealing, I’ll say that a magpie flew into the house and barely got me out!
- Yes, I forgot about an important accessory. In the pantry there was a bundle of old nylon stockings and tights. The thrifty mother-in-law hid them to store onions in. Just in case, the fireman pulled them out too, maybe they would do.
Preparing for work
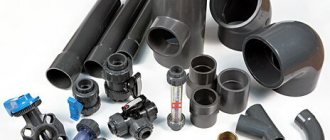
In addition to the pipe itself, other materials will be needed because of the linoleum.
Since it is made of ordinary paper, standard stationery glue or PVA is suitable for gluing. You can also prepare a homemade adhesive composition. To do this, pour cheap flour with water, stir everything until smooth and bring to a boil. Various decorations and decorative elements will also come in handy. Using various molds you can make patterns. Prepare acrylic paints that will last a long time and will not fade over time.
For bright and attractive vases, you can use sparkles, rhinestones, stickers and other decorations.
The tools you will need are scissors, a pencil, a tape measure, a hacksaw and sandpaper. To process the product you need rags, small pieces of cardboard, and a little dry alabaster.
Creative process
I had all the tools at home - scissors, pencil, tape measure, hacksaw, sandpaper. The necessary materials: rags, several pieces of cardboard and a bag with the remains of dry alabaster, were also available at home. In general, that's the whole set.
How I made a vase
- The pipe in a vertical position turned out to be quite high; we still had to saw off the excess. I wanted the neck of the vase to be slanted, it would be more original and elegant. I marked it out, cut it with a hacksaw like a sausage for a holiday, and the result was a meter-high piece.
- Next we had to come up with a basis for greater stability. I cut a circle from a piece of fiberboard with a diameter 15 cm larger than the diameter of the pipe itself.
- To properly glue the stand to the base, there is one proven instruction. The thin walls of the pipe will not stick firmly enough if you do not make an elementary thick filler.
- The newspaper scraps did not impress me with their roughness; I had to “snatch” half a roll of toilet paper. I soaked the paper with PVA slightly diluted with water, adding two tablespoons of alabaster. The last ingredient will speed up the hardening of the mass.
- I laid out a heap of paper-glue dough on the marked center of the base and literally “slammed” a pipe into it. Quickly, before the mass hardened, I leveled it along the seams from the outside and inside. The arm was not long enough to reach the bottom, so I rescued a handle from a mop and tamped it down with it. On the raw product, I checked the vertical with a plumb line on all sides.
At this point, you can insert a suitable sized waterproof container inside. For example, a plastic pipe sealed at the bottom end or a strong, narrow and long plastic bag. In this case, the vase is suitable not only for dried flowers, but also for fresh flowers standing in water.
- Half an hour later the pipe stood rooted to the spot, and this could not but rejoice. Mobility and stability have been achieved. The best part remains – decoration.
- After sitting with a cup of coffee and thinking, I decided to rob my mother-in-law for a couple of old stockings (these were left for onions). I chose black ones, and, overcoming the desire to go scare the scandalous neighbor upstairs, I put them not on my head, but on a pipe coated with glue.
- It all took three pairs of stockings with the socks cut off. If you take less, there will be few folds, and they are what added originality. Along the way, I decided to leave two gaps between the folds; here I wound twine around wet glue.
- In a draft, my semi-finished floor vase dried out in about an hour. During this time, I kneaded “dough” from soaked pieces of newspapers, paste with the addition of alabaster.
- I greased the sandbox molds with vegetable oil and filled them with the mixture, carefully compacting and leveling them. You can pull it out immediately, only carefully. It is more convenient to glue half-baked and still flexible blanks to the semicircular walls of the pipe, which I hastened to do.
- It was almost time for dinner, and I wanted an enchanting presentation of the beauty I had made with my own hands in front of my family. I painted the folds with a semi-dry brush with silver acrylic paint “along the tops” and sprinkled them with glitter. I painted the starfish blue and went over the rope with gold paint.
- Shells filled with papier-mâché dough were successfully placed in the empty spaces; small spaces were complemented with rhinestones. In the end, it turned out to be very solid, a sort of theme of a hot summer night on a sandy sea beach.
My 8 craft options
During the process, I came up with a dozen ideas for using unnecessary pipes. The price of the components is zero or negligible, but the pleasure and benefits are disproportionately greater. The evening display of my product was all the more joyful because I was rewarded with the wild delight of my mother-in-law and wife who arrived from the dacha, and was even pardoned for taking stockings and rhinestones without permission.
And here is what came to mind during the day of creativity:
- Vases can have an infinite number of options in style and design
. Moreover, it is interesting to choose the design to match the style of your interior. Color and accessories that match the design of the room - and now you have an exclusive item. - A vase stylized as a birch trunk looks great
. Honey mushrooms molded from papier-mâché will settle on an imitation saw cut.
- The work is a little more complicated - a Roman amphora
. Here you will have to cut out many identical profiles of the desired shape from cardboard and glue them to the base. Afterwards, the structure is covered with fabric or tape and painted. - There are many benefits from the pipe and in the corridor
. It is convenient to store umbrellas and canes, fishing rods and even a selfie stick.
- For the New Year, start making a Christmas tree with your children
. The pipe will serve as the trunk, but the rest is easy to figure out on your own, with your family. You can also decorate a nursery with an ordinary tree made from a pipe. - I would advise avid cat lovers to make a scratching post for their pet
. The pipe is coated with glue and wrapped with strong rope. - The flower bed on the balcony can also be made from pipes
. They are horizontal, the ends are sealed, and a strip along the entire length is cut off in the upper part. The pipe is lined with polyethylene, soil is filled in and flowers are planted. - A container for storing small children's toys, because there are a lot of them throughout the house
. There will be something to do on a free day with your child, designing and decorating a new item in the children's room.
Ideas for crafts with children
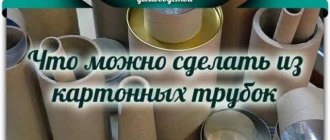
Crafts made from toilet paper rolls for children are very beautiful, bright cardboard toys that are fun to play with and fun to make by yourself or with adults.
Mouse
The sleeve can make a funny mouse. To work you will need:
- gray, black, pink and white paper (if it’s very thin, then use cardboard);
- gray or black cardboard;
- scissors;
- PVA glue.
Making a craft:
- Cut round ears and paws and a long striped tail from gray paper. Paste the sleeve with a similar color and attach paws, ears and tail.
- To make the eyes, cut out two small black circles, two slightly smaller white circles and very small black circles for the pupils. Glue one by one.
- A round nose is cut out of pink paper. Gray ears and tummy are also decorated with pink circles.
- Antennae are cut out of gray or black cardboard and glued to the muzzle under the nose.
- Two sharp teeth are made from a white triangle separated by a dividing line drawn with a black felt-tip pen.
The funny mouse is ready!
Squirrel
Children love squirrels! This animal will fit perfectly into a home cardboard “zoo”. Making it won’t be too difficult either. Prepare for work:
- orange (mustard) and brown (chocolate) colored cardboard;
- a simple pencil;
- scissors;
- black felt-tip pen;
- white and black paper or moving plastic eyes, which can be purchased at a craft store;
- glue.
Dog
Man's best friend is very easy to make. To make a dog, take a sleeve, yellow and black colored paper or cardboard:
- A yellow cut-out rectangle of the required height and width is pasted over the body.
- From black, round ears and four paws are cut out, oval in shape with a wavy edge on one side, as well as a triangular nose.
- The paws and nose are glued, and the ears are inserted into the slots made in the upper part.
The eyes are made from white and black paper, or drawn on white, or made to move. Cute doggie is ready!
Cat
Making a cardboard pet is not at all difficult. This time the technique will be a little different.
There is no need to glue the cat's ears or insert them into the slots. Their function will be performed by the folded edges of one side of the roll.
Flirty red-haired Murka looks beautiful and bright with a pink bow on her ear and a belt of the same color.
To create a cute creature, prepare orange and pink paper, glue, and scissors. Get started:
- The sleeve is wrapped in an orange sheet, the required size is measured with a pencil and the excess is cut off.
- Next, glue it to the base - the body is ready!
- They determine where the head will be and fold the ears using the origami method, bending first one edge evenly, then the other so that there is no gap.
- Also, two circles are cut out of an orange sheet, approximately the size of a ten-ruble coin - this will be the muzzle.
- Glue the eyes prepared in advance. A muzzle of two circles is formed under the eyes.
- At the junction between them, attach a pink nose and draw a mustache with a black felt-tip pen.
- Next is the turn for the paws. To make them appear, cut out two red hearts and attach them to the base of the body, bending them inward.
- The tail is made from a long orange piece and is secured, as expected, at the back.
- The final touch remains - to decorate: with a bow and a pink belt.
The cat charm is ready!
Owl
A very popular craft. It is made using the same technique as a cat (folded protruding ears), but it will be chocolate in color:
- Instead of a muzzle, a triangular red beak is attached, and orange is added to the tummy.
- Cut out wings from brown paper and attach them to the sides.
- The eyes are round and large (you can also add eyelashes).
And the last point - the paws are red in color, glued to the bottom, like a cat's, but the shape is different - with sharp edges. If desired, the owl can be made more fashionable: it is also “dressed” with beautiful jewelry.
Conclusion
If you are bored on the weekend and have nothing to do, look on the balcony, in the barn, garage or storage room. There will definitely be items worthy of your creative attention. Believe me, there is nothing more pleasant than pleasing yourself and your family with a useful thing, made at almost no cost and on your own.
You will find a lot of interesting things in the video in this article. Ask questions, if any, in the comments. Therefore, I say goodbye and success to you in your endeavors.
May 29, 2021
If you want to express gratitude, add a clarification or objection, or ask the author something, add a comment or say thank you!
A vase is just that little thing that can add special charm and comfort to any room. Of course, purchasing this beautiful thing will not be difficult. However, a truly beautiful and exquisite vase is not cheap. Well, some cheap products do not paint the home at all, and even look trashy. We suggest you make such a piece of jewelry yourself, with a little effort and spending a little free time. Products made with your own hands look very original and unusual, and besides, it’s always nice to admire the object of your creativity. One of the options is a DIY vase made from a cardboard tube. We will offer you several ideas for creativity in this article.
Making a vase from cardboard
First, let's look at the simplest option for making a cardboard vase with your own hands. To do this you will need the following:
- A cardboard box is rectangular in shape and small in size.
- Glue.
- Several sheets of corrugated cardboard.
- Paints.
- Putty.
Sequencing:
- Form the box into a hexagonal shape.
- Start making decorative elements for our vase from corrugated cardboard. To do this, cut small triangles with different sides.
- Apply glue to the edge and lay out decorative elements along the edges of the future vase, leaving small gaps between each figure.
- Once you have covered the entire vase and it is completely dry, apply a small amount of putty in the spaces between the decorative elements.
- After drying, paint the vase with contrasting colors: dark color - in the areas between the triangles.
Tools for working with bushings
To create the work you will need simple and affordable material and ordinary office tools:
- scissors;
- PVA glue;
- colored paper, cardboard;
- paints (watercolor, gouache, acrylic);
- cotton wool, glitter;
- a simple pencil;
- scotch;
- small decor for handicrafts.
Working with paper and cardboard is always gratifying for your hands, because the material itself is warm and pleasant to the touch. You can make simple crafts from toilet paper rolls with small children. Older children are happy to complete tasks themselves.
Unusual cardboard vase
The production of such a vase is somewhat different from the previous version. To make a cardboard vase, you will need:
- A narrow glass jar, for example, for canned mushrooms.
- Cardboard.
- Scissors.
- Marker.
- Glue.
- Ruler.
Sequencing:
- Start from the bottom. Take a jar, place its bottom on the cardboard and outline the outline with a marker - this will be your bottom for the vase.
- Cut it out with scissors, adding a couple of centimeters to the drawn outline.
- From the remaining cardboard, cut out a large number of thin strips 1-1.5 cm wide. The width of all strips should be the same, so you need to use a ruler for these purposes.
- Cut identical pieces 3-4 cm long from the resulting strips. Their length depends on the diameter of the bottom of the future vase.
- Start making the vase itself. To do this, glue pieces of cardboard along the edge of the bottom. This must be done in such a way that the blanks do not go beyond the outline drawn with a marker.
- Apply a second layer of cardboard pieces in a checkerboard pattern. Continue layering the entire vase in the same manner.
- Periodically insert the craft into the jar to check that it fits.
- When the jar is completely hidden, work can be stopped. Leave the vase to dry until the morning.
The very next day you can start using the new vase for its intended purpose.
Important! The jar can be left inside, then the structure will be somewhat stronger. In addition, such a product can be used as a candlestick, but then the candle must be inserted into the jar.
Master class on making:
Step 1: Cut the pipe
The first thing we need to do is cut the pipe into two parts using a saw, you choose the height of future vases at your own discretion, you can simply throw away the extra piece.
Step 2: making the bottom
- After the vase blanks are ready, you need to place the blank on the cardboard and circle the bottom of the future vase, stepping back about a centimeter from the pipe.
- Using a glue gun, glue the cardboard circle to the bottom of the pipe.
Step 3: decorate the vase
Then, around the lower base, on the protruding part of the glued bottom, you need to thoroughly smear it with glue and wrap a rope around it, which you need to press against the cardboard until the glue dries.
- Then you can continue to wrap the pipe with rope all the way to the top, periodically gluing it to the base to keep the rope in place.
- At the very last turn , you need to completely glue the rope around the pipe, securing it well.
- In order to hide the edge of the pipe, you need to glue the rope on top.
- After this, you can carefully trim the edge and glue it from the inside so that it is invisible.
Floor vase made of cardboard
In order to make a floor vase from a cardboard box with your own hands, you will need:
- Cardboard from boxes.
- Cardboard tube (suitable for linoleum).
- Hot melt adhesive or Titan glue.
- PVA glue.
- Pencil, stationery knife, scissors.
- Lots of paper or newspapers.
- Polymer putty, for example, finishing “Hercules”.
- Acrylic paints.
- Fine sandpaper.
- Acrylic lacquer.
- Two-step craquelure.
Sequencing:
- Draw the shape of your future vase. In our case, this is the shape of an ancient Greek amphora, so there will be handles on the four cardboard pieces.
- Cut out blanks from cardboard. Four blanks with handles. There should be approximately 30 pieces.
- Glue the blanks to the pipe. Glue the blanks with handles on both sides.
- Try to place the workpieces close to each other - at a distance of approximately 1 cm.
- Glue the resulting shape with pieces of paper or newspaper with PVA glue. It is advisable to do this in several layers so that there is good density and so that the newspaper does not tear during the application of the papier-mâché layer.
- Soak the cardboard egg trays in water, then squeeze and mix them with PVA glue using a mixer. After the mixture is thoroughly mixed, coat the entire vase with it.
- When the vase is dry, turn it upside down and coat it with the mixture, or apply a sickle net.
- Coat the bottom of the product with putty, and when it dries well, coat the entire vase.
- Once dry, go over the craft with sandpaper to make it smooth.
- Paint the vase with gold spray paint.
- Draw a picture and color it. However, before applying the drawing, you must first make a sketch of the vase in order to properly think through how it will look as a result.
Important! When applying the ornament, you can make a stencil so that the pattern is even, trace it with a pencil and paint it with a thin brush.
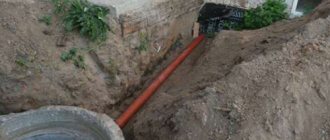
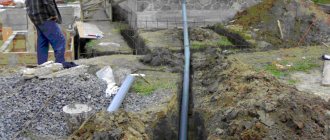
After renovation, there is always a lot of garbage left in the house, but you shouldn’t rush to throw it away, as among it there will definitely be some interesting items that, after decoration, can look like excellent accessories. An example of this are pipes, which can be turned into stunning vases. Next we will look at several ways to do this.
Vases made of plastic pipes
Decoration with stockings
First of all, let's look at how to make a vase from a plastic pipe with your own hands. For these purposes it is best.
So, the instructions look like this:
- If there is a segment longer than 60 cm left, it must be divided into 3 parts
. - Next, the ends of the workpieces need to be cut obliquely
. - Then you need to soak the stockings with PVA glue and squeeze out the excess suspension
. - After this, the stockings need to be pulled over the pipes so that you end up with twisted folds
. The product should be left in this form until the glue dries. - Further actions depend solely on your imagination, for example, products can be painted with different colors and glued together. For stability, you can glue a cardboard circle or square to their bottom. As a decoration for crafts, beads, beads, small seashells, etc. are an excellent option.
The result will be a very beautiful product that will look expensive, despite the fact that the price of materials is minimal.
In the photo - the implementation of a combined decor
Combined decoration
The technique for making the product in this case does not differ from that described above. The differences lie only in the method of decoration.
The process looks like this:
- The stockings are stretched from the bottom and top of the blanks, leaving a “bare” area in the middle.
- The space between the stockings should be coated with PVA glue.
- Next, the surface treated with glue should be sprinkled with cereal. Which one is up to you to decide.
- After the glue has hardened, the pieces need to be glued and painted. For stability, you can make a cardboard stand and paint it in a suitable color.
This completes the manufacturing process of the product.
From a metal pipe
If the edges of a metal pipe are evenly sawn off, then it is also suitable for our purposes. The best option is to prepare it immediately with a stand.
Below we will consider one of the options for how to make a floor vase with your own hands from a pipe of this type:
- First of all, the workpiece must be covered with ordinary toilet paper. In this case, small folds are allowed.
- Then two layers of black paint should be applied to the paper.
- After this, you need to apply varnish with bronze powder over the black paint.
- Additionally, the product can be decorated with beads or glass beads.
- To complete the bottom, you will need mounting foam. The craft should be placed on a plastic stand and the foam stream should be directed downward. When the foam hardens, it can be tinted with spray paint.
Advice! Unusual edges of the product can be made using a welding machine by simply melting them. As a result, they will turn into fancy lace.
Of course, such a product is not intended for fresh flowers, since it will not be possible to pour water into the container, but a composition of dried flowers in such a vase will look very interesting.
Options for making a flower vase from a pipe
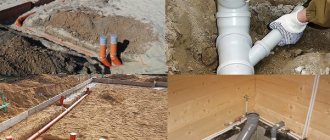
Often, after repairs, pieces of materials and coatings remain, for example, remains of linoleum and pipes. They can be used to create a unique decor for the decoration of the room. For example, a flower vase can be made using unusual materials. Pipe, linoleum, cardboard boxes, profile or plastic remains are used. With their help, it is easy to create a unique craft and decorate your home, using simple, improvised means. An unusual designer vase can be made in a short time without any financial investment.
From a cardboard tube
When packaging linoleum, manufacturers place a tube of thick cardboard inside the roll, which is an excellent material for making a vase. As always, to get an original result, you just need to show a little imagination.
Below we will consider one of the options for making a vase from a cardboard tube with your own hands. Before you begin, you need to prepare the following materials for this product:
So, the work is performed in the following order:
- As in the case of plastic products, to make vases from linoleum pipes with your own hands, first of all you need to cut the cardboard blank into three parts.
- Next, all three parts must be glued together with PVA glue and secured with copper wire.
- Without waiting for the glue to dry, apply masking tape to the joints.
- A day later, when the glue has completely hardened, the copper wire should be removed, after which the workpieces should be wrapped in a cloth soaked in PVA. In this case, you need to form folds.
- When the fabric dries, it must be painted with bronze paint. You can use the composition in a spray can.
- When the paint dries, you need to “walk” over the entire relief with acrylic gold paint to make the vase shine.
- To complete the work, the vase can be decorated with twine or other decorative elements.
At this point, the floor vase made from a linoleum pipe is ready. Of course, it is not necessary to perform all actions exactly. Using this idea as a basis, you can experiment and come up with your own product design.
Advice! In such a vase you can place dried bouquets, decorative branches or other light decorations. Of course, it is not advisable to use it for planting living plants.
Manufacturing process
When packing linoleum in rolls, a hollow tube made of durable cardboard is added in the middle, which is most often thrown away after laying - it will serve as the main material for the future vase. It will be possible to place dried bouquets, decorative tree branches and other light decorations in it, but it is not advisable to use it as a carrier for planting living plants.
Frame assembly
First of all, the pipe is cut. Since cardboard about 1 cm thick is used for its manufacture, it will be difficult to carry out this operation with a knife even when using a construction knife with a replaceable blade. (see also the article How to choose a knife for linoleum)
When cutting, you will have to make a lot of effort and the seam will, in any case, be difficult to call smooth - it is much easier to cut the pipe with a hacksaw.
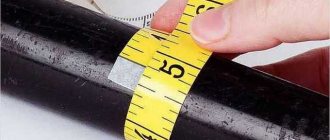
- Using a tape measure and a simple pencil, marks are made on the pipe , which correspond to the required length of the future vase - you should make at least four marks, and the ideal value would be eight points, since in the future it will be easier for you to combine them into one line;
Note! A large number of marks guarantees an even cut, which in turn will guarantee a smooth surface of the vase - a skewed, uneven edge is unlikely to contribute to the good appearance of the product.
- Once the cutting line is marked, you can begin cutting. A hacksaw will do an excellent job of this task, leaving an even, correct cut without tearing off the edges, as can happen if you use an ordinary wood saw for this purpose. The cut should be made in a circle, gradually turning the pipe during the cutting process - this way you will not lose your bearings;
Pipe with base
- Then you need to prepare the base for the future vase - most often it has a round shape and is made of corrugated cardboard. Also, the material for it can be hardboard, plywood, etc. – the only condition for the material is that it has the necessary strength to withstand the weight of the future vase along with its contents;
- The diameter of the base must exceed the diameter of the pipe to ensure the stability of the future structure - and the larger its value, the more stable the vase will be. The cutting of the base is carried out depending on the material - corrugated cardboard can be cut with a stationery knife, and other materials are processed with saws for the appropriate purpose.
Note! For reasons of style, it often happens that the base has a size that is not much larger than the circumference of the pipe - “as long as it stands,” however, do not forget that it is necessary to take into account the presence of a decorative element inside: branches, flowers, etc. – the more they rise above the vase, the more stable the base should be.
- When marking shapes such as a square, you should not have any special problems, but to cut out a perfect circle you will have to use a special device . Since it is difficult to find a compass of this size, you need to find a rope whose length will correspond to the radius of the future base;
- One end of it must be tied to a nail, and a pencil must be attached to the other - the nail is stuck into the center of the future circle, the rope is pulled tight and the outline of the circle is drawn in a taut state. This way you will get a perfect circle, since the rope will not let you go outside the circle, and the same degree of tension will allow you to control the inside;
- After both elements are cut out, you can begin to connect them . To place the pipe exactly in the middle, measure the distance from the edge of the base to its surface and move the pipe until the length of the sections on all sides is equal - this will be the correct location;
Glue for decoration
Exterior design
A floor vase can be decorated in any way - light stucco made from flour mixed with PVA, dried citrus slices, herbarium, coffee beans, etc. The only condition for decoration is the light weight of the decor - it is not advisable to use massive metal decorations for this purpose. As an adhesive for installation, you can use the same PVA or epoxy composition with an accelerated hardening time.
Vases made from linoleum pipes will decorate any room with their unusual appearance. They can also bring practical benefits, becoming a haven for dried bouquets and light everyday items.
After 24 hours, you can begin decorating the dried product. The top of the pipe can be covered with a pre-selected fabric. Measure a piece of fabric to fit the size of the pipe, saturate the fabric with glue, and then wrap the vase, creating light folds. Next, you need to wait again until the vase is completely dry. After which you can begin painting with gold or bronze paint. In addition to regular acrylic paints, you can use spray paint. When the bronze layer of paint has dried, a layer of gold paint is applied on top.
Conclusion
You can make a beautiful vase from a variety of “available” materials, and, as we found out, it is not at all difficult and does not take long. And if you experiment a little with its design, the result may even exceed your expectations.
You can get more information on this topic from the video in this article.
If you have just recently done renovations at home, then there is always a heap of unnecessary garbage left and our advice: do not rush to throw it into the garbage chute, in this heap you can always stumble upon items that will be useful in inventing fakes - these can be various design details and different decorations for your home. Most often, unnecessary items are leftover pipes that no one needs, from which you can invent a wonderful designer vase. There are several methods for reproducing our vase.
So, first, let's look at the types of vases made from plastic pipes.
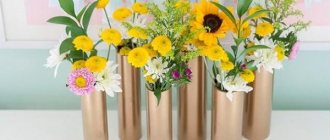
A vase made from a linoleum pipe or 8 ideas on how to use unnecessary trash
Greetings, my dear readers. The other day I had a free day, and I wanted to benefit the family hearth. In other words, earn the praise of your other half by putting things in order somewhere.
I opened the pantry and the first thing I did was hit in the head, it’s good that it wasn’t a knockout. I was attacked by a linoleum pipe left after the renovation just in case. Next, a second one rolled out, followed by another bunch of items stored for unknown reasons.
These pipes can become a source of your inspiration.
This was a subtle hint at heavy circumstances, which means that I am destined to make something useful today. I describe the whole process in order to direct your creative potential in the right direction.
Installation
We will decorate with the help of unnecessary nylon stockings.
But before we use stockings, we'll take a look at creating a vase silhouette using plastic pipes. It would be great if these pipes were intended for sewerage. They are perfect in shape and material.
Now let's move on to the manual, which will describe the sequence of work and actions:
Composite decoration for a vase
The sequence of actions is practically no different from the first version of creating an invention, but there is still a slight difference and it lies in the fact that the decoration methods are different.
Now let's move on to the process of inventing a vase using this method:
- We put hosiery on the pipes, which we prepare in the same way as in the first option, on both sides so that there is a small empty gap in the middle of the pipe.
- We apply a small amount of PVA glue to this empty gap so that it is spread over the entire area.
- Now we pour any type of cereal onto this smeared gap, depending on your imagination.
- Let's wait until the glue hardens, and attach the pipe sections to each other and paint them in different colors, depending on your wishes.
At this stage we finish making the vase using cereal.
Making a vase from a metal alloy pipe
If you still have an unnecessary metal pipe, the edges of which are cut straight, then it will be useful for creating our craft. If the pipe has an edge, then it is perfect for us because there is no need to create a stand for the vase, it will be ready immediately.
Using this type of pipe, we will become familiar with the technique of creating it using sequential steps:
- To begin with, we will take a roll of ordinary cheap toilet paper and paste our pipe in a circle so that there are no empty spaces left. The formation of small folds is allowed.
- Now we need black paint, and with its help we paint the pipe in two layers to give it a natural look.
- Next, take powder with a powder effect and apply it with gentle movements over the black paint.
- For special beauty, you can decorate the vase with beads or beads.
- Using installation foam we create the bottom of our product. We do it this way: we put the craft on a plastic stand and we put the stream of foam in a vertical position. After waiting until the foam dries, you can paint the bottom with spray paint of any color.
Take note! We can embellish the edges of our beautiful vase using a welding device by welding them a little. The result will be beautiful metallic lace.
I hope you understand that you won’t be able to place fresh flowers in this type of vase as they require water, and you won’t be able to pour it into such a craft, but don’t be upset, it’s perfect for placing dried or non-living flowers of various types into it. In it they will look aesthetically pleasing and tasteful.
Making a vase from a cardboard product
If during the renovation you ordered the required amount of linoleum to your home, then note that a cardboard tube is placed inside each such roll so that it does not wrinkle or move apart. But for the end result,
you just need to show a little of your imagination.
Today, it is rare that any interior, like a landscape, can do without expressive and spectacular accessories. One of them can rightfully be called a floor vase. In order for it to look stylish and harmonious in its designated place, it is not at all necessary to buy a finished product. It is quite possible to do it yourself, which is what will be discussed in this article.
We create original decorative elements
The disadvantage of such homemade vases is that they cannot be used for their intended purpose, especially if it is a do-it-yourself vase made from a cardboard tube. That’s why you can’t pour water in them and you can’t put fresh flowers. But don’t be upset about this, as these decorative items are perfect for dried flowers or artificial bouquets.
Naturally, there are different pipes: plastic, cardboard, metal. It is more convenient to work with cardboard elements, the most difficult is with metal ones.
Now I will tell you about the process of creating vases from plastic and cardboard pipes.
We use pipes from linoleum (cardboard)
It is very convenient to create both tabletop and floor-standing tall vases with your own hands from linoleum pipes, since the material is easy to process. It’s good if during the renovation you spent more than one roll of linoleum, this means that there is enough material to create several original vases. I suggest you familiarize yourself with several models of decorative elements made by yourself.
Beautiful floor vase
For the base of the future vase, you can take pipes from various materials, but in this embodiment, a pipe made of thick cardboard (from linoleum) is used. The height of the future vase depends on your wishes and preferences.
So, for work we need:
- pipe;
- heat gun with rods;
- base for the vase (piece of fiberboard or OSB);
- thick cardboard;
- marker or pen;
- scissors;
- putty;
- sandpaper;
- PVA glue;
- old newspapers;
- acrylic lacquer.
Once all the materials and equipment are at hand, let’s get to work:
- Measure and cut a piece of cardboard tube to the desired size. From a sheet of fiberboard or OSB, cut out a circle that will serve as the bottom for the vase. Glue the pipe to the base using a glue gun.
- Decide what shape your vase will be and make a template. Cut out stiffening ribs from cardboard. Ideally there should be at least 25-30 pieces.
- Insert a glue stick into the heat gun and heat up the device. Start gluing the cardboard blanks to the pipe.
- Glue all the cardboard parts. Try to glue so that the distance between them is approximately the same. For convenience, you can make markings based on the vase.
- We cover the resulting frame with pieces of newspaper (papier-mâché technology). Dry the completely glued product for 2-3 days until the glue is completely dry.
- Mix the putty with PVA until it becomes thick sour cream, and begin processing our product. Apply an even layer of putty no thinner than 0.5 cm to the frame.
- Carefully coat the entire surface of the vase. We try to make the surface as smooth as possible. We coat the neck no less thoroughly; we also treat the inside of the product to a depth of 5-10 cm, as far as the hand can reach.
- We wait until the product dries (several days), after which we level the surface of the vase with fine sandpaper. We decorate at our discretion, paint, and varnish.
- A wonderful decorative decoration for your apartment is ready. Enjoy the results of your work.
Floor vase “Ropes”
To create this decorative element, you will need:
- linoleum pipe;
- plywood or thick cardboard;
- small deep container;
- twine (any kind, as long as it’s not made of synthetic material);
- PVA glue;
- aerosol paint of the desired color, preferably acrylic (price in Ukrainian stores - from 50 UAH and above).
Now I’ll tell you in detail how such a floor vase is made from a linoleum pipe. So let's get started:
- Take a cardboard pipe and cut a piece of the required height. In the photo there is a vase made of pipe, 60 cm high.
- For the base, cut out a circle from thick cardboard or plywood. Make the diameter of the circle 1-2 cm larger than the pipe itself. It is impossible to make the base the same diameter as the pipe, since the vase may simply fall due to its height + the weight of the flowers.
- Glue the base with universal glue or PVA.
- Pour glue into the container. We unwind the twine, completely dip it in the glue and wait until it is saturated. It is not advisable to use synthetic twine, as it will not be saturated with glue and will not adhere well to the product.
- We wrap the pipe with soaked twine. If there are small gaps between the threads, it’s okay, but it is advisable to wrap the tube completely.
- Leave the product for several days in a warm, dry place until the glue dries completely.
- Using a can of paint, we paint the product. We work with aerosol paint outside the house: on the street or on an open balcony. Be sure to protect yourself with a respirator and rubber gloves.
- We enjoy the result.
I fervently believe that detailed instructions will help you create delightful vases from linoleum pipes with your own hands. Don’t be afraid to experiment and show your imagination, because you can create amazing things from linoleum pipes.
Plastic pipes for colorful fakes
After repairs, do you have an unnecessary piece of plastic pipe lying around, and you don’t know where to put it? They did the right thing by deciding to look for possible options for transforming this trinket.
Now I will show you what wonderful vases you can make from them. Still don't believe me? Then watch!
Vase with butterflies
Who would have thought that such beauty could be created from a piece of plastic pipe! No matter how it may seem at first glance, even the materials for yourself will be inexpensive. So, let's start creating a vase.
I’ll start the master class with a list of necessary materials:
- plastic pipe;
- plastic cover for the bottom;
- PVA glue;
- paper napkins;
- medium-weight colored paper (any color);
- satin ribbon, 3 cm wide;
- black acrylic paint;
- golden acrylic paint;
- foam sponge;
Let's start creating the product:
- First, cut the pipe to the desired height. If the size of the pipe suits you, there is no need to cut anything.
- Using super glue we connect the main part to the bottom. We wait until the glue holds the parts together well.
- We dilute the PVA glue with some water (just a little, for easy application), and use a brush to lubricate the surface. Quickly, before the glue dries, glue paper napkins.
- We wait until the first layer dries, coat it with glue and create a second layer from napkins.
- While the napkins dry, cut out blades of grass and butterflies. From colored paper we cut out blades of grass of different lengths. Using sharp scissors, cut out butterflies from the ribbon.
It will be much easier to cut out butterflies from ribbon if you use a cardboard stencil. To do this, place a stencil on the tape, trace along the contour and cut it out.
- When the layer of napkins has dried and all the parts are cut out, we begin to attach them. We do this using PVA glue, but now we don’t spread it. We glue the blades of grass with a slight tilt, and place the butterflies in a chaotic manner.
- We wait until the product is completely dry. This may take 2-3 hours.
- We take black acrylic paint and thoroughly paint the future vase. To avoid any unpainted areas, I recommend using spray paint.
If you use spray paint, it is best to work with it outside or on a well-ventilated balcony.
- And now, the product is almost ready, all that remains is to add golden notes. To do this, take golden liquid paint, pour a little into an unnecessary container and apply it using a foam sponge using point-to-point movements. Be sure to leave part of the black background, do not paint the product completely golden, but paint all the blades of grass (you can use a brush for this).
After the paint has dried, the decor item is completely ready for use. You can put it on a coffee table, nightstand or desktop. This creation will fit perfectly into the interior of your home.
Of course, it is better to put dried flowers or artificial flowers in such a vase, but you can experiment. Try using a good glue and sealant to connect the base pipe and the bottom. If everything works out, then you can pour water into such a vase and put fresh flowers.
Beautiful vase “Gifts of Nature”
I would like to invite you to try making such a decorative vase, decorated with tree bark and decoupage elements. This floor item can become a spectacular decoration for your living room or hallway. And with a bouquet of flowers inside, the appearance of the decorative element will noticeably change.
I want to immediately warn you that creating such beauty will take much more time than the previous model. Some elements and surfaces take quite a long time to dry. If you are planning to give this decorative element as a gift to someone, I recommend starting its creation in advance, no later than 1.5-2 weeks before the desired date, so that the product is completely dry.
So, what is needed to create such beauty:
- plastic pipe (about 70 cm long);
- PVA glue;
- newspaper;
- primer (any one you find in the store);
- bark of tree;
- rope or rubber bands for money;
- colored napkins for decoupage;
- stickers (if not, you can print a color image on a regular piece of paper and cut it out);
- gypsum;
- acrylic paint;
Step-by-step instruction:
- We take the pipe and cut it to the required size. The ideal height for a floor vase (if the pipe is weave) is 60-70 cm. If the height does not need to be changed, we leave everything as it is.
- We tear the newspaper into medium-sized pieces (about 10x5 cm). Dilute the PVA glue with a little water and use it to cover the pipe with newspaper. Let it dry a little, prime it for strength and let it dry.
- We decide what shape and size the area on which the picture will be placed will be. Cut out the area for the picture from paper and glue it on top of the newspaper. I will have sunflowers, so I make the background beige.
- We strip the bark from firewood or simply cut down trees (preferably with a reserve so that there is definitely enough). To get rid of various bugs in the bark, you need to boil it for about 10-15 minutes and then dry it.
The bark takes about 2 days to dry. Glue the bark onto the surface of the pipe. You can use either PVA glue (not diluted with water) or universal thick glue. If the glue is liquid, then the bark needs to be fixed with ropes or rubber bands - then it will not move out and can stick well. - When the bark has stuck (depending on the glue - about a day), we take colored napkins with a pattern. Cut out the desired objects along the contour. I have sunflowers, but you can take any flowers or a completely different design.
- Take butterfly stickers or print a color picture on paper and cut it out.
- Glue the flowers into the area reserved for decoupage. For this we use PVA with water.
- As you can see, sunflowers alone look lonely, so you can’t do without butterflies. We glue butterflies on flowers, as well as in empty spaces. You don't need too many of them, it will be too cluttered. We make a not very “cool” solution from gypsum and lay out the bottom of the vase: put a pipe on a plastic board and lay the solution on top. We wait until the plaster dries (about 2 days) and proceed to the final stage. We paint the bark with brown paint, and apply 1-3 layers of varnish on top.
- We leave the product for a few more days for final drying. We use it as a gift or decorate our apartment with a wonderful decorative element.
Selecting size and shape
Floor vases can be different: tall, medium height and width, large and moderate in size. The parameters of a floor vase depend on a number of factors. One of the key ones is the design of the surrounding space. For example, the dimensions may depend on the footage of a particular room, because the smaller it is, the smaller the vase itself should be. If you do not take this fact into account, the accessory may look too bulky in the interior, thereby disrupting the visual balance.
The height of the product can vary from 40 to 90 cm.
It is selected paying attention to the height of the walls and the spaciousness of the room, since an accessory that is too tall can visually make the height of the walls smaller, which is unacceptable. The width is selected based on your own preferences, as well as the mold available for production. In addition, it may depend on the chosen style, which should coincide with the interior design.
The shape of a floor vase can be conventionally round, square, or triangular. Each type has its own nuances, for example, the rounded shape is considered the most harmonious for blending into different stylistic directions of design. It can be made using bottles or even three- and five-liter glass jars. The papier-mâché technique is also suitable for this.
A square floor vase is good for modern interior compositions.
The basic form for its manufacture can be an ordinary cardboard box. It is somewhat more difficult to make triangular-shaped options, since it is less common to choose such shapes. Products of this type are often made from available raw materials or various components (for example, newspaper tubes).
Interior use options
A floor vase can be placed in different rooms, as well as in different places. For example:
- it looks harmonious at the bottom of the side of the stairs;
- no less expressive is its presence in the living room near a set of upholstered furniture, where everyone will pay attention to it;
- you can place the original accessory near a small cabinet and chair;
- the proximity of a floor vase to a bedside or other compact table is appropriate;
- a beautiful vase, which is part of the compositional decor, can stand next to the chest of drawers, on which there are accessories of smaller sizes, but of the same design;
- you can put not one, but three vases, placing them near the wall with paintings;
- you can decorate the space near the panoramic window with an extraordinary vase or even two;
- You can use the accessory to fill the ledge by the fireplace or by the window.
There can be many options for using a floor vase in the interior. The specific location, as a rule, is suggested by the layout of the room itself. This is a place in a niche, part of a ledge, a place on the side of a closet, in the corner of a home library, video zone and even a hallway.
The main thing is to make it stand out, you need to choose the right color before starting work. For example, a white vase needs contrast and is lost against the background of white wall cladding.
To learn how to make a floor vase with your own hands from scratch, see the following video.
Manufacturing methods
You can make a floor vase with your own hands from waste material, improvised materials and even ordinary utensils. Craftsmen make such accessories not only from three-liter jars and papier-mâché, but also from plumbing pipes, plaster, twine, and linoleum. To make it stand out against the background of the interior, and also fit harmoniously into it, it is better for a beginner to choose the option of a symmetrical round shape to create. It is important to take into account: the product looks better against the general background if its shade does not match the color of the floor covering, furniture and wall cladding.
From a three-liter jar
This kind of work is notable for the fact that without drawing skills, it allows you to get a product with an imitation of artistic painting. In addition to the jar, to make a vase you will need napkins for decoupage, acrylic paints, brushes, twine and special glue, as well as the necessary decorating accessories (selected at will). The method of making such a floor vase consists of several successive steps:
- the surface of the jar is degreased and coated with white acrylic paint;
- after it dries, twine (or tape) is wound around the neck;
- prepare decorative elements (cut out from napkins);
- they are glued on, straightened with a brush, creating a pattern, ornament or other composition;
- After they dry, transparent acrylic varnish is applied on top.
The decor in gold and bronze looks beautiful, and to create a vase like this, it is enough to use a contour gel and draw a simple design with it. If you cover the top of such a product with dark paint and spray gold in places with a sponge, such a vase will look expensive.
Out of a beautifully shaped box
Such vases look quite unusual in the interior; they are very impressive, but are suitable mainly for modern style, as well as landscape compositions. To make it you need a box (mold), plaster (cement), a container to form the internal space and cling film to make it easier to remove the vase from the base:
- gypsum is mixed with water until smooth, achieving the consistency of thick sour cream;
- it is poured into the box in a small layer;
- a smaller container is placed inside, placing it in the center;
- add the mixture to the desired level;
- when the composition is completely dry, the vase is removed from the mold;
- processed with fine sandpaper and decorated.
If you want to add a design to such a product, you can do this using spray paint and lace braid. The braid is tightly attached to the base, and paint is sprayed on top of it. If you want more chic, you can add a little silver or gold by applying it with a sponge.
From a plumbing pipe
For such a product, sometimes not only the usual improvised materials are used, but even nylon stockings and knitted fabrics. The design of the future vase depends on the type of product itself, its material and shape. Options with kinks are more suitable for decorating landscapes and cottages. Products with a straight cylindrical shape are relevant for city apartments.
The best materials suitable for the job are plastic and metal plumbing pipes.
They can be pasted over with various decors (including even cereals), or they can be given a relief pattern. For example, you can make a plastic trio from pipes of different heights by cutting their tops at an angle. The bottom of such vases is made of cardboard, although if desired and appropriate skills can be welded to metal.
You can put a nylon stocking on each pipe, forming folds. The surface is impregnated with glue and waited until it is completely dry. After the base has been created, they begin to decorate the vases, covering each of them with special paint in cans.
The color is chosen based on the color scheme of the specific room in which the accessory will be installed. All you have to do is add a little gilding or even glitter - and the unique decor is ready.
From a paper pipe from linoleum
This product can be used for dry branches. Creating it is simple: you will need the pipe itself (you can buy it at a hardware store), twine or rope thread, some cardboard, a hot-melt gun with glue and a saw for cutting the pipe. The manufacturing method is as follows:
- the required amount is cut from the pipe, having previously decided on the height of the vase;
- take thick cardboard and, placing a pipe on it, trace it, and then cut out the bottom;
- Having glued the bottom to the future vase, they decorate it using rope thread or twine;
- thread is wrapped around the vase from bottom to top, gluing it to the base using hot glue (you can also use other adhesives);
- Having tightly wrapped the product to the very top, cut the thread;
- For stability, place a little paper or small stones inside.
Made from thick cardboard and cardboard tube
To create a Greek vase you will need old newspapers, a cardboard tube and several large boxes that you can get from the store. You will have to cut out the base of the vase from them, so it is advisable to take boxes of approximately the same size (there is no point in gluing them). This option for making a floor vase is more labor-intensive, but the appearance of the finished product will delight not only the owners of the house: such a product will be a rather bright and memorable accent of the interior. Such a masterpiece is created using the following technology:
- correlate the height of the pipe, the desired height and the size of the existing boxes (everything should be the same);
- cut out a vase template, trace the blanks along it, cut it out and fold it in half;
- when there are enough of them, they paste over a cardboard tube (you get the appearance of an accordion);
- then they tear the newspapers into pieces, soak them in PVA glue and create the base of the vase, pasting it from bottom to top in several layers, trying to ensure that the shape is even;
- after the newspaper, you can stick on several layers of toilet paper;
- when it dries, the surface is covered with dark paint;
- an ornament is drawn using contour gel or special contour paint;
- You can cover the vase with another thin layer of paint, and then mark the relief pattern with bronze or gold paint.
To make a vase look expensive, you need to make it as carefully as possible, paying attention to the neck and bottom. When coating, it is important to paint them too; the lines of the design must be even, and when decorating, identical.
Vase decoration
The main work has been completed. You can start decorating. To do this, you can use old nylon tights. Lubricate the pipe with glue and put tights on the vase. You will need about three pairs, which will create originality and give a special appearance.
Leave the product in a draft so that everything dries well. This will take approximately 1 hour. During this time, soak the pieces of paper in water, add paste and alabaster, and knead the resulting mass.
To make it easier to create patterns, sandbox molds need to be greased with vegetable oil. Then fill them with adhesive mass, carefully leveling it and compacting it. After a couple of minutes, take out the resulting figures and, while they are still raw and flexible, attach them to the vase. They should fit snugly against the curved walls of the pipe.
You can finish decorating the vase as you wish. Use sparkles, rhinestones, beads. Fill the folds that formed the tights with paint. Brush over the tops with a semi-dry brush. You can choose dry acrylic paint with a silver or golden sheen.
Paint decorative elements in different colors. Choose bright, rich shades - sea wave, forest green. Paint the rope that covers the vase with gold or silver shimmering paint.
Free spaces can be decorated with various figures made from papier-mâché dough. Shells, stars, flowers and other shapes that are in harmony with the overall style of the interior are suitable.
You can put a nylon stocking on each pipe, forming folds. The surface is impregnated with glue and waited until it is completely dry. After the base has been created, they begin to decorate the vases, covering each of them with special paint in cans.
Decorating the finished product
Decorating a finished accessory will require knowledge of basic stylistic skills, without which it is difficult to make it appropriate in a particular interior. Today, fashion trends are aimed at a combination of conciseness and functionality. The decor should be minimal; it is important that, despite its apparent simplicity, the product looks status, impressive and professional, as if it had been purchased in an expensive store. Therefore, you need to approach the issue of decoration especially carefully.
Depending on the type of material used and the technique for making a floor vase, you can use the following to decorate it:
- mosaics, including homemade ones made from multi-colored tiles and mirrors;
- flat buttons of different sizes and shapes;
- coins;
- coarse salt;
- cereals, sunflower and pumpkin seeds;
- dry branches of different lengths and curvature;
- cuttings of branches;
- twine;
- tree bark;
- newspaper tubes;
- stationery erasers;
- bracelets made of beads on a rubber thread;