Polypropylene pipelines (PPR), due to their affordability, physical parameters and ease of installation, are widely in demand in households when organizing cold and hot water supply. During self-installation, the greatest difficulty is caused by soldering polypropylene pipes in hard-to-reach places, which is quite difficult for a beginner to cope with without making mistakes.
Therefore, it is useful to study techniques - how to properly solder a pipeline near walls, the specifics of soldering in corners, it is advisable to be able to repair polypropylene sections of a pipeline in compliance with technology.
At the same time, it is very important to make the right choice of tool and know the most common mistakes made by beginners.
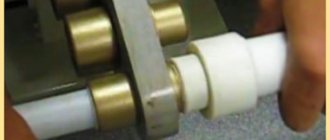
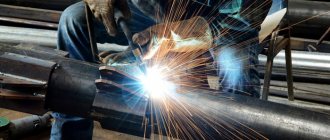
Fig. 1 Industrial apparatus for PPR butt soldering - principle of operation
Description of the pipe welding procedure
Once a constant arc has been achieved, it is possible to begin welding. During welding, move the arc as follows:
- progressively throughout the weld, due to which the arc will be stable;
- longitudinally for a narrow seam with a height depending on the speed of movement of the electrode along the surface;
- transversely in order to ensure the required thickness of the seam, moving the rod with oscillatory movements.
Pipes with small wall thickness and diameter are welded with a constant seam, while pipes with thick walls are welded with an intermittent seam. Welding of joints should be carried out until the joint is completely welded without interruptions. When welding joints with a wall thickness of up to 6 mm, two welded layers are made, with a thickness of up to 7 mm - three layers, and with thicker walls - four.
In most cases, the first layers are welded in stages, starting from the edges of the pipes with fusion, and the subsequent layers are welded evenly in a continuous layer. The stepped option is used for pipes with a thickness of more than 8 mm: the base layer is applied by dividing the surface of the pipes into certain areas with a small area and welding through one area, and later the missing ones are welded. After welding of the first layer is completed, it is inspected for cracks, since the quality level of the entire seam depends on this. If there are any, they are melted down and welded again.
Subsequent layers are welded by turning the pipe or uniformly moving the electrode along the surface of the seam, and the starting point of welding is shifted rather than the end point by about 20–30 mm relative to the previous layer and the direction of movement of the electrode is changed to the opposite. The last seam is made with a smooth transition and a smooth surface to the size of the pipe diameter. If pipes with a square cross-section are welded, their ends must be firmly secured so that the metal does not lead and the pipe does not deform. Upon completion of welding work, the surfaces are cleaned of slag.
Welding pipes using electric welding is a simple process, but important, requiring adherence and care to the sequence of actions performed.
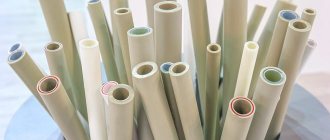
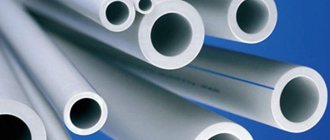
Types of PPR pipes
Polypropylene belongs to the group of thermoplastics. When heated to temperatures below the yield point, the polymer becomes viscoelastic. It is reversible, so the material becomes solid again when cooled. This property is used in PPR welding.
The industry produces pipes with a diameter of 10 to 1600 mm with a wall thickness of 2-61 mm. For domestic needs, sections from 16 to 110 mm are mainly used.
The pipe range is made from varieties of polypropylene:
- PP monopolymer;
- block copolymers PP-N, PP-B;
- random copolymer PP-R.
The differences between them lie in the structure of the polymer chains and the structure of intermolecular bonds.
Products made from PPR have the necessary strength and chemical resistance, but rather high thermal expansion. When heated to 50 °C, a 10 m long pipe lengthens by 60 mm.
To reduce deformation, polypropylene is reinforced with fiberglass or aluminum foil. Such materials are most widespread in low- or high-temperature heating systems, where the environment experiences significant temperature fluctuations.
Product labeling contains information about the manufacturer, pipe type and diameter, wall thickness, service class, and nominal operating pressure. Additionally, the number of the Russian or international standard may be indicated.
The scope of application of pipes is determined by the operating pressure:
- PN10, PN16 - for cold water supply;
- PN20 - for cold and hot water supply;
- PN25 - for heating.
The color of the plastic can indicate the purpose:
- white and gray - for internal cold or hot water supply, heating;
- black - for external systems;
- green - for irrigation, cold pipelines of short length.
Welding steel pipes
Welding of round pipes is carried out using a continuous seam. That is, if the process began from one point, then it should end at that same point, without lifting the electrode from the surface to be welded. When welding large-diameter pipes (over 110 mm), it is impossible to fill the seam with one electrode. Therefore, it is necessary to use multilayer welding, where the number of layers is determined by the thickness of the pipe walls. Eg:
- If the wall thickness is 6 mm, then two layers of metal are sufficient.
- 6-12 mm – welding is carried out in three layers.
- More than 12 mm - more than four layers.
Attention! Multilayer welding is carried out with one requirement. Before applying the next layer, the previous ones must cool down.
Pipeline assembly
Before welding pipes, to simplify the task, it is necessary to assemble the welding joint. That is, you install the pipes according to the assembly design, clamp them so that they do not move or shift. After which the tack is done. This is when spot welding is done in one place; if the pipeline is assembled from large-diameter products, then tack welding can be done in several places.
In principle, everything is ready, you can weld the pipeline. It would seem that this could be the end of the conversation about welding. But for novice welders it is just beginning, because the welding process associated with pipeline assembly involves a large number of nuances. Here are just a few of them that need to be taken into account.
- Pipes with a thickness of more than 4 mm can be welded using a root weld, this is when the metal fills the space between the edges to the full depth, and a roll weld, when a roller 3 mm high is formed on top of the seam.
- When connecting pipes with a diameter of 30-80 mm with a vertical seam, the technology is slightly different from the bottom location of the seam. First, the volume is filled to 75%, then the rest of the space.
- With multilayer welding technology, a horizontal seam is welded in two layers so that the next one is applied in the opposite direction than the previous one.
- The connection point of the lower layer should not coincide with the same point of the upper layer. The locking point is the end (beginning) of the seam.
- Usually, when welding pipes, the latter must be rotated all the time. This is done manually, so you need to know that the optimal rotation sector is 60-110°. It’s just that in this range the seam is located in a place convenient for the welder. Its length is the maximum, and this allows you to control the continuity of the seam connection.
- The most difficult thing, as many welders believe, is to turn the pipeline 180° at once and at the same time maintain the quality of the weld. Therefore, with such a rotation, it is recommended to change the welding technology. That is, first the seam is welded to a depth of up to 2/3 in one or two layers. The pipeline is then rotated 180°, where the seam is completely filled in several layers. Next, there is a 180° turn again, where the seam is completely filled with the electrode metal. By the way, such joints are called rotary joints.
- But there are also non-rotating joints, this is when pipe is welded to pipe in a fixed structure. If the pipeline is located horizontally, then the joint between its parts must be welded by dividing it into two parts. Welding starts from the bottom point (ceiling) and moves to the top. The second half of the joint is welded in the same way.
And the last stage in pipe welding technology is seam quality control. It must be tapped with a hammer to knock off the slag. Then visually check for cracks, gouges, chips, burns and lack of penetration. If the pipeline is intended for liquids or gases, then after assembly, water or gas is introduced into it to check for leaks.
The welding process is actually a responsible undertaking. And only the experience of a welder can guarantee the quality of the final result the first time. But experience is a gain. We invite you to watch a video on how to properly weld steel pipes.
How to work with an electric coupling
The technology of welding using a soldering iron is electrofusion welding. Couplings for heating pipes and fittings are included with the tool and are attached to it as needed. One person can work with such a soldering iron. In this case, it is more convenient to fix the welder with your feet while kneeling.
The tool is heated to 260 degrees - this is the standard recommended temperature for work (at an external temperature not lower than +10). The pipe and fitting are simultaneously inserted into the electric coupling and held for the required time. The pipe should be pulled out first, then the fitting. The parts are connected manually and fixed until they cool.
Things to consider:
- Parts inserted into the electric coupling must not be rotated. The movement of polypropylene will cause it to stick, deforming the part and damaging the tool.
- Overheating will cause the material to melt and the internal lumen of the pipe or fitting to float.
- Underheating will not allow the material to melt enough to join.
- Low air temperature will lead to rapid cooling of parts that have been removed from the electric coupling. This will not give a good connection, or the master will not have time to adjust the direction of the joint.
Indications
The instructions for using the product indicate the following ailments:
- the occurrence and accumulation of a large volume of gases in the esophagus, called flatulence, as well as Roemheld syndrome;
- intestinal colic in infants;
- symptoms of increased gas formation, which are formed due to functional dyspepsia;
- preparatory process for ultrasound examinations, x-rays, computed tomography;
- severe intoxication with cleaning solutions that include foaming ingredients such as detergents.
Common mistakes
Soldering plastic pipes does not require special skills, but if you do not adhere to established norms and rules, you can still ruin the connection. Typical mistakes of novice masters are:
- using dirty attachments. If drops of molten polymer remain on the nozzles, then during the next welding they can wedge between the edges of the products and sharply weaken the connecting seam;
- residual water and dirt on the outer surface. They will prevent close contact of the surfaces of parts over the entire area;
- applying excessive force when combining parts. Part of the melt under excess pressure can be squeezed into the pipe and reduce its permeability;
- an attempt to clean up the sagging of molten plastic before the joint has completely cooled, which inevitably leads to deformation of the pipe;
- insufficient heating or overheating of the joint.
Weld joint quality control
Having completed the electric welding, an external inspection determines the presence of burns, pores, fistulas and other visible defects. To detect microcracks that are invisible to the naked eye, the mounted area is usually connected to the heating system. If water droplets do not appear on the seams, the work has been done efficiently. This method of checking is acceptable in a private home, where the system can be filled at any time.
In apartments with central heating, the quality of welded joints is checked in the summer using a compressor. Plugs are placed at the ends of the pipes, the joints are coated with soap foam, and air is pumped in under pressure. Places where there are flaws are identified by bubbles on their surface.
It is better to replace or install new heating pipes in the summer, so that most of the welding operations can be performed outside. There should be no flammable materials in the room near the place of work. If you still don’t have enough experience in welding pipes, you can first weld a few unnecessary scraps, so as not to spoil the new workpieces later.
Welding in hard-to-reach places
Soldering hard-to-reach areas of polypropylene products is much more difficult than straight runs. To create favorable working conditions in such places, a sufficient amount of effort is required.
“Inconvenient” places include:
- Space under the ceiling.
- Corners of the room.
- Cramped conditions for placing a soldering iron.
When welding polypropylene pipes in hard-to-reach places under the ceiling, you need to prepare a place where the welding machine will be placed when manually forming the connection. For this purpose, you can invite an assistant or hang the device on a special hook prepared in advance.
Other methods of threadless pipe connection
Pipe connections without welding or threading are also now available. To do this, use one of several devices:
- a special coupling, which you can purchase in a store or make yourself;
- Gebo fitting;
- flange.
Connecting pipes using a coupling
The connection of metal pipes without welding and threading can be realized using a special coupling.
This fitting consists of the following elements:
- body (3), which is best made of cast iron or high-strength steel;
- two nuts (2) located at different ends of the coupling. If you make a fitting yourself, then brass or bronze is used to produce nuts;
- 4 metal washers (4) installed inside the coupling;
- rubber gaskets (5) used to seal the joint.
Connection fitting device
The diameter of the nuts, washers and gaskets must correspond to the diameter of the pipes being connected.
To install the coupling you will need:
- insert the ends of the pipes (1) through the nuts (2) to the middle of the coupling. The pipes must also pass through washers (4) and gaskets (5);
- the nuts are tightened all the way, while squeezing the gaskets. The connection is quite strong and durable.
Connecting pipes using a Gebo fitting
To connect pipes without welding and Gebo threads with a fitting made of plastic, you will need:
- purchase the required item. Gebo fitting consists of:
- housings;
- O-rings;
- clamping rings;
- clamping rings;
- nuts
Device of a special fitting for joining pipes
- Carefully place the coupling in the unscrewed state onto the ends of the pipes requiring connection;
- secure the joint with nuts.
To obtain a more reliable connection, the nuts can be tightened using wrenches.
Gebo fittings are available for plastic and metal pipes. PVC pipe couplings are also made of plastic. Accordingly, fittings for metal pipes are made of metal.
Gebo fitting for metal pipes
The connection of metal pipes without threads with a Gebo coupling occurs in a manner similar to the one described above. It is recommended to clean the pipes before joining.
Gebo fittings allow you to make pipe joints as airtight and aesthetically pleasing as possible.
Ready-made connections are not subject to temperature changes and pipe vibration. Couplings can be used for all types of pipelines.
Flange connection
A flange is a product designed for joining pipes and installing additional equipment on the pipeline.
The flange consists of several mounting bolts and nuts located around the perimeter of a metal or plastic surface. There is an O-ring in the middle.
Fitting used to join pipes
Currently, a large number of different flanges are produced. Joint elements may differ:
- by diameter (corresponding to the diameter of the pipes);
- in shape: square, round, rectangular and so on;
- by material of manufacture: plastic, metal. Metal products can be made of stainless steel, copper, brass;
- by purpose: for pipes carrying cold and hot water, gas, aggressive substances, and so on.
It is necessary to select a flange based on the parameters and characteristics of the pipeline.
Using a flange, you can connect a metal pipe to a plastic pipe without threads. To connect pipes, you must:
- install flange parts at the ends of the pipes being joined. For reliability, you can resort to the welding method (how to do this is described above);
- install the o-ring;
- secure the connection using fastening bolts.
Particular attention must be paid to installing the O-ring. It must be clearly fixed between the pipes, otherwise the joint will not be reliable
It is not difficult to connect pipes without using threaded elements. Before choosing a method for joining pipes, you need to determine their diameter and the type of material from which they are made. Some methods require special equipment and initial skills to use, others can be performed by novice craftsmen.
Valve repair.
Hello dear subscribers and guests of the blog. In this article we will look at how to repair a water valve.
Previously, I wrote an article “How to shut off the water yourself,” in which I briefly discussed the issue of repairing the valve yourself if it is impossible to turn off the water supply. After some time, I noticed that people often came to this article from search engines using the queries: “how to fix a faucet”, “turned off the faucet and water flowed”, “the valve doesn’t hold, what should I do” and the like, but the essence came down to one thing — the average person doesn’t know how a valve or faucet works, doesn’t know whether it’s possible to restore the functionality of this important element of the water supply system, and when he came to my blog, he couldn’t find an answer to his question.
I decided to fill this gap and make a separate post on valve repair; plumbers call this an audit.
So, you are faced with the problem of turning off the water, I will try to help solve it.
Regardless of what material it is made of, be it bronze, cast iron, or polypropylene, the device is identical. If a ball valve fails, it is easier to replace it with a new one rather than bother with an inspection. But let's talk about everything in order. Here is a cross-section of the diagram (click the mouse to increase the size).
1 - body, 2.13 - nut, 3.12 - washer, 4 - rubber gasket, 5 - valve, 6 - sanitary flax or gasket, 7 - rod, 8 - rod bushing, 9.16 - stuffing box, 10 ,15 — sealing sleeve, 11 — flywheel, 14 — clamping nut.
Possible valve malfunctions:
As for the ball valve, we can limit ourselves to considering only three possible malfunctions:
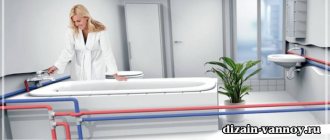
Layout of polypropylene pipes
Polypropylene pipes are used for installation of cold or hot water combs and heating. The choice of diameter in each case is individual - it depends on the volume of liquid that needs to be pumped per unit of time, the required speed of its movement (formula in the photo).
Formula for calculating the diameter of polypropylene
Calculating the diameters of pipes for heating systems is a separate topic (the diameter must be determined after each branch), for water supply systems everything is simpler. In apartments and houses, pipes with a diameter of 16 mm to 30 mm are used for these purposes, with the most common ones being 20 mm and 25 mm.
Counting fittings
After determining the diameter, the total length of the pipeline is calculated, and fittings are purchased depending on its structure. With the length of pipes, everything is relatively simple - measure the length, add about 20% for errors and possible defects in the work. A piping diagram is required to determine which fittings are needed. Draw it, indicating all the outlets and devices to which you need to connect.
An example of the layout of polypropylene pipes in the bathroom
To connect to many devices, a transition to metal is required. There are also such polypropylene fittings. They have a brass thread on one side and a regular solder fitting on the other. You should immediately look at the diameter of the pipe of the device being connected and the type of thread that should be on the fitting (internal or external). To avoid mistakes, it is better to write everything down on the diagram - above the outlet where this fitting will be installed.
Next, according to the diagram, the number of “T” and “G” shaped connections is calculated. Tees and angles are purchased for them. There are also crosses, but they are rarely used. By the way, there are corners not only at 90°. There are 45°, 120°. Don't forget about couplings - these are fittings for joining two pieces of pipe. Do not forget that polypropylene pipes are not at all elastic and do not bend, so each turn is made using fittings.
When purchasing materials, agree with the seller about the possibility of replacing or returning some of the fittings. Problems usually do not arise, since even professionals cannot always immediately determine exactly the required assortment. In addition, during the installation process, sometimes it is necessary to change the structure of the pipeline, which means the set of fittings changes.
Compensator for hot water supply and heating made of polypropylene pipes
Polypropylene has a fairly significant coefficient of thermal expansion. If a polypropylene hot water supply or heating system is being installed, it is necessary to make a compensator, with the help of which the lengthening or shortening of the pipeline will be leveled. This can be a factory-made compensator loop, or a compensator assembled according to the diagram from fins and pieces of pipes (pictured above).
Laying methods
There are two ways to install polypropylene pipes - open (along the wall) and closed - in grooves in the wall or in a screed. Along the wall or in the groove, polypropylene pipes are attached to clip holders. There are single ones - for laying one pipe, there are double ones - when two branches run parallel. They are attached at a distance of 50-70 cm. The pipe is simply inserted into the clip and held in place thanks to the elastic force.
Fastening polypropylene pipes to walls
When laying in a screed, if it is a warm floor, the pipes are attached to the reinforcing mesh; no other additional fastening is required. If the lines to the radiators will be sealed in, the pipes do not need to be fastened. They are rigid and do not change their position even when filled with coolant.
Option for hidden and external wiring in one pipeline (the wiring behind the bathroom was made open - less work)
Soldering nuances
The process of welding polypropylene pipes itself, as you have seen, does not leave much work, but there are a lot of subtleties. For example, it is not clear how to adjust sections when joining pipes so that the pipes are exactly the length required.
Another aspect of welding polypropylene pipes is soldering in hard-to-reach places. It is not always possible to fit a pipe and fitting onto a soldering iron on both sides. For example, we solder in the corner. The soldering iron has to be shoved into a corner, on one side the nozzle rests directly on the wall, you can’t pull the fitting onto it. In this case, install a second set of nozzles of the same diameter and heat the fitting on it.
How to solder polypropylene pipes in hard-to-reach places:
How to switch from iron pipe to polypropylene:
Mistakes when welding pipes with your own hands
Result of bad soldering
The first experience in assembling a polypropylene pipeline can lead to weak connections and deformation of elements
The most common problems, the possibility of which you should pay attention to when working:
- pipeline deformation
- partially blocking the lumen with a polymer material
- poor welding quality
Depending on the cause, the consequences may appear immediately or after some time.
Gaps and distortion of the structure
Loose fit of welded parts
The reasons for violation of the geometry of the pipeline system can be:
- poor fixation of long elements during welding and cooling
- incomplete insertion of the pipe into the fitting
- low heating temperature
Creating tension in a rigid system can lead to pipe rupture; immediately after soldering the elements, this error has an aesthetic effect. In the case of a leaky connection due to poor fit of the soldered parts or insufficient heating, the consequences appear instantly - the connections leak, some voids can be detected during visual inspection.
Compliance with the geometry of the connections will ensure not only a visually attractive appearance of the pipeline, but also the tightness of the connections due to the arrangement of the elements relative to each other.
Failure to comply with welding temperature conditions
Consequences of overheating during connection
If insufficient temperature during welding leads to leakage, overheating may result in molten polymer entering the pipeline, causing local narrowing and deterioration of throughput.
DIY furniture and other wood products: drawings of benches, tables, swings, birdhouses and other household items (85+ Photos & Videos)
Types of electrodes
An electrode is a thin metal rod that is coated with a special compound. It protects the metal from the occurrence of corrosive deposits and determines how the weld will turn out. To figure out which electrodes to weld pipes with, you need to consider the properties of each of them. The main parameters by which electrodes are classified are the type of coating and the type of core. Products come with a melting and non-melting core.
- To make a melting core, welding wire with different diameters is used, which is selected depending on the type of work.
- To make a non-melting core, tungsten, graphite or electrical coal are used.
The electrodes are coated with cellulose, rutile, rutile-acid or rutile-cellulose coating.
Heat the pipe and fitting
There is a risk of serious burns when working with a hot soldering iron, so be sure to wear protective gloves. Parts of different sizes need to be heated for a certain time. The larger the diameter, the longer.
For a reliable connection, it is important not to overheat the polypropylene, otherwise the material will become fluid, melt and block the fitting from the inside.
YouTube channel “Twice Father Dmitry”
Insert the fitting first into the corresponding soldering iron sleeves, then the pipe. When pushing parts, do not rotate them around their axis or tilt them. Insert the pipe to the previously marked depth until the molten polypropylene reaches the pencil line. Only then count down the allotted time.
All specified data is valid for work at an ambient temperature of about 20 ° C. If the room is colder than 5 °C, the heating time approximately doubles.
How to properly solder polypropylene pipes: 3 modern methods
A true home craftsman always tries to do without the help of professionals in any repair. And if necessary, you can also do it yourself to replace PVC heating pipes or water supply in the apartment.
The use of polymer pipes for water distribution provides the advantage that there is no need to work with welding or threading, and therefore the work is greatly facilitated.
Before installing polypropylene pipes, you need to have an idea of how to work with a soldering iron for PVC pipes and purchase the necessary tools and materials.
How to solder correctly
How to make connections correctly so that they are airtight?
For the three most common soldering methods, below is a detailed description of all operations:
Bell-shaped
- For soldering pipes of small diameter (up to 50 mm), a simple manual apparatus is used. If you need to connect large diameter pipes, then use a device with centering devices.
- Two heating nozzles are a sleeve onto which a PVC pipe is placed. This design also has a mandrel (a device for moving the workpiece in the hole of the sleeve), into which the coupling is inserted.
- The apparatus for soldering polypropylene pipes must be installed on a flat horizontal surface and left to warm up to the required temperature. The heating process lasts 10-15 minutes - it depends on the power of the device.
- When soldering pipes that belong to the categories PN 10 and PN 20 (difference in operating pressure), the joints must be cleaned of dirt and burrs. If you need to solder reinforced PVC pipes, you need to remove the top part of the pipe with a shaver so that it can easily fit onto the fitting. Shearing is done to the depth of the pipe entering the coupling.
- The fitting and pipe are put on the soldering iron nozzles and kept for heating for the required time, which is determined by the power of the soldering iron and the room temperature. Instructions for time exposure are in the documentation for the device.
- Heated parts must be quickly removed from the device and connected to each other in a forward motion. Circular movements are not allowed.
- The connected parts must be kept in a stationary position for some time so that the pipes do not deform. After the area has completely cooled, the connection is ready for use.
Installation of a pipeline with a diameter greater than 50 mm is done in a different way - using butt joints of fragments. This soldering method is effective and justified only for pipes with a wall thickness of more than 4 mm.
- Before soldering, the ends of the pipes must be aligned so that they are parallel to each other.
- It is necessary to use centering devices, since strict alignment of the axes must be observed.
- To heat surfaces, a disk heating element is used, whose heating surface is ideally flat.
- The remaining technological operations are the same as for socket soldering.
Soldering saddles
This is a type of butt soldering. With this soldering method, you need to solder a special saddle to the surface of the pipe, which has a socket with an angle of 90˚. When assembling a pipeline from polymer pipes, use a special soldering iron for polypropylene pipes.
After this fragment has cooled, you need to drill a hole in the PVC pipe through the saddle. Then you need to solder another pipe to the saddle. You should end up with a pipe structure that is shaped like the letter “T”.
Your movements should be clear and fast. If you have no soldering experience, try making a few test seams.
Soldering polypropylene pipes yourself is not difficult, but this work requires care and attention. The main thing is to observe the heating time of the elements and the cooling time of the parts - the quality of the seam of the joints depends on this.
At what temperature should polypropylene pipes be soldered?
Polypropylene begins to melt at 140°C, and the operating temperature of the soldering iron is usually 260°C to ensure complete diffusion of materials.
How to properly solder polypropylene pipes: 3 modern methods
Electric and gas soldering irons are used to connect polypropylene pipes. You can solder pipes at home yourself - for this you need to study the soldering technique and buy a set of necessary tools.
Soldering technology
Below we will describe how to solder polypropylene pipes correctly and at what temperature:
- First you need to measure and cut the required piece of pipe. Additionally, you need to add 14-25 mm, which will go into the fitting.
- Now screw the desired nozzle into the soldering iron and turn it on to heat it up. This process will take several minutes - this time determines the power of the soldering iron.
The simplest soldering irons can only solder polypropylene - they do not provide temperature adjustment. Universal ones are capable of soldering low-melting polyethylene, and they can adjust the temperature from 260 to 280 ºC.
Next, we remove the chamfer from the outer surface of the pipe, and clean the aluminum reinforcement with a shaver.
To strip, a pipe with external reinforcement needs to be inserted into the tool and turned a couple of times, but if the reinforcing layer is located inside, then the tool will need to be pressed against the end of the pipe and turned with a little force.
We place the pipe on the wide nozzle and the fitting on the narrow one. It will take a few seconds for the surfaces of the parts to melt under the influence of temperature, and they will move along the nozzles a couple of centimeters. We wait a few more seconds, remove the parts from the nozzles, and insert the pipe into the fitting. We hold it motionless for 10 seconds, after which we can assume that the connection is ready.
You can clearly learn about the process of soldering pipes by watching videos that are available on the Internet.
Here are some useful tips for beginners that will make the soldering process easier for them:
- Chamfering of pipes must be carried out in any case. If there is no chamfer stripping from the inside of the fitting, then remove it yourself, otherwise, during the process of softening the plastic, there is a high risk of lifting up the plastic when inserting a pipe into it.
- When inserting the pipe into the fitting, do not turn it. This will significantly degrade the quality of the connection.
- During the melting process, the pipe and fitting must be inserted with force onto the nozzles until they stop. When joining, the end of the pipe must be welded to the fitting. This is especially true for polypropylene pipes with aluminum reinforcement.
- After soldering, wipe the Teflon coating of the nozzles with a rough cloth, but not with metal objects.
We hope you understand how to solder PP pipes and what you need for this. Good luck with your renovation work!
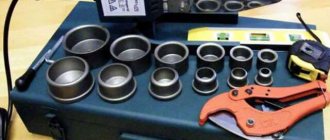
What are the tools for stripping polypropylene pipes?
Proper pipe stripping begins with tool selection. Its type and design depend on the type of reinforcement (external, internal) and diameter. For end brazing, special edge removal machines must be used. But polypropylene products are rarely made with a diameter of more than 60 mm. For this purpose, polyethylene pipelines are used.
Drill attachments
To install a pipeline with your own hands, you can buy several manual strippers for standard diameters - 16, 20, 25 and 32 mm. An example of a tool for external processing is the MasterProf or Newton series of models. Each is designed for two diameters, for example - 20x25 or 16x20. The knives are arranged vertically, they can be replaced and position adjusted.
Manual removal is convenient for small jobs. If this needs to be done en masse, it is recommended to purchase special drill attachments. They also differ in size, but all are designed to fit in a standard drill chuck. These are the optimal stripping tools for 20-25 mm polypropylene pipes.
How to choose manual or drill type cleaning:
- made of tool steel;
- corrugated surface for easy fixation;
- for manual models, the length of the knob is from 15 cm, it is possible to replace it;
- Drill attachments (shaver) can be of different diameters. This is achieved by adjusting the position of the blades.
An additional tool is a vice or clamp for fixing the pipe. This will make it more convenient to treat the surface; removal will not require much effort.
Working with a trimmer
A trimmer is necessary for cleaning the ends. It differs from attachments and shavers in the arrangement of the knives. Their plane is in a horizontal position at a slight angle. The aluminum layer is chamfered up to 1 mm. The advantage of this tool is its versatility. It is used to level the plane of the pipes, which affects the soldering accuracy.
Features of end trimmers:
- the ability to adjust the location of the knives, which will allow you to use one nozzle for pipes of several diameters;
- There are models for manual processing or installed in a drill;
- standard diameters are 20/25, 32/40 and 50/63.
The depth of chamfering depends on the evenness of the cut of the pipe. Often a trimmer is used first to level the plane of the end and then to clean the surface. Only a small part of the foil layer is removed, which eliminates its appearance at the soldering site.
Tip: according to reviews from craftsmen, plastic end caps have proven themselves well. They are suitable for arranging central and autonomous water supply and heating.
Polypropylene taps
When installing polypropylene pipes, two types of taps can be used: polypropylene and metal. If the entire water supply is made of polypropylene, then it is more advisable to use polypropylene taps, it is both cheaper and more convenient.
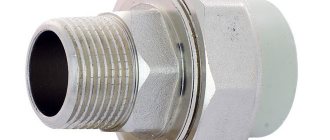
If it is necessary to install a valve in the transition between different types of pipes, for example, metal and polypropylene, or on a riser, then it is advisable to use a metal valve and use a detachable combined fitting.
It should also be noted that if we are talking about installing polypropylene pipes in a country house, then it is more advisable to use either polypropylene taps or traditional brass taps, but not ball taps. Quite often there are cases when water gets under the ball of a metal ball valve and when it freezes, the valve ruptures. A polypropylene ball valve does not suffer under similar conditions, because polypropylene is a more flexible material.
Features of welding a pipeline with an inverter
The electric arc welding method is suitable for creating a vertical seam, provided that it is located at the end of the pipe. If a horizontal seam is created, the latter should be on its circumference. If you have to make ceiling and bottom seams, then they should be at the top and bottom. Among all those mentioned, it is the last one that creates fewer problems in implementation.
If you have to deal with steel pipes, then the butt welding method is most often used, which involves welding each edge along the height of the walls. To minimize sagging inside the pipe, the electrode should be positioned at an angle of no more than 45 degrees relative to the horizontal. Such a seam should reach a height of 2–3 mm and a width of 6–8 mm. If the products are overlapped, then the seam will have a height of 3 mm and a width of 6–8 mm.
Preparation
Before you begin electric welding of metal products, you need to complete the following preparatory measures:
- It is necessary to remove the top layer from the welded aliment.
- If there are any irregularities at the ends of the pipe, they need to be cut off or straightened.
- Next we begin to process the edges. Here it is necessary to smooth out at least 10 millimeters of the surface adjacent to the edges of the pipe outside and inside until a metallic sheen appears.
Main stages
If the walls are 6–12 mm wide
Particular attention should be paid to creating the first seam, since a lot depends on it. It must be performed in such a way that it melts every edge and dull areas
It is very important to examine it very carefully, as there may be cracks on it. If they are found, they must be melted down or cut down, after which the area is welded again
When creating the remaining layers, you need to slowly turn the pipe. It must be remembered that the beginning and end of each layer should be located with an offset relative to the previous layer at a distance of 15–30 mm.
Polypropylene tap - a modern solution for your communications
Faucets made of polypropylene cause distrust among many buyers due to the fact that they consider the material to be unreliable and short-lived. Meanwhile, modern technologies ensure the highest quality manufacturing, thanks to which such cranes are not inferior in properties to metal products, and in some respects even surpass them. This article will discuss the main features of this type of product and the criteria for selecting quality models.
Taps and fittings for polypropylene pipes meet the highest quality standards if they are manufactured in accordance with the technology
Advantages of this product group
Taps for polypropylene pipes can be very different: steel, brass, or made of the same material as the main communications. It is the latter option that we will consider in more detail, especially since it has a number of undeniable advantages:
A polypropylene faucet is an excellent solution for most types of communications
Important! Another important advantage is the fact that the locking mechanism is made of high-quality stainless steel, this guarantees the durability of the structure and its resistance to adverse influences.
Features of polypropylene taps
First, you should understand the basic design features, this will allow you to better understand how the system functions.
Products can be made from different types of raw materials, most often the upper limit of heat resistance is limited to 95 degrees. It is best to choose designs from the PPRC brand of raw materials; the size range of products is quite wide, but the most common sizes are 20, 25, 32 and 50 mm, but other options can be found.
Regardless of size, the structure consists of the following components:
How to make a connection?
Let's figure out how to connect two parts of a pipeline without using welding and threaded fittings. Most often, the following methods are used:
- installation of Gebo coupling;
- installation of a clip or clamp;
- flange connection.
Gebo coupling
This is the name given to a special fitting; it can be used to manually combine two pipes into a single line. The coupling contains:
- frame;
- three rings - sealing, clamping, clamping;
- screw.
To install the coupling, put the nut and all other parts on the pipe in order, the coupling is put on last, it needs to be put on halfway, tightening the nut. Then the part that they want to connect to the pipe is joined to the fitting in the same sequence.
The reliability of the connection when using a Hebe coupling depends on how correctly the work was done. If everything is done correctly, the joint will be absolutely airtight and will last a long time.
Installing a repair coupling or clamp
The pipeline can be repaired or modified using a mounting clip. This part consists of two halves, which are bolted together, tightly gripping the pipe.
Carrying out work:
- If repairs or joining of previously used pipes are carried out, then the joint must be cleaned of scale, paint and any other contaminants. The surface must be completely clean and smooth;
- then a rubber seal is installed at the connection point, detachable parts are placed on top on both sides;
- the parts are tightened with bolts.
This method is very simple, but it does not provide a sufficient degree of reliability, so it should be used on non-pressure pipelines or as a temporary measure. Installation of the clamp is carried out in the same way. The difference between this part and the repair clip is that the clamp is tightened on one side, and the clip on both sides.
Flanges
Another simple way to connect pipeline parts is to install flanges. Flanges are parts in the form of a ring into the center of which a pipe or pipe is inserted.
Identical flanges are put on the ends of the parts to be connected, which are then connected to each other and tightened with bolts. A gasket is installed between the flanges. Making a connection:
- The parts to be joined are prepared; the ends must be cut exactly at an angle of 90 degrees, cleaned of paint and dirt. Chamfering is optional;
- flanges are put on the prepared parts;
- rubber or paronite gaskets are installed;
- two parts with flanges installed on them are connected;
- The bolts holding both flanges together are gradually tightened. The bolts should be tightened gradually and crosswise, not in a circle.
Polyethylene pipeline
A ball valve for a plastic pipe made of HDPE, just like other fittings, is made of plastic. This does not affect the quality, but ensures the overall tightness of the system. Installation is carried out in several ways, which determines the purpose of the pipeline - heating, plumbing and the diameter of the product.
- The push-in ball valve in this case does not have a fitting, so its installation is carried out somewhat differently. The plastic pipe is cut exactly perpendicular and chamfered, then a locking and sealing ring is put on it, and then a nut and collet ring are put on. The remaining steps are similar to the scheme for attaching fittings to metal-plastic water pipelines.
- Rebated - the connection of plastic pipes with shut-off valves is made by bolting through holes in the rebates. In everyday life, this method is extremely rare.
- Welded - usually required for water pipes and heating systems with a diameter much larger than 25 or 32 mm. There is no need to unscrew or put on anything here. The tap and the section of the product are welded with a special soldering iron or connected through an electric coupling. The latter method is more convenient, since it does not require holding the parts in your hands for welding. A coupling is applied to the ends to be connected, current is connected to it, and the products are welded.
How to install fittings on HDPE products is discussed in detail in the video.
How to weld pipes using electric welding
Using electric arc welding, you can create the following types of connections between metal elements:
- A connection in which products are joined to each other along the same axis;
- Perpendicular pipe connection;
- Gusset. In this case, you need to know how to weld pipes at an angle of 45 degrees;
- Overlapping connection.
The hardest thing to work with is the ceiling seam, which causes a lot of unpleasant nuances:
- The connection is extremely inconvenient to install - the liquid metal constantly tends downwards, and given that the pipes are located high, drops can also fly towards the person working with the welding machine.
- The welding site is very hard to see, so to create a high-quality seam you have to use a mirror - and this is extremely inconvenient, especially alone.
- Sometimes situations arise in which it is simply impossible to reach the junction with the electrode, so it has to be bent.
A person who does not have sufficient experience in welding is unlikely to be able to weld round pipes using a ceiling seam. However, it is not always necessary. When connecting, the pipe can sometimes be rotated, and this possibility should not be neglected. In any case, before finishing welding the structure, it is worth taking a couple of pipe scraps and practicing on them.
Conclusion
Knowing how to properly electric weld a pipe will help in carrying out welding work. By choosing the electrodes correctly and performing all the work efficiently, you can create a reliable weld that can work for many years without any complaints.
How to replace a leaking or jammed soldered plastic tap yourself, what do you need for this?
Judging by the drawing, we can note several points that complicate the installation of a new faucet - there is practically no distance between the non-dismountable coupling (metal/polypropylene) tee and the faucet, and the proximity of the wall. All this can be used further in the same form, if only a new (working) one is inserted below the faulty faucet. The old faucet, when open, will be just an attachment (unless, of course, it flows from under the lever.
What to do with a complete replacement. In your case, after stopping the water, I would cut the pipe below the tap. After this, you need to cut the pipe between the coupling and the 90-degree angle, unscrew the coupling (because the wall may not allow you to completely unscrew the coupling at the angle). After this, unscrew the coupling from the thread of the metal pipe.
Now you can use a brass faucet by screwing it directly onto a metal pipe and, in turn, using a collapsible American coupling on it. There are brass taps already with such couplings.
In a very limited space, you can install a faucet like this, which combines a transition from metal to polypropylene, a shut-off block, and a 90-degree rotation.
Another option, after disassembling, again install a non-dismountable coupling, go down at an angle of 90 degrees, and solder a faucet like this to the corner (through a section of pipe), in a vertical position as the old one stood -
And another piece of advice: When soldering polypropylene (where possible), I personally try to avoid joining corners, tees, taps, etc., too tightly to each other. It is better to leave a reserve for at least one more resoldering. This greatly simplifies dismantling and reduces costs, because the vast majority of polypropylene components can be reused by washing and degreasing.
Well, among the tools you will need, of course, a soldering iron (polypropylene welding machine), PP scissors, and the necessary faucet, it is better to have a hacksaw for metal, an angle of 90 degrees, fum tape or flax, and a gas wrench.
How to replace a leaking or jammed soldered plastic tap yourself, what do you need for this?
Judging by the picture, we can note several points that complicate the installation of a new faucet - there is practically no distance between the non-dismountable coupling (metal/polypropylene), tee and the faucet...
How to fix leaking pipes yourself
When a leak is detected, many people try to repair this leaking polypropylene pipe on their own. Mostly the following malfunctions occur:
- Wear of gaskets. As a result, a leak appears. Replacing the gasket helps eliminate it.
- Violation of tightness. If the connection is threaded, then replacing it yourself will not be difficult. It is enough to purchase the same part at a plumbing store and replace it.
- Soldering the assembly on the fly - In this case, you can use this simple technique: heat the soldering iron, disconnect the nozzle, and use an adjustable wrench to place the hot nozzle on the pipe. Next, remove the nozzle and make connections.
- Installation of a ready-made soldered assembly - It happens that you need to solder an assembly on site and it is not possible, and then we solder the required part. And then we replace the damaged section of the pipe with it.
Pipe under pressure
Sometimes it is necessary to eliminate a leak in a polypropylene pipe under water pressure. It will not always be possible to turn off the water supply. So, we repair the PP joint in the plumbing or heating system under pressure. There are several ways. The most effective ones should be indicated first.
- Installation of the clamp. A rubber seal is applied to the damage and tightened with clamps.
- Special glue. Modern technologies help solve this problem. The glue sets quickly, if possible, you can use it.
- Small leaks are eliminated by screwing in a self-tapping screw with a rubber gasket.
- A bandage impregnated with cement is applied to the damage. Everything on top is covered with solution. This method is suitable for eliminating small leaks.
Pipe without pressure
For repairs without water pressure, replacement may be required. This is done by installing a new mechanism with a threaded connection, or by soldering. When soldering, their ends and surfaces of the nozzles are treated with a degreaser.
Once a leak is detected, the water is shut off. In modern water supply systems it is possible to block certain areas. Next, we repair the joint in the non-pressure system.
- We disconnect the damage.
- If you can replace some part in it, this would be an ideal option, we change it.
- If replacement is not possible, another one is purchased and assembled.
- Then we install the already corrected one.
HelpfulUseless
Installation of ball valves
Ball valve
The installation of metal-plastic water pipes in your apartment should begin with the installation of ball valves on the riser.
Select high-quality taps from well-known manufacturers with high operating pressure (for example, 60 atm) and operating temperature within 150˚C.
Installed ball valves
It is these taps that will allow you to successfully shut off the water supply when leaks occur, thereby protecting the room from flooding. The next element after the tap and in front of the water meter should be a filter for deep water purification. Then a fine filter, a pressure reducer, and a manifold for pipe distribution (if necessary) are installed. Cleaning filters are necessary to protect plumbing fixtures by trapping scale, sand and metal particles present in large quantities in risers.
Features of soldering in corners
Soldering under such conditions is no different from carrying out similar work on other sections of the walls, with the exception of some factors.
Fillet welding requires precision and compliance with increased requirements for the geometry of a right angle; a square is used to check it. To join the sections, special corner couplings with a rotation angle of 90 degrees are used, which should be purchased together with pipes from the same manufacturer - this will ensure high adhesion between the connected elements.
Rice.
5 Sequence of soldering a PPR pipeline Date: September 25, 2021
Advantages and disadvantages of such soldering
Considering options for how to solder this or that part of polypropylene pipes without a soldering iron, you can see that each method has its own advantages and disadvantages. The advantages of this method include:
- No need to purchase a soldering iron if it is not available;
- Ability to use simple available tools;
- A cost-effective process for creating a connection that is cheaper than using a soldering iron;
- The ability to work with pipes of any diameter, both the smallest, which is quite easy, and larger ones, which will require more patience and experience.
There may also be disadvantages here, since it is not for nothing that the main working tool is a soldering iron. The negative aspects of how to solder polypropylene pipes without a soldering iron include the following points:
- Low technology of the process, which creates certain restrictions on repair work in some areas;
- It is more difficult to achieve high quality here due to the fact that most tools are not directly designed for this job;
- It is difficult to work with hard-to-reach places that can be easily reached with a soldering iron;
- Possibility of ignition of nearby objects when using a gas burner and cylinders.