Any stove, if used incorrectly, poses a fire hazard, so it is important to promptly service the system and comply with all operating requirements. Most often, people wonder how to clean a chimney pipe from soot in a private house. A clogged lumen impairs draft, which leads to problems with heating and a burning smell in the room.
Why do blockages occur?
The main factor in the formation of plugs in chimneys is emissions from burning wood. Typically, pipes become clogged with soot, tar and carbon monoxide. To reduce the amount of combustion by-products, you need to take a responsible approach to the selection of firewood and know about its characteristics.
Thus, coniferous trees produce a larger amount of resins, but produce less heat. Therefore, they are of little use for space heating. The resin, when released from the firewood, settles on the inner walls of the stove, to which a layer of soot adheres on top.
Also an excellent dirt collector is condensation formed when using undried firewood. It is worth noting that many owners burn household waste in stoves, the waste from which also reduces the clearance in the pipe.
There are also other ways of clogging. For example, in the fall, tree leaves and other debris often get inside. In addition, a layer of soot sometimes flakes off and falls down, blocking the passage.
Causes of soot formation
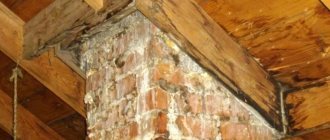
During fuel combustion, an oxidation reaction occurs. The conditions for its occurrence are high temperature and oxygen supply. If one of the conditions is not met, soot is formed as a consequence of incomplete oxidation of carbon. Visually, this is determined by the black color of the smoke coming out of the chimney, which indicates the presence of soot. But the main part of it does not evaporate into the air, but settles on the walls of the chimney in places of bends and narrowings.
Soot forms especially quickly in the following cases:
- After being loaded into the firebox, wet firewood dries out for the first time. This consumes additional energy and reduces the operating temperature. As a result, the carbon does not heat up enough and a lot of black smoke is produced. If this happens constantly, the pipe quickly becomes dirty.
- Plastic and polyethylene entering the firebox produce dense black smoke during combustion. It also occurs when burning chipboard and other materials containing glue. They make the chimney dirty very quickly.
- Insufficiently strong draft increases the burning time and heat release, but provokes the deposition of soot on the walls of the pipe. The same situation occurs when the pipe is not long enough.
Pipe contamination can be caused by burning certain types of wood. Pine or spruce wood, which contains a lot of resins, “smokes” especially strongly. Deciduous trees do not have this effect because they contain little resin.
Important! To ensure that the firewood is always dry, it is stored in a woodshed. You can store logs in it and dry them at the same time. Then the driest specimens are used first, while the rest are dried.
Damage from a clogged chimney
A dirty chimney not only impairs draft and complicates kindling. It can be fraught with many dangers that cause harm to health and property. The main threats are:
- Due to poor breathability, smoke returns into the room, which can cause carbon monoxide poisoning.
- A clogged passage quickly collects combustion products on its walls, and poor draft promotes the formation of condensation, which leads to even faster clogging.
- The soot layer is considered excellent thermal insulation and prevents the main elements of the stove from warming up, which significantly reduces heating efficiency.
- Plaque often ignites when heated, which can lead to a fire and rapid burning of pipe walls. Sparks flying out pose a threat to neighboring buildings.
All these situations cause a lot of trouble for the user. That is why you need to be responsible when servicing chimneys.
Why does the stove smoke when the chimney is clean?
Smoke from the stove can occur even if the chimney is clean; there may be several reasons. In addition to soot deposits in the chimney, smoke obstruction can cause:
- lack of a windproof cap on the chimney - in this case, the fireplace or stove smokes in high winds;
- cracks in the stove masonry—in windy weather, air pockets are created in the chimney, which redirect combustion products through the cracks into the room;
- a large volume of ash in the blower, disrupting draft;
- burnt oven wall;
- doors that are intended for cleaning the oven are not closed tightly enough;
- using brushwood or straw as fuel;
- a gas outlet channel located below the combustion door;
- increased level of humidity in the chimney.
If there is too much moisture in the chimney, then you need to put thin sticks or dry alcohol into the cleaning window and set it on fire. At the same time, you should light the stove and close the window after traction is restored.
When to Clean
It is not always possible to quickly clear a heavily clogged channel. Often, for these purposes, it is necessary to hire specialists who will perform all this work efficiently, carefully and accurately. So that you do not have to replace the pipes with new ones, it is recommended to regularly inspect the entire system and carry out timely preventive maintenance.
It is imperative to check the channel when installing new equipment or at the beginning of a cold period. The stove must be inspected at least 2 times a year. After several years of operation, the inspection can be carried out once.
Brick systems clog more often, so they are checked 3 times: before the onset of cold weather, during and after it. If the heating unit is used constantly, then it must be checked at least once every 2 months.
Ferrum stainless steel chimneys prevent the accumulation of soot due to the smoothness of the internal surface and the smoothness of the joints of the bell system. Caring for it will be much easier and will cost much less.
Methods for cleaning the stove
If you see that the chimney is clogged, then you need to start cleaning it. Of course, a chimney sweep can help you with this, but it is cheaper to do it yourself.
If your chimney requires cleaning too often, then you need to find out why it is clogged. Usually the problem is the wrong choice of fuel or the absence of a protective cap.
Sooner or later, every owner of a private house faces the question: “How to clean a chimney without disassembling it?” There are several ways and we suggest talking about them.
Methods for cleaning a chimney:
- To clean the chimney using mechanical methods, you will need a special device. The point of such cleaning is to remove soot by scraping it off.
- Chemical chimney cleaner. Chemistry is now presented in a wide variety, so you can easily find the right product.
- Cleaning with folk remedies is one of the ways to remove soot from a chimney. At this time, there are a huge number of options for cleaning pipes.
Each of the methods is good in its own way. You can handle cleaning with chemicals yourself, but we’ll talk in more detail about removing soot using folk remedies and mechanical methods.
Tool for the job
In order to clean the roof, a special device is used, consisting of a long rope with a brush attached to it. To make it more convenient to work with such a device, a weight is attached to the end that will pull the brush down. In addition, the weight helps to break through a strong blockage if you hit it from above several times.
The shape of the brush should be selected depending on the type of pipe. It is strictly forbidden to use metal pile on stainless steel walls.
Mechanical and manual cleaning
For mechanical cleaning of chimneys today, the same tools are used as 200 years ago. The technology itself has also not undergone major changes. Cleaning is carried out from the roof side and from the stove side.
Tools and materials
To clean the roof side use:
- rope or steel cable;
- hard metal brushes and weights;
It is important that the load has the correct center of gravity. Otherwise it may get stuck. It is ideal to use a round metal core as a load. It is they who break through the blockage. And only then do the brushes come into use.
If you don’t have a suitable brush at hand, you can make one yourself from an old plastic bottle. Step by step instructions below.
How to make a ruff with your own hands?
- Take a plastic bottle and cut 150 mm from the top. Make cuts along the top part in 15 mm increments. The length of the cut is selected depending on the diameter of the pipe. If the pipe diameter is 100 mm, then the brush diameter should be 130 - 140 mm.
- Drill a hole in the center of the plug. Screw the plug into place and bend the petals.
- The first brush is ready. Now we do the second one in exactly the same way.
- Find a suitable load. Its weight should be sufficient for the brush to pass through the chimney.
- Tie the load to a strong cord or steel cable. Thread the other end of the cord into the brush plugs. The brushes should be positioned towards each other.
- Take the rest of the bottle. Cut off the bottom. It turns out to be a cylinder. Cut it lengthwise. Insert it between the brushes. The length of the cylinder should be about 150 mm. Give it a diameter equal to half the diameter of the brush. Secure with a stapler.
- Tie a knot over the top brush plug. The tool is ready.
Cleaning from the roof
Cleaning with a brush is performed by a professional in several stages:
- Before starting work, all doors in the furnace are closed so that soot does not stain the room. For greater effectiveness, you can cover them with a wet cloth. Specialists wear safety glasses to prevent waste from getting into their eyes, and they also attach a safety rope, which eliminates the possibility of injury in the event of a fall.
- The first step is to remove the pipe head and inspect the channel.
- After this, the chimney sweep is carried out with a load without a brush along the entire length to chip off the layers.
- Then a brush is put on the instrument and the walls are thoroughly cleaned with forward movements to the entire depth of the canal.
- During operation, the inspection hatches are opened several times and the space is cleared of accumulated soot.
This is a very effective cleaning method that has been used for many centuries. However, this method has a serious drawback: the brush does not pass through areas where the channel is turned at a right angle.
Mechanical cleaning
You can get rid of soot mechanically. But, it is important to follow the correct sequence of actions. If this is your first time doing this, then it is better not to risk it and call a chimney sweep. Those who are confident in their abilities are advised to follow these rules:
- Close the openings through which smoke escapes from the apartment. If you don't do this, all the soot from the chimney will fly into the house.
- Close the firebox door tightly. An open fireplace will need to be covered with a damp cloth. Now you can climb to the roof, but follow safety precautions. Under no circumstances should you clean the chimney in windy or rainy weather.
- Open the channel that is designed to remove smoke and look at the soot layer. If it is insignificant, that is, less than 5 mm, then go home and start cleaning with chemical or home remedies.
- If the soot layer is more than 5 mm, then carefully inspect the chimney for debris. If you find any, push them down with a long stick to remove them already in the apartment.
- The soot layer must be cleaned with a scraper or brush.
- To clear the jam, you need to use a small metal ball that is attached to a cable.
- After cleaning the chimney, you need to open the cleaning holes slightly and remove soot from them.
- In the last move you need to clean the firebox.
If you have a fireplace with a direct chimney, then it is best to clean it through the firebox, that is, from below.
Indoor cleaning
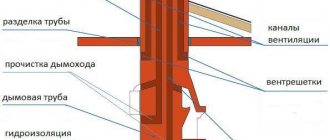
How to clean a chimney in a stove from soot in hard-to-reach places in the channel? If the stove has the correct design, it has special hatches through which you can easily clean all sections of the pipe. To do this, use a brush on a rigid bending rod.
For small sections, use a cleaning brush, sold in specialty stores. They are also suitable for cleaning drains and ventilation systems.
For greater cleaning depth, special prefabricated rods made from several parts are used. They are usually attached to each other using threads and have a length of 1 m.
The higher your budget, the more professional equipment you can order. For example, a professional flexible rod wound on a special drum, along its entire length there are indicators that allow you to control the depth of the brush.
After completing the work, it is recommended to wait about half an hour for the plaque to settle, and then clean all hatches. At the end of the procedure, the pipe head must be closed.
The second folk method: we use aspen firewood
Firing with aspen wood is also not a new method. However, unlike the previous one, it cannot be called safe.
At the beginning, a firebox with aspen wood looks like any other. We lay the material and melt it well. This firewood burns well, so constant flooding leads to high temperatures. A great fire hazard lies in the fact that the oven doors must be open and firewood must be constantly thrown into them. Ultimately, this will cause the pipe to begin to hum, white soot flakes will fly out of it, and the soot inside will catch fire. When examining the pipe, you can see a flame from there.
Before carrying out such a dangerous maneuver, make sure that the design and material can withstand temperatures of 1000 degrees.
Chemical methods
Traditional methods of cleaning chimneys are effective, but it is a very labor-intensive process that takes a lot of time. If you are thinking about how to clean the chimney in a stove at home without unnecessary hassle, then specialists who use substances that break down soot will come to your aid. However, even they are not always able to cope with severe contamination, so preventive cleaning is necessary.
The products have different compositions, but they are all aimed at detaching carbon deposits from the walls and making it difficult for new plaque to appear. Let's look at the most common methods.
Smoke
Available in several versions:
- Cardboard box - set on fire in the firebox. The preparation contains special substances that dissolve combustion products adhering to the pipe. After which the soot falls or goes away along with the smoke. After the box burns out, the effect will persist for a long time.
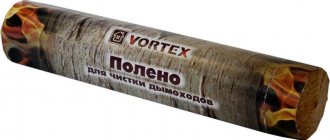
- Wooden burning "Smoke" - is burned in the stove and also cleans the chimney. At the same time, the components contained in the product produce a beautiful flame that looks impressive in the fireplace.
- Cleaner for pallet stoves - perfectly cleans boilers and stoves of this type. It can also be used for wood-burning fireplaces. The product can be used once every 2 months, strictly following the instructions.
HANSA
This is a series of high-tech products from a German manufacturer. They are aimed at dissolving creosote, which is a binding material for combustion products. The soot layer crumbles and burns entirely in the firebox.
Similar products are produced in Russia under the name “Chimney Sweep”. It also comes in a variety of forms and can be used for both cleaning and preventing contamination. The great advantage of such products is the ability to use them in chimneys of the most complex design; they do an excellent job of cleaning stone pipes that have an uneven and porous surface.
Kominichek
This product is produced in the Czech Republic and is very popular in our country. It is packaged in small bags, which are burned along with firewood. Thanks to the presence of special substances, soot is converted into a substance that quickly burns when the furnace heats up. It should be noted that this composition is not effective in case of heavy contamination, and during combustion it releases toxic substances, so it is necessary to tightly close the firebox when using it.
Other chemical cleaning products are also commercially available. It is recommended to try different options and choose the best one for yourself.
Prices for chimney sweep services and where to find them?
The profession of a chimney sweep is again in demand due to the fact that recently cases of fires in private homes have become more frequent. And they are connected precisely with the contamination of the chimney, as well as with its improper design.
It just seems that everything is easy. In fact, this profession takes several years to be trained. Where can you find such masters? This is where the Internet comes to the rescue. Similar announcements can be found on bulletin boards. You need to search in the services section for your region.
Another way is to contact a furnace equipment service company. Some of them provide similar services.
Folk remedies
It should be noted that chemical methods are not new. For a long time, folk remedies have been used for cleaning, which also cope well with pollution.
The easiest way is ordinary table salt, which is sold in any grocery store. Its vapors destroy the structure of sooty growths. All you need to do is sprinkle some of the product on the wood and set it on fire. This method is effective for prevention, but it is ineffective for large growths.
Naphthalene has the same effect, one tablet of which is quite enough for preventive work. However, this method is rarely used due to the formation of an unpleasant odor when burning naphthalene.
You can pour several liters of boiling water into the pipe before lighting. This will soften the soot, which will fall and burn when heated.
Our ancestors also used potatoes to get rid of soot accumulation by simply throwing them into a hot oven. Starch softens the plaque, which will simplify further cleaning if it does not fall off on its own.
For a long time, people have been using a mixture of copper sulfate, burnt coal and saltpeter for dry cleaning. Typically, for these purposes, components are taken in a ratio of 5x2x7.
The mixture consumption is small. Approximately 5 kg of firewood requires 1 kg of product, which is poured into a hot firebox. This composition is toxic, so you need to close the stove door tightly.
It is effective to use alder or aspen firewood for such purposes. The emissions from their combustion make it possible to effectively separate the plaque layer from the internal part. In extreme heat they are removed through a pipe.
Few people store such firewood due to low heat transfer. They are ineffective for heating a room, but it is recommended to keep them in stock for cleaning. Sometimes, as a preventative measure, it is enough to burn several of these logs to keep the chimney in order without any extra effort.
Traditional method: potato peelings
This method has been known for several centuries. In the absence of special tools, our ancestors came up with an amazing way to clean the stove.
To carry out the procedure, you will need an impressive amount of potato peelings. Today this may be a problem, but rural residents in the old days did not have such a problem. But you managed to collect at least half a bucket of cleaning. We heat the oven well and pour all the available wealth into it. The quality of cleaning depends on the size of the pipe; the larger it is, the more potatoes need to be destroyed.
The effect of this method is explained by the effect of evaporated starch on soot. Mixing in the pipe, the soot begins to decompose and within a few days actively falls off the walls. But it doesn’t fall off completely, so after a few days we tie a ruff to the brick and send it down the chimney pipe. Noise and loss of soot residues are guaranteed.
How to clean a chimney in a stainless steel stove
Stainless steel pipes are durable and resistant to contamination. Condensation does not linger on such a surface, but flows into a special receiver, from where it is drained when filling. This reduces the accumulation of soot, and the accumulated layer is much easier to clean than in other types.
Cleaning stainless steel pipes has its own characteristics. As mentioned above, they should not be cleaned with metal brushes, which disrupt the smoothness of the surface, which contributes to the formation of soot.
The procedure is carried out as follows:
- A brush on a flexible rod is inserted into the hole, with which the canal is cleaned. It is convenient to use a drill with a special attachment for these purposes. Gradually, as you move inside the canal, the length of the rod increases.
- If a coating that is difficult to remove has formed on the surface, the pipe is dismantled, after which it must be calcined with a blowtorch. If high-quality stainless steel was used in production, during this procedure the product will retain its original appearance.
The quality of the chimney components is very easy to check. If the component is not attracted by a magnet, then you have a chimney that can be safely cleaned with a blowtorch.
Sandwich pipes require cleaning even less often, but if the need arises, you can use a brush with an extended rod mounted on a drill.
What you need to know when cleaning chimneys
When working on the roof, remember safety precautions. It is strictly forbidden to drink alcohol, take medications that slow down the reaction and take narcotic substances at least 2 days before the start of work. Chimney cleaning should only be carried out in weather without wind.
Use good roof insurance. If it is not there, the fasteners can be replaced with a strong rope. One end clings tightly to the roof, and the other needs to be tied well around the waist. Cleaning a chimney at home is not particularly difficult if you approach it wisely and planned.
Do-it-yourself stove repair: types of work to eliminate defects
Repairs aimed at eliminating the causes of damage to the stove can be divided into 3 groups:
How to clean soot from the stove yourself
Depending on what type you have, there are a few different ways to go about cleaning your oven.
If you have a self-cleaning variety, congratulations; it will be easier for you. If it's an older model without this feature, you'll have to do a little work. Either way, here's a quick guide to cleaning your oven—without using any harsh chemicals. The inside of the stove is one of the most forgotten parts of the kitchen. It's one of those "out of sight, out of mind" ones. Pebbles can build up on your walls, and the more you cook, the harder it is to remove the dirt. If you don't know if your oven can clean itself, look to a notable one and there will be a setting to clean it. This process is not complicated, all it does is heat the oven to a really high temperature and burn off whatever is stuck inside. Your oven will smell pretty awful, so open the windows and keep children and pets away from the kitchen until it cools down.
- current, which is a regular check of the furnace’s performance, that is, cleaning it, filling up cracks and attaching fallen bricks;
- partial, involving the replacement of some elements of the stove structure, repair of the chimney and cleaning of the channels;
- capital, implying that individual sections of the furnace need to be dismantled or reconstructed.
Dropped Bricks
Before covering with plaster and carrying out other repair work, it is necessary to inspect the structure, because bricks could fall out of it. If you do not put them in their place, the oven will malfunction.
For some ovens, you have to lock it yourself, but others automatically lock it when you start the cleaning process. Step 2 - Press the button or move the handle to clean. The process takes between two and six hours to complete, and the door will unlock when finished. Let it cool for a couple of hours before opening it to avoid burns. When you open the door, there will be a pile of burnt grease and food left behind. All you have to do is sweep or wipe it down and the inside is done.
To detect fallen bricks, you need to do the following:
- examine the channels through which smoke escapes;
- having found a brick protruding a few mm, pull it out, first scraping off the mortar around it;
- prepare a new clay mortar and use it to place the brick in place.
As soon as the heating season ends, it is recommended to overhaul the furnace in which the bricks fell out. It will not be possible to postpone this task for another year, since next winter the collapsing stove will most likely not be able to work.
If there is still some gunk on the counters, you can take them out and soak them in the sink for half an hour and then wipe everything off. Many older ovens don't clean themselves, so you'll need to use elbow grease. There are several ways to combat the nooks and crannies of your stove. If you are concerned about the steam from the cleaner or the environment, you can make your own cleaner using baking soda and water. Step 1 - Remove the posts and wash them in warm water and dish soap for a couple of hours.
Removing carbon black from the chimney
Step 2 – Add 4 tablespoons of baking soda to a spray bottle and fill the remaining with water. Shake it to dissolve the baking soda. Spray evenly onto each surface. Step 4 - Let it soak for an hour. If you come back and the dirt is still really stuck there, spray again and wait another hour.
It happens that some bricks crack so badly that they are no longer suitable for reuse. To replace them with new ones, you need to find the following materials and tools:
- new bricks;
- chisel (to easily remove damaged bricks);
- a brush that removes old mortar;
- a sprayer filled with water and necessary to moisten the material before placing it in the masonry;
- brush;
- the raw materials from which the solution is made, that is, purified sand, cement and clay;
- a trowel, a spreading compound that holds the bricks together;
- sieve for sifting sand;
- hammer;
- fireclay powder (optional);
- a wooden float, the function of which is to level a new layer of plaster.
Repairing a stove with severely cracked bricks is carried out in several steps:
Wipe it with warm water. You can use a car windshield scraper to get out the really stubborn parts. Step 6: If the walls are still dirty after you've removed the baking soda, dilute two tablespoons of white vinegar with warm water and quickly wipe everything down. The vinegar will react with the baking soda and cause it to come right out with the washcloth and leave a nice shine.
After rinsing and drying the racks that were soaked, return them to the inside of the oven. You can clean the oven door the same way you clean the inside, with cleaner or baked goods. If you have a window in your door, you can use glass cleaner on the inside and outside of the window. Get rid of any food or grease that has dripped from the top of the stove onto the door with warm water and soap.
- removal of the damaged element;
- cleaning the area from under the brick with a brush;
- wetting the new masonry element with water;
- brick installation;
- applying a solution, into which it is recommended to add a little water to avoid the formation of cracks in it;
- plastering (after the solution has completely hardened).
How to seal cracks
If cracks are found in a structure, which tend to gradually increase and lead to the collapse of some areas, then the first step is to determine the cause of their appearance. Most often, cracks form next to a door that is installed incorrectly and therefore contributes to overheating of the brickwork.
Where can I find a chimney sweep?
Cleaning the inside of the oven sucks, so take a break before moving on to the oven - you've earned it.
Step 1 - Remove all the racks and if they need to be washed, let them soak in some water like you did with the oven. If they look good, just set them aside. Here you are faced with the same choice you had before, whether to use commercial strength or make your own. If you're making your own, use the same baking soda and water pan before, then follow with the vinegar as before. Step 3 – Place some cleaning solution over the entire area of the oven and rinse it with warm water. This is a basic cleanup, so we hope you can handle it here.
This problem occurs frequently, but is easily fixed.
Since it will not be possible to dismantle the oven door, because it is installed in the compartment for storing firewood during the bricklaying process, proceed as follows: the clay-based solution that was applied around the perimeter of the door is removed, and then the seams are closed with a freshly prepared composition. Thanks to this, new cracks will not appear on the stove, and the soot that forms along with the cracks around the door will disappear.
Step 4 Replace the grates and you are ready to start cooking. Not all ovens have grates, and if they do, you obviously won't remove them to clean them. For a glass top plate, you will need a special cleaner to avoid streaking, and this can be found at the grocery store. To use, simply place some on top and use a warm wash cloth or green cleaning pad to wash the entire top, then use warm water to rinse it. You can towel dry it or let it air dry depending on when you need to start cooking.
Plaster coating
Sometimes the oven is not treated with a special finishing compound, which cannot but affect its operation. Over time, an unplastered brick structure for heating a room becomes covered with many cracks through which smoke can pass. To return the stove to its proper appearance, it must be treated with a special composition only after creating a preliminary screed of the structure.
Find step-by-step photo instructions on how to clean your toaster oven, what cleaning products manufacturers recommend, and our #1 maintenance tip. When was the last time you cleaned your toaster oven? No judgment here, we were guilty of letting ourselves go too long without cleaning.
Are you cleaning your new toaster oven?
Today let's look at some admittedly boring, but still important stuff. If this is the first time you have cleaned your toaster oven, be sure to read the manual and pay attention to the specific steps and intentions according to the manufacturer.
Repair work aimed at eliminating defects that appeared due to the lack of a layer of plaster implies the following:
- Channels are created in the furnace that are horizontal and 1.5–2 cm deep. These grooves must surround the entire structure so that it is possible to create a strong frame;
- Steel wire is laid in the channels. Then it is tensioned, for which a simple thick nail or metal rod is used;
- The reinforced structure is covered with plaster.
The repairs done are a guarantee that the cracks that have formed will not become wider. A stove with reinforcement and plaster serves the owner of the house much longer.
What should you clean your oven with?
Mild liquid soap and water, diluted vinegar, or a non-abrasive cleanser. Sponge or soft cloth. . Instead, they recommend nylon or soft plastic pads for cleaning crumb trays and baking racks. It's tempting, but don't use a vacuum cleaner. These sprays are not designed for aluminum, which is what most toaster oven interiors are made of.
The dangers of clogged chimney pipes
Not to mention the daunting list of precautions. Always apply cleaning products to a sponge or rag, not directly to the toaster. Make sure the sponge is slightly damp and not dripping, otherwise you could easily splash liquids into electrical components, especially if you have a convection fan. Never immerse your toaster oven in water. . To keep your toaster oven in good condition, you should try to wipe it down after each use. But a good clean one like this one is more realistic for us, how about you?
A special tool allows you to apply the plaster evenly
Strengthening or replacing parts
If it is noticed that the oven door has become loose, then the masonry around it will have to be dismantled. Once this is done, the door is secured in place using steel wire. And if it is necessary to replace the grates, you need to know one thing: the cast-iron grate for fuel is installed at a distance of 5 mm from the brickwork. The gaps left should be filled with sand.
Before cleaning the oven, make sure it is unplugged and cool. Remove the baking rack and wipe any crumbs from the interior walls and doors. Some crumbs may get stuck in the corners. You can use a pastry brush or a low-maintenance toothbrush to get them out if you like.
Wipe any crumbs into the trash can and set the tray aside. Take a soft sponge, dip it in water and squeeze it out so it doesn't drip. Walls should be easy to clean unless they are heavily coated with grease. If you need to clean heating elements, gently wipe down the length of each element with water. Let them dry completely before using.
Sheets may need to be replaced before firing. Typically, this need arises when holes or rust stains appear on these parts. The operation of replacing pre-furnace sheets is carried out as follows: the old material is removed, the nails are removed, a fragment of felt treated with a liquid clay solution is placed under the bottom, and a new sheet is nailed on top.
Do not use soapy water or any detergent on the elements, otherwise you may damage them. Perhaps this is true too. This is because the ceiling usually does not have the same non-stick coating as the interior walls and crumb tray. Our tip #1 is at the end of this post. Finally, wipe down the inside of the glass door.
Wipe the outside door and outside of your toaster oven with a sponge lightly dampened with a solution of water and vinegar. If you want to use a cup or other spray on the door or outside of your toaster oven, be sure to apply the cleaner to a towel rather than spraying it directly onto the appliance.
If the firebox lining breaks or the chimney is damaged, repair work will be more difficult. When replacing the lining in the firebox, you need to keep in mind that the new lining must be made from old bricks, since the coefficient of expansion of the stove from heat must remain the same. Taking this rule into account, bricks are also placed in the chimney area.
Return to crumb tray
Again, don't use the green cleaning side of the sponge, it will leave tiny scratches all over your toaster oven. Don't forget to wipe down the controls, those knobs can get pretty dirty. If wiping it doesn't clear it, fill the sink with hot, soapy water and run the tray for a few minutes. Use a soft sponge or nylon cleaning pads to clean it.
Mechanical manual cleaning of chimneys
If the stains are really stubborn, you can soak the tray for a few hours and then try cleaning again. We know you're tired of hearing this, but be sure to use a sponge and not the rough side. Because it can remove the non-stick finish on the tray, making it difficult to keep clean in the future.
As you can see, the grate does not come into contact with the walls of the firebox
Connecting a new stove to an old chimney
If the pipe is in good condition, then, when starting to build a new stove, you can get by with the old chimney. To do brickwork without touching the chimney, you need to do the following:
- Use a hammer drill and a chisel to make 2 holes in the pipe in the attic, stretching a steel channel through them, which is pressed to the chimney with wedges almost at floor level;
- Create additional support by fixing in the original position 3 rows of masonry passing through the ceilings between the 1st floor and the attic;
- Use wooden blocks with a cross-section of 100 x 50 mm as support posts, because the weight of the masonry is relatively small - no more than 60 kg;
- Dismantle several rows of chimney masonry under the ceiling, place a beam under the pipe and support it with racks, well fixed and positioned so as not to interfere with further work - dismantling the stove down to the foundation.
Improving performance
To ensure that the stove always provides good heat, you need to follow some recommendations:
- ensure that soot does not accumulate inside the furnace, that is, clean the structure once a month;
- keep control of the dampers, which should be closed tightly;
- do not leave the door open, as this may cause heat to escape;
- clean areas that provide traction from soot and ash every year;
- sometimes load aspen or alder firewood, as they help burn out soot deposits;
- avoid overheating the walls of the stove, which often leads to heat escaping outside the house;
- Do not throw garbage like polyethylene into the firebox along with firewood, which increases the amount of soot.
Proper operation of the stove is a guarantee of its long service life
