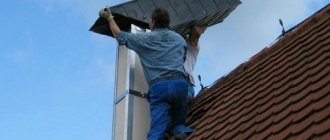
In addition to its classic technological functions, the chimney must also meet the aesthetic design of the room without disturbing the design, especially for interior spaces. Remember that the finishing of the chimney inside the house must be carried out not only from the ratio of beautiful material and appearance, but also remember about fire and building regulations.
Chimney lining inside the house
The choice of material for lining the chimney inside the house largely depends on the style of the room.
You can lay it out of clinker bricks and fit it into a brutal interior without additional finishing. The most ancient finishing method is plastering. Suitable for a “country hut” style interior. The chimney can be whitewashed or painted with heat-resistant acrylic paint.
Cladding the fireplace and chimney with fireproof tiles, tiles, majolica tiles, clinker tiles or natural stone will help decorate any interior, since the modern market is rich in a variety of materials. The choice depends on style, financial capabilities and taste preferences.
The main thing to remember is that the finishing must be safe for the life and health of people living in the house.
As already written above, focus not only on your own design developments and “trends”, but also on the correct installation of this or that material, depending on the type of channel. After all, not every chimney is suitable for a beautiful and weighty stone or tile. Calculate the weight and overall load-bearing capacity of the structure.
The chimney lining inside the room should be beautiful and fit into the design of the house. It is necessary to add the existence of several ways to pass a chimney inside the house, namely:
- in the wall of the house, when the fireplace or stove is located along one of them;
- in the center of the room there is heating equipment with an island type installation.
Carrying out work on installing a chimney inside a wall is only possible if it is made of wall blocks or bricks. In such a situation, you will only need to decorate the wall in which it is located exclusively with non-flammable materials. What can modern hardware stores offer? This is a special plaster, a huge selection of fire-resistant tiles - clinker, natural stone, terracotta, tiles and tiles.
Plaster can rightfully be called an old, proven finishing option and, moreover, the most budget-friendly one. There is only one drawback - the service life is short, since constant heating and cooling of the plastered surface eventually leads to the appearance of a network of cracks. To strengthen the plaster, you will need a metal mesh, which is fixed to the surface of the wall before the plaster.
Their design involves the presence of special sleeves - a single-walled polymer pipe made of stainless steel or a polymer liner, which is filled with hot air during installation, and after cooling, the polymer bag hardens and takes the shape of a regular pipe.
If there are curvatures or irregular shapes, then the best choice would be a liner - the pipes are too energy-intensive. It is worth considering that the internal surface of the chimney should not have sharp protrusions, and the combustion temperature at the outlet of the pipe cannot exceed 180 C.
Repair
Brick chimneys, due to the technical characteristics of the manufacturing material, are susceptible to the formation of large amounts of condensation, which has a destructive effect on the brickwork of the chimney.
Certain actions will help prevent or minimize the formation of condensation:
One of the modern and effective technologies aimed at repairing a brick chimney is lining the brick chimney with a polymer sleeve. The polymer pipe is characterized by the smoothness of the inner surface of the walls, high strength and ease of installation. The polymer liner is placed in a brick chimney, filled with compressed air, then steam, as a result of which the polymer sleeve expands, fills the chimney channel and hardens.
One of the reasons for poor draft in the chimney may be its insufficient height. In this case, to increase the draft level you will have to resort to building up a brick chimney. You can build up the chimney either through brickwork or by installing a sandwich pipe made of stainless steel. The transition from a brick chimney to a sandwich chimney can be accomplished using a special square nozzle. The nozzle is fixed to the brick chimney, and at the other end of the product the nozzle is equipped with a pipe into which a sandwich pipe is inserted. A guide on how to install a coaxial chimney and installation requirements here: https://mykaminz.ru/dymoxod/vidy/koaksialnyj/rukovodstvo-kak-ustanovit-koaksialnyj-dymoxod-i-trebovaniya-k-ustanovke.html.
The soot accumulated on the internal walls of the chimney during its operation causes a narrowing of the chimney cross-section and, accordingly, a significant decrease in the draft level. Chimney cleaning can be done either mechanically or chemically. The chemical method involves the use of special substances that, during the combustion process, react with soot and have a destructive effect on it. The mechanical method of cleaning a chimney involves using a rigid metal brush attached together with a load to a cable or rope. Cleaning the chimney of a brick stove should be carried out at least twice a year.
A stove damper is an integral element of a brick chimney, since with the help of a stove damper, air exchange is controlled; in addition, an installed and closed damper, after complete combustion of the fuel, avoids heat loss through the chimney duct. The valve is installed directly during the installation of the brick chimney.
Chimney lining inside the house
Metal profile (or profiled sheet) is the most common material for lining a chimney pipe (especially if metal tiles are laid on the roof), as it has the following characteristics:
- Ease of installation and repair work.
- Durability.
- Resistance to sudden temperature changes (the metal profile does not crack or deform).
- Light weight (the use of metal profiles for finishing is possible on any type of roof).
- Low temperature resistance.
- Fire resistance (profiled sheet does not burn or melt).
- Environmental safety (metal profiles are manufactured without the use of harmful or environmentally toxic substances).
- Strength (the material practically does not deform under physical impact, unlike, for example, plaster, which quickly collapses during a hailstorm).
- Durability.
- Large selection of colors.
The metal profile is
, the outer layer of which is represented by a special polymer paint, which additionally protects the sheet from adverse environmental conditions.
Currently, there is a huge selection of metal profiles with slightly different properties, which allows you to choose the best option for any operating conditions:
- The profiled sheet of the support type is characterized by increased strength, therefore it is used for lining pipes, the reliability of which is a determining parameter.
- Aluminum sheets are highly resistant to moisture. Therefore, they are the most durable material for cladding.
- The combined metal profile can be used both for cladding and for other construction work, since, depending on the specific model, it combines the advantages of the first two types to varying degrees.
- Painted metal profile sheets fit perfectly into any architectural design.
After purchasing the sheets, it is necessary to ensure their proper storage (otherwise the metal profile will begin to lose its useful properties even before installation), adhering to the following rules:
- Sheets can only be stored in a dry, ventilated area.
- The sheets must be stacked on special pallets one above the other in a strictly horizontal position.
- When storing outdoors, cover the sheets with thick plastic wrap.
If the storage of the cladding material has been quite long, it is necessary to check each sheet for defects, and only then proceed with installation.
Brick lining of chimneys involves the use of materials that reliably isolate the room from combustion products and will not disturb the harmony of the interior. The external finishing of the chimney is developed not only to prevent the ignition of the roof, many of whose elements are made of wood, but also to minimize the impact of the external environment on the structure.
Natural facing slate
Natural slate
has an excellent combination with almost all materials, is non-flammable, strong and durable. Roofing slate has any shape, so it is easy to work with. And besides, what is more important now, slate is natural, which means it is an environmentally friendly material; it can be used if cladding is carried out inside the house.
Slate used for tiles
To attach slate tiles, copper nails with a diameter of 2.5 mm and a length of at least 40 mm
.
And with a wide hat. The nails are not nailed down completely; there must be a gap between the head and the slate tile. This is a requirement for all roofing materials, as temperature changes can lead to deformation
. The material breathes, waterproofing is not required when working with a chimney.
- The tiles
are installed in the same way as the sheathing is attached to a tin roof. Only the fastening step between the beams is observed, the beams are fastened at the corners of the chimney and, if the distance is more than 60 cm, then another beam is installed.
For reference: with vertical mounting, a step between the guides of 40-60 cm is allowed, but this is in rare cases - it depends on the material and load.
- We set the outer guide bars to the level, pull a rope or fishing line, one at the top, one at the bottom, maybe in the middle, but this is when the height of the guides is more than 2 m, and then we place intermediate guides along the fishing line. You get one plane.
- If necessary, we insulate the chimney, as in photo 3.
- The next stage is laying plywood sheets on the guides. And only after that we begin to lay the slate tiles.
- We make a fastening step: tiles should overlap tiles within 1.2 or 1.3, no less and no more. We mark the step: we draw stripes with chalk along the horizon level (we will fasten nails along them strictly along the line), i.e. if the tile is 30 cm long, then the step we get is 15-20 cm.
- For reference: the angle of inclination of the tiles when laying must be at least 22º. If there are leaks, the reason is not the tiles, but incorrect installation and violation of technology.
Methods for laying slate tiles:
- Rectangular.
- Decorative (sharp corners).
- Wild.
- Universal.
- Scaly (“fish scales”).
Natural slate panels
This material is perfect for working inside the house; the panels are attached using tile adhesive or cement to a plastered, leveled surface. They are joined to each other, inserted into the grooves, as you see in the photo.
Traditional finishing methods
The lining of your chimney can be made of a completely different material. But keep in mind that in addition to the cladding material itself, you will also need to manufacture a special casing, sheathing or duct for the chimney, in particular this applies to ceramic and metal structures. For example, for tin, light tiles of different fractions and dimensions are often used, depending on the structures themselves.
We suggest you read: How to paint the walls in a bathhouse inside
As for brick buildings, here, of course, preference is given to facing bricks, marble and tiles. Although in fact, the range of facing elements is huge. The most traditional for the entire existence of such structures was considered classical plaster, which can be performed for all types of channels, with some reservations regarding the purchased solution.
Cladding the stove and chimney with ceramic tiles
Lining a chimney inside a house can be done in one of the following ways:
- Plaster, both classic and variations of Venetian or marble.
- Wild stone.
- Clinker bricks.
- Facing slate.
As you can see, the choice is quite extensive; then we’ll talk about each offer separately.
Sequence of work
The general technology of internal cladding comes down to several stages:
- Prepare fire-resistant glue, grout and the tile chosen for decoration.
- Soak the tiles in water for about a quarter of an hour.
- Dilute the glue according to the instructions.
- Apply adhesive to the surface of the tiles and chimney.
- Attach the finishing material to the base.
- Secure the gaps between the tiles with temporary plastic fasteners.
- The fasteners were removed after the glue hardened.
- Fill the seams with grout; it will dry in a few days.
For the street part of the building, you can use corrugated sheets.
To finish the part of the chimney that is located on the street, corrugated sheets are often used that are attached to self-tapping screws. It is prohibited to use vinyl siding, which is deformed by high temperatures. Sequence of work for finishing with plaster and tiles:
- Clean and prime the surface.
- Reinforce the pipe with galvanized metal mesh.
- Apply a mortar of cement and expanded clay sand.
- Plaster the surface (attach clinker tiles or natural stone), following the procedure for internal cladding.
Return to contents
Stages of finishing a chimney with a metal profile
Watch video - covering with metal profiles part 1
To cover the chimney with tin, you need to prepare the following devices:
- Tool for cutting sheets. The ideal option is a circular saw or an electric jigsaw, but if the amount of work is small, you can get by with a hacksaw or metal scissors. It is not recommended to use a grinder, since when it comes into contact with a metal sheet, the surface heats up, which can cause the material to deform.
- Level for maximum installation accuracy.
- Self-tapping screws and a screwdriver for fastening sheets.
The installation of the sheathing itself takes place according to the plan below:
- A metal or wooden frame is manufactured and installed on which the sheathing will be attached.
- Cutting out metal profiles.
- Laying sheets.
- Fastening sheets using self-tapping screws.
- Sealing joints.
- Installation of special corners at joints for aesthetic appeal.
Watch video - covering with metal profiles part 2
The main thing in installation is the most even laying of the bottom row (at the junction with the roof), since the tightness and reliability of the structure largely depends on it.
How to bypass a chimney with corrugated sheeting. Installation of an abutment to a rectangular chimney
To ensure that no leakage occurs at the chimney outlet, the connection must be made correctly. For this purpose, a so-called apron is made. Its main task is to collect and drain water that can get into the gap between the pipe and the corrugated sheet. As a rule, lower (main) and upper (decorative) connections are made.
For the bottom connection you will need a sheet of galvanized steel, and standard strips of the same steel 150 by 230 mm. These strips have a 20 mm bend at the top and a 16 mm bend at the bottom to protect against leakage. The installation procedure is as follows:
- Installing a sheet of galvanized steel from the bottom edge of the chimney to the eaves. A tie may be used instead.
- Chimney gating. To do this, the junction strips are tightly attached to the pipe, and a line along the edge of the bend for the groove is marked with a construction pencil or marker. The groove itself is convenient to do with a grinder using a stone circle.
- It is very important to correctly bend the sheets one under the other. Therefore, the first abutment strip is installed from below.
- Next, the side strips are installed.
- The top bar is installed last.
Chimney tiling
Brick can withstand both static mechanical impact and strong shock loads.
- If installation work is carried out correctly, facing bricks do not require special care or constant cleaning.
- Resistant to prolonged exposure to moisture.
Brick does not absorb water and is not destroyed by prolonged exposure.
- Fire resistance.
- Low temperature resistance.
- Wear resistance.
By covering the chimney with brick, you will ensure reliable protection of the chimney and the attractiveness of the building for 30-50 years. After this period, the structure will gradually begin to collapse.
Lining in this way is the most practical from the point of view of long-term operation of the channels. When using a chimney pipe, such materials withstand climatic temperature changes, exposure to precipitation, and the like. In addition, thanks to their high mechanical resistance, the tiles can be used not only inside, but even outside, namely on the caps, under the roof of a chimney on the roof.
Cladding the fireplace and chimney with clinker bricks
Several types of tiles can be used for cladding inside the house, and it does not matter where the stove or fireplace is located - in the middle or against the wall of the room. You need to understand that the stove and chimney are one whole, and therefore the finish will be identical. The most beautiful, but at the same time the most expensive option for cladding is stove tiles, made individually for each stove, and the installation process must coincide with the construction of the heating unit.
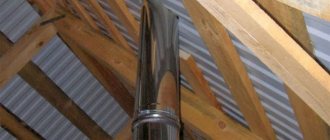
If modular chimneys in the form of a sandwich pipe are used, then there is no need for finishing, since polished metal has a place in almost any interior. Finishing the chimney on the roof is also not required. To increase the heat transfer of the furnace, natural stone is used for cladding - soapstone, jadeite, soapmagnesite.
A large number of manufacturers offer options for ready-made stone portals for options with a stone firebox. Undoubtedly, the question arises: how to properly arrange this system? According to experts, independent work should be excluded. It is better to purchase a ready-made set of pipes recommended by the manufacturer directly for this model; for sure, an option will be selected for internal and external installation of the chimney.
To heat a multi-story home, 2-3 stoves are installed, the chimneys of which should not be connected - this is strictly prohibited. For the normal functioning of the heating system, there is no need to plug pipes throughout the house; you need to make a masonry with three wells for each stove, which will allow all the pipes to be compactly located inside the house.
The following types of pipes reach the roof of the house: chimneys of heating equipment (fireplace, stove pipes), ventilation pipes (natural ventilation of rooms such as kitchens, bathrooms).
Today we want to take a closer look at the topic of chimney finishing.
It is very important to correctly position the pipes on the roof. Of course, the location directly depends on the layout of the premises in the house.
The diagram below shows the parameters for the location of the pipes and their height relative to the ridge.
As you can see, the closer the pipe is to the ridge, the smaller its height. During construction, it is necessary to follow the rules for the location of pipes and their height (according to the diagram) to create better traction.
From an aesthetic point of view, pipes located closer to the ridge look more beautiful, but this is not always feasible. More often than not, the layout of the premises that is acceptable for each specific family comes first, which controls the location of the fireplace chimney, stove and ventilation shafts.
We suggest you familiarize yourself with: Indoor vapor barrier which side is facing the insulation
- hot surfaces of heating and ventilation equipment, chimneys located in rooms in which they create a danger of ignition of gases and vapors should be insulated, ensuring the temperature on the surface of the heat-insulating structure is at least 20 ° C below their self-ignition temperature;
— heating and ventilation equipment, pipelines and air ducts in rooms with a corrosive environment should be made of anti-corrosion materials or with protective coatings against corrosion;
— chimneys should be designed from clay bricks with walls at least 120 mm thick or from heat-resistant concrete with a thickness of at least 60 mm; it is allowed to use chimneys made of asbestos-cement pipes or prefabricated stainless steel products;
— the use of asbestos-cement chimneys, as well as stainless steel for coal-fired stoves, is not allowed;
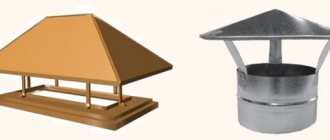
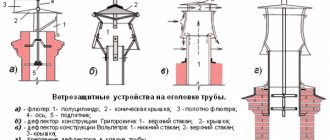
— the mouths of chimneys should be protected from precipitation; umbrellas, deflectors and other nozzles on chimneys should not interfere with the free exit of smoke;
— the clear distance from the outer surfaces of brick or concrete chimneys to rafters, sheathing and other roofing parts made of combustible materials should be at least 130 mm, from ceramic pipes without insulation - 250 mm, and with thermal insulation with a heat transfer resistance of 0.3 m2∙ °C/W for non-flammable or low-flammable materials - 130 mm;
— the space between chimneys and roof structures made of non-combustible and low-combustible materials should be covered with non-combustible roofing materials.
Final assembly of the combustion products exhaust system
What needs to be done during the installation of a chimney to ensure that the equipment works efficiently and is safe for others?
Sealing a chimney on the roof requires the following conditions:
The chimney passage can be made on the ridge or slope of the roof, and each method has its own characteristics.
The first option may lead to the need to partially change the rafter system, and the second may become a pocket for snow. But these shortcomings can be easily solved by adding an element under the ridge strip, which will avoid leaks.
After the pipe has passed through the roof, sealing begins. The building materials market offers a wide range of units that can be used in various conditions.
The traditional option is a flashing made of metal strips corresponding to the size of the pipe.
For roofs made of tiles or corrugated slabs, the fastening of elements is carried out using a lying seam, and on pitched structures with a slope of more than 30°. A special beam is installed behind the chimney. It serves as protection against rainwater.
Waterproofing a chimney on the roof involves installing a protective apron. It can be made of flexible tape or metal coated with a polymer composition.
An elastic apron is installed around the perimeter of the pipe in two layers, placing the lower one under the roofing, and mounting the upper one on top and covering it with metal profiles.
Insulation made of steel sheets is placed on a roof deck insulated with roofing felt. Its individual elements are attached along the perimeter of the channel, starting from the bottom. The grooves are filled with silicone or polymer sealant.
Finishing the chimney on the roof
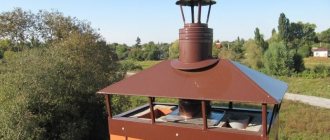
A beautiful chimney completes the architectural ensemble of the building. The roof of a house says a lot about the owner; a lined chimney testifies to a caring owner and even to his wealth. This part of the argument for the aesthetic finishing of the smoke exhaust duct is beyond doubt. However, there are several practical purposes.
Why is the external part of the chimney finished?
- Insulating and lining the chimney extends its service life. During the heating season, the outdoor part of the chimney is subject to sudden and frequent temperature changes. This difference, coupled with the formation of aggressive condensate, leads to the rapid destruction of any chimney material. Insulation allows you to move the freezing point beyond the body of the pipe, reduces the temperature amplitude and prevents the formation of condensation inside the chimney.
- The insulated pipe provides good traction. Uniform and rapid heating of the smoke exhaust channel ensures high-quality draft during combustion. Soot and gaseous combustion products (including carbon monoxide) are quickly and completely removed from the firebox without entering the living space. This condition is decisive for the safety and efficiency of heating equipment.
- Finishing the connection between the pipe and the roof protects the roof from atmospheric moisture entering the roofing pie. The slightest defect in performing these works will lead to damage to the insulation and rotting of wooden structures.
A two-layer protective apron is installed around the chimney along its entire perimeter, where the pipe exits onto the roof. The first layer is placed under the roofing covering, the second is placed on top of the covering.
This apron is called a flashing or collar and is made of metal (galvanized or steel sheet). Currently, ready-made frames can be purchased on the construction market. The junction of the apron and the pipe must be sealed.
— the pipe laying is made of low-quality material (brick);
— there is no draft, it is necessary to perform additional insulation of the pipe;
— the appearance of the pipe does not match the appearance of the house, decoration is required.
How to close the chimney? Any material must be resistant to precipitation and any influences (wind, sun, temperature changes).
For any pipe lining, it is necessary to make a frame for attaching the finishing material. The frame is made of antiseptic timber or metal guides. The chimney lining is installed only on a metal frame.
The casing of the chimney and ventilation pipes on the roof can be galvanized metal coated with polymer. In appearance, it can be smooth or profiled (corrugated sheeting). This is perhaps the most inexpensive finishing option.
The most practical solution is a chimney made of clinker bricks. But you can simply line the pipe with clinker tiles, which are compatible with many roofing materials.
Finishing the chimney with artificial or natural stone, which is also used in finishing facades.
The finishing material must be non-flammable; lime-cement plaster can be used as finishing. In this case, the plastered pipes will be combined with the plastered facades, and the building will look seamless.
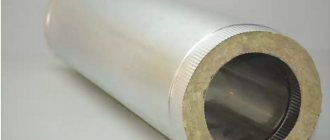
Double-walled (double-circuit) sandwich-type pipes are also suitable for chimney installations. You can read about this in a separate article dedicated to this topic.
The chimney can be lined with cement-fiber boards. This non-flammable material has an attractive appearance and is available in various colors.
The use of siding is only suitable for lining ventilation ducts facing the roof.
The choice of material here is much wider, right down to the roofing material used for the roof (metal tiles, soft roofing).
However, a lined chimney of a completely unconventional shape can become the main decoration of the house. Such a chimney will not require additional finishing.
Plaster is more often used due to its relative cheapness and lack of demands. As a rule, they combine classic colors, choosing soft colors to match the design of the room. In addition, you can create a variety of patterns by combining colors. You can use plaster in the house without fear, but when using it outside, keep in mind the characteristics of the mixture. Not every solution is suitable for street cladding due to temperature conditions and mechanical wear.
How to close the chimney? Any material must be resistant to precipitation and any influences (wind, sun, temperature changes).
We invite you to read: Installing shelves in a bathhouse
Plastering a chimney pipe is quite common throughout the world. In this case, it is possible to use both ordinary mortar used to level surfaces and decorative plaster. The second option is more interesting, since it becomes possible to create a unique design due to the special composition of the plaster (for example, some types contain crumb elements).
Features of plaster:
- Ease of use (plaster does not require any coating).
- Resistance to long-term exposure to water (during its entire service life, the plaster does not crack or wash off, even if the house is built in an area with a high average annual precipitation).
- Resistant to high temperatures (plaster does not burn or collapse, so it is excellent for finishing the chimney of a fireplace or stove).
- Fragility (high-quality plaster will last no more than 5 years, after which peeling and gradual destruction will begin; re-plastering can only be done after removing the old material and treating the surface).
Lining a chimney with plasterboard is carried out exclusively indoors, since this material is very sensitive to moisture. Drywall itself is not particularly visually appealing, but it is an excellent base for other finishing materials (for example, ceramic tiles or plaster).
If you decide to install a plasterboard box to hide the fireplace chimney, you must choose a material with a maximum heat resistance rating (most types are not resistant to high temperatures).
The process of installing a plasterboard box is quite simple and can be done with your own hands:
- Preparing the layout and cleaning the installation site.
- Installation of a metal frame.
The elements of the supporting structure are attached to the wall using self-tapping screws. The frame installation method ensures maximum reliability of the box and durability of the system.
- Cutting drywall.
- Fastening the sheets to the frame using self-tapping screws.
- Plastering the surface.
- Finishing.
The tiles are suitable for both decorative and existing chimneys. Thanks to the variety of shapes and sizes, it fits perfectly into almost any architectural style, because it can imitate many surfaces. In this case, the front side of the tile can be glossy or matte, embossed or smooth.
The tile manufacturing process consists of the following steps:
- Selection of several types of clays to ensure maximum density of the finished product.
- Crushing all ingredients.
- Mixing components: clay, quartz sand, feldspar.
- Drying the tiles at a temperature of 600°C.
- Final formation of the product.
- Re-dry the tiles to remove residual moisture.
- Firing (carried out in 2 stages).
- Tile quality control.
When all stages are carried out responsibly, the output is a product with the following characteristics:
- Moisture resistance (tiles do not collapse even with prolonged exposure to water).
- Resistance to chemicals (the tile surface can be cleaned with any detergent).
- Resistance to high temperatures (especially important for chimney pipes).
- Frost resistance.
- Durability.
Watch the video
Rules and regulations
Work on installing and lining the chimney must be carried out in strict accordance with current standards and regulations. The main document is SNiP 41-01-2003 “Heating, ventilation and air conditioning”, which details all the requirements for chimney lining:
- All heated surfaces must be insulated from flammable structural elements (for example, the roof). Moreover, the fire resistance of the insulating material should be 20°C higher than the expected temperature of the hot surface.
- The material used to cover the pipe from the fireplace or stove must be resistant to rust.
- If brick is used to line the pipe, the thickness of the masonry must be at least 120 mm.
- The design should include protective canopies (or umbrellas), the main thing is that they do not reduce the draft from the pipe.
- The distance from the pipe to the flammable roof must be at least 130mm (important to consider when covering).
Watch the video
Strict compliance with all requirements guarantees the reliability and durability of the structure.
How to decorate pipes?
If you don’t want to bother with complex construction procedures, then don’t hide the pipes, but decorate them. But you still have to tinker a little: before covering, the pipe is washed and insulated with plastic film.
Pipe decor options
Painting
It is enough to paint the pipe to match the walls, and it will become less noticeable. Apply a pattern or ornament that is repeatedly repeated in the interior (on tiles, textiles) to the pipe. This will make her friends with the space. If you are ready for bold experiments, make the pipe a bright interior detail by painting it in rich contrasting shades.
Pink pipe in the kitchen
Important: before applying paint, you must exclude the presence of condensation on the pipe and cover the surfaces adjacent to it with a protective film.
To ensure that the paint adheres well and the metal is protected from corrosion, before painting, do not forget to clean the surface of the pipe from dust, sand it a little and coat it with a primer. For pipes through which hot water passes, choose special heat-resistant paints (alkyd enamels) that do not change their color when exposed to heat. Plastic pipes are the most vulnerable to chemicals. Compositions without acetone (acrylic, water-soluble, pentaphthalic based on white spirit) are suitable for them.
Advice: to get the hang of it, paint cold pipes first, since paint dries quickly on hot pipes, and poor-quality application will be immediately noticeable.
With the participation of polyurethane tubes and stucco decor, vertical pipes can be designed in the form of columns. They will fit perfectly into the classic style of the interior. And fans of eco style can paint the pipes to match the tree trunk and entwine it with artificial vines or leaves.
Imitation of railing
A horizontal section of a gas pipe in the kitchen, running along the apron, can make a good “false rail.” Only lightweight items can be hung on it. Install the real railing parallel to the pipe, but slightly lower. The main secret: the diameters and shades of the pipe and railing should match as much as possible. This life hack is perfect for modern interior styles.
Railing and pipe
Decorative overlays
These include sockets, pipe rings and plugs. They serve to cover sloppy protrusions where pipes enter the ceiling, wall and floor. Such a small decorative touch makes the design more aesthetically pleasing and complete. The main thing is to choose the appropriate texture, diameter, section shape and color of the lining.
Pipe covers
Rope trim
How to beat pipes in eco-style? Wrap them with hemp rope or jute rope. This is a great idea for decorating interiors with marine and eco themes, especially in children's rooms. Another plus is that the rope around the pipe can become a convenient scratching post for cats.
Pipe wrapped with rope
Shelf part
If special boxes and false walls take up a lot of space, try installing a practical shelf or rack on top of or around the pipe. The final touch is to paint the pipe and shelf in the same color for better camouflage.
Pipe under the shelf
Hanging shelves without screws and drills are easy to install using a horizontal heating pipe. Wrap it with a rope and hang small planks from it using hemp ropes. You can store any small items and lightweight trinkets on them.
Decoupage
This is a well-known decorating technique characteristic of shabby chic, rustic, Provence and country styles. With its help, you can effectively decorate the pipe, turning it into a charming decorative element.
Knitting
Handicraft lovers will certainly be interested in the idea of knitted covers for pipes. The process of creating them is not fast, but as a result you can get an absolutely unique decor. Children will definitely appreciate colorful products in the shape of funny animals.
Knitted covers for pipes
Base for lamps
Incandescent lamps hanging from pipes are a characteristic touch of industrial style. It’s easy to add it to the interior yourself. Medium-diameter pipes running along the ceiling are suitable as a base. But you shouldn’t touch the gas one! By varying the length of the cords, wrap the lamps around the pipe and get an original and stylish lamp.
Facing with wild stone
This material gives the house an aristocratic appearance and allows its owner to distinguish his home from the gray and monotonous mass of other buildings. When using facing stone, pay special attention to caulking all seams, especially for interior finishing. But, wild stone is often used as a means of cladding on the outside, giving its natural and presentable appearance. In addition, the wear resistance threshold of such elements is also surprising.
Stone-lined chimney on the second floor.
This is a crumb where particles of small pebbles are mixed into a solution. Cladding, therefore, is only permissible inside buildings, since the crumb does not like exposure to cold temperatures. It goes well with fireplaces and traditional stoves, especially if the kitchen area is additionally finished with such chips, not to mention brick chimneys.
On sale it is a white powder, which must be dissolved in water when applied. If desired, you can add different colors, resulting in a rich selection of shades. Keep in mind that decorative cladding must be carried out on a pre-prepared base - plaster. After application (use a spatula), it is recommended to dry with a hairdryer.
The functional necessity of a heating boiler or stove is a chimney. It must fulfill not only its intended purpose, but also fit as clearly as possible into the interior of the interior, as well as into the architectural appearance of the house. The finishing of the chimney inside the house and on the roof must be done correctly and fully comply with fire safety and building codes and regulations.
The work performed should ensure accessibility and convenience for the process of carrying out preventive work - cleaning up combustion products that have accumulated during the heating season.
Tags: inside, chimney, sheathing
« Previous entry
Conclusion
As you can see, finishing a chimney in a private house is quite within the power of a home craftsman; there is plenty to choose from, if only there is a desire. In the photos and videos in this article I have selected additional material on the arrangement and finishing of chimneys. If you still have questions after watching, write them in the comments and we’ll talk.
Original design of the chimney.
November 21, 2021
If you want to express gratitude, add a clarification or objection, or ask the author something, add a comment or say thank you!
- February 27, 2021
- February 21, 2021
- February 20, 2021
- February 16, 2021
- February 15, 2021
- February 13, 2021
Latest replies on the forum
- Cinder block walls
How to cover cinder block wallsQuestion added: February 09, 2021 - 19:32
views
- Walls
Hello. Can you tell me how to put decorative stone on a putty wall?Question added: August 03, 2021 - 12:25
views
- Question about wall cladding in the bathroom
Good day. Having studied quite a lot of information, I could not come to a clear conclusion. Maybe you can help me. Situation …Question added: May 20, 2021 - 11:50
views
- Mystic... scary
Dear forum users, I want to know if anyone has had anything similar... I’ll say right away that alcohol and nothing else that clouds my brain...Question added: October 20, 2021 - 08:44
views
You might be interested
In addition to its classic technological functions, the chimney must also meet the aesthetic design of the room without disturbing the design, especially for interior spaces. Remember that the finishing of the chimney inside the house must be carried out not only from the ratio of beautiful material and appearance, but also remember about fire and building regulations.
