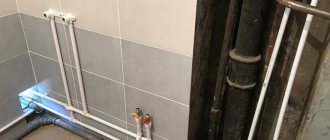
The communications located in the bathrooms look unattractive, so in most cases, when starting an apartment renovation, the owners of the living space want to disguise the pipes in the bathroom and toilet by constructing a plasterboard box for the pipes. Someone invites a master to do this, but if you have at least a minimal understanding of construction tools, you can close the pipes yourself.
Selection of material and necessary tools
Building a box is not a complicated process, but there are some nuances in this work that are worth knowing for a positive result. For installation you need to buy materials, components and prepare the necessary tools:
- fasteners - connection elements, self-tapping screws, screws, “seeds”, dowel-nails;
- putty;
- serpyanka;
- plaster;
- silicone-based sealant - useful for sealing joints with the floor;
- inspection hatch;
- drywall
- profile – rack and guide.
Material for creating a plasterboard structure
To work you will need tools, there are not many of them, so preparing it will not be difficult:
- spatula;
- screwdriver;
- bit set;
- perforator;
- drill 6 mm;
- metal scissors;
- screwdriver;
- level;
- roulette;
- knife and hacksaw;
- rollers;
- bath;
- container for mixing the mixture.
Tools for working with drywall
Once everything is ready, you can assemble the drywall box, let's look at the step-by-step instructions.
Tiling the cabinet
Before tiling the cabinet, you can seal the seams between the sheets of drywall and seal them with masking tape or mesh. Before laying the tiles, the surface of the sheets must be dust-free and the sheets must be covered with a layer of surface primer.
Laying tiles on drywall is done according to all the rules for tiling work. The tiles are laid using tile adhesive, preferably from the bottom up. You need to leave seams between the tiles, which need to be filled with grout mixture after laying the tiles.
Step-by-step instructions for making a pipe box
Before you start assembling a drywall box, you need to draw up a project. You should not ignore this stage, as it is one of the important ones, since the quality of the box made on your own depends on it.
Step-by-step instructions for assembling a plasterboard box to hide waste pipes will be described using the example of a bathroom and toilet; the process of installing a structure to hide pipes in the kitchen is identical to that described.
There is no need to create an exact drawing; it is enough to simply make a schematic drawing with the dimensions of the future structure transferred to it.
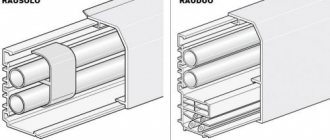
Diagram of a plasterboard box for pipes
Watch the video: how to cover pipes with a plasterboard box.
Price issue
Here are the approximate prices for the main materials for the box:
- sheet of drywall: about 70 rub. per sq. m;
- PVC panels: RUB 120/sq. m;
- metal profile for installation of gypsum boards: guide (3 m) – 52 rubles, rack-mount (3 m) – 68 rubles;
- putty: about 50 rubles/kg (per 1 sq. m of gypsum board surface usually requires 1.3 kg).
Materials for a plasterboard partition with dimensions of 1.5x2.5 m will cost 1,300 rubles.
If you hire a master, you will have to pay an additional 416 rubles. (125 rubles per sq. m).
The task of re-arranging pipes in the bathroom is quite troublesome, but such work can be done independently. Laying out pipes in the bathroom with your own hands - a detailed description of the stages of work.
We will look at which filter for water purification is better to choose in this material.
Preliminary marking
Marking stages:
- As soon as the drawing is completed, it needs to be transferred to the space around the communications;
- With a pencil you need to make a mark on the wall in the place where the pipes protrude from the corner the furthest, while retreating 5 cm;
- Once marks are made on both sides, you need to draw an even perpendicular line on the wall, passing exactly along this mark;
- To make the line straight, you can use a plumb line or laser level;
- Next, you need to mark on the floor and ceiling the location of the guide profile; for this you need a construction corner. Place the corner with the short edge to the corner at the intersection of the floor and the wall, and draw a straight line on the floor. The angle between the strip on the wall and the strip on the floor should be 90 degrees;
- The same should be done on the ceiling.
The marking is ready, you can proceed to the next stage.
Mounting and installation of a frame made of profiles
Before constructing a metal frame, you need to cut the required number of profile sections equal to the marked lines.
Watch the video: assembling the frame for the future gypsum plasterboard box.
How to install:
- You need to start by installing guide profiles on the floor and ceiling, and then on the walls. They are installed strictly along the lines and secured with dowel nails. To do this, press the profile firmly to the floor and drill holes in the floor directly through it at a distance of 15 cm from each other. Insert dowels into the holes and screw in self-tapping screws;
- After this, you can begin installing the rack profiles. It is inserted along guides at the top and bottom. The profile is pressed and secured using dowel nails. The ends of the flexible connection are bent inward or cut off. The main requirement in this situation is that the profile must be level;
- The next step will be the installation of a corner connecting profile; it is screwed with small self-tapping screws to the intersection of the guides at the corner of the future box;
Attaching the rack profile to the guide using self-tapping screws
- Then the stiffening frame is mounted in the pipe box - the profile at the wall and the profile at the corner are connected in small sections. The segments are located strictly parallel to the floor at a distance of 30 cm from each other, along the entire height of the frame on both sides.
Important! The entire assembly must be controlled by level, even a small deviation, which can lead to poor-quality assembly of the structure. This instruction will help you assemble and install a box that can cover heating pipes.
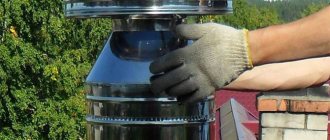
How else to hide pipes in the toilet
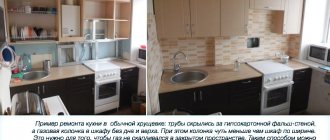
In small-sized apartments, every centimeter of space counts and simply covering at least some part of the room is a real luxury. Then you can close the pipes by making a utility cabinet. For this, narrow toilets in Khrushchev buildings are an ideal option.
You can close the pipes in the toilet by making a utility closet
Planks are attached to the walls on both sides, and hinged doors are attached to them. The shelves are assembled locally. They can be made removable to provide access to the pipes if necessary.
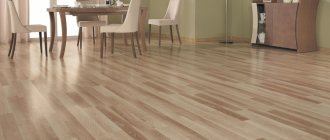
What are the doors made of? The simplest option is from laminated chipboard, but you can also order them from MDF. They will be made to your measurements by workshops that manufacture furniture. If you also choose a color to match the main finish or make a cabinet the same color as the entrance doors, you will get a good interior.
A very inexpensive way to make the back wall of the toilet attractive is to use horizontal or vertical blinds. There is no hassle at all with installation, the only thing is that you need to find the right size. Then nail the bar to the ceiling, and attach the blinds themselves to it.
Blinds in the toilet on the wall - an inexpensive way to hide pipes
When selecting, it is also important to guess the color - either match the tone, or use contrast. And by the way, plastic horizontal blinds will be more practical in this case - they will not bend if you accidentally touch them. In general, a good option in all respects.
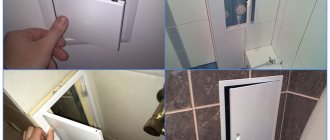
Hatch installation
The technological hatch must be equipped in the box without fail, since free access to communications must be provided. If you plan to install an invisible hatch, then this must be done before installing the drywall.
Firstly, for this structure, reinforcement is made from profiles, according to size.
Secondly, such hatches are quite heavy, so you need to secure it carefully, sparing no screws.
Also at this stage, you need to determine where the ventilation grille will be installed; it is necessary to ensure that condensation does not form inside the box.
Tips from the pros
- To ensure the durability of such a box in a toilet or bathroom, professionals definitely recommend using moisture-resistant plasterboard (its sheets are green). You need to screw the material to the metal carefully; you should not recess the screw head too deeply, otherwise the fastening will not be effective.
- If the box is lined with light PVC panels or painted, then the structure will not have to withstand a large load. For it, it is enough to select the thinnest sheets of drywall 0.65 mm. For subsequent tiling, it is better to take thicker varieties of 0.9 mm.
- Since the bathroom is a very humid environment, it is best to treat the inside surfaces of the pipe box with an antifungal agent.
- Markings for guide profiles along load-bearing walls must be made from the floor.
Sheathing with plasterboard
The penultimate stage in constructing a box with your own hands, covering the frame with plasterboard:
- Measure all parts of the frame and transfer the dimensions to a sheet of plasterboard, making a kind of pattern;
- Using a construction knife, the parts are cut out;
- Then each part is presented to the place of its permanent installation and screwed with black self-tapping screws every 15 cm;
- Before screwing the part to the location where the hatch is installed, you need to carefully measure the distance on all sides, transfer the dimensions to the gypsum board part and cut a hole; you should do the same with the ventilation hole;
- Fix the part.
We advise you to see: how to sheathe the frame of a box with plasterboard.
Follow the link to read about installing a pipe box in the kitchen.
Box finishing
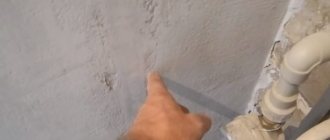
The last stage is finishing the plasterboard box. Before using the facing material, all seams on the gypsum board must be sealed. For this purpose, plaster and serpyanka are used.
The seams need to be sewn at an angle of 45 degrees with a mounting knife. Then a small layer of gypsum mixture is applied, compacting well into the seams.
Joining seams with a mounting knife
Serpyanka is glued onto the raw mortar and a second layer of plaster is applied. Leave to dry.
Applying a layer of plaster
If you plan to finish the box with tiles, then all you have to do is prime the structure twice and start tiling.
If you decide to paint it, get ready to putty the box in two layers, and you should install a perforated corner.
What it is?
The box in the toilet is a kind of frame that allows you to hide its contents from view and brighten up the overall impression of the interior of the room . This design is made from various materials individually for each bathroom, taking into account its size and configuration.
Today, the production of boxes is possible from those materials that are sold in any hardware store and can be processed at home without the need to use special equipment. The shape of the product can also be any. Thanks to this, the owner himself can assemble the toilet box himself, especially if he is, in principle, no stranger to working with his hands.
In addition to its purely aesthetic function, a well-thought-out box can also perform other small tasks - for example, include shelves in its design for storing various useful things.