In old apartments, problems arise with water and heating pipes, hoods and ventilation, and electrical wires that interfere and spoil the interior. You can cope with such a problem on the ceiling by building a plasterboard box with your own hands, under which you can easily hide it all. Typically, this need arises in the kitchen, bathroom or toilet.
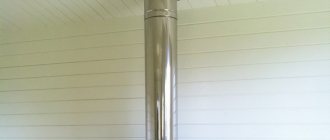
Hidden pipes in the toilet
Theoretical knowledge about drywall
Drywall, which is popular today, is a material made from a layer of gypsum hidden in paper. Standard sheets are 2.5 m long and 1.2 m wide.
Thanks to these dimensions, one whole sheet is enough to construct the box. To do this, you will also need the materials from which the frame is prepared (wood or metal).
The construction of the box is completed by directly covering the finished load-bearing frame with plasterboard elements. To attach the profile to the wall and drywall to the profile, simple self-tapping screws are used.
Materials required for the construction of the box:
- Guide profile PN 28x27 mm;
- Ceiling profile PP 60x27 mm;
- GKL sheets 1200x2500x9.5 mm (ceiling plasterboard has a thickness of 9.5 mm);
- Perforated corner 25x25 mm;
- Putties (universal and finishing);
- Interior paint (white);
- Self-tapping screw with a press washer 4.2×13mm (they are also called sunflower seeds);
- Self-tapping screw 3.5x41 mm with large thread and dowel 6x40 mm (for attaching the profile to a concrete wall and ceiling);
- Self-tapping screw 3.5x19 mm with fine thread (for fastening plasterboard sheets).
Appearance of the profiles used in the box design
Fasteners used when performing work
Materials and tools for the box
Boxes are also made from other materials:
- plastic;
- particle boards;
- plywood.
But the simplest, most convenient and profitable material is drywall. It is so popular because it is easy to work with. In addition, drywall interacts well with any finishing materials.
With the help of drywall you will create a strong, safe, and most importantly, durable box
, it is important to simply listen to the advice of experts. Drywall is suitable for the construction of structures of various sizes and functionality.
Be sure to imagine how the box will look, especially if it is placed in the toilet or on the ceiling. Initially, a layout is drawn where the elements used are indicated. So, to build a box from plasterboard sheets with your own hands you will need:
- plasterboard sheets (thickness not less than 12 mm);
- UD – guide profiles;
- hangers (sometimes made from UD profiles);
- CD profiles;
- screws and dowels.
If the box is installed in a toilet or bathroom, then you need to purchase moisture-resistant plasterboard; for the kitchen, durable fire-resistant material is used on the ceiling.
Prepare the following tools:
- screwdriver;
- perforator;
- metal scissors;
- tools for putty and primer.
Tools and materials
Tool
Anyone who has ever made anything will understand from the above that you cannot do without a certain set of special tools in addition to the usual ones when installing a gypsum plasterboard box. First, if you are a DIYer and have your sights set on a ceiling box, you will need to rent a laser level (see also the video above). The unevenness of the finished surfaces of building structures is permissible 3 mm/m. Along the diagonal of a 3x4 m room, up to 15 mm can increase in this way. A box with such a distortion will not be reliable.
We recommend: Reinforcing tape for drywall - step-by-step installation instructions
Next, you will need a drywall hacksaw, pos. 1 in Fig. The usual one for wood tears and crumbles the material, but for metal it gets stuck in it. If you have or don’t skimp on a jigsaw with a “clean cut” file, pos. 6, generally good: a roughing plane is almost never needed.
Special tools for working on drywall
The next absolutely necessary tool is a mounting knife for drywall, pos. 2. It differs from the usual one not only in its more wear-resistant blade and durable design, but also in the fact that the blade extends and is fixed to a precisely specified cutting depth: to break a plaster board, it is cut to the cardboard layer on the back side, and to break it to obtain a curved surfaces, cuts are made to 2/3 of the sheet thickness.
Planes for gypsum boards, roughing and edging are also needed. The first is to plan the cut or cut until smooth; the second is to form the edges at the joints for putty, see below. It is better for an amateur to take a combined plane (item 3), which can be used both ways. Pros don’t use combi planers: a lot of time is spent resetting the tool from operation to operation. But a good combined plane costs much less than the cheapest complete pair.
The last thing you can’t do without to make a drywall box is a set of polished metal plaster spatulas. The minimum set is an even trowel, a smoothing trowel and a corner trowel, pos. 4.
In production conditions (for example, when cutting according to on-site measurements), profiles are cut into sections for the frame using guillotine cutters (which are called cutters almost everywhere for some reason). A guillotine for a metal profile does not spoil its coating at all, but it is an expensive and cumbersome machine. Craftsmen working on site cut the profiles with metal scissors. It is much more convenient to do this with crocodile scissors, pos. 5, with a beveled working part. Especially if you need to modify something in a partially assembled structure. And simply cutting sheet metal on a workbench with a crocodile is also more convenient and easier.
If you limit drilling of a profile to a minimum, you also need to be careful when choosing a hole cutter in it. Some models of reinforced cutters (below, item 7) cope with structural profiles up to 1.6 mm thick, but they are expensive and can only be cut through the sides of the profile. In lightweight ones (above in position 7) with a punch drum, the punches (beats, strikers) are not lost, but such a tool is intended for lightweight profiles, and already on normal ones it wears out quickly. In addition, one striker has become dull - you need to change the entire drum, which separately costs almost the same as a new instrument, and the same protruding drum often interferes with inserting the cutter into the partially assembled frame.
The best profile cutter for drywall - with a large offset and opening of the jaws, pos. 8. Working with it requires a lot of muscular effort, but you can cut both the sides and flanges of the profiles. And you just don’t need to lose cue balls.
Sequence of work
The first step after purchasing the materials is to make markings for the construction of the future box. For convenient installation, it is made below the ceiling by about 20 millimeters. Make sure that there is access to communications, so the size of the box should allow you to work with them freely.
Then prepare the place where you plan to install the box. To avoid corrosion processes, communication structures are primed. If the manufacture and installation of the box is carried out on the ceiling, the surface is leveled to protect the structure.
In order to hide communications, one plasterboard sheet of standard sizes is usually enough. It is preferable to choose a waterproof sheet, especially if we are talking about a box in the toilet or on the ceiling.
To build a frame base, wooden blocks or metal profiles are used. The wood is pre-treated with corrosion protection agents. Metal does not need processing.
Frame construction
The next stage is attaching the base for drywall to the walls and ceiling. If you are sawing wooden blocks, additionally cover the cut areas with protection. And special mastic on top of the usual protection.
Next, install the drywall. For greater convenience, the sheet is cut so that the walls are solid and not made up of pieces. Initially, the side walls are installed; all elements must be the same size. Protrusions beyond the edges of the frame are not allowed. Having installed the sidewalls correctly, measure the front wall.
Do not close the box tightly and completely. Be sure to provide an inspection window for access to water supply or sewerage pipes.
After installation, they proceed to finishing the box; it is very important to use moisture-resistant materials if the box is installed in a toilet. Having completed the finishing work, you can decorate the structure, and at this point the installation of the box is considered complete.
Advantages and disadvantages of a protective box
Having a box covering the pipelines has its pros and cons. The advantages include:
- Ability to hide unattractive pipelines from view.
- The decoration of the room is carried out in the same style, there are no unnecessary elements in sight.
- Communications are protected from accidental damage, mechanical impact and other unwanted contacts.
- The tightness of the box allows you to protect the room from sewer gases.
- The surface of the walls and boxes can be easily and efficiently cleaned of dirt and treated with detergents and disinfectants.
The disadvantages include:
- Access to pipelines is difficult.
- Repair work becomes impossible without dismantling the box.
- The occurrence of leaks, cracks, and other deficiencies in the water supply or sewerage systems become visible only at a later stage, when considerable damage has been caused to the premises or to the neighbors below.
Note! To reduce the negative consequences, it is recommended to create collapsible structures that can be removed without harm to the facing materials. As an option, it is recommended to install inspection hatches to allow access to the pipelines to perform the necessary actions.
Inspection hatch in the box
Box finishing
The final stage of work with the box is its finishing. The work depends on the material to be processed. Ceramic tiles or paint are used to decorate plywood, drywall or MDF. Covering with plastic panels does not require finishing. Closing the box with such material does not reduce the area of the room and does not spoil the appearance.
In addition, this method is used to close the pipes running under the bathtub. To do this, a frame is initially constructed from guide profiles, after which it is covered in the same way with the selected material. Remember about mandatory access to communications.
Ready decorated box
Puttying the box is one of the important stages of direct decoration. In this case, it is necessary to correctly design the corners. An even angle is obtained by using special metal corners, which are applied to the corner on top of a layer of starting putty. They are pressed in using a spatula, and then the excess putty is removed.
Another layer of special mixtures is applied to this corner. Repeat these steps until the surface is completely leveled. This makes it easy to make an even angle yourself.
You can watch the video on how to hide pipes yourself
Having processed the corners, the surface is primed and then covered with starting and finishing putty. After drying the surface, grind the putty using a special grater with fine-grained sandpaper.
Remember that to solve lighting problems, you can install several small LED lamps in such a “niche”. This means that after constructing the box, such lamps will need to be properly connected to electricity.
After installing and finishing the box, the appearance of the room will change significantly. The interior of the room will become complete and harmonious. In addition, such measures help reduce the noise level from pipes.
Getting ready for work
Materials
I will start the story about how to assemble a drywall box yourself by describing everything that we may need during the work process. And first of all, we should purchase the materials from which we will make our structure.
For the bathroom, kitchen and toilet, it is advisable to take moisture-resistant plasterboard
We will need:
- Drywall 12.5 mm. For the bathroom, toilet or kitchen we take moisture-resistant slabs, for other rooms we use standard ones.
- Profiles for the frame. We assemble the ceiling box on a frame from a ceiling profile, and the wall box from a wall profile. This decision is determined by the mechanical characteristics of the parts, so there is no need to save money here.
Profiles for mounting the frame
Instead of a wall profile, you can use a wooden beam - it will be a little cheaper. But here it is necessary to take into account that the timber requires treatment with moisture-proof and antiseptic impregnations, which will “eat up” all our savings.
- Fasteners for profiles and gypsum boards - self-tapping screws and anchors with a plastic sleeve.
- Putty for drywall.
- Serpyanka tape on a self-adhesive basis.
The photo shows a sickle tape
- Abrasive meshes with different grain sizes for starting and finishing grouting.
- Primer for walls and trim.
- Perforated corner for masking corner joints.
Perforated corner for gypsum boards
- Materials for decorative finishing - wallpaper, paint, decorative plaster, ceramic tiles, etc.
In addition, if you need a plasterboard frame structure in a toilet or bathroom, i.e. where there is a periodic need for access to pipes and shut-off valves, you need to purchase a special plastic hatch with an opening lid. For the structure that is mined on top of heating radiators, we purchase special gratings.
Decorative grilles for radiators
Bath box and inspection doors
Installation tools
Despite the fact that making a drywall box is quite simple, I would not recommend tackling this task without a set of tools. Will need:
Set of tools for working with drywall
- A hammer drill with a drill for concrete or brick for fixing the frame to load-bearing surfaces.
- Drywall screwdriver with bat.
- Metal scissors for cutting profiles.
- Knife or saw for cutting plasterboard.
- Planer for drywall.
- Measuring tools - plumb line, level, tape measure, square.
- Spatulas of different sizes.
- Grater for grinding.
- Brushes for priming, antiseptic and finishing.
- Stepladder or rack for high-rise work.
To reach the ceiling you will need a stepladder
As for personal protective equipment, I would recommend performing all work with gloves and safety glasses. When sanding a puttyed box, it is also advisable to use a respirator.
It is best to work with the profile while wearing gloves.
Photo gallery
Several options for constructing boxes for placing communications in them:
Box under the ceiling for placing electrical wiring
Frame for the future box
The convenience of the box is obvious
Only with a box can you achieve an aesthetic look in the room
Ceiling box to hide wires
If necessary, take care of the door in advance
Horizontal design
After covering with plasterboard, all joints must be puttied.
Drywall for the bathroom is the ideal solution
Ceiling frame for suspended ceiling
source: //gipsohouse.ru/walls/4047-korob-iz-gipsokartona-svoimi-rukami.html
A major renovation of a premises faces the problem of the impossibility of moving various elements of water pipes and communications. The design ideas will be disrupted by an old pipe or a bulky riser. The way out of this situation is to cover the pipes with plasterboard.
Drywall processing
To make the box, not only drywall is used. However, it is more suitable for these purposes and easier to process. And its surface lends itself to a variety of finishing methods. Drywall provides high reliability and strength to the future “pipe covering”, and does not limit the choice of design. Batteries are also covered with this design. Making a box without the help of craftsmen is not difficult.
Installation of a box with lighting
The assembly of the box follows the same scheme as described above. But there are some details to consider. It is necessary to make suspension stands from the ceiling profile. For this purpose, a profile should be cut with a size equal to the height of the box. On one side, make cuts along the folds, 40–50 mm high, and bend the back wall inward. The number of such blanks should be calculated so that they are installed every 60 cm along the length of the entire box. Insert the prepared hanging stand with the uncut side into the guide profile on the ceiling and attach it with a self-tapping screw.
Now you need to make a blank from the ceiling profile. Cut a profile from it to a length equal to the bottom of the box. Please take into account the fact that the lower length will differ from the upper one, since there should be a shelf at the bottom for installing the backlight. That is, the length of the profile segment should be 5 cm greater than the length of the lower part of the box. This distance is quite enough to place the LED strip there. At one end, insert the workpiece into the guide profile on the wall with the shelves up and fix it with self-tapping screws. The other end is attached to a suspension stand. It is important to maintain an angle of 90°.
Making the frame
The result is a box with a protruding profile. Protruding sections should be drowned out. To do this, insert cut pieces of the profile of the appropriate length onto them. This will serve as the basis for attaching a strip of drywall, and the LED strip will be mounted on top.
Now you can sheathe the box. Finally, all that remains is to build the lighting. To do this you must first purchase:
- 220 V power supply for 12 V LED strip.
- LED strip, which can be one color or changing color.
Belt power selection
To select the appropriate power supply, you need to determine the power of the LED strip. To do this, you need to measure the perimeter of the entire niche and multiply the resulting figure by the power of a linear meter of tape. But that’s not all, as the following nuances should be taken into account:
- It is not recommended to connect the tape to the power supply in series, since the subsequent section of the tape will glow weaker.
- If the power of the block is too large, this will significantly affect its size. Therefore, when arranging the frame, take this into account. There is another option, for example, to purchase a power supply for each piece of tape; it has small dimensions.
The tape must be glued to the made shelf. When everything is laid out, you can connect it to the power supply.
What will you need?
To make a box
, you will need a hammer, a construction knife, a construction angle, an impact drill, a level (preferably a bubble one), and a tape measure. The materials purchased are a sheet of plasterboard. If you need to assemble the box in rooms with high humidity, it is better to choose a moisture-resistant material.
The frame is made of galvanized profile, and lovers of natural materials choose wooden blocks. If the choice falls on wood products, they are pre-treated. This will protect the frame from rotting and subsequent destruction. It is more practical to use a metal profile. It does not require pre-treatment and is easier to process. The frame is made from a special mounting (CD) and guide (UD) profile.
Drywall box
Advantages of finishing
Can be built in backlight
- Drywall is a safe and environmentally friendly material, its use is safe for health.
- The design allows you to create any geometric shapes and serves as an important element of ceiling decor.
- Possibility to integrate additional lighting.
- Easy to process and install.
- High degree of fire safety.
Why do what?
For convenience, it is better to divide the entire process into stages - marking, securing the box parts and installing plasterboard sheets.
- Let's start with the markup.
It is better to make initial markings on the floor, outlining the outline of the installation of supporting elements. The actual size of the box differs from the intended one, since the frame will be covered with a sheet of drywall. The extent to which the lines are perpendicular to each other and to the wall is checked with a construction angle.
When choosing the dimensions of the box, it is important to exclude the adjoining of drywall to pipes or a battery; make a gap of approximately 50 mm on each side. The choice of width is also influenced by the finish when it comes to laying tiles.
The marking process has been completed on the floor, but how to transfer it to the ceiling? A device called a plumb line will come to the rescue. If you don’t have it, but you don’t want to spend money, use a stretched thread.
- Securing parts.
The profiles located close to the wall are installed first. Then the posts are attached to form the front of the frame. Between the supporting profiles, to provide rigidity, additional jumpers are installed at a distance not exceeding 1 m. If the height of the frame is less than 150 cm and the width is 25 cm, jumpers are not required to be installed.
Hiding sewer pipes
If the frame is made of beams, all cut points must be processed. This will not only protect the tree, but also add stability and increase the level of sound insulation.
- The frame is ready, proceed to installing the sheets.
The material is cut so that not individual pieces are attached to the box, but entire strips. Initially, it is better to cut off the strips that will be installed on the side edges of the frame, located perpendicular to the wall. Their width does not exceed the intended width of the frame; do not go beyond its boundaries. The size of the last edge is calculated taking into account the location of the edges of the strips installed near the wall. The drywall is attached to the stud with self-tapping screws. The distance between the screws does not exceed 25 mm.
After completing the installation stage, they proceed to the formation of even corners and the puttying process. Anyone can make beautiful corners using a perforated corner made of plastic or metal. A small layer of putty is fixed to the surface. When the corners are ready, proceed to the last stage - finishing the surface. The process of constructing the box is considered complete.
Puttying drywall
It is important not to forget that the plasterboard box is a non-demountable structure. Therefore, it is not recommended to tightly close the pipes and riser. It is better to take these points into account in advance.
Materials
So, we will assume that the initial video materials have given you a general idea of the upcoming work, and then we will focus on the details that significantly affect the quality of its final result. The construction of a gypsum plasterboard box is technically quite simple: it is a non-working or only slightly loaded cladding on a load-bearing frame. As always in such cases, the overall reliability of the structure is largely determined by the correct selection of a combination of structural materials from a range of appropriate quality. First of all, you need to choose the frame material, because... Most of the weight and operating loads will fall on it.
Profiles for gypsum boards
In principle, the frame of a plasterboard box can be made from seasoned, shrink-treated wood: its mechanical properties are ideal for this application. But, in addition to the high cost of the material, the wooden frame of the box will be prohibitively labor-intensive due to the need to make a large number of reinforced carpentry joints. Therefore, plasterboard boxes are assembled almost exclusively on the frames of their special thin-walled metal profile.
A typical range of galvanized steel profiles for plasterboard is shown on the left in the figure:
Assortment and some possibilities for using profiles for drywall
In addition to standard sizes (see below), profiles for gypsum boards are divided according to wall thickness into:
Lightweight – wall thickness up to 0.25 mm. They are mainly used in unloaded designer products, because bend easily, but are fragile. Normal – walls up to 0.4 mm. Most commonly used. Reinforced – walls up to 0.6 mm. They are used in reinforced frames of large boxes. Structural for frames of load-bearing building structures – walls from 0.6 mm. Not suitable for installation of gypsum boards on them. These are profiles for metal frame structures. The fasteners intended for them will break the gypsum boards during installation.
Note: the thickness of the profile walls is not always indicated in trade specifications, so when purchasing you need to be guided by its weight. 1 linear meter of normal weighs 0.4-0.7 kg depending on the size.
There on the left and below in the center in Fig. The correspondence between domestic and foreign types of profiles is shown. The correspondence, it must be said, is not entirely accurate, because The fundamental approach to dividing profiles into types is different in both cases. However, the general principles of assembling a frame from metal profiles for plasterboard are the same:
Starter, guide and load-bearing profiles are not nested into each other without notches. You can put all the others (UD, CD) into UW type profiles. Only CD profiles are included in UD type profiles.
Top center in Fig. Typical diagrams for assembling frame elements are shown. Based on all this, the installation of the frame under the drywall is carried out as follows. order:
UW or PNP profiles are attached to the vertical base (support) surfaces; UW or PN profiles are attached to horizontal base surfaces; horizontal frame levels are assembled from PP or UD profiles; if the box is ceiling-mounted, the horizontal frame connections are attached to the ceiling with ceiling hangers, see below; the main vertical force connections of the frame are assembled from PS or CD profiles and, if necessary, additionally fastened in the horizontal direction with ceiling hangers rotated 90 degrees; the joints of the profiles of each level are connected by fastening units, also see below; from CD, PP or PS profiles, vertical force connections between the levels of the frame and additional support connections under the joints of the slabs are cut out, put in place and fastened, see below; from profiles PU, UD, PN or PNP, i.e. not having sides bent inward, support connections of hanging corners are assembled; the frame is sheathed with gypsum plasterboard parts cut to size; PU profiles are applied to the outer corners to reinforce joints for putty. the seams between the plates are prepared for putty (also see below); plasterboard sheathing is puttied for painting, wallpaper or finishing with tiles and other materials.
Note: under each joint of the gypsum plasterboard frame cladding parts there must be a supporting element from a CD type profile, i.e. with corrugated sides. For information on jumpers for joining cladding slabs, see also the video:
Video: types of jumpers for joining drywall sheets
Standard sizes
Each type of profile from the assortment is available in several standard sizes. To prevent it from happening that a piece that, it would seem, should fall into place without anything, just doesn’t fit there without notches, a set of profiles for the frame of the box must be taken as a set from the same manufacturer. An example of a set of profile sizes for drywall is given on the right in Fig. higher. Their recommended purpose:
UD 27/28 and CD 60/27 - ordinary floor, wall and single-level ceiling boxes not for suspended ceilings (simple) in rooms with walls no longer than 5 m. UD 50/40 and CD 50/50 - for reinforced floor and wall boxes (under increased weight load or with the likelihood of mechanical impact on the structure) and multi-level ceilings in rooms more than 5 m on any side, as well as for decorative boxes of complex configuration. UD 50/40 and CD 75/50 - multi-level simple boxes in rooms over 5 m on any side and boxes for suspended ceilings in rooms no longer than 5 m. UD 75/40 and CD 75/50 - the same in rooms up to 8 m on one of the sides. UD 100/40 and CD 100/50 - the same for rooms longer than 8 and for partially open non-residential premises (covered verandas, terraces, courtyards - patios, etc.).
Note: in addition to choosing the appropriate standard size of frame profiles, plasterboard boxes for suspended ceilings are reinforced in other ways, see for example. video:
Video: strengthening a plasterboard box for a suspended ceiling
What if not?
Profiles for plasterboard from one set of standard sizes, firstly, are approximately equivalent in load-bearing capacity, except for perforated PU. Secondly, they were originally designed for lathing under gypsum boards; boxes and design delights with drywall lie entirely on the conscience of craftsmen in the imagination. Therefore, it is permissible and not prohibited by building regulations to use profiles for plasterboard, but not necessarily according to the manufacturer’s recommendations.
Examples of the use of metal profiles in the frames of plasterboard structures
For example, if you try to assemble a ceiling box with a remote shelf for lighting according to standard diagrams, it turns out that there is nowhere to fit the profile reinforcing the hanging corner into the frame (on the left in the figure): a number of short jumpers will be unreliable. Therefore, the hanging corners of ceiling box frames are often reinforced by PN or PNP (UD types) with one flange notched in the center. And perforated PU is used along the lining of the assembled part of the box instead of PNP under the trace. level, on the right in Fig. In this quality, PU is quite reliable if there is no suspended ceiling, and all work is much simpler. In general, knowing the properties of profiles and the basic rules for their use (see above), which frame element to install from which profile is a matter of your working skills and ingenuity.
We recommend: How to install polypropylene water pipes: design basics and installation rules
Connectors
While it is still possible to assemble the sheathing for gypsum board wall cladding from profiles alone, it is almost impossible to do without additional connecting elements in the frame of a suspended ceiling and a plasterboard box. The most necessary of them is the ceiling suspension, pos. and in Fig.. In addition to its main purpose: hanging a CD from the ceiling, it is also used for fixing vertical CDs or PSs, bottom right in Fig. In the same place below on the left it is shown how, instead of straight connectors, CDs are fastened with UD segments.
Fastening elements of a metal profile frame for a plasterboard box
The multi-level connector (item b) is suitable not only for assembling horizontal elements of adjacent frame levels across each other. They can be used to connect end-to-end horizontal connections of the same level perpendicularly in reinforced plasterboard box frames, for example. under a suspended ceiling. In the frames of simple boxes, a straight corner connector is used for this, pos. V. To assemble the same horizontal connections of the same level, a crab connector is used, pos. G.
Note: for more information on assembling the frame of a plasterboard box, see the video tutorial:
Video: profile frame for plasterboard
Hardware
The frame parts are connected to each other by threaded fasteners - hardware. They also attach the sheathing sheets to the frame. Therefore, the correct choice of hardware is also important for the durability and reliability of the structure.
Hardware products for fastening plasterboard boxes
The frame parts are fastened with metal threading screws (item 1 in the figure). They are simply called self-tapping screws, which is not entirely true. A metal self-tapping screw (let it be so for brevity) has a shank with a groove that turns the pioneer (installation) hole into a collar in which the thread is held firmly. Therefore, for metal screws, you need to drill or, better, cut (see below) installation holes with a diameter equal to the diameter of the body of the hardware without threads. The frame made of metal profiles under plasterboard is fastened with 4x12 mm self-tapping screws; the installation hole for them needs 2.4-2.8 mm. There is no need to skimp on the length of the hardware: it will sit firmly only if it runs the thread at least 4-5 turns. You need to drill with a screwdriver. The drill bit into the chuck must be new, sharp, and properly sharpened; preferably carbide.
Self-tapping screws
The frame parts are fastened at 1-2 points. The casing is attached at many points, so for this purpose self-tapping screws are used, which are self-tapping screws, pos. 2: they can be used to fasten material “live”, without installation holes. Masters on this score are divided into 2 parties: some, more numerous, advocate fastening for profit, because Vibration during drilling can cause the zinc coating of the profile to peel off. Condensation will accumulate in microcracks, and you will be surprised how quickly the frame can rust through in a seemingly completely dry room. Others require mandatory drilling of pioneer holes: if the self-tapping screw does not immediately bite into the metal, it will pull up the gypsum board thread and crumble the material.
Beginners must definitely stick to the party of “drillers”: without solid experience, a sense of material and hands accustomed to constantly using a tool, it is impossible to correctly set the screwdriver speed in advance, and if you insert the bit into a powerful drill, the hardware can not only crumble the plasterboard, but also distort profile. In such a case: self-tapping screws are needed 6x(24-30) mm; installation holes for them are 4.5-4.8 mm. The distance from the edge of the sheet is 10-12 mm for gypsum board with a thickness of 9 mm (see below), 15-16 mm for gypsum board with a thickness of 12 mm and 20-25 mm for gypsum board with a thickness of 18 mm.
Types of self-tapping screws for drywall
That's not all. Self-tapping screws for drywall need black phosphated, very hard ones. But they also come in different types, see fig. on right. If the frame is made of a lightweight or normal profile, the threads on the hardware need to be smaller and more frequent. And for a reinforced profile and fastening UW or UD to a wooden wall, it is rarer and higher. In the latter case, the penetration of hardware into a wall made of hard wood is 80-100 mm, and from ordinary wood - 110-130 mm.
How to attach gypsum boards
Whether you are attaching the gypsum board to the frame either directly or with a drill, you must use a screwdriver. Twist by hand - the work will also go to waste, because... inevitable distortions of the hardware will crumble the drywall.
You must also use the tools with extreme care. It is unacceptable that the head of the hardware presses the cardboard covering of the slab until it breaks (on the left in the figure). The tool must be removed and stopped as soon as the head has pressed the cardboard to its height, on the right.
How you can and should not attach drywall to the frame of the box
Dowels
But let's get back to the frame. An unacceptably large number of microcracks in the coating of profiles are caused by sawing them with a grinder or a hacksaw. The minimum is the installation of metal screws with an unfolding shank. Black self-tapping screws give a negative effect somewhere in between, so it is undesirable to attach profiles to walls, floors and ceilings with them, and in bathrooms it is not necessary at all. The most reliable way to fasten the frame to the base surfaces is with dowel-nails (item 3 in the figure with hardware) in a metal cage or combined nail-screw-dowels (item 4) in a plastic one. Dowel-nails without a clip (item 5) are designed to be fired from a construction mounting gun (SMP) and are completely unsuitable for working on drywall.
The frame is attached to concrete and brick walls using steel dowel-nails. The caliber of the hardware on the holder is 6 mm. Depth in concrete 60-70 mm, in sand-lime brick 80-90 mm, in red solid brick 90-110 mm. You cannot drive dowel nails into hollow bricks! The spacer rod is driven into the cage with gentle blows of a hammer.
Self-tapping nails and dowels are used to fasten profiles to walls made of wood, cinder block, gas block, foam concrete and other weak materials, for example. to fiber-reinforced concrete. The rod of the combined dowel-nail is knocked down with light blows of a hammer until the thread “grabs” the plastic, and then it is tightened with a screwdriver. The caliber is the same, 6 mm. Penetration into the base material (excluding plaster and other finishing):
Solid fine-grained wood – 90-110 mm. Cinder block – 100-120 mm. Coniferous industrial wood – 110-130 mm. Foam concrete, gas block, etc. – 130-150 mm.
What to do with slopes?
How close is it permissible to drive dowel nails into a wall made of brick or concrete?
Novice amateur builders are often interested in: how close can the dowel-nails be placed to the window or door frame so as not to chip? For brick and concrete walls, the answer to Fig. on right; you need to choose the larger of the obtained values. For wooden ones - no closer than 1.2 times the depth of the hardware into the wall. For cinder block, foam concrete, gas block - no closer than 2 of its depths.
GKL
Since the load-bearing role of the drywall itself in a box made from it is small, it has only now come to its description. It is known how gypsum boards are constructed (see figure): these are 2 layers of cardboard, between which there is building plaster, with reinforcing fibrous additives. The thickness of commonly used slabs is 9, 12 (the most common) and up to 18-24 mm, depending on the manufacturer.
Structure and types of drywall
Regular gray (sometimes light beige), green moisture-resistant and pink fire-resistant drywall are available for sale. A plasterboard box in a bathroom should be made only from moisture-resistant gypsum board, because... others become limp and swell from moisture vapor. Unfortunately, moisture-resistant gypsum plasterboard is not an electrical insulator and fireproof, so it is highly undesirable to install electrical wiring in it. It is better to lengthen the cords from the washing machine and boiler, lead them into the kitchen and install separate sockets for them, connected to the kitchen “dose” distribution box through a residual current device (RCD). If, according to the layout of the house, this is not possible, the wiring should be made from a double-insulated cable with flexible cores increased by 1.5-2 times against the design cross-section, and the socket boxes and other fittings should be made of propylene, see Fig..
We recommend: Do-it-yourself wood brushing
How to do electrical wiring under drywall sheathing
The fact is that it is impossible to make PVC insulation completely non-flammable by introducing a large number of additives into it - the material becomes brittle. As a result, the spread of fire along the wires is not excluded in the case when the circuit breaker is triggered and cuts off the shorted branch. When PVC burns, it releases the deadly poisonous gas phosgene. Its lethal dose is negligible; there is no antidote.
The filler of fire-resistant gypsum board contains so-called. called flame retardants are substances that release a lot of water of crystallization vapor when heated. Borax is most often used as a fire retardant. If the wiring under fire-resistant plasterboard catches fire, the water vapor will cool and extinguish it before phosgene is released in dangerous quantities. Therefore, it is highly advisable to make boxes with electrical communications in dry rooms from fire-resistant gypsum board.
Also, from fire-resistant gypsum board you need to make boxes with lighting using incandescent and fluorescent lamps. Both heat themselves and warm the surroundings with thermal radiation. Gypsum also contains water of crystallization. Although it is much more difficult to “squeeze” it out of it than from borax, a slight but prolonged overheating of the gypsum board makes the slabs brittle; Properly sealed joints crack. In such conditions, fire retardant additives seem to “intercept” the release of moisture, and the entire lining turns out to be quite durable.
Note: white vibration-absorbing (anti-acoustic) gypsum plasterboard is also available on sale, but is not in great demand. It is expensive, does not dampen sounds well, and is not moisture resistant. If you need to muffle a noisy riser in the toilet (see below), then the best effect is achieved by 2 layers (precisely two!) of 9 mm moisture-resistant gypsum board.
Features of the riser
There are special inspections on the sewer riser. They are couplings closed with lids. Access to them must be free. It is necessary to provide in advance the presence of an openable window. For these purposes, plastic doors sold in building materials stores are used.
Access is also left to the places where the central riser connects to the internal sewerage system. Over time, the question may arise about the need to replace or remove the blockage that has formed inside the pipes.
Holes for lamps
We mark and, using a special crown and a screwdriver, cut out holes for the lamps.
We make holes for lamps using a special crown and a screwdriver
Choose the location of the lamps so as not to hit the ceiling profile
Features of water pipe lining
Reducers, check valves, compensators, valves and water meters - all these important elements are located on the pipes. They should always be freely accessible. Therefore, it is necessary to think in advance about the presence of a door in these places.
The openings in the plasterboard sheet are made several millimeters larger than the dimensions of the door being inserted. It is better to do this before fixing the drywall to the frame, but it is possible to only mark the lines in advance and make holes after installation.
Important elements must be open
A mandatory requirement is to install the door on the front part directed towards the exit. Don't try to hide it in a secluded place. It is permissible to install a door leading to the valves on the side edge.
In places where the pipes extend beyond the boundaries of the box, the holes are made slightly larger than the diameter of the pipes. This gap will prevent vibration. After completing the installation of the box, this gap is foamed, thereby creating a soft “cushion”.
This video will help you get acquainted with a clear example of sheathing pipes with plasterboard.
Features of boxes
The box is actually a simple structure consisting of profiles and sheets of drywall. But it is necessary to remember about the communications that this structure closes, therefore, during installation, you need to remember both the aesthetic beauty of the structure and the practical application of the structure.
Installation of a sewer riser box
All sewer risers have a special hole - inspection. This hole is used to clear and check for blockages in the riser. This place cannot be completely sewn up ; it is necessary to leave a hole for the dormer window. The size of this window should exceed the diameter of the revision by one and a half to two times and have a special door.
Such dimensions are due to the inconvenience when performing plumbing work and there is a possibility that during an emergency repair the plumber will accidentally break the box. Special doors are sold in almost any store and in different sizes.
Before making a special hole in the box, you need to already have ready-made options (or know the dimensions by heart) so as not to make the hole too large. And also when installing the box on the sewer riser, it is worth looking at other holes that may be needed in the repair of the riser itself and providing them with the appropriate windows.
It is worth remembering that the audit should always be located on the front side with a view of the entrance (exit) . This is a mandatory requirement, and without it you can easily tear down part of the box to gain access to the audit.
Water mains
The principle of installing the box is the same. Openings for windows are also required, but at the places where water meters are attached, on all valves (usually they are located in one or two places), on gearboxes and check valves. It is advisable to sign the purpose of a particular valve or reducer from the inside , so that in a critical or emergency situation you will not have part of the box torn down, trying to understand where certain pipes go to.
With a large fork in the highways, it would be best to provide each window with a door with a diagram of the pipes passing through it.
This action may seem strange to you, but during the repair, the plumber will thank you very much and will complete his job much faster. The main thing is quick access to the necessary valves and main channels; the location is not so important, even if the door with the valve faces the corner opposite to the entrance.
When taking pipes outside the box, holes are made whose diameter is larger than the diameter of the pipe itself. Empty space in drywall is usually filled with foam or regular masking tape . This is due to the fact that there are different weather conditions or the technical condition of the pipes: metal and any other materials used tend to play with temperature - they increase and decrease.
Of course, this applies to a lesser extent to plastic pipes or metal-plastic pipes, but there is a mechanical effect or human factor. For example, someone accidentally hit a pipe and it, with the help of vibrations, destroyed part or all of the drywall box. Therefore, to avoid such situations, holes are made that are larger in diameter than the pipe itself . But also, if you don’t want to buy doors for the windows separately, you can make a window from plasterboard, but then you will need a handle and door hinges (small).
How to close a gypsum board battery?
The most difficult thing in this process is to assemble the metal frame. Installing gypsum board is a simple step. To make it easier to close the battery, you should be consistent:
- The gypsum board is applied to a metal base arranged around the battery;
- The cut locations are marked with a marker or pencil;
- A cut is made according to the applied markings;
- The finished pieces are attached to the frame with screws.
To simplify the process, it is better to install each piece immediately after cutting, so as not to get confused.
If you close the entire radiator, the heat will not enter the room. To do this, a special plastic screen is installed in the front plane of the structure. It is fixed before installing the gypsum boards. After completing the entire work process of sheathing the battery with plasterboard, the outer part of the heat-conducting screen is installed.
A plasterboard box helps to hide various irregularities and communications, which in themselves worsen the overall appearance of the room. The room becomes neat and well-groomed.
source: //gipsohouse.ru/questions/4613-kak-sdelat-korob-iz-gipsokartona-na-stene.html
Do-it-yourself plasterboard box, how to create it from “A” to “Z” - this is the main topic of our article. The goal of any renovation is to create a fresh and beautiful interior in the room. But there are rooms where the “inheritance” from the builders is a complex system of pipes or communications that cannot be hidden without additional structures. This problem is faced by those who have started renovating a kitchen or bathroom. To solve this problem, we will tell you how to make a box from plasterboard
with your own hands.
Note that plasterboard boxes are also created for decorative purposes. Multi-level ceilings or niches with spotlights are popular in modern design.
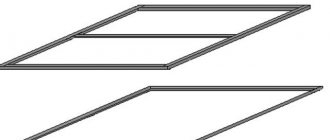
Image of a frame made of guides
Stages of work
Markings on the ceiling
- Before assembling the box on the ceiling, it is necessary to mark it. The lines are drawn with a pencil, the parallelism of the markings is controlled by a bubble or laser level. Lines for subsequent fastening of the guides are drawn on the walls and ceiling. The pipes that the box will hide need to be properly primed and painted; after the structure is installed, they will become difficult to access.
- For convenience, you can lay out the profiles for the frame on the floor and transfer the markings to the ceiling. Along the fastening lines, holes for dowels are made using a hammer drill.
- The guides that form the upper part of the box are attached to the ceiling.
- Hangers for fastening are made independently; the guide profile is cut into pieces of the required length.
- A UD guide profile is screwed around the perimeter. It forms the plane of the structure; the shape of the box depends on the accuracy of maintaining the horizontal level when securing it. Galvanized slats are fixed using self-tapping screws. The fastening pitch should be from 30 to 60 cm, it depends on the weight of the structure. If the starter profile has holes, this will make installation easier.
- According to the markings, hangers are attached to the ceiling. They are easily cut with scissors to fit the length of the box. The supporting CD profile is attached to their lower part with self-tapping screws. The main load of the structure falls on this element, because the sheets of drywall are screwed to it. All parts must be in the same plane, no bends are allowed.
- It is necessary to prepare the wiring for spotlights by marking their installation locations. The wires are secured so as not to damage them during further installation of the box.
- Lastly, the transverse parts are screwed on; they are fastened perpendicular to the wall in increments of 60 cm. The frame is ready, you can sew it up with sheets.
Which drywall to choose
Some will say that pipe lining can be done with other materials. But drywall has long established itself as the most practical material. And after completing the work on creating the box, no one will limit you on what finishing material to choose. Drywall is pasted over, painted, and covered with ceramic tiles.
The following types of drywall are produced:
- GKL – standard type of drywall;
- GKLV – moisture-resistant plasterboard;
- GKLO - option with fire-resistant properties;
- GKLVO is a specific type that combines moisture-resistant and fire-resistant properties.
Standard sheets are intended for use in rooms with humidity up to 70%. If the installation of the pipe box takes place in the bathroom or kitchen, you need to use moisture-resistant gypsum board material. This type of drywall is immediately impregnated with an antifungal substance, and its resistance to high moisture is significantly superior to the standard version.
If we talk about the thickness of the sheets, then for the box choose ordinary sheets with a thickness of 12.5 mm. A thin sheet of 9 millimeters will not work, as it will not be able to create a rigid base.
Drywall covered pipe frame
Assembling the frame with your own hands step by step
In bathrooms and bathrooms, sometimes the sheathing is assembled from wooden blocks, since the wood absorbs the noise of water flowing through the pipes. In this case, all parts should be treated with water-repellent impregnations. It is recommended to use stronger and more durable metal profiles, as they are easier to install.
When assembling the frame, the installation of windows for access to valves and meters is taken into account. Hinges or canopies are secured to the sheathing. Places for passing pipes where this is necessary are also provided (for example, in a toilet, water supply to the toilet cistern).
Sequence of assembly work:
- Drill holes according to the markings.
- Insert plastic dowels.
- Secure the profile with self-tapping screws or anchor bolts.
When mounting on the ceiling, the guide element is attached first, then the suspensions are installed. Ceiling slats are fastened to guides and fixed in hangers. The vertical structure is assembled in a similar way, but instead of a ceiling profile, a rack profile is installed. Laying insulating materials helps reduce the noise from water flowing through the pipes in the toilet.
Frame covering
The sheets are cut out in accordance with the drawings. If horizontal pipes are sewn up with a box of three walls, then a narrow slot is cut in the lower part. This is necessary for timely detection and repair of leaks. When sheathing vertical pipes, first the end solid parts are cut out and attached flush. After this, the front elements are cut out and placed on the sidewalls. Bent products are prepared in advance if they are provided for in the design.
Everything is fixed with self-tapping screws using a screwdriver or screwdriver. The seams and heads of the fasteners are puttied, rubbed down after drying, and the corners are taped with serpyanka (mesh masking tape). Can be finished with any decorative materials on the same day. A box in a plasterboard toilet is traditionally laid with ceramic tiles at the same time as the finishing of the entire room.
Instructions and recommendations
- When installing in a house with reinforced concrete walls, a hammer drill will be required.
- For systems in bathrooms, a profile made of galvanized steel is required (resistant to corrosion, does not require additional processing).
- The box in the bathroom or toilet, which hides meters and valves, is equipped with a Euro hatch, providing access for taking readings, audits and other manipulations. The “window” can be made from plastic, plasterboard or wood yourself, or you can purchase a finished product on the construction market.
- In rooms with high humidity (kitchens, bathrooms, basements) it is secured with black hardened screws.
- Since decorative finishing in the toilet and bathroom is usually made of ceramic tiles, the distance between the fastenings of the sheets to the frame should not exceed 15 cm.
- If the box width is more than 25 cm, an additional profile is recommended (ceiling or rack-mount depending on the design).
- When fixing gypsum boards, do not screw self-tapping screws into the ends of perpendicular elements.
- It is more convenient to use mineral wool as a noise-absorbing material (glass wool is usually used).
What you need to pay attention to before starting work
Before making a plasterboard box to hide pipes, pay attention to the following points. First of all, evaluate the quality of the material for the structure. There should be no chips or damage on the drywall. The profile for drywall should be rigid and not wrinkle when pressed by hand. After all, the reliability and durability of the structure depends on the choice of component materials. Prepare your tools for work in advance. Their list is as follows:
- roulette;
- construction knife;
- corner;
- impact drill or hammer drill;
- pencil;
- metal scissors;
- hammer;
- screwdriver or screwdriver;
- screws, dowels.
Purchase the drywall itself and profiles (racks and guides) based on the results of calculations of the required amount of material.
When it comes to creating a box around a sewer riser, remember that in such a riser there are couplings with outlets (revisions), which are needed for cleaning the sewer. In such places, provide access to the pipes.
Creating a hidden hatch for access to pipes An example of a successful location of a box to mask communications A frame for the future box is installed around a pipe Before installing the frame, you need to take the necessary measurements and calculate the material An example of a horizontal box to hide all communications Another example of installing a frame under plasterboard cladding
Accessories for drywall
Drywall does not have a high load-bearing capacity, being, in fact, a cladding. It requires a supporting structure (for volumetric figures) or a sheathing (for planes). There are frameless structures made of gypsum plasterboard, but they have only a decorative purpose and are installed, as a rule, in the upper tiers of rooms.
The frame for the plasterboard box can be made from wooden blocks, or standard metal guides can be used. There are three main types:
- Ceiling guide (main) profile (PN, UD) . It is used to form the base or frame for the frame posts.
- Ceiling transverse (PP, CD) . Used for making crossbars.
- Bearing profile (PN, UW) . Its other name is rack profile. Serves as the main supporting element of the frame to which gypsum plasterboard panels are attached.
- Partition rack (PS, CW) . Also used to create vertical support structures.
- Arched profile . Used to create curved shapes. It has multiple cuts to facilitate bending in the desired direction.
Profile types and sizes
Prices for ceiling profiles
Ceiling profile
The names of the metal strips do not indicate that they can only be used for their intended purpose. All these elements are a kind of construction kit that allows you to assemble frames as the situation requires.
In addition, there are various types of connecting and fastening elements on sale:
- Single-level crab-type connectors providing a cross-shaped connection of the guides.
- T-shaped connectors for right angle connections.
- Extensions with plug-in fixing element.
- Two-level connectors providing a criss-cross connection of one guide profile over another.
- Direct hangers for ceiling mounting.
- Sliding hangers capable of moving inside the guide profile.
Suspensions and connecting elements
To work with metal guides, you must have the appropriate tool:
- Metal scissors.
- A hacksaw for metal.
- Electric drill or screwdriver.
- Self-tapping screws with a drill tip.
Tools for installing drywall
Prices for popular hammer drill models
Hammers
If using these tools is difficult or they are not available, the frame can be assembled from wooden blocks that are commercially available. Working with wood is easier, but the properties of wood are somewhat worse than those of metal parts. Wood rots, warps, and is capable of absorbing moisture and changing linear dimensions. A box assembled on such a frame can come apart at the seams, and the finishing can peel off or bounce off. These disadvantages must be taken into account when choosing material for the frame of the box.
What are the advantages of plasterboard structures?
Let's start creating the box
You already have an idea of what a box is; essentially it is a structure made of a metal frame covered with plasterboard. But even this matter has its own nuances.
The first step is marking for the future pipe frame. Using a level, markings are made on the floor, wall or ceiling. Next, proceed to fastening the guide profile. Having drilled holes for the dowels and secured the guide profiles, install the jumpers. The recommended distance between jumpers is from 50 to 70 centimeters. The front edge, which is not adjacent to the walls, is mounted after the installation of the other two is completed.
Finished box after tiling
When creating a frame for pipes, remember the places where you need to ensure their exit. And in places where valves or meters are installed, provide space for a door or a removable part of the box. If the frame is made over noisy sewer pipes, special materials are used for sound insulation that reduce the noise level. Since such a box is not dismountable after installation, think in advance about access points for pipe repair.
Later the doors can also be made
less noticeable by covering them with the same material as the rest of the walls. From an aesthetic point of view it is very beautiful. The main thing is to make sure that the door can open and close easily.
In the future, a door will be installed in this place to facilitate monitoring of water meter readings
The next stage is the installation of drywall on the frame. The sheets are cut so that the frame consists not of pieces of plasterboard, but of solid sheets. Remember that the side edges of the box are sheathed first, since the front strip should also cover the side sheets. The sheets are secured with self-tapping screws every 25-30 cm. Screw in the screws so as to recess the caps into the sheet by a millimeter. This will hide them while puttying the surface.
If the box is installed on the ceiling, the technology is almost the same. The only caveat is the mandatory installation of frequent jumpers for the integrity of the structure on the ceiling.
Installing a box on the ceiling, the main thing is to attach the jumpers, which will ensure the strength of the structure. Using the same technology, you can decorate the space under the bathroom. You can carefully hide communications only with the box. Example of using plasterboard boxes in the living room
Example video:
Having secured all the sheets of drywall, we begin to putty and process the corners. The corners are formed using special perforated corners, which are attached to the starting putty. At the last stage, final puttying or preparation for laying tiles is carried out. At this point, we can assume that the process of creating your box has been successfully completed.
source: //gipsohouse.ru/questions/2407-kak-sdelat-korob-iz-gipsokartona.html
Sooner or later the moment comes when it is necessary to make repairs in your apartment or office. I want a beautiful and stylish design of the room, regardless of its purpose and price factors.
Therefore, in such a situation, the most pressing question arises, requiring a prompt solution: how to make a box from plasterboard with your own hands.
GCR box for pipes in the bathroom
Technology for assembling gypsum plasterboard structures - step-by-step instructions
The general technology for assembling frames consists of three main stages of work:
- Creating a frame.
- Sheathing the frame on the outside with plasterboard.
- Finishing the surface of the box.
Video - How to make a box for pipes in the toilet
Let's look at these stages in more detail.
Frame making
The pipe box consists of two mutually perpendicular planes, attached to the wall and the floor (for horizontal distribution) or to two adjacent walls (for a vertical riser). Therefore, the frame is also made of two gratings perpendicular to each other, fixed to the corresponding surfaces of the walls or floor. The order of assembling the frame is determined by the configuration of the room and the location of the pipelines.
First, you need to attach the main guides to the load-bearing surfaces of the walls or floor, to which the rack elements will be attached, connected by an edge from another main profile. They are connected using special self-tapping screws; at the joint areas, the side shelves are cut with metal scissors and bent to connect the elements more tightly. If wooden blocks are used, first assemble two gratings, which are then attached to the wall on one side and to the floor on the other (or an adjacent wall if you need to cover the riser).
Wooden frame for the box
Step by step procedure:
Step 1. Surfaces are freed from foreign objects (hooks, hangers, mirrors, etc.).
Step 2. The frame is carefully marked. The position of all lines is controlled by a building level or plumb line. The distance to the edge of the frame is determined by the area where the pipes protrude further from the walls, plus 5 cm for the width of the guides or wooden blocks.
We make markings
Step 3. Using an electric drill or hammer drill, prepare sockets for installing dowels. The installation step of fasteners is determined by the size and location of the box, but not less than 0.7 m.
Making holes for dowels
Step 4. Cuts are made on the side walls of the metal main guides where the crossbars are attached.
Step 5. The main guides are installed on the walls and fixed with self-tapping screws.
Fixing the guides
Step 6. Install pre-cut cross members.
Step 7. Both sides of the lattice are connected with an external rib from the main profile, in which cuts have been made in advance for attaching the crossbars.
Metal frame for vertical pipes
Installation must be done as firmly and accurately as possible. It must be taken into account that any mistake made when assembling the frame will subsequently affect the appearance of the box. Distortions will become noticeable when laying tiles or wall panels that have clear geometric shapes.
Important! To connect metal elements, you will need a screwdriver and a bit that matches the size of the screw slot. It is almost impossible to screw a self-tapping screw into a galvanized metal profile by hand, allowing it to fit under the drill bit. Alternatively, you can use an electric drill. Two fasteners are installed at each connection.
Self-tapping screws for metal with a drill tip
Drywall installation
After completing the assembly of the frame, they begin to cover it with plasterboard. First of all, you need to cut pieces of material corresponding to the sides of the box. It should be noted that the first will exactly repeat the shape of the frame, and the width of the other will increase by the thickness of the sheet. It is best to cut off and immediately attach one of the pieces (either horizontal or the one without inspection hatches) so that the size of the second piece can be measured without errors.
Attention! Drywall is a fragile material; if handled carelessly, it can crack or break in half. Before starting work, you should prepare a workplace where the sheets will be reliably protected from mechanical influences. The gypsum board should be cut on a level, flat support so that it does not sag.
To cut drywall, use a hand saw with fine teeth and a slight spread, a jigsaw, and sometimes a regular stationery knife. They cut the sheet along a ruler, break it along the smooth edge of the table and finally cut it off along the fault line.
Cutting drywall with a utility knife
The resulting edge is rarely perfectly smooth, so it is additionally processed with a plane or a special grater. During cutting and processing, a large amount of gypsum dust is raised, so you should work with safety glasses and a respirator. In addition, you cannot work in rooms where computers are installed - fine gypsum dust has a fatal effect on fans, completely depriving them of their functionality and jamming the bearings.
The material is fastened to the frame using phosphated plasterboard screws. They are black with a fine thread pitch. You can also use ordinary wood screws, but you need to be more careful at the final stage - they have a larger thread pitch, so the head may go too deep into the surface of the gypsum board. It is recommended to make the distance between adjacent fasteners in the range of 10-15 cm.
Self-tapping screws for drywall
A socket for installing an inspection hatch or a window for taking meter readings is cut in place. First, mark the surface and drill holes in the corners. Then a hole is cut out of them according to the markings, the dimensions of which correspond to the size of the hatch frame.
To avoid false starts
Often we are faced with a fairly common problem: imperfect planning and protruding communication systems (ventilation shafts, pipelines, electrical wiring). There are other unpleasant additions to the interior that need to be decorated or hidden with building elements .
If you are sewing communication systems into a box, then before starting work, be sure to inspect them so that later you do not have to urgently destroy the erected structure. Carry out the painting and be sure to save a diagram of the location of all valves and connections in case of an emergency. Check the integrity and tightness of shut-off valves and pipelines.
Photo of false panel from gypsum plasterboard
Think about how to discreetly design an inspection window or false panel for access to communications. If necessary, tie the pipes with insulating tape. If sewer risers or ventilation shafts are a source of constant noise, then use mineral wool as a soundproofing material.
Installation of jumpers
Now we mark the locations of the vertical and horizontal jumpers. Ideally, the step between them is 400 mm. But such an element as a box is often not only decorative in nature, but also serves as a place for mounting lighting and ventilation. Therefore, first of all, we note where the outputs of various communications will be located and make adjustments to the position of the jumpers.
For example, when constructing the frame of the box covering the forced exhaust system, I was faced with the need to install two diffusers and two hatches to provide access to servicing the system. It is clear that in this case it will not be possible to maintain the sequence of jumpers with one step. When there are no obstacles, it looks like this;
I had to step back from an even step between the racks:
What you should pay attention to when determining the positions of the frame elements. The presence of metal strengthens the structure, primarily at its location. Any cutouts in the drywall, as well as the installation of lamps, on the contrary, weaken the rigidity.
Therefore, it is advisable to move or install additional jumpers in close proximity to areas of increased load. In the case of hatches, the profile is mounted as a frame, on at least two sides of the cut rectangle. The screws show where the horizontal posts are located.
Covering the box with plasterboard is the final installation operation. Having installed the required number of racks, they still need to be secured, and this must be done in such a way that the shelf (rib or outer edge of the frame) forms a clear, straight line.
Initial training or master class
To make it easier for novice craftsmen to navigate how to build a plasterboard box, here is a complete list of equipment and materials needed to start work:
- Metal profiles of two types;
- Drywall (preferably moisture resistant);
- Fastening elements (dowels, screws);
- Building level;
- Hammer;
- Screwdriver;
- Hammer;
- Reinforcing strips for sealing seams;
- Roulette;
- Knife;
- Ground solutions;
- Putty;
- Spatula, brush.
Basic materials for repair work (items 1,2,11,12) can be purchased at any hardware store. The price for them may fluctuate depending on the manufacturer, but does not differ significantly from each other. If the household does not have specialized tools (items 6, 7), then they can be borrowed for temporary use from friends or from organizations offering rental services. The instructions supplied with the devices will familiarize you with their operating conditions.
Tools for working with plasterboard
Marking
When designing a box in the kitchen, you have to start from the external dimensions of the hood, or rather its most massive parts - the muffler and the engine.
We find the lowest point and transfer it to the wall with a level. We project the part furthest from the wall onto the ceiling. To do this, holding the building level vertically, press its plane against the protruding part of the structure, and the end of the level against the ceiling. Having found the vertical position according to the air bubble reading, we mark a point on the ceiling.
We draw a horizon line through a point on the wall. The ceiling is a little more difficult, since you need to think about the kitchen furniture in advance, that is, maintain a 90-degree angle between the walls.
It is more convenient to mark all long straight lines using a painting cord (beat). When carrying out complex repairs, it is advisable to have 2 pieces with paint (sold separately) in blue and red, since the line of one of these colors will be better visible on different surfaces. For example, red is visible a little better than blue almost everywhere except exposed brickwork.
On the way to beauty
To understand how to assemble a plasterboard box, you need to familiarize yourself with the main range of work:
- Design and installation of a frame made of metal profiles according to your dimensions.
- Fastening at the destination (to panels, ceiling, floor). There are two fastening options: in the first case, you make a rectangular frame for drywall and install it in the right place; in another case, we start with a stationary installation of a guide profile around the perimeter of the selected object, and we attach a rack profile to it horizontally, thereby forming the same frame.
- Preparation of plasterboard panels according to size and shape.
- Installation and fastening of plasterboard blanks to a metal structure.
- Surface finishing works.
Armed with these tips, you will not only learn how to make plasterboard boxes, but also how to use your family budget economically.
Profiles
Before you can properly make a plasterboard box, you need to purchase a profile. In this case, two types of products are needed: a guide and a rack profile. The first serves as the frame of the product, and the second is attached in the transverse direction and gives the necessary rigidity to the structure. When mounting the frame, be sure to check the horizontal and vertical positions of your structure with a level and only then proceed to fix it permanently using self-tapping screws.
Placement and purpose
In order to improve the room, as well as to avoid visual or other inconveniences, there is a fairly simple method of solving the problem - sewing it into a plasterboard body. But it is not at all necessary to stop only at sheets of drywall - to solve such a situation, there are plastic panels, chipboard, and other materials, but the peculiarity of these materials is that they are perfect for something more specific. But sheets of drywall are a universal solution to such problems. Among the advantages, we can emphasize that it is ideal for processing and performing unusual tasks that arise during renovation work. When choosing future finishing materials, plasterboard sheets are more versatile because it allows for almost all types of finishing. In a plasterboard box you can place:
- Installations.
- Backlight with a strip containing built-in light diodes.
- Heating radiators.
- Curtains under the cornice at the top.
- Sink.
- Closet.
- TV.
- Luke and stuff.
You can make a similar design in the living room, in the bedroom, and in any other room of the house.
Forms
They can be completely different, as your imagination allows you, but the most common are regular geometric shapes, of which the most popular is rectangular. But there are also options with a round shape, but the circle is made not only using sheets of drywall, but also during the finishing of such a workpiece. Triangular shapes are practically not used, but they are quite possible to implement - everything will depend on imagination and skill. Even today, oblique and corner boxes are popular.
Varieties
The main element for creating a plasterboard profile is the profile on which it is mounted. The profile, like other materials, is available in different typical sizes. Sometimes it turns out that a profile of seemingly the same typical size does not fit together, one is slightly shorter than the other (in width). In order to avoid this situation, profiles for plasterboard sheets should be taken from the same batch and from the same manufacturer. The main typical dimensions of profiles and functional purpose, where UD is the guide profile, and CD is the main one.
UD 27/28, CD 60/27 - simple profiles for all types of premises, but definitely not for stretch ceilings. They are used indoors, the length of which is no more than 5 meters.- UD 50/40 and CD 50/50 are profiles for floor and wall profiles that can withstand physical and mechanical loads. They are also used for multi-level ceilings, in rooms with a length of more than 5 meters, and sometimes they are used for decorative boxes.
- UD 50/40 and CD 75/50 are approximately the same as the previous typical size, but allow the installation of a stretch ceiling (in a room with a length of no more than 5 meters), but we do not recommend it for floor-type boxes.
- UD 75/40 and CD 75/50, UD 100/40 and CD 100/50 - all of the above, but with a room length of more than 8 meters, suitable for terraces or verandas.
Now let's talk about the tools and materials that will come in handy.
Option No. 1 – Pipe in the corner of the room
Lined corner box
In order to make the box shown in the photo ourselves, we will need three profiles.
In principle, you can also use wooden blocks that have been pre-treated with varnish to prevent the wood from deteriorating due to high humidity.
- We cut our profiles according to the height of the room.
- Box size. If there is no cladding, we simply screw them vertically to the wall as close to the pipe as possible.
If you additionally cover drywall, then it is advisable to adjust the size to the tile. In this case, take a square and draw the required dimensions directly on the floor. Then, using dowels and self-tapping screws, we screw our profiles to the wall.
- We measure the required distance of the plasterboard strip using a tape measure and a square.
We measure the required size
- We cut the workpiece and screw it to the profiles. To be sure, check the size of the second strip with a tape measure once again.
Rechecking
- We still have a third profile, which we screw along the edge of our strip.
- The final step will be to cut out and screw the second plasterboard strip onto two profiles with self-tapping screws.
Installation of guides
After marking, we fix the guides along all the lines formed at the intersection of the planes (box and three walls).
The profile must be secured with reasonable sufficiency, that is, in increments of about 300 mm. Plastic dowels with a diameter of 6 mm are used for fastening. and black wood screws with a diameter of 3.5 mm, length 41 or 51 mm.
Pay attention to how the guides set the position of the edges of the box, or more precisely, the relative position of the vertical and horizontal parts of the profile. In the photo below you can see that in the corner the profiles converge in such a way that the vertical fragment is the “final” one, that is, it is the one that reaches the top of the corner.
It is important to make a similar arrangement on two opposite walls of the room where the box is mounted.
Painting the ceiling box
The final stage in the construction of the ceiling box is painting it.
Before painting, it is necessary to remove dust from the surface using a primer.
Primer for removing dust from the surface of the box after puttying
White interior paint, a roller and a brush were used for the work.
Painting the surface of the box using a roller
To achieve an optimal result, it is necessary to paint the surface 2-3 times.
How to choose the right materials?
Making a box in the bathroom with your own hands is not technically difficult, but you should take into account the features of this room. High humidity and possible splashes on the walls dictate that the owner give preference to moisture-resistant materials. These include:
- moisture-resistant drywall;
Moisture-resistant drywall - plastic panels;
Plastic panels - special grades of plywood.
Moisture-resistant plywood
Having a low ability to absorb moisture, sheet materials are easy to cut and process. They can be decorated to match the overall design of the bathroom by painting, tiling or plastering if necessary.
It is necessary to fasten the sheet material to the frame, so in addition to gypsum board or other sheets, you also need to select the material for the guides. It is most convenient to use ready-made profiles for installing drywall. These are metal structures, durable and light at the same time. They are easy to cut and attach to each other and walls. Installation of sheet material is carried out using self-tapping screws.
An alternative to profiles can be a wooden block. The 3-5 cm thick planks do not weigh down the structure and are easily connected with self-tapping screws. Their only drawback may be their susceptibility to rotting when exposed to moist bathroom air.
The versatility of the box
The box is a site-assembled structure consisting of an internal load-bearing frame and an external cladding. The first is represented by a profile pipe, the second by plasterboard sheets.
The ability to build different configurations from these elements allows you to:
- Zoning premises;
- Create an additional ceiling level for decoration purposes;
- Organize niches for storing things and household appliances;
- Hide utility lines;
- Mask defects of the main planes.
As a result, creating a box is relevant for any room. But before dealing with those problems that traditionally concern different rooms, it will be useful to consider the technology of box installation.
Living room box
The hall is the room that needs decoration the most. Its space welcomes a variety of styles and techniques:
- Organization of a multi-level ceiling;
- Creating niches for storing things or installing a plasma TV;
- Allocation of a separate area for a study or children's area.
Therefore, using a box in the living room is no less important than in other rooms.
Installation of perforated corner
Appearance of a metal perforated corner
The perforated corner performs two functions: 1 - gives the structure evenness, 2 - protects the most vulnerable part of the structure from damage.
Of course, in the case of using a perforated corner in a ceiling structure, the main task will be to give our frame evenness.
Installation of the corner is carried out using putty. The perforated corner is quite light and the putty holds it in place without any problems.
We need to dilute a little universal putty and apply it to the corner of our box, then take the perforated corner and press it tightly. Next, you should apply a little putty on top of the corner itself and, for reliability, secure it with several self-tapping screws.
Installation of a perforated corner on putty
After the mixture has dried, the screws must be unscrewed and excess putty removed with a spatula. Then you can sand the surface of the corner and putty it again, trying to make the surface of the structure even.