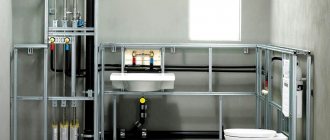
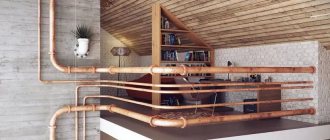
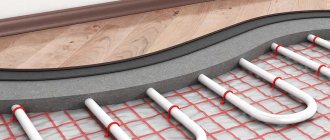
One of the most convenient materials for installing flooring is laminate. The range of color and texture solutions makes it possible to combine it with any interior. Locking fastening systems help to install the coating without special preparation in a short time. However, transitions to an adjacent room, joining with another type of flooring, installing the last row of laminate, piping heating and water supply pipes require knowledge of the technology and installation features. In this article we will tell you how to place laminate flooring around the pipe.
Laminate flooring
Option for hiding heating pipes in the wall
Pipes located along the wall can ruin not only the appearance of the wall, but also the interior design of the entire room. But first of all, we would like to inform you that it is strictly prohibited to completely close the heating pipes in the apartment by hiding them in the wall or under the floor.
- Firstly, there is a law prohibiting, without the consent of the housing office, carrying out “reconstruction of residential premises that involves the installation, replacement or transfer of utility networks...”, and obtaining permission there is not so easy.
- Secondly, this case can be risky in multi-apartment residential buildings, since if a completely walled up riser breaks, you can pretty much flood your neighbors, because not all plumbers are experienced, and some can cheat, as a result of which all the trouble will eventually fall on you .
- And thirdly, if the central heating system is pretty worn out and leaves much to be desired, then even more so, the method of hiding heating pipes in the wall of a room can lead to a decrease in heat transfer in the apartment and the formation of dampness and mold in the apartment.
The option of disguising heating pipes in the wall or under the floor is perfect in a private home, since in such houses an individual boiler is usually installed, where the temperature regime is regulated by the owners and in the event of an emergency, you can easily stop the boiler system and drain the water.
How to close heating pipes in an apartment photo on the wall
First of all, if the heating system in a private house has already been installed, you should carefully inspect the pipes and the system as a whole. It is strictly not recommended to hide metal pipes, especially old ones; it would be better if you replace them with plastic ones. For those who are just building a house and installing a wiring system in a room from scratch, it is much easier for them.
Before starting work, you should draw up a diagram of the future location of the pipe system. Next, in the wall or on the floor, recesses are made with strobes of the appropriate size, using a grinder with a diamond wheel to cut the markings and a hammer drill to deepen the recess itself; if you do not have the proper power tools at hand, you can use the old-fashioned method, that is, a chisel and a hammer.
After the recess in the wall or floor is prepared, all that remains is to drown the pipes
This process is quite simple, but remember, do it wisely, that is, pay special attention to the connection points of fittings, elbows and tees. After laying and installing the pipes, you need to check the reliability of their fastening and the absence of leaks, in order to avoid further troubles. To check the heating system of pipes in a room, follow these instructions, connect the heating system to the pump, then fill it with water and create a pressure that exceeds the working pressure, and then visually inspect all pipe connections for leaks
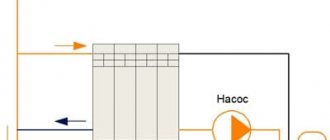
To check the heating system of pipes in a room, follow these instructions, connect the heating system to the pump, then fill it with water and create a pressure that exceeds the working pressure, and then visually inspect all pipe connections for leaks.
In order to reduce heat loss in the system, it is recommended to insulate the pipes with polystyrene foam insulation. To do this, you need to make a side slit in the covers and put it on the pipes; the seams can be taped with special tape. After all the work done, the wall should be given a uniform appearance by covering the openings with mortar and removing all accumulated construction debris.
How to disguise a heating pipe in a room under a screed photo
At the end of the process of completing all the work, a pipe route diagram is drawn up, so that during further repair and construction work, the integrity of the hidden structure will not be accidentally damaged.
What do you need to do before starting work?
You need to start decorating the heating risers in your apartment only after preliminary preparation has been completed. If the communications in your apartment are old, then before installation they must be replaced with new ones. Sheathing involves an insulation device. It is necessary to put a layer of polyethylene on the pipe or a special sleeve instead. Regardless of the chosen decoration method, the pipeline must be washed before decoration. If you decide to paint heating pipes, then serious preparation will be required.
- It is necessary to remove traces of previous finishing from the surface of the pipe.
- The surface must be cleaned with a wire brush.
- It is also necessary to perform priming.
By deciding to decorate the pipes in your home in an original way and using your imagination, you can get an original interior element and achieve an incredible effect in the room.
Features of factory products and homemade products
All structures designed to hide heating systems can be divided into two large categories: ready-made devices and specially made boxes.
Option #1: factory-ready devices
Such devices are purchased in specialized stores, where a large assortment of products of different colors, sizes and designs is presented. The shape of such structures can be angular, rounded or rectangular.
The first option is especially convenient in the corners of the room for masking risers, and also if the heating system is located close to the ceiling or floor. Other modifications are perfect for pipes that are laid around the perimeter of walls and a free-standing riser.
Various solutions are being practiced. Factory-made polymer air duct parts are suitable for pipe design.
When choosing such options, it is advisable to pay special attention to the quality of the material, since low-grade polymers can turn yellow, swell and lose their appearance when exposed to heat. Metal boxes can be painted with durable dyes that can withstand prolonged heating well
Such elements prevent dust from settling on the pipes, making cleaning easier
Metal boxes can be painted with durable dyes that can withstand prolonged heating. Such elements prevent dust from settling on the pipes, making cleaning easier
Boxes made of regular or perforated metal look very impressive. If a practical goal is being pursued, it is better to give preference to the second option, since thanks to the holes, metal elements provide better heat transfer.
Another option is budget designs made from MDF, which have an attractive appearance and good performance. The disadvantages include a small model range, which is dominated by “blind” devices without holes, which reduces heat transfer.
Option #2: self-made structures
Despite the significant selection of ready-made boxes, hand-made designs are very popular. They not only allow you to save money, but also allow you to ideally solve the problem of how to ideally hide heating pipes in the interior, taking into account the exact dimensions and style of the room.
Boxes and linings for heating communications play not only a decorative role, but also perform a protective function, eliminating direct body contact with a hot pipe, which could lead to burns
The most popular materials include:
- Brickwork. An effective, but rather complex method of camouflage, which will require a lot of work. In addition, such a box can hardly be disassembled if necessary.
- Drywall. By far the most common material.
- Plastic lining attached to a frame made of metal or wood.
- Boxes made of natural wood. Eco-friendly designs that decorate any interior; usually made to order.
The most common are plasterboard boxes, which are easily installed around pipes on a metal profile frame. The choice of material for manufacturing depends both on the room design project, as well as on personal preferences and financial capabilities.
Do-it-yourself manufacturing and installation
Making a decorative product on your own is a doable task. The materials chosen are wood, plasterboard, brickwork, and plastic linings. When making a box from brickwork, one should take into account the impossibility of disassembling such a structure without destroying the integrity of the bricks (for example, when a battery leaks). Plasterboard boxes easily hide communications; they combine ease of processing, convenient operation, and low price. Installation of such boxes includes several stages:
- Accurate measurements of heating communications to determine the size of the lining.
- Assembly of the structure. The main profile is attached to the floor, and the sheathing is assembled with support on it.
- The cut plasterboard parts are sanded with a plane, applied to the frame, and secured with self-tapping screws.
- The gaps between parts of the structures are covered with putty. The surface of the box is primed and finished.
Installation of overlays
Installation of pipes in the wall
The installation of risers in the wall must be approached with all responsibility. First of all, you need to be sure that the pipes will not leak. And you definitely can’t brick up the connections.
Step 1: calculation
For polymers, the so-called linear expansion reaches 5 mm, so it is necessary to provide a sufficient number of expansion joints. The size of the grooves is calculated based on the diameter of the pipe, the thickness of the insulating material, and the volume of mortar.
Step 2: installation
A recess is made in the wall according to the calculations made. In this groove, vertical and horizontal brackets are installed along the entire height. A riser wrapped in a heat-insulating casing is mounted on them.
Before sealing the grooves, it is necessary to connect and check the main line. If everything is in order, the hole is sealed.
Step 4: Mapping
Upon completion of the work, an as-built diagram must be drawn up showing where the route goes. It is needed to avoid damage to the pipeline as a result of minor repairs.
Popular articles Hot water bottle and teapot napkin
Masking horizontally laid pipes
The easiest way to close horizontal communications in a toilet or bathroom is to build a box lined with chipboard, plywood or plastic. To create such a structure, markings are made on opposite sections of the wall.
When determining the length of the indentation, they are guided by the most protruding points along the entire length of the pipeline, including its farthest sections
A guide profile is attached along the marking line using self-tapping screws. Jumpers are inserted into it, maintaining an equidistant distance of 60 cm. Pre-cut blanks are attached to the assembled frame.
If desired, you can build a removable structure. To do this, according to the height and width of the pipes, boards are cut to create a vertical and horizontal plane. They are fastened together with a perpendicular “corner”. The assembled structure is simply placed above the pipe location.
In addition to the above options for masking pipes in bathrooms, there are original options:
How to decorate gas and exhaust pipes in the kitchen
A decorative box made of plasterboard will perfectly help hide these types of communications. You just need to choose the right finish so that the design harmonizes with the interior style, and the problem is solved.
Another good solution is to hide the gas pipeline or hood in a special cabinet provided in the kitchen unit.
Decor of a gas pipe in a kitchen set
Features and Benefits
In old-style apartments, it was common practice to install radiators under the windows and a piping system leading to them from room to room. Sometimes so many of these structures accumulated in a small room that it greatly affected the overall appearance of the living space. Modern buildings are erected with skill, depriving residents of the above problems. Unfortunately, there are still very few such houses, and most are still puzzled by how exactly the heating pipes and the radiator itself can be removed from view.
There are many options for how exactly you can cope with the task, and everyone decides for themselves what to choose for themselves. The simplest and most progressive of them is a box for heating pipes, which can accommodate all communications, covering them from prying eyes. Using beautiful linings or materials, you can decorate the pipes so that they will not be noticeable, but they will be able to fully perform their function in the cold season.
Before carrying out any work, it is important to familiarize yourself with the features that the heating system has, these are:
Any pipes can leak, a breakthrough or breakage of any of the parts may occur, therefore the structure being erected must be easily disassembled so that the problem can be dealt with as soon as possible. If during the renovation process the risers are closed using decorative overlays, the heat transfer will be greatly reduced and the room will be much cooler. The opposite effect will occur if the pipe is mounted into the wall, which will lead to its complete heating and a significant increase in the temperature inside the room. If you need to decorate the radiator and cover it with something, it is important to provide ventilation for it in the box so that there is always a natural escape route for heat. When thinking through the radiator box system, it is important to make it such that, if necessary, it can be easily disassembled into parts, and not be monolithic.
Most often, the following options are used to decorate heating pipes in apartments:
- Placing structures in panels on a wall, floor or ceiling.
- Use of a box that is designed for this type of activity.
- Decorating heating communications using fine art and other creative methods.
To disguise pipes, as a rule, special plastic boxes are used, but they have a number of disadvantages. They make them not as versatile as drywall or regular plastic, from which you can make any structure yourself.
The advantages of this option include the following points:
- To hide the pipes, you can come up with a wide variety of structures that will comply with the design of the room, emphasize it and complement it.
- The cost of the parts needed to translate the idea into reality is low, so almost everyone can buy everything they need.
However, these materials also have disadvantages that are worth knowing about:
- Structures of this type are long and if any problems arise, they need to be completely dismantled to find the problem area.
- If you hide pipes under a decorative plinth, then there is a risk of damage to them by builders or workers who will not know about the existence of heating structures in an unnatural place for them, which will lead to a violation of integrity or more serious problems.
- Having installed a complete box once, it will be difficult to modernize or partially replace the pipes of the heating system.
Coloring and patterning
All of the methods described above for masking heating pipes reduce the flow of heat into the room to one degree or another. One of the best options for hiding heating pipes in an apartment in order to preserve their heat transfer is painting and applying various designs. Both artistic painting and decoupage coated with heat-resistant varnish give good results.
If you do the work yourself, this method is the cheapest, since the metal elements of the heating system still need painting, and the paint consumption for patterns is insignificant. In the case of decoupage using napkins, the costs are generally minimal. At the same time, pipes and radiators turn from ugly objects that you want to hide into interior decoration.
Important! The paint must be applied to a cold circuit when the heating system is turned off, otherwise, when it dries quickly, it may crack or simply lie in an uneven layer with spots and stripes. In order to give the elements of the heating system a decorative appearance, painting is sometimes used even on plastic pipelines and heating devices already coated with a protective layer.
Well-chosen colors can make pipes and radiators the main highlight of the interior, or can help harmoniously fit them into the decor and make them invisible
In order to give the elements of the heating system a decorative appearance, painting is sometimes used even on plastic pipelines and heating devices already coated with a protective layer. Well-chosen colors can make pipes and radiators the main highlight of the interior, or can help harmoniously fit them into the decor and make them invisible.
When choosing paint, you need to pay attention to such parameters as color range, resistance to fading over time, gloss, ability to withstand high temperatures, and good adhesion to the appropriate substrate. Environmental friendliness and smell are also important, since when painting, you will have to breathe in the fumes of paints and varnishes for quite a long time.
Advice: Under no circumstances should you skimp on the price of paints or brushes. After all, bold design solutions for successful implementation require the use of the highest quality materials.
The easiest way to hide heating pipes is to paint them to match the walls. Nevertheless, the time spent on artistic painting always pays off later with aesthetic pleasure from contemplating the resulting paintings.
An ordinary radiator can become a canvas for an artist's work. With the help of brushes and paints, skillful hands can turn a heating device into a real work of art.
Pipe decor
Editorial “So Simple!” I have prepared 11 amazing ideas for you on how to disguise the pipes in the toilet without walling them up in the wall.
- The easiest camouflage option is to paint the pipes in the toilet.
- I really like the idea of a bathroom cabinet. This very useful cabinet will not only cover the pipes in the toilet, but also provide space for storing cleaning products. This idea is very popular among apartment owners.
- You can paint the pipe not just one color, but, for example, make the background white and apply black stripes in spots - you get the texture of birch wood. You can attach artificial leaves on top, and it will be a wonderful full-fledged imitation of birch.
- However, the cladding of heating or sewage systems can serve not only to improve visual perception, but also have a purely practical function.
For example, if, before decorating the pipes in the bathroom, you find that there are no shelves in this room, then why not make these same shelves right in the lining box? It turns out that communications will be disguised, and there will be practical benefits. - To disguise pipes in the toilet, you can use another simple option - use decorative plastic panels.
They are inexpensive, easy to install, and can be used to disguise pipes in no time. The main thing here is to choose the right color and type of panels. - Another way to hide pipes in a toilet is to disguise them with furniture.
A cabinet with doors that hide communications and shelves for household needs are hung on the wall behind the toilet. This provides free access to all communications. - Shutters or blinds are a budget option not only because of the cost of the material used, but also because of the space saving and its rational use.
In a small niche hidden from prying eyes between the roller blinds and pipes, you can make shelves. They can hold all the tools to keep the toilet clean, as well as a supply of paper. - Another interesting idea.
- As you can see, the shutters easily rise and open all communications, which is very convenient. If something suddenly starts to leak, there will be no need to dismantle the stationary structure.
- This method will be a salvation for those who rent housing and want to create normal living conditions for themselves. If you suddenly need to move out of this apartment, you can always dismantle the roller blinds.
- The toilet is one of the most important elements that ensure comfortable living in a home. It should be comfortable and convenient enough so that no problems arise with its use.
None The problem with the design of heating radiators is especially relevant in children's rooms and rooms where children often play, not only for aesthetic reasons, but also because kids run around a lot and can hit the radiator.
- roomplan.ru
- www.babyblog.ru
- rucco.ru
- takprosto.cc
Painting
Stylizing them using paint will help you create a catchy and unusual design for communications in any room of your home. Solutions in this direction can be divided into the following types:
- creating an accent. Excellent for heating systems in bedrooms and living rooms. For example, against the background of blue, turquoise, and purple walls, yellow and orange batteries and wiring will look striking.
- neutral design. For this method, the paint should be selected to match the finish used. The optimal solution for communications located in front of plain wallpaper, paint, and tiles.
- interior styling. To ensure that toilet wiring or wiring in a bedroom with colorful tiles or wallpaper stands out minimally, it is recommended to complement the plain painting with thematic patterns, ornaments or designs.
Using paint, you can stylize the vertical layout as wood in the hallway or children's room or living room. To do this, a crown is depicted on the wall, and the tubes themselves act as a trunk.
Box on a frame for the heating line
If you have already installed the heating system, and now want to hide it, you can hide the pipes in a box. It is made of plastic, plasterboard or wooden materials that are attached to a frame. Before sewing pipes into the box, make sure they are intact!
To install the box you will need:
- metallic profile;
- self-tapping screws with dowels;
- cladding material;
- screwdriver;
- cutter;
- knife for cutting sheathing material;
- drill;
- scissors for cutting profiles;
- measuring instruments.
The first step is to build a frame for the box. It is made of a metal profile or wooden blocks, which are secured with self-tapping screws. First, markings are made around the pipes depending on their location on the floor, walls and ceiling. In this case, you need to take into account the width of the profile or bars, the size of the finishing material and the distance from the pipes to the walls of the box.
Popular articles Cross stitch from photo
Heating pipes should not be located close to the duct. Between them leave a free space of at least 3 cm wide.
If the risers located in the corner of the room are closed, it may happen that the walls are not level. In this case, it is more expedient to make the angles formed by the walls and the frame 90°, and align the protruding angle with them. After marking, they begin to install the rack profiles to the walls. Then the guides are attached to the floor and ceiling. The profile is fastened together with a cutter.
The height of the corner frame for vertical pipes is more than 1.5 m. Therefore, for its strength, it is necessary to secure horizontal jumpers. If the distance between the posts is more than 0.25 m, they also need to be strengthened
Next, depending on the design of the future box, one or two corner profiles are installed. If the distance between the posts is more than 0.25 m, you need to make additional jumpers parallel to them. If the racks are higher than one and a half meters, you need to install horizontal jumpers. After constructing the frame, they begin to line it. If plasterboard is used for this purpose, then before closing the heating pipes with it, it is necessary to remove the chamfers from the sheets. This process is skipped if the box is subsequently tiled.
Once all the frame elements have been installed, we begin cutting out the sheathing material. This should be done in such a way that there are fewer joints
First, the side elements are fixed, and then the central ones. After completing the installation work, the final finishing of the box begins. The plasterboard structure can be covered with wallpaper or painted to match the walls. Special corners are placed on the plastic elements so that the joints are not visible. Drywall is reinforced with an angular profile. The box, the front part of which is a stained glass window, looks very interesting. You can enhance the effect by installing lighting inside.
Some structural elements can be made removable or small doors can be hung for system maintenance.
In rooms where heating elements occupy a large wall area, it is possible to build a false wall. It is made using the same method as the box. First, the frame is mounted, and then it is sheathed with suitable material. However, keep in mind that a false wall reduces the area of the room. Also, a ready-made box is used to hide heating pipes. On sale you can choose a suitable option for any room design.
To disguise heating elements, you can purchase a ready-made perforated metal box. Thanks to small holes, heat penetrates into the room
Stained glass windows and furniture cornices
The use of non-standard solutions for styling an apartment and hiding gas, water, and heating communications makes it easy to transform living spaces and dining rooms. For vertical layouts it is recommended to use stained glass. They can be used to decorate living rooms, adult and children's bedrooms. Stained glass will not only cover communications, but will also become a stylish decoration. If you place a backlight behind multi-colored glasses framed by a wooden or similar body, the finished object will become an auxiliary lamp. In the case where communications are located at the top (ceiling placement), a beneficial solution would be to cover them with furniture cornices. They are installed along the side of cabinets, sets on top and fixed under the ceiling. At the same time, access to communications remains simple, and the space around them remains free.
Curly cornices will fit classic sets, but are unlikely to complement models with bright facades or chrome rails.
Using a plasterboard box to mask a pipe
Decoration of heating pipes is often carried out using a box constructed from plasterboard boards. The choice of this material was dictated by its low cost, ease of installation and low weight, which eliminates the need to use a powerful frame. If a bathroom is equipped in this way, then it is better to use a special moisture-resistant type of plasterboard to construct the box: it is specially designed for use in such conditions.
In order to ensure that the valves and taps on the pipeline are always freely accessible, the structure is prudently equipped with a neat and invisible door from the outside. To decorate a heating pipe using a plasterboard box, no special construction skills are needed.
To do this, you will need to first stock up on the following materials and tools:
- Aluminum profile or wooden slats to construct the frame.
- Self-tapping screws, screwdriver or screwdriver.
- Plasterboard board.
- Putty.
- Decorative plinth.
- Water-based paint, the color of which matches the overall tone of the room. You can also use any other finishing material, based on personal taste.
The sides of the frame are measured with special care, after which the plasterboard panels are cut out and fastened to the frame with self-tapping screws. After completing the assembly of the box, all joining areas are puttied.
It is more convenient to cover the junctions with the walls with a decorative plinth, which can be easily cut to size. At this point, the work of masking heating pipes using a plasterboard box can be considered complete. The final decoration of the structure is usually carried out by painting it in the general tone of the room, finishing it with wallpaper and even laying tiles. If you decide to use paint, the heating pipe box will need to be completely puttied and sanded. The areas where individual plasterboard elements are connected must be glued with sickle tape. Both before and after puttying, the entire surface of the structure must be covered with a primer.
In addition, the plasterboard sheet provides the possibility of attaching light shelves to its surface for various decorative items such as small souvenirs, photo frames, etc. For those with artistic taste, there is an excellent opportunity to show their talent by painting the surface of the box with images and drawings that correspond to the general interior style
When choosing a finish, it is important to achieve a harmonious integration of the new element into the bathroom decor.
Tips for choosing
When choosing decorative products, they are guided primarily by the categories of aesthetics and safety. No pads are needed for the heating system to operate. Finished products allow you to evaluate the quality and appearance of the future interior decoration at the moment of selection. The material and color should be selected depending on the decoration of the room.
It is worth choosing a collapsible structure, which, when installed, will not spoil the existing decoration of the room.
There are products with holes for better convection of warm air, but they are difficult to clean from dust
Disguise methods
There are many ways to close heating pipes in a private house or apartment. The most radical is to hide them altogether, the least is to decorate them with decorations.
At the same time, in individual heating systems, the volume of heat will be distributed between radiators and pipes, and in apartments with central heating, pipe insulation often results in heat loss. But there are ways to avoid this problem.
Place inside walls or floors
Pipes can be hidden inside walls or floors. It is very convenient and aesthetically pleasing. To lay the main line, a groove is made, the pipes are wrapped in heat-insulating material and laid in a recess in the wall, then it is sealed or covered with plasterboard.
All connections and valves should under no circumstances be walled up in the wall - in the event of a breakthrough, it will have to be broken down. Old pipes cannot be insulated in this way.
Hide in a box
Another way is to place the pipeline in a plasterboard box on a metal profile. The box can be painted, plastered, covered with wallpaper - this gives a huge selection of options for decorating heating pipes. You can choose perforated metal - it looks stylish and has good heat dissipation. It is also possible to hide the gas line under a ready-made plastic box.
If plastic is chosen for masking, it must be of proper quality: some types of this material turn yellow and swell when heated, so it is necessary to clarify its technical characteristics.
It is important to remember the rules: the pipe must be at least 5 cm from the walls of the box, and it is also necessary to provide access to taps and fittings
Painting and decorating
The pipeline is painted with paint, matching it to the color of the walls or, conversely, in contrast. Decorate the risers with a tourniquet and rope. Sometimes a bamboo outline is made for them. Later, appliqués made of paper, leather or fabric can be placed on top - this is a decoupage technique that is widespread in modern design.
It is necessary to paint heating elements only when they are in a cold state - when the heating is turned off. Rapid heating may cause the paint to crack.
Disguise with furniture
Disguising it with furniture is the easiest way: push the riser with a cabinet - and no money or hassle. This is convenient to do in the kitchen and bathroom, where furniture is most often placed around the perimeter of the room close to the walls. Special holes are made in the back and side walls of kitchen cabinets.
At the same time, in living rooms it is problematic to disguise pipes with furniture: risers and radiators are located, as a rule, on the wall where the window is, and you can’t put a cabinet there.
Close with screen
Decorative screens are a great way to hide not only risers, but also radiators. The screen can be made of glass or transparent plastic, or even designed in the form of a stained glass window - beautiful, intriguing, stylish. If there is lighting, it will add mood to the interior and can serve as a night light.
To avoid problems with heating, there is an option to make decorative grilles through which heat will still flow. In this case, all screens must be removable.
Prices for screens for radiators
screens for heating radiators
Construction of a false wall
A false wall also allows you to hide all communications from view. Behind the artificial wall, not only heating risers can pass, but also a gas main, electrical wires, and a coaxial cable for a TV.
You just have to remember that a false wall reduces the space of the room. And some elements cannot be left without access. For example, gas workers are very unhappy when they try to hide a gas pipe.
Popular articles Decorating a fence with cement decorations
Hide behind a suspended ceiling
This method is not so popular. However, in a private house it can be used if the heating distribution of the first floor is made under the ceiling, and the second floor - under the floor. In this case, a suspended ceiling is installed. Although, for all its practicality and elegance, it also reduces the space of the room, this time the height.
Prices for different types of suspended ceilings
suspended ceiling
This is interesting: Installing a check valve on a sewer - vacuum + water seal
Types and designs of linings
Overlays are divided into two types:
boxes, covers, screens for pipes;
rings, sockets and plates for passing communications through walls and ceilings.
Finished rings and plates consist of two halves that are connected to each other by snapping. They are attached to the wall or floor using a small amount of any glue. Material: plastic or wood. They cover well the gaps that form in the places where pipelines pass when laying the laminate.
Finished boxes:
Tall (up to 20 cm or more) polyvinyl chloride, steel, aluminum, and even wooden baseboards are very common; they have channels through which any small communications can be passed, as well as wires, communication cables, Internet, etc. Such structures are also made from particle boards;
rectangular PVC moldings intended for placement on the wall;
almost flat small moldings - they cover communications recessed into grooves in the plaster;
traditional plastic PVC boxes (cable ducts);
metal prefabricated casings;
prefabricated boxes made of valuable wood species. Presentable and expensive option.
Wooden boxes are secured using special brackets. Metal and plastic casings are attached using dowels.
Options for making homemade covers:
metal or wooden frame, plasterboard sheets + putty and painting or wallpapering (optimal for plasterboard ceilings on several levels);
- metal or wooden frame, drywall + tiling;
- the frame can be sheathed with laminate, glass, or covered with plastic panels;
- Chipboard, MDF, LDF, HDF (medium, low, high density particle boards), thick plywood + painting or varnishing, lamination, pasting with self-adhesive PVC film;
- “for an amateur” option - bamboo trunks sawn lengthwise are cleared of partitions and glued to pipes, painted with a natural light green color, they can be decorated with artificial greenery;
pasting with tree bark, sometimes with other decorative materials.
Use decorative elements
There are several ways to beat a riser:
- Make it in a marine style - wrap it with twine, cover it with shells, pebbles and other attributes associated with the marine theme.
- “Nature” style - decorate batteries with twigs, artificial flowers/fruits, glue miniature birds and butterflies.
- A very original solution is to “hide” the riser in bark or bamboo, thus giving it the appearance of a real tree.
- A useful device - make a scratching post for your beloved pet from pipes with your own hands. It is necessary to first pack them with polystyrene foam, then wrap them more tightly with twine. A satisfied animal is a complete piece of furniture.
Each method is good in moderation. The main thing is not to overdo it with the decor, remember about the thermal conductivity of the batteries.
Construction made of plastic panels
In places where there are a large number of people (for example, in public buildings), as well as in corridors and bathrooms, structures made of durable plastic panels where heating systems are hidden look appropriate.
It is advisable to install such devices in parallel with the cladding of the room, since in this case it is possible to predict the rational consumption of finishing material. Installation of boxes is carried out in stages.
Step 1: securing the frame
First of all, a sheathing made of wooden beams with a cross-section of approximately 40x40 millimeters is attached to the ceiling and walls. These elements are fastened to the walls and ceiling using dowels equipped with a polymer sleeve. After attaching the beams, they are aligned in the horizontal and vertical directions.
After installing all the frame elements, you can begin cutting the plasterboard sheets. The process must be carried out in such a way as to reduce it to a minimum number of joints
In places (on the floor and walls) where heating communications are located, additional support beams are installed, to which frame racks located lengthwise and crosswise will be attached.
Step 2: paneling the frame
Having installed the frame, you can proceed to covering with panels, which is done as follows. Panels cut to the height of the box are installed on the side plane so that they are in a vertical position. You can fasten polymer parts using small nails, special adhesive mixtures, or a construction stapler.
The last stage is the installation of special elements at the corners designed to hide the cut edges, thanks to which plastic boxes for heating pipes acquire a neat appearance.
One panel
When placing holes for pipes on one panel, perform the following steps:
- try the panel to the joining place, make marks indicating the centers of the holes;
- measure the exact distance from the wall and the adjacent panel, taking into account the locking device, transfer the readings to the surface being treated;
- using a drill with a crown of the required size (pipe diameter and technological intervals), the laminated panel is drilled on both sides to prevent the edges from collapsing;
- Electrically, using a jigsaw with a fine blade, make transverse cuts and separate the seats from the panel;
Important! Work may only be carried out using a serviceable electric tool, while ensuring compliance with technical safety measures. If chips get into the cornea of the eye, it is imperative to immediately contact a specialized doctor.
- the panel is laid in its regular place, the laminate is joined on the back side around the pipes, and the locking fastening system is attached;
- when joining surfaces, it is permissible to use a small amount of adhesive;
Using seam sealant
- if there is no electric tool, use a regular jigsaw - the process will be long, but the result will be the same;
- installation of subsequent laminate panels will give the desired rigidity to the structure.
Laminate box, MDF
The assembly of structures from wood boards and similar materials is suitable for communications located above the baseboards leading to the basement. Their base should be assembled from slats. The use of timber and boards will allow you to quickly create a durable frame, complemented by a liftable MDF door or a fixed top. Using slats, you can assemble a completely removable structure. The top can be covered with laminate. The sizes and materials of different types of boxes are determined individually. The use of slats and laminate will result in significant costs. Wood boards and plywood will cost less, but their appearance will be simpler. Therefore, this type of box is recommended to be made for rooms where strict styling is not needed. The use of expensive laminate is mainly for rooms with a distinct stylistic direction (for example, modern, Provence, Scandinavian).
False wall
In a situation where the pipework is large and creating a small box will not solve the problem, you should make a full-fledged false wall. It is assembled from profiles and plasterboard sheets. It is recommended to supplement the created ledge with a plumbing hatch. This will allow owners to easily access communications and repair or replace them. In plumbing rooms, the false wall may be non-standard. To do this, boxes are assembled on the left and right, and plumbing roller shutters are hung on top of them. This solution will allow you to instantly gain access to the wiring, eliminate the leak and carry out a complete replacement of communications without delay. The false wall itself can be covered with wallpaper or painted or tiled. Moisture-resistant plasterboard sheets should be used as a base.
Decoupage
A simple way to decorate communications in a living room or dining room is to carry out decoupage. For it you can use decorative paper, newspaper and even napkins with small pictures. Doing the work yourself is quite easy and quick. To perform it correctly, you can use the following scheme:
- Clean the surface of communications with fine sandpaper. Remove dust using a stiff brush.
- Cover the communications with construction adhesive that is resistant to temperature changes and high humidity. It is recommended to do the work in stages: conditionally dividing communications into several parts.
- Place sheets of newspaper and napkins pre-cut to the diameter of the communications on top of the glue.
- Carefully process the attached materials using a flat, stiff brush, removing air bubbles and leveling the surface of the pattern.
- After the adhesive composition has completely dried, coat the paper materials with acrylic varnish with an increased degree of resistance.
Preparing for work
Before carrying out work with the creation of false walls and boxes, you should take care of the communications themselves. Damaged elements or old connecting parts should be replaced with new ones. This way, it will be possible to prevent problems with their condition in the future. Small ventilation hatches must be installed above the heating elements. This will eliminate the possibility of moisture accumulation and poor-quality heating of the premises. Waterproofing should be done around or under water pipes. For this, thin roll materials or denser tile analogues cut to the size of boxes can be used. Their use will prevent the accumulation of moisture and the destruction of the finish and the appearance of mold. As for old metal communications, they should first be cleaned with sandpaper and covered with a new layer of paint (resistant to high temperatures and moisture).

