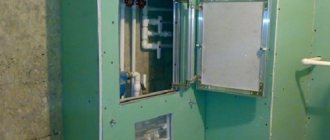
The open placement of sewer and water mains disrupts the overall design of the toilet room. It is not recommended to lay bricks, since if they fail, the entire decorative structure will have to be broken. Therefore, homeowners are wondering whether it is possible to close the pipes in the toilet so that the room looks aesthetically pleasing, and the costs of restoring the design of the bathroom after their renovation are minimal.
With the help of plastic panels you can not only completely hide communications, but also give the bathroom a unique style
Selection of materials for construction
Expert recommendations for the selection of materials are based on the basic requirements of regulatory documents and are formulated as follows:
- environmental Safety. The material should not emit harmful substances when temperature and humidity increase;
- corrosion resistance. To reliably close the pipes in the toilet, choose a material that is not only not susceptible to corrosion, but also does not contribute to its spread;
- ease of use. The material should provide the ability to create a lightweight, non-bulky structure. After all, the area of the toilet room in modern apartments is very small.
When deciding how to close the pipes, the contractor has several options. The most commonly used materials include the following:
- Plastic panels.
- Moisture-resistant drywall.
- Moisture resistant plywood.
- MDF - boards.
Most homeowners and contractors prefer the first option. But, even knowing how the pipes in the toilet are sewn up with plastic panels, when purchasing, you should first of all take into account not the volume of the required material, but how it will harmonize with the existing cladding of the walls, ceiling and floor of the bathroom.
PVC panels can be chosen in any color so that the design fits into the overall color scheme of the bathroom
If necessary, you will always purchase the missing square meters, while eliminating dissonance in colors will require additional optional material costs.
The following factors speak in favor of the use of this material:
- masking toilet pipes with plastic panels does not take much time;
- the resulting structure weighs little and, if necessary, can be dismantled without problems;
- moisture resistance and hygiene - thanks to these properties, plastic panels are the most suitable option for use in a bathroom;
- the level of sound insulation in the toilet increases;
- the design of the panels is varied, and their appearance does not cause any complaints, so choosing a material that suits the style will not be difficult;
- low price and long service life.
The main disadvantage of plastic panels is their low fire resistance. Of course, many manufacturers guarantee self-extinguishing and heat resistance. But smoke is no less terrible than fire. After all, it contains many toxic compounds. So in a toilet with pipes hidden behind plastic panels, you need to beware of not only open fire, but even simple smoking.
Plastic panels do not require large financial investments for purchase or installation, while their appearance is not inferior to tiling
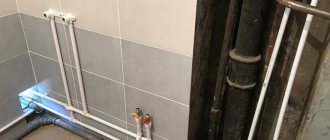
Concealed installation - gating
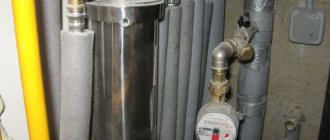
In addition to decorative cladding options for masking pipes, there is also an “internal” option - installing toilet wiring in specially punched grooves. Using a wall chaser, a hammer drill or a door, special grooves are cut out in places where pipes are laid, where water supply and sewer branches are hidden.
For hidden installations, preference is given to straight pipeline sections with permanent or semi-detachable connections and assemblies. “Invisible” installation has two main advantages: the absence of plumbing parts, the appearance of which does not correspond well to the beautiful wall cladding, and space saving.
There are a number of rules prescribed in regulatory documents that sharply limit the use of gating:
- it is impossible to lay grooves in load-bearing walls;
- For hidden installation, only pipes connected using one-piece, monolithic technology (soldered) are suitable; access to other types is required;
- the gating area must be free from electrical networks;
- when choosing the width of the groove, you need to take into account the linear expansion of the material (for example, polypropylene expands in all directions);
- clamps are used for installation so that the pipes do not make sounds when they come into contact with the walls; sometimes heat-insulating material is used.
Experienced plumbers recommend storing a hidden wiring diagram, as it may be useful during major or emergency repairs. Before sewing up and walling up the pipes in the toilet, we recommend drawing up a detailed drawing.
Installation options and required tools
You can cover the pipes in the toilet with plastic panels in the following ways:
- In the first case, the engineering communications themselves are subject to closure, that is, boxes are built around the pipes. This method will leave more free space and save on material.
- In the second case, the wall is completely closed, that is, the pipes are located between it and the panels. From the point of view of aesthetic perception, this method is more attractive, but the useful volume of the bathroom is reduced.
Advice! Before covering the pipes in the toilet with plastic panels, you need to make sure they are reliable. By performing this operation on a pipeline that has defects, you run the risk of having to dismantle the closing structure in the foreseeable future.
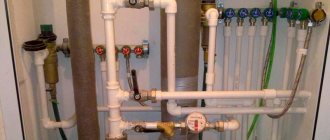
Regardless of the method, to sew up the pipes in the toilet you will need:
- construction level;
- screwdriver and screwdriver;
- assembly knife;
- perforator;
- fastening elements (dowel-nails, self-tapping screws, screws);
- starting profile;
- guide profiles used for mounting panels;
- the panels themselves.
How to hide pipes in a toilet using blinds
Blinds in the toilet are the best option for those who do not want to bother with drywall and build various structures. This option is suitable for small bathrooms. It is much easier to close communications using blinds, but its cost is 2-3 times higher than the cost of a box or plumbing cabinet. Regular blinds can be made from floor to ceiling. Installation of blinds takes little time and leaves virtually no construction waste.
When choosing a method for masking communications, determine the possibility of installing a particular structure in your toilet. To avoid pipe breakage, before installing the camouflage structure, it is worth checking all connections for leaks.
Plastic panels - main advantages
Plastic decorative panels (you can also find the name “lining”) are made from polyvinyl chloride, a durable polymer material. The lightness of plastic sheets is achieved due to a special cellular structure. In the cross-section of the panel you can see voids with thin plastic partitions.
The thickness of the plastic decorative panel, as a rule, does not exceed 1 centimeter. The size of the lining varies depending on the width of the sheet; the size range ranges from 15 cm to 50 cm. To create a decorative box in the toilet, you will need plastic panels measuring from 20 to 37 cm.
Decorative panels made of plastic are chosen not only because of their lightness and durability: among their advantages there are also such qualities as increased sound insulation in the room and ease of maintenance. And purchasing panels will cost much less than using drywall or plywood. It is also important that to create a box from plastic panels you will not need any special tools.
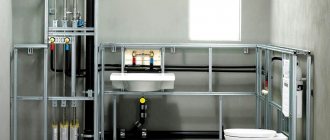
Partition position
This question is quite important. Where should the false wall be located - behind the toilet cistern or in front of it? It depends on the toilet model. For the “compact” design, in which the cistern is mounted directly on the toilet bowl, there is only one option - the wall is mounted behind the cistern. If you use a wall-hung model with the tank located on a special installation, you can safely install a partition immediately behind the back wall of the toilet. The installation in many cases becomes the basis for installing such a partition and always has a sufficient distance from the racks to the edge of the toilet so that decorative panels can be mounted.
Below is a diagram of the placement of the wall between the wall-hung toilet and the installation.
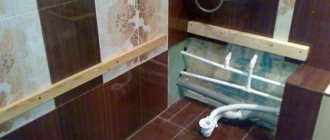
Creating a box from plasterboard
To create a decorative box from sheets of moisture-resistant plasterboard, you must follow the following step-by-step instructions:
- At the preparatory stage of work, measurements are taken on the walls at the locations of the pipes, the distances are transferred to paper, and a detailed plan for the construction of the structure is drawn up (opposite the meters and shut-off valves, a hole is provided for the installation of a hatch).
- Marking lines are applied in the bathroom on the surface of the walls and ceiling, if necessary (the minimum distance between the extreme part of the utility line and the inner surface of the box is 3 cm).
- They proceed to the construction of a frame made of galvanized profile (dowels-nails are used to fix the guides, and screws or self-tapping screws are used for fastening on wooden structures).
- In the case of installing a box for masking vertical pipes of engineering systems, first of all, a metal profile is installed along the walls, then on the ceiling. To ensure the rigidity of the structure, jumpers are installed. The box should have a minimum number of bends, this will greatly simplify installation work.
- Cut sheets of moisture-resistant plasterboard in such a way that a minimum number of joints is obtained.
- The sheets of material are secured with self-tapping screws to the previously installed frame.
- Lay serpyanka (reinforcement mesh) and apply putty on the corners of the structure and at the junctions of the sheets.
- Insert doors or an inspection hatch.
At the final stage of the work, the box is coated with a primer and finishing work begins. The structure can be painted or tiled to match the color of the walls in the bathroom.
Collapsible design
If necessary, you can make a collapsible box, which will simplify the repair of utilities. In this case, sheets of drywall are secured with screws to the edge of the frame. The finishing material in the end part is not puttied; in the future it will be covered with a metal corner. To disassemble the structure, simply remove the corners and unscrew the screws.
Tiling
To disguise utility lines, ceramic tiles must be selected according to the color and pattern of the existing finishing material. At the initial stage of work, drywall is coated with a primer, which will promote better adhesion of the base surface. Make a preliminary layout of the tiles and determine the most advantageous placement of the elements.
Now you need to prepare the glue. The solution is mixed with water according to the manufacturer's instructions. The mixture is applied to the surface using a notched trowel, after which the tiles are laid. To maintain equal gaps between adjacent elements, plastic crosses are used. The position of the ceramic tiles is adjusted with a rubber hammer and a building level.
To trim tiles, use a tile cutter or grinder with an abrasive disc. During work, it is necessary to take into account the size of the gap between the tiles. When the glue has dried, fill the seams with grout of the selected color using a rubber spatula and clean the surface of dirt.
Conclusion
As for other box options, you can safely proceed by analogy, there are no special secrets there. In addition, you can watch the video in this article, which contains a lot of information regarding apartment renovation. And it’s time for me to start laying the tiles, which I, of course, will talk about a little later.
Did you like the article? Subscribe to our Yandex.Zen channel
August 1, 2021
Design, Bathroom and toilet design
If you want to express gratitude, add a clarification or objection, or ask the author something, add a comment or say thank you!
A radical way to hide pipes
One of the most labor-intensive methods is to install pipes in the bathroom in a hidden way. But it makes it possible to “kill two birds with one stone”: hide unsightly communications and make the bathroom more spacious.
When choosing a radical method of hiding pipes, keep in mind that, according to building codes, it is not allowed to trench brick and thin-walled partitions of panel houses
When implementing the method, it is very important to provide measures that minimize the risk of leaks:
- there should be no detachable connections in the wall;
- for installation, use polypropylene pipes and fittings, which are convenient to solder into one piece;
- Grooves for laying hot and cold pipes must be equipped with sleeves made of thermoflex or foam rubber.
The use of a sleeve made of insulating material will relieve cold pipes from condensation and allow hot pipes to expand under the influence of temperature.
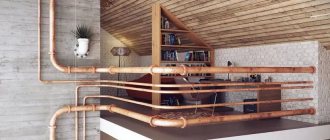
External placement of communications
Is masking of pipes always required? They are left in sight in the only case: if they are visually attractive and themselves carry some kind of aesthetic meaning. For example, copper pipes, along with plumbing fixtures made of a similar material, are often a decorative element.
Installation of an external pipeline, as well as repairs, does not cause difficulties. All parts and connections are visible, so they can be easily replaced or strengthened if necessary. As parts of the decor, they require constant care.
The big disadvantage of metal external pipelines is their high cost. Another inconvenience is the risk of getting burned from a hot pipe.