Can polypropylene pipes be filled with concrete? What conditions are necessary for this?
Carrying out major repairs in residential premises of apartment buildings or private buildings involves replacing (upgrading) elements of the heating system. The need is associated with reducing energy costs for further operation and giving an aesthetic appearance to the rooms.
Sometimes owners decide to hide heating pipes under the floor covering or in the walls of the room. In this regard, they are interested in the possibility of using plastic pipes for these purposes and the question, can a polypropylene pipe be filled with concrete? How long is the service life of communications located under the screed limited?
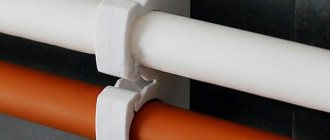
Hidden placement of pipes
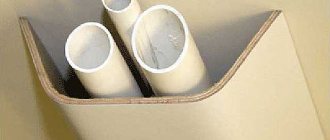
How to fill sewer pipes into the floor
Walling up a sewer pipe is a way to rationally use space and give the interior a complete aesthetic appearance. But during the installation process, the question arises: is it possible to hide the collector under a layer of concrete so that future accidents will not occur, in places with difficult accessibility.
Restrictions
The wastewater disposal system is carried out in accordance with the requirements and standards of SNiP 2.04.01-85:
- Liquid waste is removed via gravity mains.
- Laying is allowed on technical floors, production and utility rooms, basement floors, specialized technological rooms intended for the installation of communications.
- Hidden devices are allowed above a suspended ceiling, in technological shafts, bathrooms or showers, in structures hidden under a layer of concrete.
- It is forbidden to install sewer pipes in dining areas, children's bedrooms of preschool and school institutions, hospital wards and offices, living rooms, rooms with electrical equipment (panel rooms, transformer rooms), and public halls (reading rooms, libraries, classrooms, etc.).
Causes
The need to fill the indoor collector with concrete is caused by a number of factors:
- replacing an outdated design with a new one;
- sewer pipe repair;
- current repairs of plumbing facilities, kitchens;
- it is possible to raise the floor level without much loss of space;
- It is possible to hide sewer pipes in the floor or walls when constructing a new building or private house.
By removing a sewer pipe into a layer of concrete, a number of positive aspects arise:
- it becomes possible to rationally plan the interior space of the room;
- hidden pipes in the floor are not an eyesore;
- the room is cleared of “protruding” elements of communications.
Installation nuances
When solving the problem: is it possible to wall up the main line under a brick or screed, it is necessary to take into account the technical properties of the collector material. Liquid waste can have different temperatures, from 0 to 90°C. This factor causes stress to appear inside the sewer pipe due to thermal expansion. The plastic structure, having less strength, can suffer mechanical damage and loss of tightness.
A simple action helps eliminate harmful phenomena and reduce stress. Before installing the sewer pipe in the shelter, it is wrapped in several layers of plastic film. This will create freedom of expansion in different planes. An additional advantage of relieving the pipe from thermal overload is a reduction in the influence on the rubber ring seals at the junction of individual parts of the pipeline.
Characteristics and application of polypropylene pipes
To determine the possibility of installing polypropylene pipelines under a screed, it is worth referring to their characteristics. Note that polypropylene is one of the polymer options, the components of which are combined with derivatives of ethylene gas. The material is resistant to interaction with aggressive environments and alkaline solutions, while the operating conditions declared by the manufacturer allow a difference in operating temperatures from -10 to +110 degrees.
- the service life under thermal loads without changes in quality and appearance is at least fifty years, and when organizing cold water supply it is twice as long;
- operating pressure in the water supply or heating system can reach 20 Bar;
- constant contact with the water mass of the internal part does not provoke the formation of scale;
- the noise of flowing water is absorbed by the walls of the products;
- propylene has the properties of low thermal conductivity, which prevents the formation of condensation on the outer walls;
- the product is lightweight and requires installation even by one person;
- when using a special tool, the products are connected and mounted in their standard places in a short time;
- elasticity helps to give the turns the desired bends;
- After installation of the products, no additional maintenance is required;
- reasonable price of the product and fastening elements.
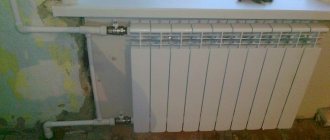
Hot water pipes
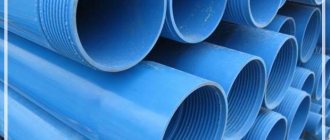
In the construction market there are polypropylene pipes of different colors. This fact does not determine the properties of the material from which they are made, with the exception of black - which helps protect against ultraviolet radiation. The properties of the product are determined by the markings applied to the surface:
- RRV. The defining characteristic is increased mechanical strength due to reinforcement technology during manufacturing. Recommended for use in heating and water supply systems, including under concrete screed.
- RRN. The marking is applied to products of significant diameters, the size of which allows them to be used in ventilation, sewerage, and cold water supply systems.
- RRK. The most commonly used brand of polypropylene products. Can be used in cold and hot water supply and heating systems. Easily tolerates thermal and mechanical loads.
Cold water pipes
Important! The price of polypropylene pipes and connecting elements differs in each region of the country. In this regard, before purchasing, it is recommended to familiarize yourself with the characteristics of the products presented in stores and choose copies that are optimal in price and quality.
Characteristics and use of PP pipes
To determine the possibility of installing polypropylene pipelines under a screed, it is necessary to refer to their properties. Let us recall that polypropylene is one of the types of polymer material, the components of which are connected by derivatives of ethylene gas. The material is resistant to mutual action with aggressive environments and alkaline solutions, while the operating conditions declared by the manufacturer allow a difference in operating temperatures from -10 to +110 degrees.
- the service life under thermal loads without changes in quality and appearance is at least fifty years, and when organizing cold water supply it is twice as long;
- the operating system pressure of water supply or heat supply reaches 20 Bar;
- systematic contact with the water mass of the internal part does not provoke the formation of scale;
- background noise of flowing water is absorbed by the walls of the products;
- propylene has the characteristics of low thermal conductivity, which prevents the appearance of moisture on the outer walls;
- the product weighs little and allows for installation even by one person;
- when using special tools, the products are connected and installed in their regular places in a short time;
- plasticity helps to give the turns given bends;
- After installation of the products, additional maintenance will not be required;
- democratic cost of the product and fasteners.
Hot water pipes
In the construction services market there are polypropylene
pipes of various colors. This fact does not determine the characteristics of the material from which they are made, except for black - which helps protect against the influence of ultraviolet radiation. The properties of the product are determined by the markings applied to the surface:
- RRV. The defining characteristic is very high mechanical reliability due to reinforcement technology during manufacturing. Use is recommended for heating communications and water supply, plus under concrete screed.
- RRN. The marking is applied to products of significant diameters; their size makes it possible to use them in ventilation systems, sewage systems, and cold water supply.
- RRK. A much more commonly used brand of polypropylene products. Can be used in cold and hot water supply and heat supply systems. Easily tolerates thermal and mechanical loads.
Cold water pipes
Main! PP pipe price
and elements for profiles differ in each region of the country. Therefore, before purchasing, it is recommended to familiarize yourself with the parameters presented at the points of sale of products and select copies that are of good quality and cost.
Features of application
The manufacturing technology of polypropylene pipes does not exclude linear expansion of the product when exposed to high temperatures. Correct selection of pipes with the necessary properties and installation of supports with the organization of compensators will allow you to compensate for this drawback. Any system includes branches from the central pipeline, direct connections and the creation of turns at different angles, while differences in pipe diameters are not excluded. The solution of these problems is simplified by the use of fittings, which are divided into the following types:
- flange type;
- crimping device;
- using a threaded connection;
- welded structure.
Fittings made of polypropylene are used to connect pipes made of the same and other materials. This effect is achieved by placing chrome or brass inserts in the interior, which determine the technical possibility of connecting to plumbing fixtures and creating transitions.
Fitting
Practice shows that the main reasons for ruptures of heating pipes under screeds are gross violations of installation technology and poor-quality soldering of fittings at the joints of products.
The soldering process is not difficult for home craftsmen. The device for connecting pipes is represented by a benchtop soldering iron with marked nozzles of various diameters. Before industrial soldering, it is recommended to carry out a trial thermal connection of materials on small pieces of pipe and unused connecting elements. Using combined fittings, it is possible at the design stage to ensure optimal pressure in all parts of the heating structure, while preventing unnecessary costs for using pipes of larger diameter than necessary.
Soldering of polypropylene pipes
Important! The connection of polypropylene pipes with the external location of the aluminum amplifier requires its removal to the length of immersion into the joined element. Otherwise, all soldered elements must be free of dust. It is recommended to degrease them.
Selection of polypropylene pipes
Main types
Polypropylene pipes are made from various types of polypropylene. You can determine what kind of product it is by the markings:
- PP pipe is made of thermoplastic. Therefore, such pipes can be welded. They have sufficient rigidity and are connected by fittings using permanent connections. Such a pipe can withstand an operating temperature of 70 degrees C and has a diameter from 16 to 125 mm.
Polypropylene pipes with markings applied to them to determine the type
- Polypropylene pipe type pph is made from homopropylene. These pipes are suitable:
- for ventilation lines;
- for installation of cold water supply;
- for industrial pipelines.
- PPB type pipes are made from block copolymer. They are best used for installing central and autonomous heating in the house. They are suitable for both underfloor heating and cold water supply.
- Pipes of the ppr type are characterized by increased heat resistance, strength and dimensional stability. They are used to supply cold and hot water in heating systems. They are able to withstand temperatures up to 95 degrees C. You can be sure that a polypropylene pipe of this type will not leak even in the case of very high mechanical load.
Basic Rules
When installing polypropylene pipes, it is necessary to correctly connect them to each other. Segments of polypropylene pipes are connected using fittings. Today, such products are presented in a large assortment. With their help, installation takes very little time. The pipe is cut using special tools and the segments are subsequently connected through fittings.
You can also use pipe soldering. This connection method takes a little longer than connecting using fittings, but the connection itself is more reliable and airtight.
Connection of polypropylene pipes
Polypropylene pipes are connected using a special soldering iron. This is a cheap tool that you can not only buy, but also rent today. It does not require special professional skills and is easy to use.
The only thing you need to remember when working with it is that the diameter of the polymer pipe should not change during welding. To do this, do not overheat the pipe or fitting during soldering. Particular care is required when connecting large diameter pipes.
In order to avoid melting a polypropylene pipe, you need to perform a simple test: blow into it. If the air flows well, then the connection was successful. If you have to exert some effort when blowing into the pipe, then the pipe has melted.
Features of the use of polypropylene pipes for heating systems
Polypropylene pipes are suitable not only for hot and cold water supply. They can be installed on a central or autonomous heating system. They can significantly reduce the cost of installation work when replacing an old heating system. After all, the metal pipes themselves cost no more than 30% of the total cost of replacing an old heating system. The rest of the money goes to pay welders and installers.
When replacing an old heating system, installing polypropylene pipes will be the most economical repair option. Therefore, if you decide to repair the heating system in your home on your own, then it is best to use polypropylene. For installation you will need the pipes themselves, a special soldering iron and a little patience and accuracy on your part. It is worth noting that the replacement of metal pipes with polypropylene ones will be carried out as soon as possible.
Professional installation of polypropylene pipes
Installation technology
Polypropylene pipes for organizing heated floors are included in a separate category. Their characteristics allow installation in a concrete screed without fear that the system will break. The basis for this statement is the pipe laying technology, in which the joints are located above the floor surface, and only entire sections of the pipeline are silted with the mixture.
The installation procedure when laying a water-heated floor is represented by the following measures:
- It is advisable to carry out a full calculation of the required material and accessories and draw up a diagram for laying polypropylene pipes. When calculating the number of products, take into account the shape of the installation (serpentine, spiral and other optimal for a given room).
- The surface of the rough screed is cleaned of construction debris.
- The waterproofing layer is laid sequentially, then the thermal insulation material is installed.
- As a base, a metal mesh is laid over the entire area of the room covered by the heating circuit. Products are directly attached to it using plastic clamps or iron wire.
- Connect all heating circuits to a pre-formed manifold. The system is tested with higher than operating parameters. The temperature is raised gradually to operating temperature.
- After checking, the final screed is poured and the floor covering is laid.
Warm floors under screed
Important! If there are signs of a pipe break under the screed, it is necessary to identify a local area of the floor surface where the pipe damage occurred, using the installation diagram, and open the surface. Dry the affected area and carry out repair measures.
The information presented above indicates that the use of polypropylene products when installing individual heating systems is a reasonable and correct decision. Compliance with installation rules and high-quality soldering at the joints of connecting elements ensures a long period of trouble-free operation. The technical characteristics of polypropylene elements, which determine their reliability, make it possible to place communications in wall cavities and under concrete screed.
Secrets of installing polypropylene pipes
The installation of the structure begins with cleaning the rough screed. To do this, remove dirt from the surface and eliminate uneven places. Cement mortar is used to cover cracks and recesses.
When the elements are ready, you should prepare a drawing of how the elements of the pipeline system will be located. In this case, it is necessary to accurately count them with an indication of the exact quantity.
The base should be waterproofed and also thermally insulated, followed by laying the structure on a reinforcing mesh. Here the plastic is secured with special clamps made of the same polypropylene.
After assembling the structure, the special system is tested. This allows you to find out whether the structure is leaking or not. If the work goes smoothly, fill the surface with cement. Start using the polypropylene pipe after the mixture has completely hardened. To do this, wait several days. Carefully inspect the surface. Filling can be repeated if the surface is uneven.
Is it possible to pour polypropylene pipes into a screed?
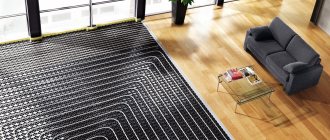
Heating systems installed in private houses and apartments are being improved every year, resulting in modern products that are not only convenient, but also economical. To make the room even more comfortable, it is now popular to install a “warm floor” system.
The pipes are laid in a concrete screed, which is heated by circulating hot water. The heat gradually rises, causing the floor to heat up first, and then the entire room. The described heating system is considered more economical. But the question remains whether it is possible to pour polypropylene pipes into the screed and how to do it correctly.
Polypropylene pipes in a heated floor system
Polypropylene pipes are known to many, mainly because they are popular for organizing plumbing systems. However, if a “warm floor” system is planned for the home, the use of these products still gives rise to controversy. The main advantage of the material is its affordable cost, the disadvantage is the low level of thermal conductivity when compared with metal-plastic products.
Important! Some craftsmen are worried that pouring polypropylene pipes with concrete is dangerous, which damages both the screed and the products themselves. However, it should be remembered that the operating temperature of the heated floor is +45 degrees Celsius, so the likelihood is minimal.
Some enthusiasts tried to combine heated floors with central water supply. However, current laws prohibit this. In addition, there will be no possibility to regulate the temperature of the coolant - this is where the main difficulties lie. The project, as a rule, is implemented on the basis of an autonomous boiler.
When installing the system, it is important to take into account that heating pipes made of polypropylene have a low thermal conductivity, so you will have to increase the frequency of turns - laying should be at least 10 cm from each other. Filling the pipes with screed is allowed, but it is important that the screed layer is not too large. If possible, the flooring used should have a high thermal conductivity. The best option is porcelain stoneware.
Before installation is carried out, the ceiling is covered with a layer of hydro- and then thermal insulation. In any case, polypropylene products are allowed for use in water and heat supply. Of course, products have limitations, but in order to prevent possible difficulties, you should carefully read them. Every home craftsman will confidently note the affordable cost of polypropylene products and their high performance characteristics.
Installation nuances
If the sewer pipe is installed in the floor, the system does not need to be secured. This is required only in difficult places, where there is a high probability that the pipeline will bend and access will be needed for further work. It is important to remember that polypropylene pipes have a high coefficient of thermal expansion. Thus, when installing such a system, the following recommendations are taken into account:
- If the installed pipeline with a total length exceeds 10 meters, then a compensation coupling is installed on the site. Filling the coupling with a screed is not allowed. An alternative option here is a sand cushion.
- All kinds of components are installed on the pipeline, that is, elbows, tees and other fittings. They are placed in an insulating box or corrugated pipe. If there is too much tension in the system, this will lead to leakage or destruction of both the products and the screed itself. In the worst case, improper installation will ruin the floor covering.
- If you want to install heating pipes made of polypropylene in the floor, then it is better to use a cross-linked type of product. This material is characterized by strength, reliability and resistance to high temperatures. But, it is important to know that in cement floors these products will not hold their shape well, so they are fixed with fasteners, which may be needed in large quantities.
- If the polypropylene line has a diameter of 15 mm, the branches will be 120 cm apart from each other, and this is not the best option if you want to effectively warm the room. Installation of heated floors using such products can only be carried out if the temperature in the home is at least +15 degrees Celsius.
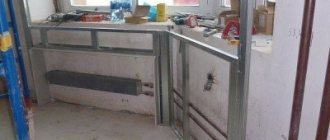
Installation of reinforced concrete sewer pipes
The assembly of a reinforced concrete pipeline begins with digging a trench.
After preparing the pit, you can begin laying pipes. Moreover, this operation involves the use of heavy equipment - a crane and a loading platform (for transporting pipes). Laying the main line involves installing sections from 2.5 to 5 meters long. Moreover, every 50-100 meters of the pipeline are equipped with an inspection well.
The connection of measured pipe sections involves joining into a socket, with rubber seals, or installation into folds with sealing with sealant. In the latter case, there are no protrusions (bell-shaped extensions) on the body of the pipeline, which facilitates the installation process.
Polypropylene heating pipes in a screed. Is it possible?
IMHODom › Forums › communications and heating › Polypropylene heating pipes in a screed. Is it possible?
- This topic has 15 voices and 27 replies.
The installation of heating and water supply is just around the corner, and the question arose: is it possible to install polypropylene pipes “into” the screed. More precisely, not into the screed itself, but into the insulation under it. The idea now is something like this: we lay 50 mm EPS on concrete slabs, then another 50 mm EPS, and in the top layer of insulation we make grooves for pipes, solder heating and water supply pipes, pressurize them, put them in Energoflex stockings, put them in grooves in the top layer of EPS and fill free space with polyurethane foam. We lay polyethylene underfloor heating pipes on top of the mesh. And fill in 7-8 cm of screed. Does such an idea have a right to life?
On the second floor, installation of pipes in grooves along the walls, also in energyflex stockings and foam for plaster...
I would say absolutely not. But we love experiments...
And why? Well, okay, even why, but what would they say “yes” to? So, open installation is not an option at all, because... in the hallway through 5 pipes (heating return supply, hot water supply return and hot water supply) you will have to jump like over a springboard...
- Timiryazevo
I have pipes from the riser to the collector, about 3 meters, running near the heated floor screed. Over the past year, no problems have been identified. And all the water goes in the grooves in the wall.
If you have a subfloor or basement, you can install pipes there. My wiring to the second floor goes along the ceiling of the first floor.
What's stopping you from throwing MP or cross-linked polyethylene? It will be even easier.
Recently I was in a town in the west of the country. They all have warm floors there in the first place. Some directly into the screed, some into the insulation, some under it.
The screed contains the pipes running along the wall, under the battery. The house has been inhabited for more than one year. I specifically looked under the linoleum - there were no cracks.
I personally had the sad experience of polypropylene being grooved in the wall, coming from the floor to the bathtub faucet. It looks like they put on a fur coat and threw a net over it. As a result, the tile broke right along the hot water pipe...
Heating pipes in the floor: pros, cons and features
Today, one of the ways of transferring thermal energy that is considered when installing a room heating system is the use of liquid coolants. This could be water, antifreeze, antifreeze. The heated liquid transfers heat to pipes and radiators, which, when heated, increase the air temperature in the room.
Heating pipes are usually installed in the following ways:
- Open method. This includes the classic heating scheme in a house or apartment, which consists of a riser (vertical pipes, their number can reach 8 pieces per entrance in apartment buildings), a heating radiator (the number depends on the area of the room), as well as taps, fittings, pipe fastenings and radiators. The pipeline is located along the walls and connects the riser and radiators.
- Closed method. This involves laying a heating pipeline in the walls or floor. The pipes can be connected either to radiators located above the floor level or located completely below its surface. The closed supply of pipes to radiators is more of an aesthetic nature and does not affect the temperature in the room due to their small area.
Let us dwell on the closed method and consider its advantages and disadvantages.
Positive aspects of closed installation
Uniform heating and economic benefits . These specifications only apply to a radiatorless system that is completely hidden in the floor.
In this case, the heated air rises from the floor . The highest temperature is in the lower part of the room. The area where the person is located is heated, which is economically beneficial in comparison with the classical scheme. As the air rises, it cools down, which is beneficial for the body. It is generally accepted that your feet should be kept warm and your head cold.
Also, in order to save money, you can install a heat meter and pay heating bills according to its readings.
This installation is relevant only for modern buildings in which horizontal distribution of the heating system is used, when pipes disperse from one central riser to apartments.
In buildings with vertical wiring, you will have to install meters on each radiator. In this situation, installation is associated with high costs and is rarely implemented in practice.
The absence of radiators , although slightly, increases the area of the room. Frees up additional space for furniture. The room benefits from its appearance. There is no need to hide risers and pipes running along the walls.
Advice
If only the pipes are hidden in the floor and the radiators remain on the walls, the effect of the closed arrangement will be slightly less.
The floor temperature with completely enclosed installation is always above zero . It is pleasant to walk on it, children can play on the floor without the risk of getting sick. Can be disabled if necessary.
Disadvantages of placing heating pipes in the floor
If you need to make a hole in the floor, for example, to install wooden structures, difficulties may arise. Work must be carried out carefully to avoid damaging the heating pipes. To eliminate such situations, after laying the pipes, a diagram of their location should be drawn up.
Difficulties associated with possible repairs can become an obstacle to laying pipes in the floor.
It is not easy to detect leaks in closed installations . Its first sign is wet spots on the floor. They can go unnoticed under the topcoat for a long time.
Features of warm water floors
Heating of the room occurs due to the circulation of coolant in a circuit placed in a concrete floor screed. Water is heated in a heating boiler connected to the system. The movement of liquid along a closed circuit is ensured by a circulation pump. The heated floor scheme also includes a distribution manifold, shut-off valves, and fittings.
The base of the floor is insulated and waterproofed before installation. After laying, connecting and checking the system, the pipes are filled with concrete screed. Heat is evenly distributed throughout the entire thickness of the formation, accumulated and transferred to the room. This is the best option, heating the house using the convection principle. In well-insulated rooms it can serve as the main source of heating.
Warm water floors are usually installed in private homes. Systems are not prohibited in apartments, but residents encounter some difficulties when installing them.
The water circuit must not be connected to the central heating system, so an autonomous boiler must be installed. In addition, it is necessary to find out whether the ceiling can withstand the weight of the concrete screed. One of the main disadvantages of the system is the difficulty of repair in case of leakage. In an apartment building, the problem will result in flooding of neighbors.
Advantages and disadvantages of polypropylene
One of the most popular types of water heating is heated floors made of polypropylene pipes. Among the many available materials, it is chosen due to its many advantages:
- No corrosion or deposits.
- Chemical inertness, the material does not oxidize when interacting with concrete.
- Reinforced pipes have the strength necessary for safe operation of the system.
- The high thermal conductivity of polypropylene ensures rapid heat transfer.
- Long-term operation of heated floors. With proper installation, the service life is 25-30 years.
- Affordable cost of polypropylene products.
- The material is resistant to temperature fluctuations and does not tear when water freezes.
- Polypropylene for heated floors is not flexible, so connecting fittings are required when installing the circuit.
- High coefficient of expansion when heated.
- To install the system, you must be able to operate a soldering machine.
When choosing a material for installing a heating system, take into account the thickness and diameter of the pipes.
Types of polypropylene pipes
By design, pipes can be single-layer or multi-layer. Two large groups are divided into several subgroups according to the type of base material or reinforcement.
Single layer
The scope of application of the products depends on the material used for their manufacture:
- PPH – homopropylene products for cold water supply.
- PPB is a block copolymer used in low temperature heating systems.
- PPR - random copolymer is the best option for installing heated floors.
- PPS is a non-flammable polypropylene that can withstand high water temperatures.
Another classification parameter is working pressure. It is indicated by the manufacturer when labeling products:
- PN10 is a thin-walled design designed for a pressure of 10 bar and a temperature of 45°C.
- PN16 – designed for a nominal pressure of 16 bar.
- PN20 - the product is intended for pipelines with a pressure of 20 bar and water flow up to 75°C.
Russian-made pipes have a service class determined by GOST. For heating, products of 3-4 classes are recommended.
Multilayer
Pipes consisting of several layers are more resistant to damage and deformation when heated. The reinforcing frame is made of fiberglass or aluminum foil. It is located between two layers of propylene. The foil protects the pipeline from air entering the closed system. Products with a composite frame are more often used when installing water-heated floors. They have the necessary rigidity and do not require stripping when soldering.
Requirements for underfloor heating pipes
Theoretically, any pipeline is suitable for transporting coolant that is not too hot. Even assembled from various scraps. But in cases where leaks threaten to seriously waste money, reliability becomes a determining requirement. This is an abstract concept, like durability, that includes a whole range of characteristics. Therefore, the simplest and most obvious recommendation is to use only specially designed pipes.
Temperature resistance
Temperature resistance, necessary even though floor coverings do not heat up above 35°C. For heating, in any case, materials are used that can withstand heating up to 90° and above. This is due not only to peak temperature values, but also to the continuity of exposure. The structure of materials not intended for this purpose crystallizes if they are permanently heated to just 30-40°C and is destroyed.
Mechanical strength
Pipes must have mechanical strength sufficient to contain internal pressure, the weight of the concrete screed, various deformations, and the erosive effects of water. As a rule, the pressure in heating systems of private houses does not exceed 2 atm, but the pipe must withstand at least 6 atm. This figure will include almost any load.
Chemical inertness
Chemical inertness, including resistance to oxygen, electrochemical corrosion, coolant components, as well as aggressive alkaline environment formed by cement.
Sufficient pipe length
The length of a separate section of pipe must be sufficient to lay a separate circuit. This is perhaps the main reason why rolled steel is practically not used here, even from stainless steel. Any joint is a “weak link” in terms of strength and chemical inertness. At the same time, it disrupts the smoothness of the inner surface of the pipeline, reducing its permeability and increasing hydraulic losses.
Therefore, pipe intended for heated floors is most often sold in long sections, rolled into coils.
Options for laying pipe contours
Quality of materials and components
The quality of materials and components, confirmed by certificates, the name of the manufacturer, and consumer reviews. Of course, no one is safe from fakes. But a well-known European brand will definitely be more reliable than a “left noname”. Although you can test the pipe yourself by subjecting it to some extreme loads.
Interchangeability, fittings compliance with accepted standards
An unknown small manufacturer will not be able to saturate the market with them. Buying a pipe on the cheap, even a good one, is only half the battle. Without high-quality fittings, which have nothing to replace, it is completely useless.
Another significant nuance is oxygen diffusion. SNiP 2.04.05-91 directly states that the heating system pipeline must contain an anti-diffusion layer (oxygen barrier) that prevents the penetration of air into the system. We are talking here about polymer pipes - plastic (metal-plastic), polypropylene, polyethylene.
However, opponents of this statement provide their own arguments. For example, that even in a closed system the appearance of oxygen is inevitable. Therefore, the more important task is to eliminate it effectively. A safe, reliable way is to install air vents and (or) deaerators. You can also add hygroscopic additives - toxic hydrazine or sodium sulfite, but their content must be controlled.
Application nuances
In order for the heating system to work efficiently, it is necessary to make a preliminary calculation of the number of pipes and select a laying scheme. It is advisable to make the drawing on graph paper. There are two laying patterns - “snake” and “snail”. To speed up installation, professionals recommend placing the circuit on a mesh with large cells, attaching it with plastic clips. Pipeline laying can be double or single. The optimal pipe diameter is 16-20 mm.
For the normal functioning of a heated floor, there are several rules for installing polypropylene:
- The total length of the circuit should not exceed 80 meters.
- The recommended pitch of turns is 30 cm, to increase the heating intensity it is reduced to 15 cm.
- The “snake” installation pattern is simpler, but it is suitable for small rooms.
- The coolant temperature should be within 35-55°C.
Before starting work, the floor covering is selected. The heated floor system is compatible with tiles, laminate, and linoleum.
Step-by-step instructions for installing a polypropylene circuit
To install a heated floor from polypropylene pipes with your own hands, you will need the following tools:
- soldering iron for plastic with attachments;
- pipe cutting scissors;
- roulette;
- building level;
- drill.
To prepare the concrete solution, it is advisable to use a concrete mixer.
Preparing the base
The base base for the heating system must be horizontal. If there are significant differences in height, a concrete screed is poured. The structure is covered with a layer of waterproofing. The most practical option is plastic film. A damper tape is glued around the perimeter of the room to compensate for the expansion of concrete. The next step is thermal insulation. To reduce heat loss, slabs of penoplex, expanded polystyrene, and basalt wool are laid under the circuit. Experts advise using material with a foil surface. It reflects heat into the room.
Installation of polypropylene pipes
Before installation begins, a distribution manifold with a valve and valves is installed. An outline will be attached to it. The pipes are laid on insulation or reinforcing mesh with 10x10 cm cells. The second option is more convenient and reliable. When working with polypropylene, it is important to observe the temperature regime. Installation is carried out in a warm room, where above +5°C.
The contour is laid out according to the intended pattern. Separate sections are connected with a soldering iron. Soldering produces a strong and airtight seam. Beginners are advised to perform several test welds to avoid damaging the pipeline. The pipes are secured to the reinforcing mesh with plastic clamps and wire. The fasteners must not be over-tightened.
Hydraulic test
After connecting the circuit to the distribution unit, the system is pressure tested. Water is supplied to the pipeline under pressure. The procedure helps to find poor-quality seams and cracks. The water is left for a day and the pressure parameters are monitored. If they are stable, the heated floor is assembled with high quality.
Pouring concrete screed
The final stage is pouring cement screed along the beacons. The solution is poured onto the floor and stretched using the rule. The optimal layer thickness is 5-7 cm. After the concrete has set, the beacons are removed and the holes are sealed with cement mortar. To ensure uniform drying, the screed is covered with film and watered for 14 days. The heated floor system is turned on after 1 month.
Polypropylene pipes are durable, inexpensive and reliable. The material is easy to install, allowing you to do the entire amount of work yourself.
Heated floor installation
Warm floors consist of pipes laid on the floor, in most cases, in the thickness of a cement screed. Warm water flows through the pipes, the source of which may be a heating boiler or heating system.
So, the process of installing a heated floor has several stages:
- Drafting:
- Laying and connecting pipes;
- Checking the system functionality;
- Execution of the screed;
- Laying the finishing coating.
Based on this, we will then consider all the stages in detail.
Creating a Project
The project is needed to calculate the amount of materials and the temperature that this heating system can provide. In addition, you need to find out in advance the location of the boiler and collector.
In addition, the diagram must indicate the length and diameter of the pipes, and other nuances of the system. Based on this, it is better to entrust the calculations to experts so that the heating efficiency does not suffer.
Execution of preparatory work
It is necessary to begin the construction of the system with preparatory work; instructions for their implementation are as follows:
- First of all, a manifold cabinet is installed, in which the circuits are connected to the heating system. All adjustment elements are located there. It is optimal to place the collector on the wall near the floor.
- Then you need to connect the warm water supply and return pipe to the collector.
- Then a layer of waterproofing is laid on the floor. Much more often polyethylene is used for these purposes.
- A special damper tape is glued around the perimeter of the room to prevent cracking of the screed due to thermal expansion.
- After this, thermal insulation is laid, which reduces heat loss.
- At the end of the work, an iron mesh is laid on the floor.
Laying contours
In order for the heating system to be effective, the circuits must be installed correctly, following the following rules:
- The usual contour diameter is 2 cm.
- The length of the circuit should not be more than 80 m, but the most optimal length is 50 m. This will allow them to warm up evenly.
- The course of the circuit depends on the location where it is located. In a cold place, for example, near a door, the stroke should be less. In places where furniture will be placed, the contours by and large do not fit.
Laying can be done in two ways:
- Snake;
- "Snail."
The second method is preferable because it ensures uniform heat distribution due to the parallel placement of inlet and outlet pipes.
Once the polypropylene pipes for the heated floor are laid, they must be attached to the iron mesh using clamps. Then you need to connect the pipes to the circuits and fill the system with water.
This will allow you to check it for leaks.
The last time the system must be left for a few days - if during this time the pressure drops by no more than 2 bar, then the installation was completed successfully.
Pouring the floor with concrete
The final stage of the work is pouring the floor with concrete. To do this, you must first install a special iron beacon profile, using it to ensure a horizontal level along which the surface of the screed will be leveled as a rule.
The thickness of the screed can be 30-70 mm.
Once the concrete has hardened and completely gained strength, which will take at least 28 days, it is possible to install the finishing coating. This may be laminate, linoleum, carpet or other material.