Replacing the heating system in a private house
Replacing the heating system in a private house: quickly, efficiently, affordably
Heating a cottage is always particularly important and requires increased attention. Agree, any heating system, regardless of the type of boiler, is a complex set of equipment where the slightest errors and omissions are unacceptable. It is not for nothing that it is regulated that the installation of home heating must be carried out exclusively by specialized organizations that have the appropriate permits. Not only the comfort in the house, but also the safety of those living in it depends on the correct installation of heating equipment.
Engineering communications service Heating, water supply, drainage, sewerage systems
around the clock tel: 8
INSTALLATION, REPAIR, MAINTENANCE, MODERNIZATION, REPLACEMENT
Installation of home heating , as a rule, involves several practical complex stages of implementation of this task, including design, calculations and configuration of alarm and control systems. the replacement of the heating system in a private house can do without these stages . Often, users mistakenly believe that it is enough to replace, for example, a solid fuel boiler with a gas unit, and the new equipment will provide adequate comfort and convenience.
replacing the heating system in a private home in full, starting with replacing the heating boiler and ending with replacing heating radiators. In addition, when installing home heating our specialists pay special attention to the design of the chimney. This element of the heating system is both the key to the efficient operation of heating equipment, providing optimal draft for the most complete combustion of fuel, and, at the same time, the key to the safety of residents, effectively removing combustion products.
Heating the cottage
House heating
Home water supply
Dacha water supply
In addition, existing models of cottage heating , due to their design features, work with certain chimney designs. Some boiler models are compatible with standard (single-pipe) chimneys, while others will require the installation of a coaxial (two-pipe) chimney. And the boilers themselves have specific features. The equipment currently offered is structurally different in the type of burner, the presence of additional equipment (electronic control units, circulation pumps, etc.), which requires certain qualifications when installing them.
You can continue to list all the reasons for installing heating at home by specialists, but it is enough just to note that otherwise the consumer will lose the right to warranty repairs of the equipment. By contacting us, you can avoid many unpleasant moments during the further operation of heating equipment.
Our specialists are highly qualified and have practical experience, which allows them to carry out design and installation work in the shortest possible time, with high quality and reliability. In our work, we implement all the customer’s wishes, taking into account the requirements for the safe operation of equipment. We guarantee that the heating of the cottage will be efficient and safe.
What and how to replace it with?
Before answering this question, it is worth studying in detail the characteristics of the currently installed heating system.
Please note:
- Operating temperature of the existing coolant;
- System pressure;
- What load can the system withstand?
With this information, you can easily select more suitable pipes.
Installation of water supply heating systems Klin, Klinsky district
- Repair the boiler room
When and why is it necessary to carry out boiler room repair? Over time, boilers age and fail. The process is accelerated by improper operation, bad water, lack of maintenance, as a result of which the boilers fail and the boiler room needs repair.Our company repairs boilers and other boiler equipment in domestic and industrial boiler houses. We also carry out maintenance, reconstruction and modernization of domestic boiler houses, and technical re-equipment (modernization) of industrial and municipal boiler houses in Moscow and the Moscow region.
Completion
As usual, the video in this article will provide you with additional materials. I look forward to your additions and sharing your own experiences in the comments. Good luck, comrades!
Did you like the article? Subscribe to our Yandex.Zen channel
July 28, 2021
Operations with pipes, Apartment heating, Pipe laying, Pipes
If you want to express gratitude, add a clarification or objection, or ask the author something, add a comment or say thank you!
Boiler equipment repair
In a modern boiler room, in addition to the boiler, a large amount of auxiliary equipment is installed. Like any other engineering equipment, it requires maintenance, repair or replacement over time. Safety valves, membrane tanks, automatic air vents, servo drives for three-way valves, three-way valves, filters, water treatment systems and other equipment. Big problems happen with the chimney. Previously (and even now) builders did not think about installing the correct chimney. Usually they lay it out with bricks and that’s it. It’s also good if it has a sufficient cross-section. But modern boilers require acid-resistant materials such as stainless steel or plastic (PVC).
Our specialists have already carried out work on repairing equipment in the boiler room more than once; we have experience and knowledge. In terms of labor intensity, the work of repairing boiler equipment is more difficult than conventional installation, since all the equipment is already installed, cramped conditions, and outdated materials were used in the installation.
Radiator installation
At this stage I will not go into detail. I note that I only used American taps for connection, which allow not only to reliably shut off the coolant supply, but also to remove and install radiators without losing the tightness of the connection thanks to a special sealing design.
Straight tap with American 3/4 inch.
Well, it's time to tell you why I didn't wait until the end of the heating season . The fact is that my vacation was running out, plus in a few days of work all the shortcomings would appear that I could quickly eliminate.
If such work had been carried out in the summer, then the system would have stood without inspection until the fall. And so, by the end of the day the system was running, there were no leaks. A couple of days later I painted the pipes, and it became much more beautiful.
After the 2015-2016 heating season, I can say the following: the apartment was warm all winter, since the heat transfer of bimetallic radiators is an order of magnitude higher. In addition, they look aesthetically pleasing. As for the pipes replaced with your own hands, everything is also without any complaints. As they say, everyone is happy, there is harmony in the family, which is what was required.
Cost of work
| № | Name of works | Unit. | Price, rub |
| Installation work | |||
| 1 | Installation of a wall-mounted gas boiler includes the following work: hydraulic piping of the boiler, installation of a coaxial chimney up to 2 m with punching a hole up to 110 mm (brick, foam concrete, wood), installation of a chimney in the boiler room to the shaft. | PC | 20 000 |
| 2 | Installation of a floor-standing boiler 20-70 kW includes work: hydraulic piping of the boiler, rigging work, installation of a chimney inside the boiler room connected to a common chimney | PC | 43 000 |
| 3 | Installation of a floor-standing boiler 70 -140 kW includes work: hydraulic piping of the boiler, rigging work, installation of a chimney up to 3 meters inside the boiler room connected to a common chimney | PC | 54 000 |
| 4 | Installation of hydraulic manifold up to 80 kW | PC | 6 500 |
| 5 | Installation of hydraulic manifold up to 160 kW | PC | 8 500 |
| 6 | Installation of hydraulic separator up to 160 kW | PC | 4 500 |
| 7 | Installation of the pump group | PC | 4100 |
| 8 | Installation of a 3-way, 4-way mixing valve | PC | 3 900 |
| 9 | Installation of a boiler up to 300 liters | PC | 16 000 |
| 10 | Installation of a radiator heating system | dot | 4 200 |
| 11 | Installation of a water supply system | dot | 3 000 |
| 12 | Installation of a heated floor includes the following work: installation of insulation over the area of the room, fastening of a marking grid, installation of thermal insulation under a heated floor, pipe laying, pressure testing | m2 | 800 |
| 13 | Installation of heated towel rail | dot | 3 000 |
| 14 | Installation of a heated floor comb from 2-5 outlets | PC | 4 500 |
| 15 | Installation of a heated floor comb from 5-10 outlets | PC | 6 000 |
| 16 | Installation of a sewer riser includes the following work: laying a PVC pipe Ø110, 50 mm from 2 meters (vertically or horizontally), without gating | PC | 14 000 |
| 17 | Sewage installation | dot | 2 000 |
| 18 | Replacing antifreeze coolant | n/hour (min 3 hours) | 2 000 |
| 19 | Repair work does not include transport costs | n/hour (min 3 hours) | 2 000 |
| 20 | Dismantling works | 25% of the cost of installation work | |
| 21 | Boiler house design up to 140 kW | PC. | 25 000 |
| 22 | Design (water-heat supply systems) | m2 | 120 |
| Preparatory and general construction work | |||
| Punching holes in brick | |||
| 1 | Hole diameter up to 50 mm | PC | 800 |
| 2 | Hole diameter from 50 to 100 mm | PC | 1 400 |
| Punching holes in concrete | |||
| 3 | Hole diameter up to 50 mm | PC | 1 200 |
| 4 | Hole diameter from 50 to 100 mm | PC | 1 900 |
| Grilling | |||
| 5 | Concrete | cubic meter | 35 000 |
| 6 | Brick | cubic meter | 30 000 |
| Fare | Zone 1 RUB 1,500 | Zone 2 RUB 2,500 |
You can also conclude a service agreement, the price of which includes annual maintenance and the cost of repair visits is much lower!
Note!
If your boiler is broken or there is a problem in the boiler room, do not try to repair it yourself!!! Trust the professionals to repair your gas boiler!
Using glue
Holes of small and medium sizes, cracks can be sealed. This option is temporary and is only suitable so as not to drain water from the riser or deprive the room of a heat source. After the heating season, the aluminum radiator must be removed in order to carry out high-quality repairs.
You can seal the hole using:
- Epoxy glue.
- Cement.
- A solution called “cold welding”.
Repairing holes with epoxy glue
To use epoxy resin glue, you need to prepare fiberglass or thick fabric. Since any of these materials must be wrapped around the radiator, the use of such adhesive is limited. After all, not every place can be wrapped easily and tightly. For some versions of aluminum radiators, this method is not suitable at all.
To seal holes or cracks:
- Cut the fabric into long narrow strips.
- Clean the area from which water is flowing. That is, remove all paint that has peeled off and all particles that are easily removed. This is done with a spatula. Next, take a brush with metal bristles and clean the surface. There should be pure metal left. It happens that a crack appears in a place where it is impossible to reach with a brush. An iron cable can help in this situation. It is pushed through the desired part of the radiator and pulled by the ends one by one, cleaning the desired area. This area is then dried.
- Apply glue to the treated area and wrap it with cloth.
- Apply glue to the fabric and wind another turn. This should be done until there are 4-5 turns. No glue is applied to the top layer of fabric.
- Secure the fiberglass using clamps or wire.
- Wait for the glue to dry. It dries from 2 hours to 3 days. If the room temperature is 20-25 °C, then it will dry in 2-3 hours.
To enhance the properties of the glue, you can add aluminum or bronze powder to it. Such powder is obtained by grinding off an unnecessary aluminum or bronze part with a rasp. Before use, the glue and powder must be mixed well.
Cracks are repaired in the same way using cement. However, medical bandages should be used instead of cloth. They need to be soaked in the solution and wound around the radiator.
We use “cold welding”
It is very convenient for sealing cracks and holes. This is a putty that looks like plasticine. There are two types:
- Single color.
- Two-color.
The first type is easier to work with, since you need to cut off the desired piece and knead it with your hands. You should wear gloves on your hands, because the putty is chemically active and can harm the skin.
Two-color cold welding must be mixed until a homogeneous solution appears. It becomes sticky while mixing.
The fight against holes using “cold welding” is carried out as follows:
- Clean the damaged area from dirt and paint.
- Knead the cut piece of “cold welding”.
- Apply the solution to the hole and rub it in (this is done with a metal spatula). To prevent the putty from remaining on the spatula, it must be moistened with water.
- If after grouting the cork begins to come out (a bubble forms, which then bursts), it must be rubbed again with a spatula. This may have to be done before the “cold weld” has completely dried. It dries in 5 minutes.
- Secure the plug with a clamp or rubber.
You can also seal the hole with heat-resistant sealant. However, you need to use the right sealant because there are acidic sealants that can corrode aluminum. Practitioners advise using neutral solutions.
Our advantages:
We have been repairing boiler rooms and boiler equipment for more than 15 years!
Over the years, we have repaired and modernized more than 800 boiler houses in Moscow and the Moscow region.
You can consult and agree on the cost of repairing or modernizing the boiler room by calling us by phone +7
Similar services:
- Heating in a private house with gas Gas heating for a private house is a very profitable option in terms of the return on investment of the heating system. Natural gas, if it...
- Laying out heating pipes in a house Laying out heating pipes in a house is of great importance, since the efficiency of the system directly depends on it. It is necessary to draw up a detailed plan with...
- Heating repair in a private house The optimal solution in this situation is to contact specialists who will carry out the necessary repair of the heating system, its diagnostics and commissioning, but...
- Replacing home heating It is no secret that in cold weather the issue of maintaining a comfortable temperature regime in the house is very relevant. Alas, not always...
- Services for replacing a boiler in a private home Selection and supply of Russian and foreign heating boilers to replace old appliances. Replacement of gas, diesel, electric, solid fuel heating boiler(s) with…
- Installation of a heating boiler in the Ershovo Holiday House Installation of a heating boiler The heating boiler is the heart of the heating system of a country house or cottage. From the heating boiler, as well as from the quality of work...
- Installation of a heating boiler in the holiday home "Karallovo" Installation of a heating boiler The heating boiler is the heart of the heating system of a country house or cottage. From the heating boiler, as well as from the quality of work...
- Installation of a heating boiler in the Rest House of the Ministry of Railways "Beryozka" Installation of a heating boiler The heating boiler is the heart of the heating system of a country house or cottage. From the heating boiler, as well as from the quality of work...
- Installation of a heating boiler in the Ogarevo Holiday House Installation of a heating boiler The heating boiler is the heart of the heating system of a country house or cottage. From the heating boiler, as well as from the quality of work...
- Installation of a heating boiler in the Ozera Holiday House Installation of a heating boiler The heating boiler is the heart of the heating system of a country house or cottage. From the heating boiler, as well as from the quality of work...
- Installation of a heating boiler in the Pokrovskoye Holiday House Installation of a heating boiler The heating boiler is the heart of the heating system of a country house or cottage. From the heating boiler, as well as from the quality of work...
- Installation of a heating boiler in the Uspenskoye Holiday House Installation of a heating boiler The heating boiler is the heart of the heating system of a country house or cottage. From the heating boiler, as well as from the quality of work...
- Repair of a boiler room in a private house The word “boiler room” is understood as a complex of equipment and all the technical equipment that provides heating and hot water supply to a living space; so and...
- Heating distribution in a private house When solving the problem of heating a home, there are many combinations of constructing a coolant supply and removal system. Every heating installation in a private home...
- Installation of radiators in a private house Installation of radiators in a private house Installation of heating at home, as our practical experience shows, is a complex process in which there is no…
- Heating Moscow Our organization has been designing, completing, repairing and installing autonomous heating systems in Moscow and the Moscow region for a long time. We are proud of our excellent reputation...
- Heating of a private country house Heating of a private country house: steam is used mainly as central heating for apartment buildings. To implement this type of heating it is necessary…
- Heating and boiler room Heating of the house must be thought through before the construction of the house itself begins. Especially if this house is not just an easy home for a summer resident,…
- Heating installation Heating installation for private houses, wooden or block houses, summer houses, cottages. Incorrectly set levels of coolant movement during natural convection, illiterate...
- Installation of heating pipes In order to decide on the materials from which the heating pipes will be installed, you need to consider their strengths and weaknesses. About it…
Implementation
I hope I convincingly explained which pipes are best to use for heating an apartment when installing bimetallic radiators. Of course, metal.
Captain Obviousness reports: you must agree that if a water hammer occurs, and they are not uncommon in a heating system, the weakest point will be the area that can withstand the smallest value. Those. it will simply collapse and there will be a flood in the apartment. Therefore, when installing a radiator that is resistant to water hammer, the connections should also be made reliable.
And if so, then it was necessary to properly plan the dismantling of the old system.
I will dismantle the cast iron radiator and part of the pipe.
The presented photo shows that I don’t have to cut anything special with a grinder:
- The first option is to unscrew the old radiator, install ball valves and attach a new bimetallic one;
- The second option provides the same option, but with the replacement of a three-way valve that acts as a bypass;
- The third option was to manufacture part of the system in advance and connect it to the riser using pipes.
The photo shows the manufactured part of the eyeliner and the segment to be removed.
Having prudently considered that the riser had become unusable over many years of use, I decided to choose the third option. For this purpose, I measured and ordered liners from an experienced welder, as a result of which my work boiled down to the following:
- Unscrew the coupling;
- Cut off the riser at the bottom;
- Cut a thread on it using a die;
- Attach a new connection and install the radiator.
For those who are interested, the current GOST 6357-73 provides for the following sizes of bends :
| Product length, mm | Length of long threaded section, mm | Inner diameter, mm | Length of short threaded section, mm |
| 110 | 40 | 15 | 9 |
| 150 | 65 | 50 | 17 |
| 130 | 55 | 32 | 13 |
Thread cutting
The most difficult thing in all the work is cutting the thread correctly. To do this, I rented a standard manual clamp from a friend. As a tool, it is interesting because in addition to threaded heads, the kit includes a ratchet with an extendable, collapsible lever.
It’s also good that the attachments in the set are collapsible. Under the top cover of each there are 4 replaceable cutters. In case of damage, it is easy to replace damaged cutters - it is much cheaper than buying a new die.
The ratchet is equipped with a switching mechanism that allows you to change the direction of movement of the cutting head in one direction or another.
In the photo there is a manual clamp.
This tool allows you to:
- cut threads from half an inch to an inch and a quarter;
- cut threads from one and a half to two inches.
Plus: I liked the fact that in addition to the replaceable nozzles (dies), the set includes a guide pipe. It is a piece of pipe, the Ø of which is slightly larger than the working one. Thanks to it, threads can be cut easily, even if the supply pipe itself is not cut straight.
So let's get started:
- First, we clean the edge of the pipe from burrs and rust;
This is an important step and should not be skipped! A file will help to remove the chamfer, and you can sand the edge of the pipe.
- Then we lubricate the pipe, and also apply lubricant to the cutting mechanism itself;
- Set the direction of movement on the ratchet lock, following the arrow;
- We put a guide pipe on the edge of the pipe;
- We begin the rotation;
- After a couple of revolutions, we stop and switch the ratchet to move in the opposite direction . This is caused by the need to remove chips;
- Make a half turn;
- Switch the ratchet back to the working position and cut the thread further.
This is the result we need.
Assembly
Having created all the conditions for connection, I got down to business. The instructions look like this:
- Instead of the existing old coupling, I screwed on a new one (in diagram No. 3), at the same time changing the lock nut (4);
- I joined both pipes and fitted the coupling to a short thread;
Everything is extremely simple and clear.
Make sure that the axes of the pipes being connected are aligned - if there is skew, there is a chance of breaking the threads on the cast iron coupling.
- Tighten the coupling with a locknut.
Linen impregnated with nitro dye was used as winding. Flax ensures the tightness of the connection; the paint prevents it from rotting .
Stop heating the street!
Whether the radiators will be changed during the heating reconstruction process or not, but since they will still have to be removed for some time, it is highly advisable to cut off the outflow of heat to the outside. To do this, you need to cover the wall behind the batteries with heat-insulating mats aluminized on both sides. How such a bedding works in terms of heat can be read in the article on floor insulation; here it is enough to note that in a block Khrushchev house with radiators in niches, double heat shields behind the radiators are equivalent to covering the walls with 20 mm plywood.
In an alternative option for insulating the wall behind the radiator, heat-insulating material (1) and aluminum foil (2) are used separately.
Installing the shielding mat is simple: we cut holes in it for the hooks of the battery suspension, apply thin “sausages” of construction silicone or mounting adhesive using an “envelope” to the side adjacent to the wall, put it on the hooks and press it to the wall.
An indispensable condition: the mat must be organic, made of synthetic or natural fibers. The use of open mineral wool mats in residential premises is unacceptable - it is harmful to health.
Calculation of the required number of sections
For calculations we will use the standard formula - Q=Sx100, where:
- Q – Heat transfer of the radiator, declared by the manufacturer.
- S – Room area.
- 100 is 100 watts, which is enough to heat 1 square. m of premises.
By calculating using the formula, you can determine the power of the radiator required for installation in one room. The calculation is correct if the structure is non-demountable.
For extended radiators, it is necessary to use a different calculation formula - N=Q/Qyc, where:
- N – Number of sections.
- Qyc – Specific thermal power.
- Q – Heat transfer of the radiator, declared by the manufacturer.
The formula is suitable for rooms with a standardized ceiling level of 2.7 meters. Higher ceilings in the apartment require an increase in the number of heating radiator sections.
Black steel
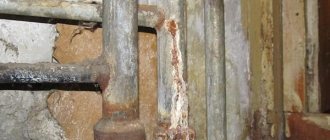
Steel rusts. It rusts especially quickly with prolonged contact with water. That is why the service life of steel risers and connections laid down in the regulatory documents, frankly speaking, is not amazingly long.
Standard service life
The main document establishing the standard service life of utilities in a residential building is VSN (departmental building codes) number 58-88, adopted in 1988. They regulate the timing of maintenance, reconstruction and repair of buildings.
Appendix No. 3 to the document provides the following figures:
Destructive factors
What factors limit the service life of VGP pipes without anti-corrosion coating:
| Image | Description |
| Corrosion. Rusting of the pipe is accelerated by a damaged outer layer of paint, frequent shutdowns of the water supply (in this case, the unpainted inner surface of the pipe is in contact with air with high humidity) and poor ventilation in the bathroom (read: consistently high humidity). The first fistulas appear on longitudinal welds (VGP pipes GOST 3262 are electric welded), on threads where the thickness of the pipe walls is minimal, and in ceilings where the surface of the pipes is not ventilated and (in the case of cold water risers) is continuously wetted by the condensate falling on them. | |
| Overgrowing of pipes with deposits (primarily lime salts) and rust. The rate of overgrowing is directly proportional to the hardness of water in the region: where it erodes sediment on the way to the consumer, the clearance in the water supply decreases much faster. The narrowing of the lumen leads to a drop in water pressure on plumbing fixtures connected to the water supply. | |
| Pipeline diameter. The larger the internal cross-section of the pipe, the longer it maintains acceptable throughput. | |
| Wall thickness. According to GOST 3262, ordinary, reinforced and lightweight pipes are produced. It is clear that those reinforced before the first through fistulas appear will last longer. |
Actual service life
In the author’s memory, the minimum trouble-free service life of a steel cold water supply system in a new building was only 10 years. The house was built and delivered shortly before the collapse of the Union, in conditions of austerity on building materials and the actual inoperability of Soviet norms and standards. Lightweight VGP pipes, purchased for reasons of economy, quickly and en masse began to leak at welded joints and threads.
The oldest engineering systems made of black steel have been in service for more than half a century.
In addition to the large thickness of the pipe walls, their longevity is facilitated by:
- Low humidity levels;
- No condensate on cold water pipes;
- Periodic painting of risers and liners;
- Low content of mineral salts in water.

