The peculiarity of the drip irrigation system is that moisture supplied through a special polymer tape or droppers is delivered directly to the root system of plants. Thanks to this, the overall water consumption is reduced and at the same time the crop yield increases. In addition, drip irrigation does not lead to waterlogging of the soil and reduces the likelihood of weeds appearing - they do not receive enough moisture.
It’s not difficult to create a similar system in your own garden. This article will provide you with detailed step-by-step instructions for designing and installing drip irrigation using polypropylene pipes.
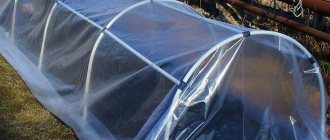
Do-it-yourself drip irrigation from polypropylene pipes
Irrigation systems
Surface watering is the easiest way. Water is supplied to the plants through dug narrow trenches. Everything is on the surface, there is no question of installation.
Such soil moisture is not desirable, since water enters near the root system and the crop loses some of its oxygen.
Sprinkling – humidification occurs by spraying water. The sprayers themselves are installed in certain places on the site so as to irrigate the entire area. This method of watering is very good, water enters the basal system and roots, the plant itself receives moisture and oxygen.
The peculiarity of the spray irrigation system is that if there is low pressure in the pipes, the coverage area will be reduced, which can lead to drying out of some of the plants and also in the presence of wind, watering will not be uniform.
Drip irrigation system
One of the most economical ways to moisturize. Water through hoses with holes flows directly to the root of the crop. The watering hoses in this system are connected to a water pipe, which can be connected not only to the central water supply, but also to any storage tank. There is a plug at the end of each hose. The system is equipped with a filter and a tap for supplying and shutting off water.
The downside of drip irrigation is that the hose gets clogged; the holes are not large and soil particles get into them.
Subsoil irrigation
This type of irrigation line is laid with a recess under the soil layer of 0.3 m. the pipes are equipped with special holes to supply water directly to the roots of the plants. This type of humidification is well suited for greenhouses and places where the soil is not dug up. Although it is possible to organize a watering system from plastic pipes and plant plants relative to the highway. Intrasoil watering eliminates regular loosening of the soil, and the process has a positive effect on the supply of oxygen to the root system.
Pipes can become clogged; to avoid this, it is worth installing a water filter.
Advantages of plastic pipes
- Smooth walls, which stops the formation of deposits.
- Excellent throughput
- The material is durable and can withstand moderate loads, like gardening equipment.
- Long service life
- Resistance to aggressive environments and chemicals
- Frost resistance
- Easy, simple installation, eliminating the use of expensive equipment.
- Plastic is not subject to corrosion
Irrigation systems are divided into automatic, semi-automatic and manual controls
- Mechanical control is the simplest. Watering occurs using a hose or an organized humidification system by turning a ball valve on and off.
- The semi-automatic watering system at the dacha is designed for manual water supply, that is, opening the tap, then distributing the liquid through the pipes, adjusting the pressure and flow of water occurs automatically.
- Automatic watering of a site is a completely automated process. A person doesn’t even have to be at the dacha. The soil of the site will be moistened in a given mode with a normalized amount of water. The system is equipped with sensors that record air temperature, soil, and soil moisture. They automatically turn on irrigation when necessary and turn off the system.
First option
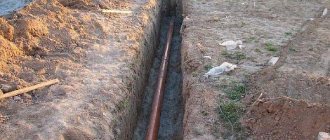
To simplify the process and reduce water consumption, the first version of an automatic irrigation system was installed last year. So, the garden is located between the house and the bathhouse, and the container is behind the bathhouse. A shallow trench was dug between the path and the ends of the beds, into which a welded main line was laid - a polypropylene pipe with bends to each box.
A shallow trench was dug between the path and the ends of the beds, into which a polypropylene pipe was laid with bends to each bed. Photo by the author We welded it using a special welding machine. Of course, the need to have this tool increases the cost of the irrigation system, because its price ranges from 1,000 to 10,000 rubles. You can assemble a system from HDPE (low-density polyethylene) pipes. The plus is that in this case you won’t have to weld anything, but the minus is that all fittings (connecting elements) are more expensive than polypropylene ones.
In one place we had to lay this pipe under the path so as not to stumble later. The same pipe was extended to the greenhouse - but on top of the ground along the fence. They made a plug at the end of the pipe to drain the water in the fall, then checked everything for leaks and buried it.
Plug for draining water in autumn. Photo by the author
Drip tapes, which were purchased at a garden store, were attached to the pipe outlets, laid out along the plantings, and the ends were plugged. The width of the tapes is 16 mm. The length of the roll is 50 m. You need to determine how many tapes to put on the bed according to the needs of the planted crop. Some places require 2, some require 1 watering line.
Drip tapes were attached to the pipe bends. Photo by the author
At first, we planned to install a watering timer on the barrel, which was purchased 2-3 years ago from a well-known manufacturer. But we did not take into account that that device could only work from the water supply: to turn it on, it required more pressure than that generated at the outlet of the barrel. Therefore, it was decided to again install the Aquadusya system indoors. So last year the greenhouse was watered automatically, but to water the garden the water had to be turned on manually.
In our market, which unites large online stores, you can choose everything you need for watering. Take a look at the selection of Tapes and hoses for drip irrigation.
How to install a sprinkler system yourself
For installation, products made of polyethylene or polypropylene with a diameter of 20 mm to 40 mm are used. HDPE pipes are joined using fittings. The execution process is done manually and does not require tools.
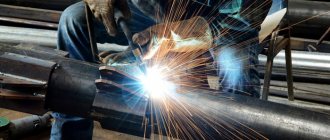
Polypropylene is joined by soldering, so electricity is needed.
- Surface irrigation installation . The system is mounted on the ground, and if it malfunctions, it can be easily and quickly repaired.
Cons: Due to its location on the surface, damage is possible; Movement requires attention.
- Installation of a deep system.
- A pipe laying diagram is being drawn up
- According to the scheme, trenches are dug from 0.3 m to 0.7 m deep with a slope towards the low point of the site.
- Pipe installation is being done
- Pipes are laid in trenches
- An incision is made into the main pipeline and a ball valve is installed
- Small diameter pipes or hoses can be used for bends
- Sprinklers or drippers are installed at the ends of the branches.
- The finished irrigation system is connected to the central pipeline and automation
- A check is in progress. If there are leaks, the malfunction is eliminated.
- The works are covered with soil. The system is ready for use.
A properly assembled do-it-yourself irrigation system made from plastic pipes will save the gardener from painful work for many years.
Drip irrigation system made of polypropylene pipes
Regular watering is the key to normal growth and development of any plants. But many of them, primarily valuable vegetable crops, spices and flowers, are especially sensitive to the intensity of soil moisture. Water should be supplied to their root system not just once, but over a certain period of time. Overmoistening is equally dangerous, because it leads to rotting of the roots and creates favorable conditions for the development of fungi and mold. The solution to the problem is drip irrigation. At the same time, it is not at all necessary to purchase complex and expensive watering systems - an excellent tool for drip irrigation can be made with your own hands from polypropylene pipes, which are sold in any construction supermarket.
Related article: Garden watering system
Materials and tools
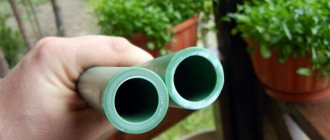
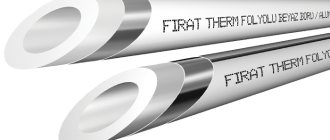
First of all, it’s worth understanding why you should use polypropylene. Firstly, it is many times cheaper and lighter than steel pipes, is not subject to corrosion, and does not accumulate salts on internal surfaces. Secondly, it outperforms flexible hoses in strength and durability, and does not lose its properties from prolonged exposure to weather and climatic conditions.
But, perhaps, the main advantage of polypropylene pipes is the ease of their installation - the market offers a wide range of pipeline fittings of any configuration, the joining of products to which is carried out with a simple pipe soldering iron with an appropriate nozzle. However, polypropylene also varies.
- PN10. Designed for cold water and relatively low water pressure; as a rule, the pipes made from it are thin-walled and relatively flexible.
- PN16. It can work with water of medium temperature (up to +60 C), withstands pressure of 16 atmospheres, and is used in pipes with medium wall thickness.
- PN20. The operating temperature reaches +95 C, the high wall thickness and special composition allow the pipes to withstand pressure up to 20 atmospheres.
- PN25. It has reinforcing layers, thanks to which it can withstand relatively long-term exposure to boiling water and cope with pressure of 20–25 atmospheres.
For drip irrigation, PN16 pipes are best suited; in some special cases, PN20 may be preferred, for example, in the central lines of large, highly branched systems. It is not advisable to use the PN10 grade due to its low reliability, and it is not easy to find pipes made from it on sale - the characteristics are too low by modern standards. Well, systems made from PN25 pipes would be too bulky and expensive.
The diameter of the products is determined in accordance with the water consumption, which, in turn, depends on the area of the irrigated area. It can be approximately calculated from the ratio of 500–750 liters per hour for every 100 square meters. m. Here are the pipe diameters suitable for different irrigation intensities.
- 500 l/h - 16 mm;
- 1000 l/h - 20 mm;
- 1500 l/h - 25 mm;
- 3000 l/h - 32 mm;
- 5000 l/h - 45 mm;
- 7500 l/h - 50 mm.
In addition to pipes, you will need fittings (turns at different angles, crosses, ball valves, adapters). If watering is carried out from a low-pressure water supply system, a water container should be provided.
Main working tools
- pipe shears or jigsaw;
- soldering iron for polypropylene pipes;
- drill with drills;
- knife;
- measuring and marking tools.
Video description
Useful video on the topic:
See also: Catalog of companies that specialize in the installation of metal structures - canopies, greenhouses and others
Timers can operate from mains or batteries, be mechanical, electro-mechanical or electronic:
- The mechanical timer is manually controlled and has only one function. Before you start watering, you need to turn it on and set the time after which it will stop supplying water. This device is convenient if the area is small and is under constant supervision. It eliminates the need to turn off the water on time and generally keep this concern in mind.
- The electronic-mechanical device can already do more: it provides the specified frequency and duration of watering, independently controlling the system in accordance with the program.
Electronic-mechanical timer with output to two lines Source growsvet.ru
- Electronic controllers are capable of executing up to 16 commands when connecting to them additional devices that monitor soil and air humidity, temperature and other environmental parameters. They can be programmed to different modes for each crop. They are expensive, but they allow you to not have to worry about watering at all, no matter what the weather is like outside and no matter how long the owners’ absence.
When deciding how to make automatic watering in a greenhouse with your own hands, you need to decide in advance on the optimal irrigation mode and choose the most suitable timer in terms of price and functionality. It is installed at the beginning of the system on the main line and does not particularly complicate the process of its assembly.
Electronic timer connected to the central water supply Source treetrekkers.com
System assembly
The installation of the irrigation system is preceded by site marking:
- It is divided into beds, in each of which there are grooves for pipes at a distance of 20–60 mm.
- Then the length of the segments is determined, the pipes are cut into sections, and the need for fittings is calculated. In complex and highly branched structures, pipes with a slightly larger diameter are chosen for central mains than for the periphery.
- In all pipes that will be laid in the grooves, holes with a diameter of 2–3 mm are drilled at regular intervals (usually 7–15 cm).
- When each individual branch of the system is ready, assembly begins.
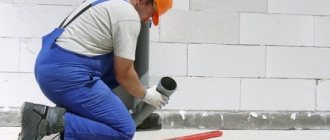
- Pipes and fittings are joined using a soldering iron, and excess plastic is trimmed with a knife. It is better to use modular technology - assemble individual sections of the system, put them in their places, and then continue assembly in the “working area”.
- You can lay pipes directly on the ground, but it is better to provide small stops (up to 5 cm above the ground). This will prevent the holes from clogging.
Please note that the holes should not be directed straight down, but at a slight angle. It is better not to install the drill strictly perpendicular to the axis of the pipe - this will help distribute the moisture more evenly
Now you can do a test run. If it shows leaks, they can be eliminated by “cold welding” - a composite adhesive composition. But it will be safer to resolder the weak points.
We hope this material will help you organize uniform irrigation of your site, and therefore ensure the health and prosperity of your plants. Good luck and good harvests!
How to make your own drip irrigation from polypropylene pipes
Drip watering of indoor, garden and garden plants is one of the irrigation methods in which moisture is supplied in doses (drops) to the root zone. Dropper dispensers are the main executive unit of the device. What are the benefits of an irrigation system made mainly from polypropylene pipes? This is a significant saving in water, electricity, labor and financial costs, plus constant and continuous irrigation of plants. Automatic watering on the site means an early harvest, and in some cases several harvests, minimizing soil erosion and the development of soil and plant diseases.
Drip irrigation technology was developed and tested in Israel, after which it spread to other countries. Metered irrigation is used not only in the private sector, but also on an industrial scale.
What is included in the drip system
Any drip irrigation system on polypropylene pipes, even the simplest one, consists of:
- A pipeline route through which water is constantly supplied to the dispensers;
- Propylene drip lines for watering the garden.
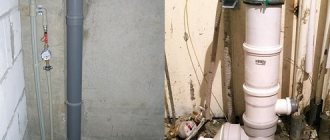
The best source of water is a centralized water supply, as it will always have water. If this is not possible, the pipe system of the watering device is connected to an autonomous pumping station or to a reservoir on the site. The main pipeline, from which the distribution to the drip lines will go, is laid from pipes Ø 25-32 mm, long sections are assembled with fittings. The route is assembled from metal, metal-plastic or polypropylene pipes.
Related article: Do-it-yourself summer water supply at the dacha
Drip lines made of polypropylene pipes are laid from the main pipeline to the plantings. To carry out irrigation from polypropylene pipes with your own hands, use two options for drip lines - polyethylene tapes or tubes. The diameter of such tapes (tubes) is taken in the range of 16-20 mm, polyethylene has a thickness of 100 microns. The tape is made from a strip of polyethylene, rolled into a ring and sealed at the edges. Holes are punched along the surface of the tape with a pitch of 200-250 mm, through which water flows by gravity into the root zone of a plant or group of plants.
A home-made garden watering system made from polypropylene pipes is adapted for watering trees and garden plants: water is supplied to the tree or bush with pipes, and the garden is watered with ribbons.
Droppers with fixation of liquid output
Devices without adjustment are designed for a specific pressure indicator and have a fixed fluid performance, which is measured in liters per hour of operation. Therefore, uncompensated options are highly dependent on pressure characteristics and are not used for large areas, because at the end of the system the pressure is much lower than at the beginning. As a result, it will not be possible to water the plants evenly. But for small gardens this option is perfect.
Compensated options inside the structure are equipped with a silicone membrane. When the pressure drops, the valve completely closes the water outlet. As a result, irrigation stops. The operating pressure of such a dripper is 0.4-3.5 atm, and when the pressure rises to such values, water will drip again. Based on liquid consumption, three types of devices are produced at once - 2, 4 and 8 liters per hour.
To water multiple plantings, you can use a branched dripper that resembles a spider in appearance. Such a device consists of an adapter for several outputs, various microtubes, pegs and the irrigation system itself. The “spider” is used to simultaneously supply water to several plants at once or to supply moisture to the roots from all sides.
Installation of a drip irrigation system and calculation of water consumption
You should start by drawing up a plan for the area to be watered (vegetable garden). Then they calculate how much water will be needed for drip irrigation of a particular area. After that, a scheme is drawn up for the uniform distribution of tubes or tapes between the plantings.
The correct calculation of a self-created irrigation system takes into account the properties of the soil, the time and schedule of watering, and the distribution of water collection points - tapes or tubes. Water can even be taken from a nearby reservoir, but if the water supplied is dirty, then it is better to install at least a coarse filter at the inlet.
Tools and materials for creating drip irrigation
You will need an electric drill or screwdriver. The diameter of the main supply pipe affects the diameter of the drill: for a Ø 32 mm pipe into which you need to embed a valve with a fitting (attached through a rubber or silicone gasket), you will need a Ø 14 mm drill. If polypropylene pipelines have a Ø 25 mm, then use a Ø 10 mm drill. It is better to use drills for wood - the protruding spike at the end will not allow the drill to leave the center of the intended hole.
Installation procedure
The assembly of a drip irrigation system begins with the connection of polypropylene pipes and the water storage tank being checked for leaks. The capacity of the tank depends on the area of plantings, the need for watering (different plants consume different amounts of moisture), and the layout of pipes and tapes. For some, a two-hundred-liter metal barrel will be enough, but for others, even a Eurocube will not be enough. In any case, you need to be able to replenish the water in the tank at any time. The container is installed on a stand that ensures gravity flow of water - above 1-15 meters, it does not flush, so as not to increase the pressure in the pipeline: the water should flow slowly. If there is a coarse filter installed on the main pipeline, but at the outlet of the tank it makes sense to install a fine water filter.
It happens that the site has a slope, and sometimes quite a large one. In this case, it is possible to use a pump for the irrigation system, since the height of the stand may not be enough to deliver water to the highest irrigation areas.
The preparation of polypropylene pipes and installation of the irrigation system begins with cutting the sections to the required size. The length of the pipe must correspond to the distance between the beds, and at each end of the pipe, a plastic filter tap is inserted into the side through an adapter.
Industrial irrigation tape has hole pitches of 200 mm, 250 mm and 300 mm. Cut the ribbon to the required length and attach it to the tap, and tie the free end tightly. When applying the tape to the faucet, it is recommended to use graphite lubricant or liquid soap. The connection itself does not need to be reinforced with anything - neither with clamps nor other clamps, since there will be practically no pressure in the system. The last stage of installing drip irrigation in one of the areas will be tightening the control nut, and after assembling all the necessary connections and installing the required number of tapes, the system can be turned on for irrigation.
But using such a homemade drip system also has disadvantages:
- It is necessary to constantly monitor the volume of water in the tank. Although this can be avoided by installing an electronic float pump on/off system to automatically fill the tank. If drip irrigation is connected to a central water supply, then the problem disappears;
- The injectors (holes in the bands or tubes) constantly become clogged. The problem is solved by flushing the entire system and installing filters at the main water inlet into the pipes and at the outlet from the tank.
A small drip irrigation system can even be assembled using plastic bottles - the bottoms are cut off, the bottles are inserted into each other, making a pipe of the required length, and the bottles themselves will serve as drip irrigation tapes - small holes are made in them, and the device is ready.
Drip irrigation of a vegetable garden does not change if you move it to a greenhouse or winter garden, therefore, once you have assembled such a scheme, you can use it for the rest of your life, and, taking into account the place of use, add or remove additional equipment.
Related article: Do-it-yourself irrigation system at the dacha
Installation of a pipeline at a summer cottage
Before installing the water supply system, it is necessary to develop and draw a clear diagram. You need to think through the exit points to the surface in advance and estimate the number of connections. After this, mark the water supply on the site and take the necessary measurements, from which you can determine the pipe footage, as well as the types and number of connection elements.
Summer water supply is used only in the warm season. Therefore, a small pond near the site or a well can serve as a source of water. This is the most economical option.
You can also drill a well and take water from there. However, it must be used regularly, since winter downtime leads to severe clogging of the filters, the replacement of which is problematic.
In case of connection to the main pipeline, it is enough to lay the pipes across the site.
How to solder polypropylene pipes
To learn how to lay and connect pipes yourself, you don’t need a plumbing education at all.
To carry out this type of work you will need a special soldering iron “iron” - a connection device for polypropylene elements. Also included with it are special Teflon nozzles. They are attached in pairs to a soldering iron and heated. The diameter of each pair corresponds to the outer and inner diameters of the parts being soldered. That is, in order to connect two parts, you must first solder the coupling to the pipe, and then solder the next one.
For different pipe diameters, the heating time in the soldering iron and the temperature differ.
Table of time and temperature conditions
| Pipe diameter in mm | Distance from the end of the pipe to the mark (welding depth), mm | Heating time in sec | time in sec |
| 20 | 14-17 | 6 | 2 |
| 25 | 15-19 | 7 | 2 |
| 32 | 16-22 | 8 | 4 |
| 40 | 18-24 | 12 | 4 |
| 50 | 20-27 | 18 | 4 |
| 63 | 24-30 | 24 | 6 |
| 75 | 26-32 | 30 | 6 |
| 90 | 29-35 | 40 | 8 |
The same applies to soldering corner joints. A corner is soldered to the straight pipe, and then the next structural element. Both parts are simultaneously inserted into the soldering iron nozzles, heating the outer and inner surfaces of the parts, and then they are removed and joined end-to-end while the plastic is in a semi-molten state. After cooling (approximately 25 seconds), further work can be done.
Threaded connections and transitions from one diameter to another are soldered in the same way.
To ensure that the holes in the components are not blocked by molten plastic, they can be checked by blowing air.
Pipe bending
Pipes are bent in different ways:
- To make a bend, you will need a couple of plugs and sand, which should be used to fill the space. If such materials are present, the likelihood of breakage or damage to the product is low. Instead of plugs, it is allowed to use wooden choppers. Pipes are produced with different hardness, so you need to prepare for possible physical effort. The easiest way is to insert another pipe into the pipe being bent, but with a larger cross-section, find a stop and bend it, pressing in the desired direction.
- For steel or aluminum pipes, a torch will be required. Cover the product with sand and seal it around the edges, heat the bent area red-hot and bend it with another pipe.
- Pipes of large diameter and square shape are bent using sand and a torch.
The burner can burn through metal, so you should sometimes move it to the side and check the heating level.
How to bend a pipe by hand
To do this kind of work on metal-plastic, it is recommended to follow several tips:
- Fold slowly and without jerking. For every couple of centimeters of bend length there are 15 degrees.
- To ensure an even angle, it is recommended to lay pieces of wire before the bend.
- The greater the leverage of the pipe placed on the structure, the simpler and easier it is to bend.
Bending polypropylene pipe
- The product should be heated with a hairdryer at a temperature of 150 degrees. It is necessary to bend the area where there is a thicker wall.
- You can bend such material without heating, but then the bending limit is 8 degrees.
Upon completion, you should check for defects.
How plastic pipes bend
To do this you need:
- Make the frame using a wood fiber board to obtain the desired shape.
- Install the pipe into the shell.
- Fix the structure.
- Give the pipe the desired shape
- Remove and cool.
All bending methods presented do not require special equipment.
Source: domik-derevne.ru
DIY drip irrigation from polypropylene pipes
The peculiarity of the drip irrigation system is that moisture supplied through a special polymer tape or droppers is delivered directly to the root system of plants. Thanks to this, the overall water consumption is reduced and at the same time the crop yield increases. In addition, drip irrigation does not lead to waterlogging of the soil and reduces the likelihood of weeds appearing - they do not receive enough moisture. It’s not difficult to create a similar system in your own garden. This article will provide you with detailed step-by-step instructions for designing and installing drip irrigation using polypropylene pipes.
Requirements for products
Requirements for PVC pipes intended for water supply and heating are regulated by GOST R 52134-2003.
It provides information regarding pipe dimensions, including minimum wall thickness, as well as requirements for fittings and pipe surfaces. According to the document, products must be smooth both inside and out, and have an even color. They should not have cracks, depressions, bubbles or other structural defects. The same requirement applies to the ends.
The types and range of pipes made of unplasticized PVC are described by GOST 28117-89.
Benefits of drip irrigation
The main advantages of the irrigation system are:
- significant savings in water and electricity (if a pump is used for irrigation);
- clear and regular distribution of moisture, even if the bed is not located on a flat surface, but in difficult areas;
- absence of waterlogging of the soil, which helps maintain the maximum amount of oxygen in the soil and maintain its looseness;
- improving the development of the root system and increasing its absorption of nutrients;
- paying attention to each plant;
- reducing the number of weeds that simply cannot develop due to insufficient moisture for them;
- reducing the risk of diseases (due to the fact that the leaves remain dry, there is no humid microclimate, which fungi and bacteria love);
- earlier ripening and prolonged fruiting;
- significant increase in harvest volumes;
- the ability to use any source of water (well, borehole, water supply or even a barrel).
Materials for drip irrigation from polypropylene pipes
Unlike metal pipes, polypropylene analogues have great advantages. In addition, the material is quite cheap and suitable for assembling a drip irrigation system.
Before assembly, you need to prepare the following:
- Container with a volume of 100 l. The water will heat up under the influence of sunlight, which has a beneficial effect on the plants.
- Ball valve.
- Filter for water purification. Otherwise, the system will quickly fail.
- Container for nutritious fertilizers.
- Pipeline
- Bends made of polypropylene pipes or special tapes, which are connected using special tees.
To determine the size of the materials, you need to mark the land. To water 1 m2 you will need about 30 liters of liquid per day, depending on the type of planting. You also need to calculate the number of taps and the distance between installed droppers.
To ensure the required pressure, it is recommended to install the container at a height of 1-2 m. This will be enough to provide watering of 50 m2. The container is installed on a strong and level support.
Useful articles for gardeners and gardeners
The tap is installed in a hole made in a container of water, at a height of 10 cm from the bottom. On the other side, make a connection to the country water supply. To ensure that the container is filled to a certain level, it is recommended to use a valve with a float.
Which ones to choose?
To make the system last longer, it is important to choose reliable pipes. They will need to be laid underground to prevent the PVC from deteriorating under the influence of the sun.
Main characteristics
What to pay attention to first:
The hose must have at least 2 layers (preferably more) in its structure.
Single-layer products wear out in 1-2 years. They easily lose their shape from UV rays or high water pressure.- The tube must be opaque, otherwise algae will grow in the cavities over time.
- It is better that the pipe is dark in color. Such products contain additives that increase resistance to ultraviolet radiation. Due to the lack of direct exposure of the water to sunlight, the use of such pipes reduces the risk of algae.
How to determine the diameter?
The diameter of the main pipe (D) is usually determined by the formula: D=1.13*√Wi/(3600*V), where:
- V is the desired speed of water movement (usually from 0.9 to 2 m/s);
- Wi – design flow passing through this section (cub.m./h);
- 1.13 – calculated coefficient.
The resulting number is rounded up to the nearest standard size. As a rule, pipes with a diameter of at least 3.2 cm are used. The smaller the diameter, the less water pressure will be. For greenhouses, wide main pipes are usually taken - about 6 cm.
Other selection criteria
PVC pipes may have mesh or cross braid . The first option for drip irrigation is better. They must be of sufficient thickness to match the pressure in the system. When choosing fittings, you need to consider switching to a smaller diameter.
Assembling a drip irrigation system from polypropylene pipes
Before organizing watering, the summer resident must prepare a project. It is necessary to indicate the placement of the beds, the distance between them and individual plants or young seedlings. To draw it up, you need to take a construction tape, take all the measurements and sketch it on paper.
Special scissors are used to cut polypropylene pipes for bends. You can also use a construction knife or a hacksaw.
The installation of the irrigation system is preceded by site marking:
- It is divided into beds, in each of which there are grooves for pipes at a distance of 20–60 mm.
- Then the length of the segments is determined, the pipes are cut into sections, and the need for fittings is calculated. In complex and highly branched structures, pipes with a slightly larger diameter are chosen for central mains than for the periphery.
- In all pipes that will be laid in the grooves, holes with a diameter of 2–3 mm are drilled at regular intervals (usually 7–15 cm).
- When each individual branch of the system is ready, assembly begins.
- Pipes and fittings are joined using a soldering iron, and excess plastic is trimmed with a knife. It is better to use modular technology - assemble individual sections of the system, put them in their places, and then continue assembly in the “working area”.
- You can lay pipes directly on the ground, but it is better to provide small stops (up to 5 cm above the ground). This will prevent the holes from clogging.
Please note that the holes should not be directed straight down, but at a slight angle. It is better not to install the drill strictly perpendicular to the axis of the pipe - this will help distribute the moisture more evenly
Now you can do a test run. If it shows leaks, they can be eliminated by “cold welding” - a composite adhesive composition. But it will be safer to resolder the weak points.
Climate
Polypropylene pipes appeared relatively recently, but have already firmly gained a leading position. Thanks to the combination of excellent characteristics and affordable prices, their use has become universal. They are used for plumbing and heating systems in new buildings, and also replace outdated metal analogues in Khrushchev-era buildings. In addition, craftsmen have found a number of other uses for them. In this article we will talk about installing polypropylene pipes with your own hands.
Content:
Advantages of polypropylene pipes
- Polypropylene pipes are chosen for water supply, heating, and sewerage installations. They are excellent for external systems that are laid on the side of the living room, as they do not heat up (for example, when running hot water pipes).
- Polypropylene is not affected by moisture and does not deteriorate under the influence of external factors for a very long time. Therefore, they are used when arranging underground drainage, drip irrigation, or when laying water supply throughout the site.
- It is environmentally friendly and will not cause harm to the environment during operation. This factor is also important when supplying both drinking and industrial water.
- The low weight of the material allows it to be easily transported and even long pipe sections can be easily installed.
- Manufacturers provide a guarantee of at least 50 years.
Marking of polypropylene pipes
Depending on the task at hand, the required type of polypropylene pipe is selected. The most common are 3 main types:
- PN25 – optimal for heating systems;
- PN20 – intended for sewerage and water supply;
- PN10 – only for cold water.
The main difference is that PN25 and PN20 have special reinforcement that protects the pipe from deformation when carrying hot water.
Advice: when buying pipes, you need to focus not only on the lower cost, but also on their quality. First of all, pay attention to the cut; its edges should be smooth, without burrs.
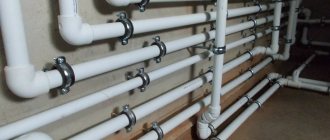
Any installation of polypropylene pipes will require the use of connecting elements - fittings.
- Couplings . They are used when it is necessary to join pipes of different diameters and different materials (for example, polypropylene with cast iron). There are also adapter couplings that connect pipes with internal or external threads to pipes that have a different type of fastening.
- Corners . Needed to connect the system in the corners of the house or when you need to change the direction of the pipe by 90 or 45 degrees.
- Tees . Used in system branching nodes.
DIY tools for soldering polypropylene pipes
Installation of polypropylene pipes is impossible without a number of specialized tools.
- So, for basic types of work you need a special soldering iron. Which will melt pipes and couplings at the fastening points. This is a narrowly focused tool and is only suitable for one type of work, but you should not skimp on it. Cheaper moments melt the pipes more slowly, which negatively affects the quality of the seams. And the speed of work is significantly reduced, which is especially important for large volumes. In addition, such a unit can quickly break down.
- A set of nozzles for a soldering iron of the appropriate diameter. Usually they come in a set with a soldering iron, but if necessary they can be purchased separately.