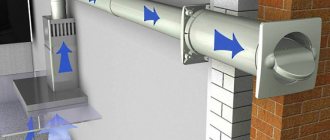
The best option for organizing the removal of hot humid air, fumes, and odors rising from the stove is to connect a forced kitchen hood to the ventilation riser of an apartment building.
Or make a connection directly to the street, if the location of the kitchen allows you to make an additional ventilation hole.
The only thing left to do is to lay a channel through which this will be carried out.
There is no need to invent anything special here - there are many products of this class on sale. The main thing is to decide on the material of the air duct, its dimensions, parameters, configuration, external design, and additional equipment.
Types of pipes
Ventilation pipes are not subject to high loads . Even with the most intensive cooking, the air and steam temperature above the stove does not exceed +80 degrees. The air flow created by the most powerful fan is also relatively weak and certainly does not exceed the capabilities of the home ventilation system. The communications are located quite high and do not experience mechanical stress.
Plastic
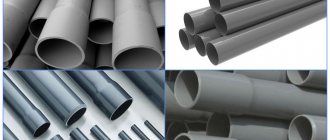
They produce polyvinyl chloride, polyurethane, and polypropylene pipes. Most often PVC , since their characteristics and price combine well. It doesn’t make much sense to choose something more durable or, for example, more resistant to temperature. But if they cook very often and prefer to fry in boiling oil, they choose polyurethane ducts. They can withstand heating up to +280°C and do not lose their properties at constant temperatures above +100°C.
Characteristics and features:
- Dimensions - ventilation pipes can be round or square in cross-section. This does not matter much, since their length is very small and the air does not have time to create turbulence here. Dimensions are selected according to the size of the ventilation hole. Typical sections include 100, 125, 150 and 200 mm. For rectangular ones: 55–60 by 110–124 mm.
- Resistance – Successful air removal requires smoothness of the material. Plastic perfectly meets this requirement. Moreover, grease and dirt are difficult to deposit on its surface, so there is no threat to a reduction in the working diameter of the plastic pipe.
- Noise level – conducts air silently.
- Installation - various adapters are used to connect pipes. Installation takes time. But communications can have any configuration and be located anywhere in the kitchen. Frequent bends somewhat impair ventilation, but this can easily be solved by using a fan in the hood.
- The cost is low. The price increases due to adapters, if needed.
- Appearance - a rectangular pipe looks more aesthetically pleasing, as it is perceived as a decorative box. In addition, plastic leaf blowers can be painted, painted and decorated.
The disadvantages include relative fragility: the pipes are designed for 10 years of operation.
Aluminum corrugated
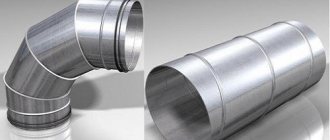
The main advantage is durability. Aluminum is completely insensitive to corrosion, indifferent to salts, steam, and chemically aggressive substances. Such an air duct will last for several decades.
Corrugated pipes are used for ventilation . This makes installation easier: the corrugation can be bent at a large angle, so there is no need for adapters.
An aluminum pipe can only be round. Popular sizes are the same: from 100 to 150 mm.
The advantages include:
- Ability to bend the product . The corrugation can be given smooth bends. In this case, turns and corners do not impair air circulation, ventilation remains just as effective.
- There is no need to develop complex circuits if the air duct can be slightly rotated, compressed or expanded by 4.5 times . The plasticity of aluminum allows this.
- The metal can withstand very high temperatures.
- Design - in the kitchen in the loft, hi-tech, industrial, techno style, ventilation is emphasized. Aluminum pipes look attractive: they have a beautiful natural color and shine.
- The pipes are light and do not create a load on the wall. For installation, use the simplest brackets.
Flaws:
- The corrugation resists air movement . If ventilation is natural, this can be a problem. If it is forced, the fan copes with the resistance.
- The same feature causes another drawback - noise . Not only the working hood will “sound”, but also the exhaust pipe.
- It is difficult to remove grease film, scale and dirt from the corrugation Soot accumulates faster here.
Decorating aluminum air ducts is more difficult. For painting you need to take a heat-resistant composition.
Steel
They have almost the same advantages and disadvantages as aluminum ones. However, there are some peculiarities.
- Galvanization is not as resistant to corrosion as aluminum, so the pipe lasts less.
- Stainless steel is much more durable, but is more expensive.
- Steel ducts are less flexible. The corrugation can be stretched and compressed within smaller limits.
- The price of galvanized steel pipes is less than plastic ones. The absence of adapters also reduces installation costs.
The biggest disadvantage of a steel air duct is that it is even more noisy than an aluminum one.
Criterias of choice
The choice depends on the installation features and budget.
Most often, the choice depends on the method of installation of communications.
- If the pipe remains visible , plastic is preferred. Pipes can have a rectangular cross-section, which looks more attractive and is easier to decorate. The exception is kitchens in loft, techno, and industrial styles.
- If hidden installation , it is better to take metal corrugation. It is easier to install and does not require adapters.
- If the hood is mounted far from the wall or the kitchen has a complex configuration, preference is also given to corrugation. The more turns, the less effective the ventilation.
- Another factor is noise . A round pipe has less air resistance and therefore makes less noise than a rectangular one. Corrugation makes more sounds at any diameter.
Budget also matters. Steel corrugated pipeline is the cheapest.
Types and differences of air ducts for hoods
The exhaust duct can be divided according to the following characteristics:
- According to the material from which the channel is made: plastic or metal.
- Shape : round or rectangular.
- By rigidity : flexible or rigid.
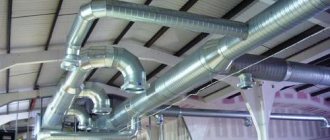
Features and advantages of metal (corrugated) air ducts
Corrugated metal (or rather, aluminum) pipe is the most popular option for creating an air duct. You can read more about the selection and installation of corrugations for the hood separately. Let's look at this option briefly below.
Corrugated air duct in the kitchen interior
In terms of price, the corrugation will cost approximately the same (for reference, here are the most common sizes):
- Diameter 100 mm: about 90 rubles per meter.
- Diameter 120 mm: about 120-130 rubles per meter.
- Diameter 150 mm: about 135 rubles per meter.
The advantages of such an air duct include:
- flexibility (the corrugation can be easily bent to give the air duct the desired shape);
- the ability to stretch and fold (and therefore the ability to adjust the length of the channel);
- ease of connection (for corrugation there is no need to separately purchase and install adapters and connecting elements).
Of the minuses:
- relatively high noise level (however, the noise of the motor of a running hood will still cover the noise from the air passing through the duct);
- faster contamination (than with PVC products);
- unsightly appearance (corrugation spoils any interior, so the metal air duct is almost always covered, which means you need to spend additional time and money on creating a “cover”).
Features and advantages of plastic air ducts
A plastic pipe is a rigid product that does not bend. The cross-sectional shape can be either round, rectangular or square.
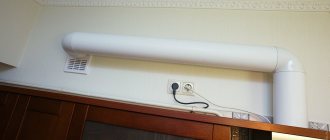
Rectangular plastic duct for exhaust hood
The main advantages of plastic (compared to metal):
- noiselessness (a smooth, flat surface does not contribute to noise);
- ease of maintenance (smooth surfaces become dirty much more slowly and are easier to clean);
- aesthetic appearance: in the interior, a plastic pipe looks much neater than corrugated pipe.
The most successful solution is to use a rectangular duct. It is easy to run such a pipe along the wall, saving space. On the other hand, such a channel requires an adapter with which the rectangular pipe will be connected to the round openings of the hood and shaft. You will also need connecting elements to hold together a system of several sections.
Of the minuses:
- more complex installation;
- higher cost than corrugated pipes (both the pipes themselves are more expensive, and in addition you will need to buy additional adapters and elbows);
- inability to bend, stretch or compress the pipe.
More complex installation is the most serious disadvantage of plastic. The corrugated metal sleeve is flexible, it bends, stretches and folds easily. Even if you made a mistake in the calculation, it can be adjusted to the required conditions without any problems. But this will not work with a plastic air duct: it needs to be measured and planned as accurately as possible.
Plastic Air Duct Parts
In terms of price, plastic will cost about this much:
- Plastic adapter from a rectangular channel 60x120 mm to a round hole with a diameter of 120 mm: about 150 rubles.
- Flat air duct, cross-section 110x55 mm: about 260 rubles per 1 meter.
- Round air duct, diameter 100 mm: about 250-270 rubles per 1 meter.
Which option is better?
The question of which air duct to choose (corrugated or plastic) is not critical. If it is correctly calculated and laid, the hood will work normally.
Minor differences include several points:
- Exterior to interior. Here plastic clearly wins. However, air ducts are often decorated, so the corrugation will still not be noticeable.
- Ease of installation. In this regard, it is clearly easier to take corrugation.
- Air duct price. Corrugation will cost a little less.
Calculation of diameter and dimensions
The diameter must correspond to the cross-section of the outlet pipe on the hood. Since the dimensions of the outlets and pipes are standardized, this is easy to achieve. For plastic it is 10, 12.5, 15 and 20 cm, for corrugated pipe – 10, 12.5 and 15 cm. It is recommended to take a pipe whose cross-section is slightly larger than the cross-section of the pipe.
The ideal length of the air duct is no more than 3 m. If the pipe is longer, install a more powerful fan.
Valera
The voice of the construction guru
Ask a Question
It is usually not necessary to calculate the diameter of the pipe, since it is determined by the pipe and the ventilation hole. In rare cases, when the hood is not equipped with a fan, multiply the volume of the kitchen space by 12 - this is the recommended air exchange, and by 1.3 - the power loss coefficient. The resulting value is multiplied with the cross-section of the pipe and the maximum rate of air removed. As a result, the minimum permissible pipe cross-section is obtained.
Is it possible to do without an air duct?
As an alternative, you can install hoods that operate on the recirculation principle. Typically their power and efficiency are lower. Installation of an air duct for this hood is not required. Sometimes air is vented outside. A hole is made in the wall after agreement with the BTI and housing and communal services. According to SNiPs, the distance to the nearest window must be at least 8 m. As a rule, this is only possible on the upper floors.
Or they install an outer box through which the air rises to the roof level. This is necessary so that the exhaust air from the kitchen does not reach the neighbors on the upper floors through the windows. This option is often used by owners of cafes and restaurants located on the 1st floor of a multi-story building.
So, you need to correctly connect the hood to the ventilation so as not to disturb the air exchange in the room. This is important primarily for health. In many modern house designs, several channels are provided at once: one for ventilation with natural current, the other for connecting an exhaust hood. Their accelerating shafts are separated. If the house has already been built, it is important to take into account all the nuances: the volume of the room, the frequency of cooking, the size and capacity of the ventilation ducts. Only after this should you purchase a hood and air ducts for it, having thought in advance how to aesthetically design them.
Installation rules
When installing ventilation of any type, the following rules must be followed.
- The ideal shape of the pipeline is straight. But if corners appear, they should not be sharp. The path from the hood to the ventilation shaft should be minimal.
- Place the pipes on special clamps to ensure reliable fastening.
- The joints when connecting pipes and adapters are carefully sealed.
- If ventilation outlet in the kitchen , it cannot be completely blocked by the air duct. In this case, air circulation is completely dependent on the exhaust fan. When the appliance is turned off, there is simply no ventilation in the kitchen, and this is unacceptable. A two-part grille is placed on the outlet hole: with a hole for the pipe and with a grille for natural ventilation.
- If the kitchen has 2 exits to the shaft , one is occupied by the blower, the second provides natural air replacement. But at the same time it is necessary to install a check valve here. Often, when the hood is running and the windows are closed, natural circulation becomes insufficient, and then exhaust air returns to the room. The check valve does not allow this.
If the distance from the hood to the shaft significantly exceeds 3 m, it is worth considering other options, for example, venting the ventilation duct outside through the wall.
Characteristics of corrugated pipes
Such pipes are made of thin aluminum. In this case, there is a significant disadvantage - the appearance of the air tract . It is unlikely that there will be many who want to see a metal pipe in their kitchen. Therefore, the use of this material requires obligatory masking of the pipe. But there are also obvious advantages:
- ease of installation work - corrugated pipe is easy to cut, can be bent at any angle, and is easily attached using special clamps;
- lack of resonant hum;
- low cost compared to plastic air ducts;
- Sharp pipe bends are eliminated, which increases the efficiency of the ventilation system.
Such pipes are produced in the form of small pieces that stretch to a significant length.
Installation instructions
For installation you will need the usual tools: a screwdriver, a hacksaw and sealant. And also corners, adapters, check valve.
- The ventilation grille from the entrance to the mine is dismantled. As far as possible, the channel is cleaned of dust, dirt, debris, and soot.
- Mark the walls for the pipe. If necessary, drill holes for brackets and clamps.
- The first fragment of the air duct is inserted into the exhaust pipe of the hood. The joints are coated with heat-resistant sealant.
- The pipes are laid, alternately inserting one element into another. The connections are treated with sealant.
- Secure the pipe with clamps. The distance between the fastenings is 50 cm.
- Insert the ventilation grille into place. It is worth using a model with a check valve: it prevents the draft from tipping over.
The system is being tested. A properly assembled ventilation system should operate silently, without rattling or leaking air.
Recommendations for selection
Experienced specialists give a number of tips to make it easier for owners to choose products for arranging a ventilation system. Some of them:
- It is best to buy products in branded stores or specialized retail outlets.
- In addition to the product, the kit should contain instructions for use, as well as a warranty card. If such documentation is missing, it is better to refuse the purchase.
- It is necessary to take into account the design of the products so that they fit organically into the interior of the room.
- The manufacturer is of no small importance. It is advisable to choose high-quality branded models.
- No need to focus on low prices. Of course, a high-quality and reliable ventilation system will be quite expensive, especially if good materials are used. However, you need to understand that high-quality models will serve for many years without complaints.
- Products must have sufficient performance. If the ventilation system is weak, the hood will not be able to cope well with its main task, so the exhaust air masses will remain in the room.
We recommend that you read: Exhaust ventilation and its features
In addition, when choosing the components of the ventilation system, you need to take into account the main functions of the kitchen hood. The latter must meet the following characteristics:
- An attractive appearance is important so that the device fits organically into the interior, complementing it.
- Low noise level during operation.
- The ability to quickly and to the required extent remove foreign odors.
How to hide a pipe
The ventilation pipe does not always fit into the interior. To disguise it, use the following methods.
- Imitation of a kitchen hanging cabinet - if the outlet to the shaft is located close, the entire pipe can be hidden in the cabinet.
- If the ventilation is located high, you can hide it under the suspended ceiling.
- The pipes are painted in the color of the wall or kitchen apron, and painted with patterns.
- Communications can be hidden in a decorative box . The latter is easiest to make from drywall.
Decorative screens, boxes and other methods of disguise must comply with the rules. Access to ventilation must remain free.
Types of kitchen hoods with ventilation outlet
The devices are installed directly above the stove. They differ in the method of fastening and installation location.
Island
Another name for the products is hanging. Such instances are used if the stove is not against the wall, but in the center of the room. Then the equipment is suspended from the ceiling above it. Such models look very stylish and original, but they are only suitable for large kitchens.
Original and stylish island hood
Mounted
One of the most popular devices. They are mounted on the wall, in many cases under the kitchen shelf. They allow you to save space, which is convenient for small rooms. Installation of such installations does not cause any particular difficulties. They look attractive, are inexpensive and do their job perfectly. They have a low noise level.
The mounted option is one of the most popular. Interesting! Attachments can be flat or dome. Recently, manufacturers have begun to produce inclined models that fold and unfold when necessary.
Built-in
This option is the most convenient and visually attractive - specimens look advantageous in any interior, even in the smallest kitchen. When choosing, special attention should be paid to the dimensions; the hood must fit into the dimensions of the kitchen unit and correspond to the dimensions of the stove. Typically, the depth of the exhaust system is 60 cm; many products are produced with a sliding visor, which allows for even more space saving.
Built-in model
Fireplace
They are expensive, but they look incredibly beautiful and luxurious. They are installed in designer luxury kitchens, where every detail is thought out to the smallest detail. For the device to operate effectively, a high-quality modern ventilation system is necessary, and complex installation requires the participation of specialists. The equipment is able to cope with large volumes of contaminants.
The fireplace hood looks luxurious
Oblique
A modern option for compact spaces. Takes up little space and looks very stylish. Fits perfectly into a designer interior. She copes well with her duties and is not picky in her care.
An inclined hood is suitable for a compact room
Corner
Designed to be placed in the corner of the kitchen. Mounted to the wall, they come in various shapes - T-shaped or dome. The angular location of the stove is a non-standard solution that allows you to intelligently manage the space of a small room. They require installation near ventilation due to the design features.
Corner hoodHelpful! The corner hood must match the dimensions of the slab or exceed its dimensions. This will make it possible to effectively and quickly remove dirty air and unpleasant odors from the room. In stores there are models with sizes from 50 to 90 cm.
Do-it-yourself pipe masking
Work on the construction of a protective box begins with the development of a diagram and calculation of the required amount of material. It should be taken into account that the distance between the walls and the pipe must be at least 10 centimeters.
Materials and tools
In addition to drywall, to carry out the work you need to prepare:
- tape measure and pencil;
- drywall hacksaw (“Fox”);
- screwdriver;
- hammer;
- galvanized screws;
- “quick installation” dowels (size 6x40);
- UD – profile with holes for fasteners.
It is also necessary to take care of eye and respiratory protection from concrete dust generated during drilling.
Work progress
https://youtube.com/watch?v=MsDV9Sicjwg
First, markings are applied to the wall and ceiling in the places where the guide rails will be fixed.
The workpiece is a structure of vertical and horizontal slats connected to each other using self-tapping screws. The distance between the vertical “stiffening ribs” is set to no more than 50 centimeters.
The drywall sheet must be cut according to the required dimensions. This operation is not at all difficult to perform, since the material is thick cardboard, laid in two layers, between which there is plaster.
The sheet is installed vertically, leaning against the wall. First, it is cut along the top cardboard layer with a knife, then the plaster is broken and the cutter is passed along the fold line.
The finished frame is sheathed on top with prepared sheets, screwing them onto self-tapping screws. The joints between the walls are reinforced with an angular profile. The finished box is finished in a suitable way so that it does not stand out against the general background.
Drywall can be plastered, wallpapered, or painted to match the color of the ceiling. Before this, the structure is puttied and coated with a moisture-repellent primer.
Common mistakes
Often, apartment owners, having set themselves the goal of masking communications, wall them up tightly. Meanwhile, gas workers may well consider this a violation if a gas pipe turns out to be hidden.
In the event of a leak, methane will accumulate in a closed space, which can lead to an explosion and fire. Therefore, it is better to hide gas pipes behind single panels attached to the wall.
Advantages and disadvantages of angular slab placement
If you plan to install the stove in the corner of the kitchen, then you should consider the pros and cons of this location.
The advantages of the L-shaped layout are obvious:
- The kitchen becomes more cozy, since the stove in the corner and the hood above it evoke associations with a fireplace in a country house.
- A slab in the corner is an ideal base for creating a work triangle. Cooking will be as convenient as possible, since both the refrigerator and the sink are in close proximity. If the kitchen area is several square meters, a kitchen design with a corner stove will be the best option for creating a full-fledged functional space.
- A stove moved into a corner will allow you to create a comfortable, full-fledged work area and organize additional storage spaces, which are never superfluous.
- The stove is convenient to use, however, this arrangement will require special care when preparing food. Fat flying around will stain two adjacent walls and both countertops that are closely adjacent to the cooking equipment.
The disadvantages of this layout include:
- Installing a stationary slab and eliminating unnecessary gaps will require a strongly beveled corner. Then the hood, the size of which will correspond to the parameters of the slab, will easily fit onto the beveled ledge. A beveled corner is a loss of precious centimeters, for the sake of which an angular layout of furniture equipment is chosen.
- Giving a special shape to the countertop covering the adjacent cabinets so that it fits closely with the cooking equipment. But before that you need to prepare the corner, then install and connect the stove, and only after that order the furniture. All this increases the time it takes to arrange the described space and causes certain difficulties.
- When purchasing a panel instead of a slab, it will be easier to install a corner. It is made both beveled and straight, but beveled will allow you to install a hood of any shape, any model. We repeat: it is irrational to mow a corner in a small kitchen.
- To install a hob, you will have to order furniture with sloping countertops. Otherwise, the cooking equipment simply will not fit in the corner. In situations where furniture is customized to fit the existing design features of the layout, kitchen equipment is more expensive than purchasing standard sets.
https://www.youtube.com/watch?v=5d-dE7xItAE
Rules for laying the air duct from the hood to the ventilation shaft opening
The quality of the hood’s operation directly depends on how correctly the air duct is laid to the ventilation hole.
When planning your route, remember:
- The bending angle should only be obtuse (more than 90º). A right angle bend will take about 10% of the hood's performance. If the duct has bends less than 90º, this can create backdraft.
- The more bends, the more performance drops. If you get a lot of bends (3 or more), you should make them as smooth as possible.
- The length of the air duct should ideally not exceed 3 meters. Each meter will take 5-10% of the hood’s performance.
Installing an exhaust duct (video)
Choosing a hood
Dimensions play an important role when choosing, that is, width, height and depth. To achieve optimal efficiency from the operation of the exhaust unit, it is required to position it as accurately as possible over the gas stove. Naturally, the size of the hood should match the area of the hob or, to achieve an even greater effect, be 15 cm wider.
It should be noted that built-in models are equipped with a retractable part, which helps to increase the working surface area of the unit; this additional function is an advantageous difference from classic options that do not have such properties. In cases with corner, dome and island hoods, when using non-standard installation methods, the size of the working surface area plays a significant role.
It is very important to determine the desired hood height before purchasing. It is selected taking into account the height of the ceiling, so as not to violate the standards of safe operation, which regulate the minimum distance between the device providing filtration and the hob of 75 cm
You should not try to reduce the distance on your own initiative in order to avoid unpleasant consequences in the form of fire or damage to the device. It is also not recommended to exceed it, so as not to reduce work efficiency.
The use of ventilation pipes for kitchen hoods
The key to a beautiful and cozy kitchen is its impeccable cleanliness. Regular cleaning and clean air are important. Ordinary ventilation is not enough here, since during cooking, moisture and combustion elements are released, which settle on the walls, ceiling, floor and furniture. A ventilation hood will help solve this problem to a large extent. This device requires proper installation, especially at the connection to the ventilation duct. By choosing the right exhaust pipe, you can significantly increase the efficiency of ventilation.
A correctly selected and installed pipe increases the efficiency of the kitchen hood
Any residential building must be equipped with an exhaust hood. This is the most important condition not only for comfortable, but also safe living, since people themselves emit carbon dioxide and moisture when breathing. In addition, decomposition products such as soot, fat, gases and moisture appear during cooking.
As a result, moisture settles on furniture and walls, forming mold, fumes and soot that contaminate surfaces, and combustion elements such as carbon dioxide lead to fatigue, irritability of the respiratory system, poor health and decreased performance. Carcinogens released during frying can cause poisoning. That is why it is important to install a hood, the efficiency of which is greatly influenced by correctly selected pipes.
The evolution and development of air ducts for kitchen hoods
In high-rise buildings built during Soviet times, apartments had a small area. Ventilation in such rooms took not only harmful substances from the kitchen and bathroom, but also air from living rooms. Ventilation ducts were then built directly into the walls of buildings. In individual houses, ventilation was not provided at all, and residents were saved from the harmful effects of carbon dioxide by an ordinary chimney built into the home stove. The products of fuel combustion and decay elements formed during cooking evaporated there.
As a rule, the exhaust duct is not enough, so an additional hood with an air duct is installed
Fresh air entered old houses and apartments mainly through loosely fitting doors and windows, and soot and soot gradually accumulated on the walls and ceiling, so whitewashing was required every year. In some apartments, ventilation ducts were provided - prototypes of kitchen hoods; the same ventilation was installed in bathrooms and toilets.
In modern apartments, in addition to the hood, an additional ventilation system is installed. It can be exhaust or supply and exhaust. In energy-efficient houses, installation of a supply and exhaust system with heat recovery is a prerequisite.
