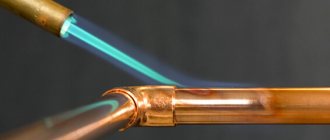
Making a lamp from PVC pipes or metal elements is much easier than it seems at first glance. You can assemble a modern, stylish model in a couple of hours. For this, scrap materials are used: everything you need can be bought in almost any store. The components are inexpensive and a homemade lamp will cost several times or even tens of times less than the finished version.
The simplest option from plastic pipes for a summer residence.
Lamp made of pipes - features of working with the material and assembling the structure
Lighting devices made independently from plumbing fittings have undeniable advantages over factory-made ones.
Among them:
- Unique design. Craftsmen can be sure that their work will exist in a single copy. Such an item takes into account the interior features of the room and will fit well into it.
- Availability of components. The lamps are made from materials left over from repairs.
- Low cost. Chucks, adapters, and switches can be purchased at a building materials store. Components from unnecessary lamps are also used, so manufacturing costs are minimal.
When choosing materials, keep in mind that:
- Plastic segments should be made of a material that bends easily when heated. Polypropylene or polyvinyl chloride is suitable.
- Plastic is sensitive to heat, so it is better to use LED or LED lamps in combination with it. Standard incandescent lamps are allowed in metal products.
- Although designs in the steampunk or loft style look aged and even rusty, you need to remember that these are only design elements. Materials must be free of rust and dried before work, and the antique effect is created on the finished lamp using a chemical patina.
- If structural elements are attached to each other using threads, then their main condition should be the equal diameter of the pipes.
- Adapters will be needed to secure the cartridge and other structural parts.
- Assembly must be carried out according to the diagram and in accordance with electrical and fire safety requirements.
Wall option
The pipe lamp, the photo of which is shown above, is made as follows:
- The grille is removed from the old street-type lamp. If it fits into the interior, this is not necessary.
- A pipeline flange is attached to the cartridge, which will serve as a base fixed to the wall.
- Then it is connected to a tee, nipple and angle. Another flange is attached, then the wiring is pulled through the pipes.
- The height of the lamp placement is adjustable.
- The lamp is connected to the socket and the switch is mounted.
- The flange is attached to the wall using screws, and the operation of the device is checked.
The operation will require the following materials:
- Lamp with or without grille.
- A pair of black nipples for plumbing purposes.
- Cable.
- Two metal flanges, the diameter of which matches the size of the cartridge.
- Screwdriver and fixing screws.
Making a wall lamp from flexible metal-plastic
From polypropylene fittings you can make an original sconce on the wall, with its help you can highlight interior items or zone a room. For this purpose, water pipes of small diameter or ventilation scraps with a diameter of 25 cm or more are used.
In the first case, the pipe can be bent under high temperature using a hair dryer. The pipe heats up to 140°C and becomes flexible. At this moment it can be given any angle. After cooling, the shape is retained. After this, an electric wire is pulled through it, plastic couplings are attached under the dies for fastening to the wall and under the cartridge. The blank can be painted in any color in accordance with the design of the room. This wall lamp would be appropriate in a country house, garage or workshop.
You can make an elegant night light from a ventilation pipe. To do this, a pattern is applied to its walls according to a template, which is then cut out using a drill with drills of different sizes. Using abrasive tips, you can remove the outer layer according to the drawing and get the effect of translucent illumination in places where the walls become thinner.
The edges of the sections are treated with a thin layer of silicone, and the desired tone is applied to the workpiece. After this, wires, a socket and an LED lamp are installed inside the pipe.
How to make a table lamp from couplings?
The table lamp algorithm is universal for most of this type of design.
To make a 2-arm lamp you will need:
- 2 cutting cable 70 cm long;
- fumlenta;
- adapter-tee with thread – 1 pc.;
- double curved fitting – 2 pcs.;
- direct coupling – 2 pcs.;
- adapter with thread for cartridges – 2 pcs.;
- base die;
- metal paint;
- electric base – 2 pcs.;
- incandescent elements – 2 pcs.;
- acetone;
- electrical plug and switch.
All parts are pre-degreased and wiped. The cable is pulled through fittings and adapters, after which they are connected into a single structure and coated with paint. When the workpiece is dry, electrical accessories are attached to it according to the diagram. Parts that cannot be fixed with threads are installed with “liquid nails” glue or sealant.
For such a lamp, it is appropriate to use light bulbs with twisted bulbs, which create a “candle in the wind” effect.
List of required materials
Based on the simple design, I needed:
- metal spray primer;
- decorative spray paint (I wanted to take one with a craquelure effect, but settled on black, and I can’t remember the name);
- degreaser - 1 piece;
- sandpaper - 2 different coarse grits and 2 more pieces of 1000 grit;
- twisted wire loft 2x1.5 - 3 meters. Sold by the meter and used for installing indoor wiring in loft and retro style rooms, I took the darkest one I had, which is brown;
- lamp socket E14 ceramic - 1 pc. You can also buy plastic with an E14 or E27 base, it all depends on what you plan to do and the method of attaching it;
- fabric lampshade - 1 piece;
- electric plug - 1 piece;
- switch - 1 piece (attached directly to the wire);
- cast iron corner with internal thread 1⁄2 - 3 pcs;
- cast iron coupling with internal thread 1⁄2 - 2 pcs;
- galvanized threaded fitting, length 60 mm, external thread 1⁄2 - 2 pcs;
- plug external thread 1⁄2 nickel-plated brass - 1 pc.;
- corner, external thread 1⁄2 nickel-plated brass - 1 pc.;
- nipple 1⁄2 external thread, nickel-plated brass - 2 pcs.;
- We buy a thread locker at an auto parts store. There are several types of them and they differ in the degree of fixation. I took the blue one - according to the seller, it allows you to disassemble the structure without much effort.
This small design was chosen based on the fact that this lamp should sit on the bedside table, and therefore it should not be bulky.
It is worth noting that the lampshade adds some zest to the interior of the cottage living room. The selection of ready-made lampshades is quite large, both in color, texture and material.
The lamp also looks good in the bedroom. The main thing is to choose the power of the light bulb so that the light does not cause discomfort to the eyes.
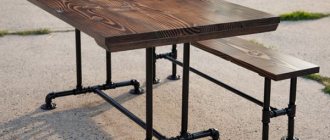
Making a lamp from water pipes with your own hands
By adding pieces of plumbing fittings of equal diameter to the design, you can adjust the height and width of the lamp. The pipes are attached to couplings, and fittings for lighting elements are installed at their ends. The fastening can be installed either sequentially or using a tee.
The process is reminiscent of assembling a children's construction set and allows you to make different types of lanterns:
- wall sconce;
- floor lamp;
- table lamp;
- chandelier;
- Street light.
Adjustable Table Lamp: Initial Manufacturing Process
This DIY pipe lamp is distinguished by the fact that it can be adjusted in reach and height. Many replacement parts are available to find at home, so it is also economical and also custom.
Materials used:
- Bicycle star.
- A pair of metal pipes with a half-inch thread (length - 450 mm).
- Flange.
- Fitting.
- Two elbows at 45 and 90 degrees.
- Two ¾ copper tubes.
- Socket.
- Polymer bushing.
- Electrical cable.
The bicycle sprocket will serve as the base. Holes for the flange are drilled in its center, after which it is painted. Then an iron pipe is screwed into the flange. The upper part of the element is attached to the base of the lamp, and the second part with a larger diameter is installed in such a way that a sliding effect appears. This will allow the upper part of the structure to be folded down by moving the top tube.
The process of making a lamp from pipes in steampunk style
The word steampunk comes from the English steam, which means “steam”.
The concept of “steampunk” is broader than a design direction: it is an entire philosophy in art and a subculture with its own trends in clothing, painting and cinema. Moreover, all items of this genre exist in 1 copy, because they are made by enthusiasts, and not by workers at industrial enterprises.
The basis of the design are the details of the mechanisms:
- hinges;
- levers;
- valves;
- gears;
- chains;
- aged wood;
- pieces of old pipes;
- parts of clock mechanisms;
- Edison lamps;
- pressure gauges from steam engines.
They allow you to experiment endlessly with lamp designs. This could be a pendant chandelier made from scraps of water pipes, a futuristic table lamp in the form of a flask screwed into a water tap, or a floor lamp made of brass wire.
The manufacturing process takes from 30 minutes to several weeks, if the desired color must be achieved through the process of natural oxidation of the metal.
LED lamp
PVC pipe is optimal for this device. It is worth noting that this option is equipped with autonomous power supply. The design of the lamp is as simple as possible; anyone can assemble it with a minimum of tools and materials. You will need several larger pieces of pipe for the base, including angles and fittings, and smaller diameter PVC pipe for the stand. The system uses a resistor with a power of at least 1 watt. This indicator is designed for 6 LEDs.
The circuit is connected in the standard way. It is recommended to use type. This will allow you to quickly make a socket for it in the pipe and will not require cutting out additional elements in the form of a rectangle for the slide switch. In addition, the switch should not be instantaneous, otherwise you will have to constantly hold the button to operate the device. The lamp made of PVC pipes is equipped with a lampshade. Its painting is carried out in several layers. Otherwise, when the diodes are turned on, streaks or uneven processing will be visible. A battery of suitable capacity is mounted at a distance of 80 millimeters from the edge of the pipe at the base. You can also install a switch there. The main thing is that these details do not interfere with each other.
Making a floor lamp from water pipes
When working on a floor structure made of metal reinforcement, you need to remember that stability is important for a floor lamp. The stand must be heavy and reliable. This can be a wooden beam or a metal disk (in this case, welding is necessary).
A floor lamp made of plastic can be supported by 4 spacers made of couplings.
Advantages and disadvantages
Now let's look at the positive aspects and disadvantages of assembling a lamp at home.
Minuses
- painting work - since the smell of aerosol paint will remain in the room for a long time, it is not worth doing this inside the living room, but dust may stick to the open area. Here you will have to find a compromise;
- time - you will have to spend more time on manufacturing than on choosing and purchasing a ready-made lamp, sconce or chandelier;
- Electrical knowledge is not a minus, but a necessity. Depending on the complexity of the design and the desired result, the electrical circuit connection diagrams may differ, and therefore, if you do not have experience, it is better to purchase a finished product.
How to make a hanging chandelier from pipes?
A hanging chandelier with a base made of a water pipe is a creative solution for a large kitchen in a private home or for a cafe. In this case, long fittings of large diameter are suitable, to which lamps are suspended on wires disguised with decorative rope. Jars or bottles coated with varnish for glass and ceramics can be used as lampshades.
If the glass is painted in different colors, the chandelier will create unusual lighting in the room.
Preparation
Sand the pipes to remove any dirt or paint markings. Determine how tall the lampshades will be. I recommend starting with a small, wide piece; this will make it easy to master the technique and even find your own design options. In general, you need to catch the inspiration and drive of creativity. Grind the ends of the pipes; if you plan to further install the lampshade on the stand, then check the level of inclination of the lower part of the workpiece.
The greatest value in the house is peace: how to save a family (advice from a hieromonk)
Planetary alignment in March 2021: good and bad dates for all zodiac signs
Pavel Moskovsky, who maintained a clear mind until the age of 101, derived a formula for longevity
Draw a lampshade pattern with a marker, thanks to it the lamp will diffuse light in space. It’s worth imagining a little, for example, you can draw a schematic flower, leaves, letters, symbols or the silhouette of a building. There are a lot of possibilities in this process, but the first experience should be simplified a little, so I decided to make squares and narrow stripes, and the end result was beautiful.
Making an oil lamp from pipes
Using a tee, a cotton cord and kerosene, you can quickly create an oil lamp that will help out on a hike and in the country. To do this, 3 pieces of thin rope made of natural fibers are pulled through the fitting, after which one side of the tee is closed with a plug, and an elbow is installed on the other, which will connect it to the stand.
The wick is held in place by 3 small hose adapters. Any oil or kerosene is poured inside it, and the wick soaked in it is set on fire.
Street lamps made from natural materials.
An unusual and stylish street lamp can be made from grapevines in the fall. We will need an inflatable beach ball as a template. We wrap the vine around the ball, securing the intersections with wire to strengthen the structure.
After our improvised ball of vine is ready, we deflate the ball and carefully pull it out.
Inside such a ball you can place it as a solar lamp, and wrap it with LED strip for outdoor lighting. Such strips often have a color switch, then using the remote control you can change the color of your street lighting.
Procedure for making an LED lamp from pipes
The combination of LEDs and white plastic is suitable for a high-tech interior. This design is suitable for lighting an office, a store or a living room decorated in this manner. Hanging, wall or floor mounting options are available.
The basic model is a PVC pipe with a diameter of 60 mm, inside which LED modules are attached to thermal tape. You can also cut part of the pipe at an angle, install LEDs and cover them with plexiglass, securing everything with sealant.
DIY loft chandelier made from pipes
The name “loft” comes from the English word “loft” and means “attic”. When decorating the interior, in addition to minimalist design, rough brick walls and massive furniture, open building elements are used that are not hidden in the walls (pieces of pipes, piles, massive beams, open ventilation, valves).
A loft-style chandelier can be made with your own hands without forging or welding. In this case, all decorative elements are attached with glue. The loft style allows the use of a wooden base. The effect of aged wood can be achieved using tea leaves in which the workpiece is soaked. Then it is covered with a layer of tinted varnish.
Making a brass loft chandelier
The loft style is characterized by a combination of similar lamps in one area. But you can make your own chandelier, which will have shades of different shapes.
In this case, lamps of different lengths are hung on a massive beam made of wood or metal, which are decorated with brass caps of different shapes: cylindrical, semicircular or triangular. Design elements can include water taps, kitchen utensils and other scrap that remains after repairs.
The unifying link will be the material of the lampshades and decorations – brass.
Chandelier manufacturing technology
Many may think that when using pipes and plumbing components, a chandelier will look rustic and even clumsy, but this is not so. With the right approach and careful execution, they create a work of art even from such simple materials.
Build process
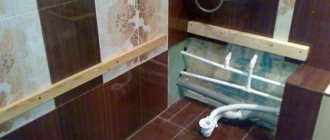
For production you will need pieces of metal-plastic pipes, splitters, a ceiling socket, and cartridges.
To begin with, they think about the design of the future product and the number of lamps that will be installed. In the center of the entire structure there will be a splitter, to which the pipes are connected and bent into the desired shape. Wires are passed through the resulting workpiece. Since the cord will pass through several end points, it is recommended to run parallel lines into each separate branch, connecting them only under the ceiling rosette, excluding breaks inside the chandelier.
Chucks are attached to each pipe at the ends, having previously connected them to the cable. Through a small piece, connect the socket to the splitter. Then the electricity is connected.
The finished product is painted and equipped with lampshades. The main thing is that the result pleases the inhabitants of the house.
How to make an industrial style lamp?
An industrial style lamp implies the presence of household and industrial items in the design. The main requirement for compliance with the style is minimalism and ergonomics.
The lamp can be decorated in silver or dark colors. Small red details are allowed as a stylish accent.
Making a floor lamp from pipes
A floor lamp made of pipes coated with black varnish will fit well into the interior of a bedroom made in light colors. The height and direction of the stand can be adjusted using fittings, which make it possible to give the lamp any shape. Moreover, this model provides for the presence of a lampshade.
It can be made from any available materials that fit into the style of the room:
- thick metal wire;
- kitchen bowl or small saucepan;
- colored glass bottles.
Desk lamp
An original lamp made of pipes will add some zest. The structure can be assembled from scraps available on the farm or purchased material at a hardware store. After purchasing all the materials, it will take no more than an hour to assemble the lamp.
Among the required components:
- Long and short nipple.
- Six pipe squares.
- There are the same number of small nipples that serve as corner clamps.
- Three purposes.
- Drill.
- Wire with switch and plug.
- Insulating tape.
- Hot glue.
First, all pipes are treated with solvent, and the stickers are removed. The light element is inserted into the socket, after which the wire is pulled through the square. The light bulb socket is fixed with glue. The structure is processed carefully so as not to affect the threads, after which it is left until the adhesive composition dries.
Lamp design at home
The basic principles of making a lamp with your own hands are as follows:
- The effect of negligence. The more open, massive parts, the better.
- The undesirability of eclecticism. It is inappropriate to combine crystal lampshades with plastic pipes.
- Limited color range. Futuristic style does not involve bright colors. All decorative elements must be white, gray, black or bronze. The use of copper and brass is allowed.
- Material limitation. Fabric, rubber, natural materials will not fit into the style.
- Dim lighting. You should not use powerful incandescent lamps, because retro style implies dim light. You can use a dimmer to control lighting.
Pattern
Cut out the drawn contours with an engraver, use a diamond-coated nozzle; it cuts through thick plastic perfectly, leaving a small amount of burrs. Create a through pattern; the more openwork the pipe is, the more intricate the play of light and shadow will be.
Remove the remaining plastic from all the slots; this is almost a jeweler's job of polishing the material with your own hands, but the accuracy and quality of the final product depend on it.
What rules should those vaccinated against COVID-19 follow: protein foods and more
Loss of muscle mass begins at age 30: diet and fitness will save the day
X-rays helped scientists “see” schizophrenia
Carefully sand the sharp edges in the slots, giving them a rounded shape. Shake off any shavings from the outside and inside of the pipe and wipe the surfaces with a damp sponge.
What difficulties may arise during the manufacturing process?
To avoid any difficulties during the work process, and to ensure that the lamp pleases you with its appearance, you need to take care of the following things in advance:
- The same thickness of the components of the base and its correspondence to the diameter of the thread on the adapters.
- Reliable fastenings. Buy mounting surfaces for wall lamps and pendants for chandeliers in advance.
- Installation of the lampshade. Often it is not possible to attach the desired lampshade due to different diameters of the outlet holes. It's a good idea to consider a design with an exposed incandescent lamp. You can use colored glass bulbs, the light of which compensates for the lack of a cap.
- Fastening the base. It is not always possible to find fittings with threads corresponding to the diameter of the cartridge. In some cases it will have to be mounted on glue.
It is important to remember that any metal structure through which electric current passes must be grounded, and all wire connections must be reliably insulated.
Tools and materials
This instruction describes the principle of creating a lampshade; the decor must be invented and implemented independently.
Bare plastic does not look very presentable, but if you paint it, cover it with a mirror film, and decorate it with wood, the lamps will receive a creative design according to the tastes of the owner.
What you will need:
- PVC pipes of different diameters.
- Hacksaw, sandpaper.
- Battery-powered light bulbs with a sticky backing.
- Hand engraver.