Heating a bathhouse from the home heating system
If the central heating system of the house has sufficient power, the auxiliary rooms of the bathhouse can be heated using it.
To do this, heat-insulated pipes are laid from the home heating system to the bathhouse, to which heating radiators for the auxiliary rooms of the bathhouse are connected. In this case, the stove-heater can only be used to heat the steam or washing section of the bath, if necessary. If the distance from the water heating boiler of a residential building to the bathhouse is small, then heat loss with such a heating system can be minimal.
In addition, the presence of an independent external heating system will allow you to maintain the optimal temperature in the bathhouse during the winter. This is required to prevent freezing of water supply and sewerage pipes, as well as the bathhouse itself. The combination of heating systems of a residential building and a bathhouse in this case can be of an auxiliary, backup nature.
Cast iron stoves with water circuit
Cast iron stoves with a water circuit are produced in different capacities and are designed for heating different areas. Some of them are capable of heating a two- or three-story house. The heating circuit is constructed using the same system as for brick stoves.
Long-burning cast iron stove with heating circuit
Furnaces are produced from cast iron and combined type, i.e. having electric heating, which turns on automatically when the temperature of the smoldering firewood decreases. This combination of oven functions will always help maintain the heating system at the desired temperature.
One of the possible heating schemes for a two-story private house
Cast iron boiler-stoves can also be designed for a double-circuit heating system, i.e. In addition to the warmth in the house, the owners will also have heated water.
What should you consider when choosing and installing a stove?
When choosing which heating stove will be installed in the house, you need to correctly formulate the requirements for it, and, based on them, purchase or build a heating device.
- The heating properties of the entire brick kiln structure are very important. Therefore, if you decide to install such a stove, you need to choose the right project and ensure the ideal construction of the building.
- The efficiency of the heating system will also depend on the design and layout of the water circuit, as well as the choice of radiators for the heating system. There are stove designs that can operate in summer and winter mode - this factor also contributes to the economical operation of the device.
- Part of the savings can be attributed to the long cooling of the furnace, which will allow you to use less fuel.
- An important point is ease of operation and maintenance.
- The structure must comply with all fire safety rules for its location and installation.
- A properly executed design will have the required draft, which will protect the house from carbon monoxide entering the premises.
- The oven must be designed for a long period of operation.
- Of course, it would be nice for the stove to become a real decoration of the house, and not just be functional from a practical point of view.
How to heat water in a bathhouse from a stove
You can organize heating of water in a bathhouse with a brick stove using a cast-iron stove above it. The hot water tank is installed directly on the stove itself, it can be round or square, with water supplied to fill the tank from the incoming water pipe and hot water drawn through the tap.
You can heat water without connecting water pipes to it. In this case, for each heating of the steam room, reserves of cold water should be made in the dressing room, and the water tank should be filled manually before lighting the stove.
This method of heating water is quite simple, but it has significant disadvantages:
- labor intensity of preparation;
- increased humidity from boiling during prolonged heating;
- risk of getting burned on the heated walls of the oven and tank.
You can heat water from the stove in different ways. This depends on the type of stove itself, the presence of water pipes connected to the bathhouse, the financial capabilities of the owner and his desire to make certain efforts.
Heating water in a bathhouse through a heat exchanger
The best option for heating water in a bathhouse is the heating method using a heat exchanger. There are several ways to make a structure for heating through a heat exchanger.
In a brick oven, the heat exchanger can be a multi-section cast iron battery or a register welded from a thick-walled steel pipe. The heat exchanger is mounted in a special furnace cavity with separate inlet and outlet valves. When the stove heats up, the water in the exchanger becomes hot and is dispensed through the water tap as needed.
In the case of a metal stove, everything is much simpler. In order to heat water with such a furnace, several types of heat exchangers are used:
- external heat exchanger (located in close proximity to the firebox or above it);
- internal heat exchanger (located in the firebox itself);
- heat exchanger on the flue pipe (located on the chimney pipe above the tank with stones).
Advice! The water tank with heat exchanger and the hanging tank can be used simultaneously. This combination makes it possible to heat an almost unlimited amount of hot water.
Water heater for a bath on a pipe
To heat the water in the bathhouse, tanks located on the pipe are used. They can have a rectangular, square or cylindrical shape and are rigidly mounted on the stove chimney pipe. Pipe water heaters are universal; they are used in wood stoves and gas boilers. The water tanks on the pipe are small (optimally up to 80 liters) and can fit even into a small bathhouse.
The tanks on the chimney pipe are located high enough above the stove, so there is no need to pump up hot water - it simply flows by gravity. The water tank can occupy the entire length of the pipe, from the heater itself to the ceiling. This increases the hot water production area and the efficiency of the heat exchanger.
The design of the water tank on the pipe must have reinforced fastening to the stove and the exhaust chimney on the ceiling, since a tank filled with hot water is heavy. The usual soft fastening of the chimney in the ceiling area is not suitable here, so for fastening it is best to use special chimney brackets.
Built-in or attached water tank to the stove
Another option for heating water is a water tank built into the stove structure or located on the side of it.
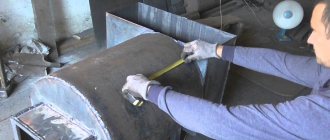
A built-in tank is a rather complex structure that must be thought out before laying a brick oven. The optimal solution here could be a special niche or recess in the furnace to accommodate a water tank with inlet and outlet valves and hot water intakes. It should be noted that for such a design the tank must be durable (preferably made of stainless steel), with thick walls and double welded seams. Otherwise, if a leak is detected, the entire structure of the furnace will need to be disassembled.
A water tank attached to the side of the stove is a less energy-intensive way to heat water. It is often used in bathhouses with metal stoves, which are supplied with water tanks. Since the steel or cast iron body of the furnace has good thermal conductivity, the water in the tank heats up quickly, and if necessary, the tank can be easily refilled (centrally or manually).
Hot water in the bathhouse from the stove (the layout of the water tank is shown below) is a simple task for a good owner.
Integrating a water container into the oven
In this case, the water heating tank can be combined with the stove base in the following ways:
- if you want to make a hinged structure, the container is attached from the outside to the side wall of the furnace or installed on its body (if the latter is positioned horizontally);
- The heating tank is built into the stove structure directly above the firebox (stove).
As a variation of the second option, installing a remote tank in the washing room can be considered. In this situation, heating is carried out indirectly, for which a water circuit built into the firebox is used.
System Features
When installing a heated water floor in a bathhouse powered by a wood-burning stove, there is no need to install a boiler. However, a heat exchanger needs to be built above the firebox. Any stainless steel tank that is not prone to corrosion is suitable for this. A circuit extends from it into the room where the heated floor will be installed.
To return the waste liquid to the tank, you will need to install a small pump. Without it, the design will only work when the stove is located below the level of the floor covering. The diameter of the pipe with this scheme should be taken equal to 16 mm; the usual 24 mm ones will not work.
The main feature of the stove floor design is the inability to adjust the temperature level. The recommended temperature of heated floors in the bathhouse is 40 degrees, but the heat carrier from the stove will heat up to boiling water.
Video
Therefore, it is necessary to make a mixing block in which hot water will be mixed with already used water, thereby reaching the desired temperature level.
Since it is not possible to install a large container in the furnace, you can place a battery tank near it and stretch steel pipes from it to the heat exchanger.
What makes this type of floor heating system unique?
Thermal energy tends to the top, so in the bathhouse the air is distributed in layers - cold at the bottom, hot at the ceiling, most comfortable in the center. Therefore, the floor in the bathhouse is always cold, which cannot but cause discomfort. This problem is especially relevant for baths with ceramic tiles on the floor. This finishing material is beautiful, but has a cold surface. But there is a way out - to mount the system in the floor, the coolant in which will be heated by the stove.
Instead of a boiler, the heating unit will be a furnace, so a heat exchanger is installed above the firebox - a tank made of stainless steel or other metal that is not subject to corrosion. The pipeline from the heat exchanger is carried out to the premises where the “warm floor” will be installed.
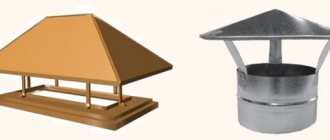
Sauna stove with heat exchanger
To return cooled water back to the tank, you need to install a circulation pump. It is impossible to refuse it, since the stove is not installed below floor level. It is recommended to choose a pipe diameter of 24, while for installation of “warm floors” in residential premises, contours of 16 diameter are chosen. The main feature of a water system powered by a furnace is that the temperature of the coolant inside cannot be adjusted.
For a “warm floor” system, a comfortable coolant temperature is 40 degrees. Very hot water, almost boiling water, will be supplied to the system from the stove, which is unacceptable. Therefore, it will be necessary to install a mixing unit, where the cooled coolant will flow into the hot water. It is advisable to install a “warm floor” from the stove in all rooms of the bathhouse.
Cake of water “warm floor”
Cast iron stove
Cast iron stoves, although small in size, are capable of heating a fairly large room with a volume of up to 80 - 90 cubic meters. meters. This option will be ideal for a country house, since the device has a hob function. Thanks to their elegant design, today they are also happily installed in expensive mansions, as they are an interior decoration.
Cast iron heating stove
The best option of all cast iron models is a long-burning stove. It is capable of transferring heat into the room for a long time, despite the fact that firewood is placed in it once during the entire heating period. This effect is achieved due to the internal design of the furnace, which allows the active flame to be reduced to slow smoldering.
A long-burning boiler-stove can also have a water circuit.
Installation of a water floor from a sauna stove
Initially, water heated floors were not intended for installation in a bathhouse. Therefore, when laying such a “pie” in a bathhouse, it is required to equip it with additional elements.
The installation of a water heated floor from a sauna stove includes several components:
The heated floor contour is the main working element, which is laid evenly across the entire floor of the room with a certain pitch, filled with a concrete-cement mixture screed. You should choose the right pipe model; in this situation, not every one will be suitable. It is best to use copper, metal-plastic or stainless steel corrugations. However, many people prefer cross-linked polyethylene pipes with increased heat resistance, with a service life of at least 30 years, or polypropylene pipes, with a warranty period of at least 50 years.
The mixing unit is an important part of the system, since the stove is not capable of heating the coolant to the required level. It heats the water almost to the boiling stage; in this state it cannot be supplied to the circuit. Therefore, a mixing unit is needed, in which boiling water will be mixed with the waste coolant to the required 40 degrees, and in this form it will be sent into the pipeline. It is used to regulate, configure and automatically maintain the temperature level of the heated floor in the desired mode.
Heat exchanger - a container, coil or register located above the firebox, where the liquid from the furnace is heated. When using antifreeze as a coolant, you will need to equip a separate heat exchanger, then the antifreeze will not be able to get into the washing water.
A circulation pump is necessary to ensure that the coolant is evenly distributed and moves through the pipeline. Without it, a warm water floor cannot function, as it provides the circuit with additional pressure for fluid circulation. When selecting the pump power yourself, you need to take into account the area of the heated room; the larger it is, the higher its performance should be.
To reduce the load on the pump, it is recommended to divide the pipeline into several parts of equal length.
Drainage is necessary to remove excess liquid from the steam room and washing room of the bathhouse. You can equip it with your own hands, taking into account the following two points: by constructing a water outlet - a drainage hole, through which the water will flow into the pipe and be discharged into the sewer pit; fill the screed with a slope in the direction of the drain hole - then all the water will flow towards the slope.
Connecting the water supply from the house to the bathhouse
Air laying of temporary water supply in a bathhouse is allowed only if it is insulated and regularly uses the steam room and water.
But even in the warm climate of the subtropics of Sochi, frosts occur in winter, so sooner or later, such a water supply system will freeze. Therefore, all ground and air options can only be used in summer, and for a winter dacha, the water supply system will need to be laid in the ground. For areas where there are frosts of more than -20°C in winter, the water supply in a bathhouse without heating can simply be retrofitted with a diffusion drain valve. The process of arranging the valve drain is as follows:
- Under a polyethylene water supply pipe, in a convenient place, perhaps even in a bathhouse, a mini-well is punched in the ground to a freezing depth of plus 50-60 cm. The diameter of the punched hole is slightly larger than the diameter of the water pipe;
- In the area above the mini-well, a U-shaped elbow, also plastic, is soldered into the polyethylene line. At the lower point of the elbow, a fitting is cut into which a plastic drain pipe is placed, with a length equal to the depth of the mini-well;
- A thick geotextile cover is placed on the end of the drain tube. A small amount of sand is poured inside the mini-well so that the end of the drain pipe connected to the water pipe elbow rests slightly on the sand cushion.
Advice! Before making a well for water in the bathhouse, you will need to conduct a small reconnaissance of the depth of the water layers. Otherwise, instead of draining into the ground, you can end up in an underground spring, and then all the work and effort done will be in vain.
It is clear that when working under pressure, part of the water flowing through the plastic water pipe will fall into the ground. But this will be a very small amount, no more than 20-25 liters for a whole day of active use of the bathhouse. After the valve at the inlet is closed, all the moisture remaining in the winter water supply pipe will begin to flow into the elbow.
Often, before building a winter water supply system in a bathhouse with your own hands, the problem arises of choosing the appropriate pipe material. The answer to the question is not as obvious as it might seem. For example, polypropylene pipes No. 25 are ideal for distributing water in the shower bath of the wash compartment. Plastic is easy to solder and lay in the most inaccessible places, so most of the plumbing in the bathhouse is made of polypropylene.
For a winter water supply system laid in the ground between the well and the bathhouse building, polypropylene pipes must be seriously insulated and equipped with heating. If water regularly freezes inside a polypropylene container, then after 20-25 cycles of freezing and thawing, cracks will appear in the welding areas, and after a couple of years the bathhouse will be left without running water. It is better to immediately replace them with polyethylene, which has amazing plasticity even at -50°C.
Inside the bathhouse, plastic can be used without restrictions. With the water supply valve closed and the taps open, the water will in any case flow to the lowest point of the water supply system, which is usually equipped with a liquid discharge line. The exception is the transition from the water supply manifold to the taps and hot water tank inside the steam room. This part of the water line in the bathhouse is made from a half-inch steel pipe.
The situation is greatly simplified if the steam room is located next to a heated house. In this case, the water supply to the bathhouse can be laid without any special tricks or reinsurance.
The material you can use is polypropylene pipes, preferably the “Stabi” brand, reinforced with thick aluminum foil. In the house, the winter water supply pipe is connected to the hot water supply system. It can also be connected to the cold water outlet, but in this case, to heat the main line, you will need to put a heating element on the connecting coupling. The thermal conductivity of the foil will be sufficient for the heat supplied to the pipe to spread over 5-7 m of the length of the water pipeline.
To lay the main line, it is enough to dig a trench 60-70 cm deep between the house and the bathhouse and fill it with bulk thermal insulation. The plastic pipe is covered with two-layer polypropylene thermal insulation, laid on a cushion and covered with clay soil.
If the distance between the bathhouse and the house is more than 7 m, then you will need to use a self-regulating heating cable. The plastic line is pre-covered with metal foil, then a 24 V cable is wound in a spiral, after which a “stocking” of thermal insulation is put on and laid in the prepared trench.
It is clear that you will have to heat the winter water pipe in the bathhouse around the clock, so to ensure fire safety for electric heating you will need to make a separate step-down transformer with a circuit breaker.
Very often, the main source of water for a bathhouse at a dacha or in a suburban area remains an ordinary well, dug quite far from the steam room. You have to take water from the well using a submersible pump. The water supply pipe is laid in the ground to a depth of at least 2 m and led into the well shaft through a hole in the side wall. A rubber corrugation or hose for the electrical wiring supplying the pump is laid along the same line.
To avoid defrosting of the winter water supply, a check valve is not installed on the pump, and a drain air valve is installed on the inlet line in the bathhouse. After completing the bath procedures, it is enough to open it for 10-15 minutes so that the water runs back into the well. The liquid can drain without an air throttle, but the process will be quite long, and in severe frost the water at the drain in the well shaft may be covered with ice.
The second most popular method is to supply water to a bathhouse from a well. The water supply system for a bathhouse is not much different from the system for an ordinary residential building, but it also has its own tricks.
If the bathhouse has a full-fledged sewerage system with drainage of dirty water into a septic tank, then a well for water supply can be drilled under the bathhouse building. It is clear that in this case it will be necessary to make a full-fledged MZL foundation with insulation of the support tape and blind area.
If the well is located outside the building, then the shaft will have to be equipped with a warm brick caisson with a double hatch. In order not to freeze the valve fittings of the water supply system, the entrance hatch at the well head is supplemented with a warm sash made of polystyrene foam or expanded polystyrene 70 mm thick. The caisson walls can be insulated with PPS or polyurethane foam up to the very bottom.
To discharge water from the water supply system, a drain valve with a short adapter elbow connecting the pipe to the well shaft is installed on the outlet line of the submersible pump. To drain the remaining water accumulated in the water supply in the bathhouse, just open the valve for 5-10 minutes and remember to close it back.
Many owners install remote-controlled electric valves so as not to lower themselves into the caisson after each wash in the bathhouse. This is convenient, but in practice manual valves are more reliable.
Source of water supply
A water source is rarely constructed exclusively for a bathhouse. In the absence of a centralized water supply system, a water supply system is needed primarily for residential buildings and household needs. Therefore, as a rule, a bath water supply system is built into an existing private water supply system. For this purpose, a collector distribution line is installed, where the pipe is routed to the bathhouse building.
The most common source of water is a well. It most often reaches the second aquifer, and its depth is 10-30 m, depending on the depth of the groundwater. If the task is specifically to make water in a bathhouse of a wooden or other structure, then the potable degree of purification is not necessary, which means that it is enough to open the uppermost water carrier at a depth of 5-10 m. Such water should not be used for cooking, but for It's quite suitable for swimming.
Water supply diagram from a well
The depth of the well shaft is important for choosing the type of pumping equipment. The fact is that when lifting from depths of up to 12-15 m, you can safely use conventional centrifugal, surface pumps. With a deeper fence, you will have to lower the deep, submersible installation, which is somewhat more expensive and more difficult to operate.
Another option for a water source is a well. Its depth is 30-50 m, which makes it possible to reach the lower artesian layers, which provide especially pure water, and most importantly, a large and stable volume of liquid for a long time. It is the inextricability of the well source that is considered its main advantage, because wells tend to dry up periodically. The lifting of water from the well is ensured only by deep pumps.
In principle, a third option is also possible - pumping water from a natural reservoir. However, such a system is used quite rarely, and most often unofficially, because requires approval from the relevant authorities. The most important thing is that in this case you will have to solve the problem of installing a rather complex treatment plant.
Tips for installing water supply for baths
In order for the system to serve for a long time and be reliable, you need to plan the construction of the bathhouse and water supply carefully, taking into account all the nuances.
Selection of materials
It is very important to choose the right pipes for supplying and distributing water. They must be durable, easy to install and withstand significant temperature changes.
- Steel pipes, for which there were practically no alternatives in earlier times, are practically not used today due to their instability to corrosion. They wear out quickly, and their replacement is associated with large expenses and a large amount of work.
Steel pipe after several years of use
- Polyethylene pipes are resistant to low temperatures. They are flexible and durable, easily connected using special fittings. They are convenient to use for laying summer water supply. PE and HDPE pipes do not require preservation; it is enough to simply drain the water from them for the winter.
Polyethylene pipes and fittings
- Polypropylene pipes are indispensable for the installation of external underground water supply and internal wiring. They are securely connected by soldering.
Glass fiber reinforced polypropylene hot water pipes
- Copper pipes are the most expensive. They have excellent performance characteristics. Their main area of application is a hot water supply system in a bathhouse with a remote hot water tank.
Copper pipes in the bath
Installation features
The pipeline must be protected from external influences and soil pressure. To prevent pipes underground from receiving mechanical damage, the instructions recommend laying them on a sand bed or placing them in a corrugated hose of a suitable cross-section.
This will prevent them from being deformed and compressed by the layer of soil located above, and will protect against its seasonal movements.
In order to have access to a sauna throughout the year, the water supply in winter needs to be protected from freezing. And first of all, this applies to complex pumping equipment.
- If the pump is submersible, it is in the water. It can freeze only in severe frosts if it is standing close to ground level. In this case, it is necessary to insulate the outer walls of the well and equip it with a lid.
Warm cover for the well
- The presence of a pumping station will require the installation of a caisson or an insulated pit in the bathhouse.
Insulated caisson
- Any system must have drain valves to be able to completely drain water from equipment and pipes during extreme cold weather.
Faucet for draining water to the street
How to choose the right system?
When choosing a water heating system, consider the following parameters.
If you are choosing equipment for a small room, opt for a compact unit. Modern manufacturers offer mini-equipment that boasts high technical performance. Another important parameter is the speed of water heating. Some options quickly heat water to the desired temperature, others work more slowly, but have their own positive characteristics. If you don’t have a lot of time to warm up the steam room, choose the first equipment option. The most important characteristic when choosing equipment is consumables. In this case, you need to consider cost and capabilities. For some users, it is not profitable to use gas for the reason that it is not installed in a specific area. Many people are accustomed to heating with wood and continue to use the natural resource. Before making a choice in favor of a specific option, it is necessary to compare the advantages and disadvantages of all types of heating equipment
Pay attention to the cost of the unit. One model may have different prices depending on the store.
Heat exchanger for a sauna: why is it needed, how to install and connect to a sauna stove
Having made the right choice of heating equipment, you can steam and wash without purchasing and installing a boiler. A reliable, modern, spacious heat exchanger for a bath will perfectly cope with the role of a heater: it will be able to supply the required volume of hot water to the storage tank. In this article you will learn about the options and operating features of the technical tool that exist today, practical advantages and the most popular models.
What it is
The device is used to heat water in the bath. Its operating principle is based on the physical properties of hot water, expanding and rising upward, while cold water remains below.
Typically the heat exchanger is small in size, so the liquid in it heats up quickly. Two pipes are connected to it - below and above. Thus, hot water through the upper pipe, replaced by cold water from below, rises into the tank, which can be located either in the steam room or in an adjacent room, usually in the sink. In this case, low-temperature water is constantly added to the heating device through the lower pipe without forced supply.
Options for heating water in a bath from a stove
The following models are distinguished:
1. Samovar-type container - installed on the outlet pipe of the chimney. Heating occurs due to the heat of the flue gases escaping into the chimney. A tap for dispensing hot water is connected to the fitting at the bottom of the tank. If you don’t have a washing machine, then this option will be an excellent solution for heating. We recommend paying attention to the following operating conditions:
- the use of a samovar-type tank is allowed only with bathhouse stoves;
- It is prohibited to operate an empty tank while the stove is operating;
- If you want to get a “Finnish sauna”, this option for heating water will not suit you, since if the steam room is heated for a long time, the liquid will begin to boil, which is why heavy steam is formed.
2. A samovar-type heat exchanger (small in size with the ability to connect to a tank), which can be located anywhere. It is convenient because, if available, the tank can be placed in the washing room. One of the obvious advantages over other options is that it quickly heats the water.
3. Heat exchanger, which is installed on the starting chimney.
4. Starting chimney + tank-backpack - an option with being in a steam room and the absence of controlled convection to warm up the room. The container comes into contact with the wall of the chimney pipe, due to which the liquid is heated. Among the disadvantages, it can also be noted that this model does not have protection from hard infrared radiation, and in case of strong heating, the water begins to boil.
5. Convector chimney with a heater built into it.
Features: the register is located inside a pipe from which 2 identical ¾-inch fittings with internal thread come out. Using pipes, the device is connected to a tank hanging in a convenient place.
May be:
- Built into the oven - when scale appears, it loses efficiency.
- Located near the chimney (on it) - it provides heating to the required temperature more slowly, but nothing settles on its inner surface, it is easy to access, and its repair is not difficult.
The choice depends on the user: what to give preference to, performance or ease of maintenance, saving usable space or fuel.
Difference by type
The simplest designs of heat exchangers are coils with ends removed from the tank: one takes in liquid at room temperature, the other releases hot liquid.
More complex ones are a system consisting of two metal tanks with anti-corrosion properties - cylindrical and rectangular in shape with connecting pipes.
At the location of the water tank
There are two ways:
- This photo shows an option for installing a heat exchanger in a steam room and a tank in a wash room.
- The second option is to install a heat exchanger with a tank inside the steam room.
Advantages of installing a heat exchanger in a steam room
- high water heating speed;
- saving free space in the steam room;
- Wide range of options for installing the tank - in a steam room or in a shower room.
Features of installation and operation of the heat exchanger
Installed between the firebox and convector:
- built into the oven;
- attached to the chimney;
- or built into it.
The productivity of the device with a capacity of 5 liters is enough to quickly fill a 120-liter tank with hot water. It’s easy to use – just organize a timely supply of liquid (uninterrupted operation can be ensured by using a circulation pump) and “feed” the firebox with firewood.
When installing a heat exchanger (recuperator) for a bath, the following points must be taken into account:
- the total length of pipes for water supply should be laid at 3 m, which minimizes heat loss;
- with a connecting pipe diameter of 1 inch, it is permissible not to use a circulation pump.
The longer the heat exchanger is in use, the more justified the installation is from an economic point of view.
Rules for installing a heat exchanger on a sauna stove
The following rules must be followed:
- The heat exchanger must consume no more than 10% of the total energy produced by the furnace, then the latter will operate with good efficiency.
- The pipes must be laid so that the water flows by gravity, that is, at a 250-degree slope on the direct supply and 30-degree on the return one.
- It is important to reserve power for cooling after fuel burns.
- It is necessary to provide a sufficient volume of water for each individual model, because if there is too little of it, it will boil quickly, which can lead to the formation of deposits on the walls and a fire hazard, and if there is too much, you will have to wait a long time before taking a shower.
How to connect a heat exchanger if the tank is in a steam room:
- The entrance to the hot water tank should be at least 5 cm higher than the upper register fitting. This is necessary for better circulation.
- The upper register is from 1.4-1.5 m from the floor, despite the fact that the podium under the stove is 15 cm. The bottom of the tank in the steam room should be at least 1.5 m, and preferably higher.
- If the tank is 0.5 m high, then we have a total installation of 2.0 m. That means there is still half a meter to the ceiling. And here the question arises: how to fill the liquid. If there is a running water supply, then water will flow without problems.
Existing types of sauna stoves
Currently, there are a large number of varieties of furnaces with heat exchangers and water tanks.
Their diversity is due to the fact that there are factory-made ovens and home-made devices.
There are two types of factory devices:
- with built-in heat exchanger;
- with an external tank for heating water (usually installed on the chimney pipe).
In various designs of stoves with a heat exchanger, there are options for connecting a water system to provide hot water for the shower, or a heating system so that it constantly works in the bathhouse.
Reference. Homemade devices most often have a tank installed on the chimney pipe for heating water.
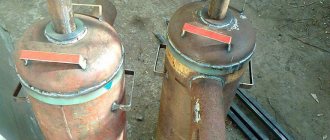
With pipe water tank
This design is the simplest version of the unit, since the water tank is installed directly on the chimney pipe, which requires virtually no additional labor costs.
Water is heated by the hot walls of the water tank body.
The general diagram of such a stove is as follows:
- blower;
- firebox;
- chimney;
- a water tank installed on the chimney.
The main feature of this design should be considered that there is no direct contact with the heat source in this stove - the water used as a coolant in devices of this kind is heated from the walls of the tank itself, located on the chimney.
Photo 1. A stove for a bath with a pipe-mounted water tank. The liquid is heated from the walls of the tank itself.
The dimensions of the structure can vary from 80 to 150 cm in height, and also from 30 to 60 cm in width, depending on the total volume of the steam room; with an installed water tank, the size of the structure can reach 200 cm in height (excluding the size of the chimney).
With a heat exchanger, how it works
A device with a heat exchanger is a more complex structure in which the coolant (water) circulates through the system due to the difference in temperature and the resulting difference in pressure.
The diagram looks like this:
- blower;
- firebox;
- chimney.
Important! In such a furnace, the heat exchanger is installed in the firebox body, but in a special way to avoid its direct contact with an open flame. The heat exchanger is connected to the water tank using two fittings, which allow for water circulation and uniform heating of the coolant
The heat exchanger is connected to the water tank using two fittings, which allow for water circulation and uniform heating of the coolant.
Since the heat exchanger is installed in the stove itself, its height, as a rule, does not exceed 120-150 cm, the width ranges from 30 to 60 cm. The height of the chimney is not included in the overall height of the structure.
Heat exchangers
Devices operating on the principle of heat exchange have a classic design, according to which a small volume heating tank (no more than 5 liters) is installed in the hottest place of the furnace.
The cooled medium flowing through it is heated to a high temperature and then flows through a system of twisted pipes into a tank with working water. Its capacity significantly exceeds that of the internal tank (it can reach 120 liters).
Important! In order to eliminate the possibility of steam shock due to the rapid boiling of water in the heating tank, it is poured into a system of two containers even before the sauna stove starts igniting.
Taking this into account, the carrier in the first container is heated gradually and, due to the temperature difference, flows by gravity into areas with reduced pressure. Flowing through the primary circuit, the pipes of which are in contact with the external (heated) aqueous medium, it gives off its energy to it and enters the output of the system in an already cooled form.
Next, the entire heat exchange process is repeated, ensuring continuous circulation of the hot medium and heating of water in the user (working) tank. In order to avoid troubles associated with the formation of air pockets, as well as to maintain the required heating mode, an electric pump is often built into such heat exchangers.
Drain system
How to drain water in a bathhouse? This is a primary issue, without which it is impossible to equip your own water supply system. All water from bathhouses must be removed outside the building and collected in special containers. First of all, in the steam room and washing room, drain holes with a ladder are installed on the floor, and the floor itself has a slope for gravity flow of waste water to these holes. A liquid drainage system in the form of pipes or trays is installed under the floor.
The question of how to drain water in a bathhouse also involves solving the problem of its disposal. Wastewater must not be discharged into the ground without treatment. To ensure this, special filtering septic tanks are constructed in which mechanical, chemical and biological purification of the liquid occurs. As a rule, a septic tank system consists of 2-3 wells with filters, after which the water can be discharged into the ground. The drainage is provided by gravity, for which the pipes are laid with the required slope.
Scheme for draining water from a bathhouse These are sealed containers of the required volume in which water drained from the bathhouse is accumulated. When they are filled, the liquid is pumped out and removed.
When arranging a sewage system, it is important to remember that it must function in winter, therefore, it is necessary to use the same methods as when installing a water supply system - burial below the freezing level, thermal insulation of pipes, insulation of septic tanks
Water supply to a bathhouse in the absence of a centralized water supply is a rather complex, but completely solvable problem. When installing such a system, technical recommendations and sanitary requirements should be followed. When using electric heating or gas devices, we must not forget about fire safety.
Heating methods
Operational heating of water in a bathhouse is usually organized in one of the following ways:
- using a wood boiler;
- installation of a gas-powered column that provides rapid heating of the water mass;
- use of electric heaters such as heating elements;
- heating in a special container mounted either close to the stove or in the chimney duct;
- arrangement of a special unit operating on the principle of a heat exchanger.
There is another known method that manages to heat water within a bathhouse, called combined. It consists in the joint use of the main heating boiler and auxiliary devices such as heating elements.
Additional Information! All of the above systems are able to work effectively only when water continuously flows into the container allocated for it.
Despite the well-known variety of methods for heating water in a bathhouse, only the first three are the most popular. Let's look at each of them in more detail.
We heat for heating
Frost creates additional requirements for how we heat a bathhouse in winter.
How to drown
The rooms become cold, approaching the temperature of the environment. In this case, heating immediately causes the appearance of condensation - water vapor from the air strives to instantly settle on something colder than the air itself.
The process of kindling in such conditions becomes an art. Of course, what type and fuel you use is also of great importance. It is difficult to cope with a brick stove; an iron stove is simpler in this regard.
There was a video on the Internet, the author of which shares his experience of lighting a Feringer stove at sub-zero temperatures:
But this is not so much about art, but about whether a small stove can bring a steam room out of the red in an hour. The author clearly shows that he can.
We want to say that you can’t break time records with a brick, but if it happens in winter, and the bathhouse has cooled down to sub-zero temperatures, then you need to be more careful with the stove.
After a cold period, the brick oven is first slowly heated and the moisture is allowed to evaporate.
The video below shows the process of heating a brick stove in a house, and this is somewhat different, because in the house the stove is not overcooled, it does not need to be gradually turned into positive mode, besides, it has a different operating mode - it is heated only in cold weather and constantly, and the bathhouse is heated for procedures at any time of the year. But so far no one has made a video about how you can heat a bathhouse in winter with a brick stove.
How can I heat it?
The question “how to heat a bathhouse in winter” can be answered in two ways - talk about what kind of firewood is best suited for winter heating. Or how to achieve a comfortable temperature for a person in rooms other than a steam room. Above, we have already talked about alternative methods for heating a bath without heating in winter.
Therefore, here we will only say that the only fuel whose quality depends on us is firewood. And you should know that this quality determines how well your stove will work. Specifically, how long will your chimney last without cleaning?
This is influenced by the presence of resin in the firewood - firewood made from coniferous wood is, of course, the cheapest, but it also creates the most problems. Because during combustion, more soot is formed, which settles in the chimney pipe.
Hardwood is much better in the firebox. But they also differ in the heat of combustion. Unfortunately, valuable hardwood species have the highest combustion heat - oak, hornbeam, and ash are good for burning. But, on the other hand, not all of their wood is suitable for processing and turning into building materials, furniture or something else.
Fruit trees (cherry, apple, etc.) are suitable for heating; they are only slightly inferior in heat of combustion to the species mentioned above.
Next come deciduous trees, but not so rare - birch, alder, etc. It is better to use them than conifers.
Another important characteristic of firewood is its moisture content. The damper the wood, the worse it burns, everyone knows this. Therefore, the woodpile should be located in a dry place, protected from precipitation, and you can also dry the wood next to the stove, using its heat to drive out excess moisture from the wood, which will then go into the firebox.
Brick oven
So, as mentioned above, for a small building it is enough to build one stove, which will be heated with wood or coal.
The stove model must be chosen in such a way that it can not only heat the premises, but also be an assistant in cooking.
To ensure that this heating structure does not cause any inconvenience and is as efficient as possible, you need to choose a suitable location for it. A well-placed stove can easily warm two rooms and a kitchen.
Such a stove will successfully heat several adjacent rooms.
For example, this model shown in the figure would be a good option for heating three rooms. You need to know that the heat transfer from the stove depends on the surface area of the structure, i.e. if one side of the stove opens into the room, it will be fully heated. In addition, the massive structure takes much longer to cool down. By heating the building in the evening, you can be sure that it will radiate heat into the room until the morning.
The stove must be laid during the construction of a house, but its foundation must be separated from the general foundation of the building. It is possible to install a brick stove in an already built house, but this will be more difficult, since you will have to raise part of the floor and make a hole in the ceiling and roof to install a chimney.
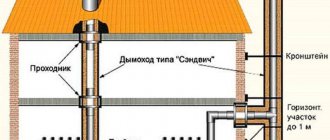
General diagram of a home stove heating system
This diagram clearly shows the structure of the building, the structure of the foundation, the chimney channels and the passage of the pipe through the floors with all the necessary parameters that must be adhered to.
Drying the bath
There are two components to quickly drying wet rooms: heating and ventilation. They should not be considered separately, because together they work most effectively. You just need to combine them in a specific case.
How to dry: ventilation methods
The ventilation system is laid at the stage of construction of the bathhouse (see here about the diagrams and design of the bathhouse ventilation). Therefore, if something is forgotten, it may be too late to redo everything.
For example, vents are usually made in the foundation - these are through holes lined with sewer (most often) pipes that lead to the underground space. They have plugs on the outside that allow you to open and close them at the right time.
For more details about the scheme, see
Such vents are opened only after procedures. And they serve for better ventilation and drying of the bath.
Also, another through hole is usually made in the wall of the steam room under the shelves, leading to the street. On the inside it has an adjustable plug. This hole is also used to speed up the drying of the steam room.
You can dry the bathhouse in winter with the help of ventilation by opening the windows and doors wide - after all, the air inside is much more saturated with water vapor. But you shouldn’t think that all the moisture will leave the bathhouse only thanks to open doors and windows.
In addition to ways to create a draft simply by opening holes, there is also a method where ventilation actively cooperates with heating and works when the stove is on - this is bastu, which you can read about.
Well, don’t forget that even if natural ventilation is not installed correctly or its power is not enough to ventilate the bathhouse, you can always install fans in the air ducts. Forced ventilation, although noisy, is still effective.
BY THE WAY! Heat guns can help here too.
For those who believe that heating alone is enough, and ventilation becomes optional, we recommend watching the video by Konstantin Bely:
After washing: methods of heating
Heating is just as necessary for drying as ventilation. You understand the mechanism: by heating water molecules, you make them more mobile, transform the water into a gaseous state (steam), and it is easily carried away by the breeze. What will the breeze do if the water is cold? Nothing. And if there is no breeze, the steam will cool over time and calmly settle as condensation.
So, the easiest way to dry a bathhouse after washing in winter is to put one or two logs in the firebox and let them burn out. All ventilation openings must be open.
This is for an iron stove. A brick stove is a heat-storage stove, so its heat is enough to dry the bathhouse after the procedures (together with open ventilation).
***
Well, as you can see, you have to invest some money and make an effort in order to use a large bathhouse in the winter. The smaller it is, the easier it is to warm it up even in cold weather. The power of the sauna stove is calculated for the steam room; it is difficult to fit other things into its responsibilities, because there is summer when all this is not needed. So it is better to use autonomous heaters.
Winter water pipe with valve
The first thing you need to pay attention to before running water into the bathhouse is the level of groundwater. The most ancient and proven method of laying a water supply for a steam room without any unnecessary wisdom and tricks requires the fulfillment of two conditions:
- Maximum dry and dense soil, with a low level of surface water;
- Pipes for water supply to the bathhouse should be made only of polyethylene, no polyvinyl chloride or polypropylene.
A polyethylene water pipe laid to a depth of at least 50 cm is flexible and elastic enough to withstand the pressure of frozen water without damage. The only weak point in the bath water supply remains the metal fittings - taps and pipes, with the help of which the individual branches of the water supply system are traditionally connected.
Advice! To avoid destruction from ice jams, a section of polyethylene water supply laid in an unheated room is not joined with steel pipes and couplings, but soldered end-to-end, in the form of one continuous line.
If, after closing the bathhouse, less than ¼ of the internal volume of water remains in the pipes, then the winter water supply system made of polyethylene can be connected in any available way, but the main line itself is insulated with polystyrene foam.
One of the typical options for laying pipes indoors is shown in the diagram below.
Water enters the building through the floor or wall of the dressing room. A mud filter and a tap for draining water from a storage tank, usually raised into the attic of the building, are also located here. The design of the water supply system provides three independent drainage systems:
- From a storage tank;
- From the cold circuit of the boiler;
- Drain from the hot circuit connected to the furnace heat exchanger.
Despite the apparent complexity, the scheme is quite simple and effective in operation. After shutting down the furnace firebox, excess steam pressure will squeeze water out of both the boiler and the water storage tank. The drain taps located under the subfloor in the bathhouse are left open, which ensures a relatively complete release of liquid from the water supply in a short time.
In addition to the material and climatic conditions, when laying a winter water supply system, you will need to take into account the method of supplying water to the bathhouse. As a rule, water for the steam room and washing department at the dacha can be supplied in three ways:
- From a centralized water supply system;
- From a well drilled at a distance of 15-20 m from the bathhouse;
- Collect water from a well located a short distance from the bathhouse building.
Connecting a winter water supply for a bathhouse in all cases is somewhat different from the water supply system for a summer house or residential building due to the lack of constant heating of the room. The most difficult connection is considered to be the connection of the winter water supply to the centralized water supply line of the holiday village.
If you use water pipes made of polyethylene, then you don’t have to worry too much about their integrity. Plastic will withstand any freezing. The situation is more complicated with the valve and filter, with the help of which the water pipe is connected to the central main.
In this case, the only technically competent solution is to build a caisson or well, as in the diagram.
If the bathhouse is used once a week, and there is no residential, constantly heated room nearby, then you simply cannot do without installing a caisson. There are many schemes for heating winter water supply, but their reliability leaves much to be desired. Especially in a situation where the bathhouse is located far outside the city, where the owners go once a week in winter, or there are constant power outages.
The water supply system will need to install two drain valves:
- One directly after the inlet valve;
- The second is at the lowest point of the water supply inside the bathhouse.
After completing the paired procedures, you have to lower yourself into the well, turn off the water at the entrance to the water supply and open the drainage tap. But until the drain valve inside the bathhouse is opened, the water will not leave the system. You need to go up into the room and unlock it. The air pressure in the line will equalize, and the remaining moisture, which is about 10 liters of water, will flow into a plastic container in the well.
Self-production
Some users prefer to make wood-burning boilers with their own hands, which is only possible if you have the necessary tools and practical skills.
When assembling a heating unit yourself, be sure to consider the most labor-intensive design option, which you have to deal with in the absence of a plumbing system.
In this situation, you will need a device capable of accumulating (accumulating) liquid under a certain pressure. The function of such an accumulator can be performed by a container placed on an elevated place, from which a pipe with a pre-calculated diameter is drawn.
The heating unit itself must be installed on a well-leveled and sufficiently rigid platform to ensure a stable position. For its installation, a pre-concrete patch within the bathhouse that has a suitable size is best suited.