The construction of a sauna stove and chimney is now accessible to non-professionals. Manufacturers of heating equipment offer a large selection of stoves, pipes and fittings for installing a chimney in a bathhouse through the wall and with your own hands.
Exiting the smoke exhaust channel not vertically through the roof, but through the wall is more convenient in terms of installation, fire safety and waterproofing of the pipe exit point from the bathhouse. But to make a chimney yourself, it is important to comply with all the required standards.
Requirements for chimneys
There are two main requirements for a chimney:
- It must work effectively, removing combustion products quickly and completely. To do this, calculate the diameter and length of the pipe for a specific furnace. The stove in the bathhouse has a simple device with direct exhaust of combustion products (unlike a room stove, where for maximum heat transfer the chimney has winding passages - wells). An ineffective chimney can lead to the accumulation of carbon monoxide, which is deadly to humans.
- It must be safe. All sections of the pipe are isolated from the walls, ceiling, roof, depending on how the smoke exhaust is installed. Fire safety requirements include strict standards for the distance from flammable structures and neighboring buildings.
Additional requirements include high-quality hydro and thermal insulation of the pipe from temperature changes and environmental influences. To comply with all the above requirements for chimneys, installation standards and rules have been developed, which indicate the exact dimensions and distances that are observed at the manufacturing stage of the chimney project.
Tips for choosing
Chimney pipes are made from different materials:
- ceramics;
- asbestos cement;
- tin;
- of stainless steel.
For a bathhouse, it is important to choose a high-strength pipeline that is resistant to temperature changes and water contact with a hot surface. Metal products best correspond to these characteristics.
Depending on how long the inside of the chimney will be (before it exits the wall), choose a simple tin pipe or a stainless steel pipe. When the output is made directly from the furnace, then any type of metal products will do. But when installing long internal chimneys, it is worth choosing stainless steel: it will last longer and will always have an attractive appearance.
The outer part can be made of asbestos cement or prefabricated metal sections. In this case, it is necessary to take into account the weight of a structure with a height of at least 5 m. A solid asbestos-cement pipe weighs a lot, and with an accidental mechanical impact or fall it can split. The metal products are light and consist of individual parts about 1 m long. The connection is made by simply composing the corresponding parts of the parts. To change the direction, special branch modules are used.
Among the types of metal products for the external part, you should prefer stainless steel structures. Sandwich chimney parts will help retain heat. In these products, a thermally insulating non-flammable material is laid between 2 layers of metal. It has little effect on the weight of the structure, and the principle of assembly from separate blocks makes the installation process quite simple for the home craftsman.
Types of chimneys for baths
There are two fundamentally different types of chimney:
- Internal (classic). The pipe is routed through the ceiling of the room and the roof.
- External, which became widespread in our country not too long ago. When installing this type of chimney, the pipe is routed through the wall, the main part of it is routed along the street.
Internal chimney
The internal smoke exhaust device in the bathhouse is traditionally used for brick stoves. In this case, the pipe is also made of brick. Install a classic traction control valve. The channel is led vertically from the stove through the ceiling covering, then to the street through the roof.
We recommend that you read: How to make a stepladder (ladder) from a profile pipe
This type of smoke exhaust device involves two technological openings that require thermal insulation and high-quality waterproofing. Not every person who likes their own steam room can do complex work on their own. The disadvantages of a budget bath include the bulkiness of the brick stove and pipe design. In small steam rooms, such a structure can occupy up to half the area.
An internal chimney with wells and a stove bench can also be made in a bathhouse. A warm wall will allow you to retain maximum heat, which will be useful in northern latitudes. Here it is better to hire a professional and arrange the crossings according to the requirements. At the same time, the internal chimney in the bathhouse will save money on heating.
It is much easier to install a ready-made solid fuel stove in the bathhouse and run the pipe through the wall in the bathhouse with your own hands.
Installation through the ceiling
The advantages of venting a bathhouse chimney through the roof are:
- high efficiency, as more heat remains in the room;
- less deposits and condensation;
- stable traction.
The disadvantages of this scheme include the increased complexity of installation work. All internal flammable structures must be shielded from thermal radiation with specialized materials. It is also necessary to compare the weight of the structure with the load-bearing capacity of the furnace and, if necessary, unload the roof using brackets. The relative position of the chimney and rafters must be taken into account when designing the building, so as not to weaken the ceiling or roof.
External chimney type: advantages
If your steam room is not in the Far North, then the option of arranging a bathhouse with an external chimney has undoubted advantages over a bulky, expensive, difficult-to-install internal smoke exhaust channel.
The external type of chimney is so called because the pipe goes outside the room. The outlet is carried out from the stove horizontally through the wall. The vertical part is located on the street.
Advantages of the external type of chimney:
- High fire safety. The short length of the chimney in the room, one technological hole in the wall for exhaust, reduces the risk of fire by several times, in comparison with the installation of an internal chimney.
- Ease of installation. All components are assembled in stages and are sold ready-made. Installing an external pipe with your own hands does not require special skills in handling metal and does not require special tools.
- Small sizes. Since the main part of the pipe runs along the street, the room remains completely at the disposal of the steamer.
- Easy to select the desired pipe diameter and length. Pre-fabricated pipes are designed for use with specific stoves. A heating equipment consultant will help you choose the optimal diameter of the chimney pipe for your stove.
- Simplicity of installation of heat and waterproofing of wall openings. You can purchase a ready-made kit for arranging a technological hole in accordance with all rules and safety requirements. The kit includes a horizontal pipe section, two fittings (external, internal), a package with thermal insulation of the required type in the required quantity. The cost of a simple adapter of small diameter starts from 1000 rubles. The price of a branded stainless steel set reaches 3,500 rubles.
We recommend that you read: Drainage pipe wrapped in geotextile: features and installation rules
Ready-made chimney kits are sold both completely and in separate segments. It is convenient to use ready-made sandwich pipes (with thermal insulation).
Note! If you assemble a chimney yourself, then when choosing thermal insulation, carefully study the parameters of hygroscopicity and resistance to high temperatures.
It is recommended to purchase mineral wool with a characteristic of at least 800 degrees. Mineral wool with a heat resistance of 200-300 degrees in a humid environment quickly becomes unusable, losing its thermal insulation properties.
Materials
The efficiency, durability and cost of a chimney depend on the material from which it is made.
Brickwork
- a classic option, characterized by good thermal insulation and durability. However, its use is currently limited for the following reasons:
- The large mass of the structure requires a separate foundation.
- To build such a structure, you need to attract an experienced stove maker, who is extremely difficult to find.
- The cost of work and materials will be exorbitant compared to other types of chimneys.
- Due to the rectangular cross-section and the seam between the bricks, turbulences are formed in the gas flow, due to which a large amount of soot is retained in the channel. A brick chimney should be cleaned at least twice a year.
- The sauna stove is operated intermittently, and in the intervals between fireboxes the brick accumulates moisture. Accelerating the furnace requires a large amount of fuel.
One solution that partially compensates for the shortcomings of masonry is lining. If you get a bathhouse with a ready-made brick chimney, you can insert a stainless steel sleeve into it, which will significantly improve the aerodynamics of the channel and reduce the amount of deposits. Flexible pipes such as FuranFlex® are also used, designed specifically for the repair of such structures.
Metal pipe
- the simplest and most affordable material suitable for self-installation of a chimney in a bathhouse. The sectional structure is assembled from individual elements. Socket connections are treated with heat-resistant sealant. The part of the chimney located in the room is assembled from a single-wall pipe. A draft adjustment slide is installed in it. Outdoor sections are made from a sandwich pipe consisting of outer and inner sleeves of different diameters, the gap between which is filled with non-combustible thermal insulation.
The advantages of such designs include:
- low dead weight;
- smooth inner surface, resistant to soot accumulation;
- stable draft and low condensation formation.
Stainless steel sandwich pipes are very popular. They are not subject to corrosion and are durable.
Vermiculite
- a lightweight porous material made from natural raw materials, used in the manufacture of chimneys relatively recently. It retains its properties at temperatures up to 1200 °C and is highly fire resistant. In terms of thermal insulation, vermiculite is superior to other materials.
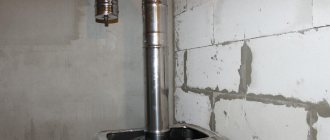
How to install a chimney through a wall
The algorithm for installing a chimney through a wall is simpler than an outlet through the roof. However, there are certain installation requirements that you should know at the bathhouse planning stage:
- The technological hole for the pipe outlet in the wall of the bathhouse is made at a height of at least 1.2-1.5 m.
- The horizontal section of the pipe (from the stove to the external turn to the vertical) should not exceed 1 m. The large length of this section leads to a significant decrease in draft and rapid clogging of the chimney with combustion products.
- The vertical section of the pipe running along the outer wall of the bathhouse should not be adjacent to it by more than 1.5 m. The same distance is left when going around the roof overhang.
- The distance to neighboring buildings when leading a pipe along the street through a wall is prohibited to leave less than 1.5 m to your own building, and less than 3 m to a neighbor’s building.
- For effective smoke removal, it is prohibited to make more than 3 turns of the pipe from horizontal to vertical position.
- The total length of the vertical section must be at least 5 meters to ensure effective traction.
- The pipe has no thermal insulation in the room. After passing through the wall, the insulated sandwich comes out.
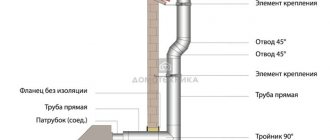
Installation of a chimney in a bathhouse through a wall is carried out as follows:
- A segment with a damper (shaver) is connected to the oven through a special adapter. The damper, like in a classic stove, regulates the draft level. Its complete overlap prevents heat from escaping into the atmosphere after the stove goes out. Each joint is treated with fire-resistant sealant and tightened with special clamps.
- A heat-protective reflector screen is installed on the wall in the area of the technological opening. The diameter of the hole is calculated so that the pipe wall does not reach the wall of the bathhouse 45 cm.
- The pipe is taken outside, covering the free space of the box in the wall with thermal insulation. The mineral wool is placed in a special metal mesh, which serves as a mechanical limiter.
- When withdrawing, the structure is continued with a tee. The lower hole of which has a plug, forming a container for collecting resin and condensate. The chimney is periodically cleaned through this hole.
- The vertical section leads straight to the roof canopy. It is bent around corners at 45 or 90 degrees. It is preferable to mount sharp corners for a smooth bend.
- The top of the chimney is decorated with a protective umbrella.
Note! All structural elements are mounted on top of each other one by one. Each subsequent one is put on top of the previous one, so as not to create thresholds along the smoke path, which will delay and accumulate combustion products.
To support the weight of the pipe, special supports are installed on the outside. In addition, after 50 cm, special brackets are installed on the wall of the house to hold the vertical structure in an immovable, fixed position.
We recommend that you read: Use of cross-linked polyethylene pipes for heating systems
The lower supports on the outside of the bathhouse support the weight of not only the vertical section of the structure, but also fix the horizontal elbow, keeping the guide axis away from the stove.
Do it yourself or order it?
If you are unsure of your own abilities or lack minimal construction skills, it is better to prefer the services of professionals. The work of installing a chimney is not particularly difficult: the cost of work in Moscow is calculated based on the height of the house and is about 2,000 rubles. per 1 m. The total cost of installation also depends on the choice of material (diameter, type, additional structures, etc.).
Modern building materials allow you to do all the work yourself: the outer part is assembled from separate modules. Sandwich products do not require additional thermal insulation. Before making a pipe in a bathhouse through a wall, you need to calculate its height, take into account the purchase of related materials and the requirements for the safe installation of a hot structure.
Safety Recommendations
By following the following tips on installation and purchasing materials, you can reduce the risk of a fire to a minimum. Organizing further maintenance of the chimney in the bathhouse will make your stay safe and comfortable, allowing the chimney to operate in optimal mode.
Recommendations for ensuring safety precautions:
- Carefully select the materials used to insulate hot structural elements from walls and roofs.
- Follow all recommended standards and dimensions for installing pipes and additional fittings.
- The most polluted area of the chimney is the furnace exit. Install a structure with a removable plug there and clean the transition from soot once a quarter.
- The vertical section of the pipe should be periodically cleaned with a special brush to remove carbon deposits from the walls.
- Do not skimp on pipe thermal insulation if you are not installing a ready-made sandwich, but are installing the thermal insulation yourself.
Installing an external chimney in a bathhouse with your own hands is not difficult. It is easier to make than venting a pipe through the roof, and in terms of efficiency, such a chimney is in no way inferior to a classic one.
Smoke and condensate installation
There are two schemes for assembling a chimney system from sandwich pipes:
- Along the smoke, or downwards
. This scheme prevents the escape of flue gases if the seal of the joint is broken, but may be accompanied by the escape of condensate to the outside. This scheme is used for internal installation. This eliminates the risk of carbon monoxide poisoning, and the appearance of a small amount of moisture is not critical. - Along the condensate, or with the socket up
. This scheme is used when assembling street chimneys, where the release of gas is not dangerous. A condensate collector is made at the bottom of the chimney, into which all moisture enters.
Sandwich pipes from different manufacturers may differ in the design of the socket connection. When choosing an assembly scheme, read the instructions. Manufacturers provide detailed step-by-step installation instructions.
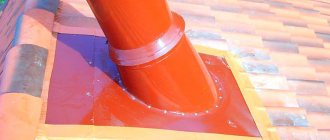
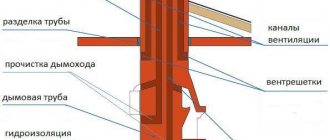
Roof and ceiling passages
It is very important to treat with the utmost care and responsibility the places of passage through the ceilings of the bathhouse. These areas are insulated, regardless of the type of chimney used, be it sandwich pipes or ordinary metal ones
These areas are insulated, regardless of the type of chimney used, be it sandwich pipes or ordinary metal ones.
To ensure that passage through the ceilings is as safe and high quality as possible, a special box is used. You can either make it yourself or purchase it in a store.
During the installation process, the following should be taken into account:
- The diameter of the hole for the pipe should be much larger than the diameter of the pipe itself, since there should be a distance of 25-30 cm from the surface of the chimney to the ceiling structure;
- There should be no free space left around the pipe, since all of it must be tightly filled with insulation;
- The edges of the pipe connector should be treated with metal sheets before installing the box;
- Nearby wood elements must be treated with fire retardants.
What do the professionals advise?
As you can see, making an attached chimney yourself is not so difficult. The main thing is to choose all the materials correctly and take into account fire safety standards, which will allow you to avoid many unpleasant situations. It’s up to you to decide whether to vent the chimney through the roof or make it external. After all, what is better or worse is always easier to determine in each specific situation.
And finally, I would like to share some advice that professional stove makers give:
- Before you start purchasing chimney elements and installing it, be sure to determine the power of your firebox. The more powerful it is, the larger pipe diameter you will need.
- Be careful when choosing the height of the structure, which has a significant impact on obtaining good traction. A chimney that is too short will poorly remove combustion products, while a chimney that is too long will lead to excessive heat loss. Practice shows: the optimal pipe height is 5 meters. But here, too, everything is individual.
- If your boiler is equipped with forced draft, then the output of the external chimney can be completed at the stage of arrangement of only the horizontal section (without further extension of the vertical pipe).
- It is better to remove the chimney from the side of the gables (if possible). This greatly simplifies the task, since its arrangement will not be hampered by awnings and roof eaves.
- The maximum length of the horizontal section should not exceed 1.5 meters. It is here that the smoke flow is inhibited, which significantly reduces draft.
- Here, provide a special hole for technical needs: inspection and cleaning of the chimney. After all, the horizontal section is the most problematic in this regard. Sales consultants will help you choose the right item.
- If there is a wooden wall on the side of the boiler, fireplace, or stove, be sure to install a protective screen. These can be sheets of mineralite, asbestos, galvanized, fire-resistant plasterboard, glass magnesium or other fire-resistant material.
There's no need to do that
This is where I will end my short review. I hope that this information will help you avoid mistakes when making an external chimney yourself. I will be happy to answer all your questions, listen to your wishes and criticism (this is always useful).
Warmth and peace to your home, and impeccable operation to your boiler and fireplace. And don’t forget to recommend the article to your friends, in case someone finds it useful... See you, bye!
Wisdom Quote: Nothing teaches you more than realizing you made a mistake. This is one of the main means of self-education.
How to remove: fire standards
All features of the passage through the ceiling in the bathhouse are related to fire safety. Furnace gases and solid particles formed during fuel combustion have a temperature of several hundred degrees (up to 700). And this hot stream almost immediately (in the case of a metal stove, because a brick stove has labyrinths where the walls take heat from the stove gas) enters the chimney, heating it and making it dangerous for adjacent structures.
We read SNiP 41-01-2003, which talks, in particular, about the heating device, and highlighted what concerns our case, that is, the passage of a chimney through the ceiling in a bathhouse.
First, you need to comply with temperature restrictions. Most people install metal pipes, and according to regulations, they should not heat above 500 degrees. For asbestos-cement, the limit is 300 degrees, but who sets them now?
Secondly, SNiP describes the empty space that should separate the pipe from combustible and non-combustible roofing materials:
- from concrete and brick pipes to flammable materials - at least 130 mm;
- ceramic pipes: if without insulation - 250 mm, with insulation - 130 mm.
Despite the fact that the use of steel pipes is not prohibited, nothing is said there about at what distance from the ceiling material the pipe in the bathhouse can be installed through the ceiling. And we are talking about the roof, if you noticed, that is, you have to extrapolate the available information to the ceiling.
Metal pipe at the installation stage. Photo StroyDom
So, the minimum for insulated pipes (thermal insulator with a heat transfer resistance of 0.3 m2∙°C/W) is 13 cm, for non-insulated pipes – 25 cm.
There is also Appendix K, which everyone interprets in their own way, which states that, together with the thickness of the stove or pipe (the latter is not written explicitly), the amount of indentation is 50 cm for combustible materials and 38 cm for those finished with 2.5 cm thick plaster or metal sheet on top of asbestos cardboard 8 mm thick. It implicitly follows from this that we are talking about an air gap between the heated and combustible surfaces.
In SP 7.13130.2009 there was another addition: that the cutting size should be 7 cm greater than the thickness of the ceiling. In this case, a link is given to the application already mentioned above, which talks about 50 and 38 cm.
BUT! In some cases this is seen as an indication of the size of the opening in the ceiling.
Preparing for assembly
Before installing a stove in a country house with a pipe exiting through the wall, you need to prepare. Work requires special clothing and gloves. If you will be cutting metal products, it is advisable to wear safety glasses.
Selection of tools and materials
To complete the work, the following tools are required:
- drill, equipment for cutting material;
- heat-resistant sealant;
- riveter;
- clamps, dowels, corners;
- foil construction tape;
- screwdrivers;
- level, plumb;
- knife;
- ladder;
- When working with concrete walls, you will need a hammer drill.
Components for installing a chimneySource vse-postroim-sami.ru
The materials required are a steel pipe, with which the horizontal fragment is connected to the boiler. You also need a tee for connecting pipes, an elbow (with its help the structure is directed upward), and a support console. Brackets and dowels are used to mount products on the wall. The connection of several pipes is carried out using clamps. You also need thermal insulation material and a protective cap.
Choosing a location
The house has central and side walls. The second is located on the side of the slopes and under the roof overhangs. Liquid gets onto this part when it rains (if the drainage system is not fixed). There is a small roof overhang above the central walls, so the risk of liquid entering from the roof is minimal.
It is better to mount the smoke exhaust structure on the front wall. Here it is taken into account that there should be no windows or balconies on it along the line of the chimney. If you have to install a pipe through an overhang, then high-quality fire protection is installed.
Choosing a location for the chimney outlet through the wallSource stroychik.ru
Calculation of chimney height
Since it is possible to correctly bring a chimney through a wall to the street in a wooden house only if technical requirements are met, the first parameter that is taken into account is the height of the structure. It depends on the number of floors of the house. If the height of the building does not exceed 5 m, then the minimum parameter for the height of the structure is 5 m. If this value is neglected, the structure in the house will smoke in the house, the draft will deteriorate, and the performance of the heating device will decrease.
If the pipe is too long, fuel consumption will increase. When the height of a building exceeds 10 m, the main reference point is its ridge: it should be 0.5 m below the chimney. This characteristic is affected by the cross-section of the pipes and the power of the heating equipment.
Chimney heightSource vosaduly.ru
Pipe diameter calculation
The internal diameter of the structure must correspond to the dimensions of the pipe. Any narrowing of the internal volume of the pipe affects the formation of draft. The presented value is affected by the power of the equipment: the higher it is, the larger the internal diameter. You need to follow standard building rules:
| power, kWt | Internal section, cm | Minimum diameter, cm |
| up to 3.5 | 14×14 | 15,8 |
| 3,5-5,2 | 14×20 | 18,9 |
| 5,2-7 | 14×27 | 21,9 |
If we take into account all the technological features of installation, the structure will last for decades without significant problems.
How to make a brick pipe in a bathhouse through a wooden ceiling
A chimney made of brick is the most reliable design. Before you begin installing the structure, you need to design a chimney
During design, you should pay attention to the features of the stove that is installed in the bathhouse. Also take into account that installing a massive brick chimney is not practical in small bathhouses. Technology for installing a chimney on the roof:
Technology for installing a chimney on the roof:
- Make a hole for the pipe. The diameter for the passage should be 20 centimeters larger than the diameter of the pipe itself.
- Then you need to remove the product through the roof.
- Insulate the pipe using a metal sheet.
- Seal the structure by placing the edge of the sheet under the roof.
- Attach a metal umbrella to the chimney. It will protect the structure from moisture.
- Apply heat-resistant paint to the chimney. It will protect the metal parts of the structure from corrosion.
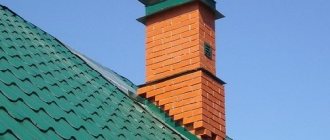
Construction of a sauna chimney made of brick
Stonework (brick) looks beautiful; regardless of weather conditions, such a system has strong traction. The model can be built with your own hands and connected to a sauna stove of any height. Brick pipe is economical, durable, and has high performance. The material tolerates strong heat and temperature changes well. The supercharged smoke exhaust channel is good because it does not take up extra space in the bathhouse, but simply continues to bake vertically.
To reduce the amount of fuel during furnace operation and ensure high-quality removal of carbon monoxide, you need to correctly design the smoke exhaust system and its location.
- The shortest distance from the brick channel to the wall of the bathhouse is 38 cm; in places where it passes through the floors and roof, an extension is made, the diameter of which is more than 15 cm. The space is insulated with thermal materials.
- The minimum pipe height is 5 m, regardless of the height of the building. Only from this magnitude will the traction force be productive.
- Wall thickness - thick walls heat up less and provide less likelihood of a fire. It is believed that 10 cm is the optimal width.
Sections of a brick chimney overlay:
- The top part is installed directly on the stove (on the shoulders), and a valve is made in it. The supernatant channel is laid out by special ligation of bricks. This pipe ends 5-6 rows before the overlap, followed by the neck of the fluff.
- Fluff is a channel of 6-9 rows of masonry, passing through the ceiling, with the expansion of the chimney walls (25-35 cm), the internal cross-section does not change. The purpose of the department is to protect the wooden floor from overheating and ignition
- The riser is a vertical chimney having the diameter of the nozzle. Reaches the roof of the building.
- Otter - masonry that covers the gap in the roof. It is done at the level of the junction of the channel walls and the roof. Expand the wall to the outside (the diameter of the channel inside does not change) by at least 10 cm. This ensures thermal insulation of the roof and protects from precipitation.
- Neck – diameter is equal to the diameter of the riser. Same throughout the entire height.
- Head - the masonry increases from the outside of the wall. A deflector, an umbrella, and a spark arrester are attached to this last section.
The internal walls of the smoke exhaust duct are made very even and smooth. The amount of settling soot, traction force, and the length of work without cleaning depend on this. The smoother the internal surfaces, the better the functioning of the chimney and the more stable the draft.
Selection of material and preparation of solution
Brick selection
To build a chimney you need bricks and cement mortar. Let us immediately note that ordinary building bricks are not suitable for building a chimney. The masonry is made from fireproof fireclay ceramic material from fireclay clay and additives. Mostly rectangular bricks of a standard size are used, 65 mm x 120 mm x 250 mm (ShB-8), weighing 3-3.5 kg. The side surface can be smooth or corrugated. For masonry, purchase corrugated ceramic material. In Russia, popular products are “Vitebsk Workshop 1, 2”, TM Lode, and others.
What does brick marking mean:
- The letter "Ш" means fireclay.
- “A” – class, the material can withstand temperatures of 1400°C
- “B” – resistant to heating at 1350 °C.
- The letter “M” and the following number indicate the limiting load per unit area, measured in kg per m². Brands M200, M250 are suitable for the chimney. It is not practical to use higher grades for economic reasons. Also, with increasing density, the thermal conductivity of the material decreases, that is, the rate of its heating decreases.
- The letter “F” and the number after it indicate frost resistance (the number of freezing-thawing cycles), produced from F25 to F300. When choosing, focus on your climate zone.
Preparation of the solution
In the assembly of the chimney, a cement mortar made of sand, cement, and water is used. To prepare a high-quality solution, take clean, soft water and fine sand, which produces a thin layer of solution. The strength of the mixture depends on the brand of cement and proportions; the solution itself is prepared before work (it sets quickly).
Laying a brick chimney
Install the chimney according to the technological drawing and diagram.
Prepare your tools:
- A trowel (trowel) is used to stir the mixture and apply the solution.
- A mason's hammer (or a small pick) is used to chip away and chip away parts of the brick.
- A construction mixer equipped with a whisk for mixing the mortar mixture.
- A cord with a plumb line - to control the verticality of surfaces and corners.
- Construction level - to ensure smooth, horizontal planes.
- Grinder for pruning.
Laying a pipe with a channel 140 mm x 270 mm:
- Lay out the inner channel of the neck in the form of a rectangle with sides 140 mm, 270 mm. External dimensions – 380 mm by 510 mm. The bricks are laid with bandaging, in a checkerboard pattern. After the second row, insert a valve that will control traction. Complete five rows.
- Begin assembling the fluff (cutting), gradually pushing the bricks outward (a little in each row) until the external dimensions are 450 mm x 590 mm. Use a mason's hammer to break off pieces of the desired size, or cut with a grinder.
- Extend the outer wall to a size of 560 mm by 610 mm.
- Increase the dimensions of the flue to 570 mm x 710 mm. Maintain the outer section of the cut.
- Then pull the riser according to the size of the neck - 380 mm by 510 mm.
Running otter in rows
Perform this part by constantly bandaging to a height of nine rows. You will need cut bricks in the middle to maintain the proportions of the flue.
- Lay out five rows, maintaining an outer size of 390 mm x 510 mm.
- Make the long side larger by adding 1/2 and ¾ bricks in a row. Install the plates on the inner row.
- Do not change the length, add ½ block in width, this will be the cut point.
- Lay out according to the pattern, increasing the slopes to the fifth row.
- The sixth row reaches a bevel length of 480 mm.
- Complete the otter on three sides.
- Release the slope from the last side.
- Make a dressing in the eighth row, completing the otter laying.
- Reduce external dimensions to 310mm by 580mm. Start laying out from the right, expanding the channel by ¼ of the length of the block.
Finish the pipe by installing a weather vane, reflector, and umbrella-cap. Be sure to leave windows through which stove chimneys are cleaned. Check traction. Dry the pipeline for several days - put 3 kg of firewood in the firebox, let it burn completely, wait until the stove cools down, repeat the action. Check the draft and leaks again, and eliminate the defects.
Metal structure
The most favorite material for building a bathhouse for many years has been wood. In addition to all its unique positive properties, wood also has increased flammability, which is why the bathhouse needs fire insulation.
In order to avoid fires, to insulate the pipes in the bathhouse with your own hands, as well as to insulate the walls and ceiling, we used a lot of different materials: asbestos, clay, various insulating boards. The most important thing in insulation is low thermal conductivity.
Information. In addition to fire safety, the thermal insulation of the pipe ensures that it cools more slowly, which avoids the accumulation of condensate and rapid destruction of the structure.
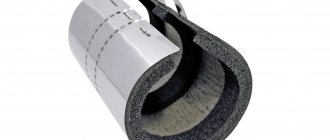
What to wrap: thermal insulation
Teploizol is a relatively new type of insulating material. It consists of foamed polyethylene with a foil surface on both sides.
Teploizol has excellent resistance to elevated temperatures, which is why it is so often used for insulating pipes in bathhouses. The thickness of this material varies from two to ten millimeters. The maximum temperature it can withstand directly depends on the thickness of the insulation layer:
- The material with a thickness of two to five millimeters can withstand from -30 to +100 degrees;
- From five to ten millimeters – from -60 to +150 degrees.
Before wrapping a pipe in a bathhouse with thermal insulation, you need to stock up on metallized tape or wire, since you will need these materials during the insulation process, which is completely simple and does not require outside help.
What to wrap in the attic: foil insulation
Folgoizol is also perfect for thermal insulation of a chimney, due to its resistance to temperature changes. It consists of a double layer of foil and insulation.
For the production of foil-isol, fairly dense food foil is used, due to which it is distinguished by its harmlessness.
Folgoizol is able to withstand temperatures from -60 to +200 degrees, which is why it is used not only for insulating pipes, but also for insulating walls and ceilings. Folgoizol is an excellent heat, hydro and vapor barrier material at a relatively low price.
Attention! Foil is an excellent reflector, thanks to which it retains up to 90% of the heat in the bath.
You can wrap the chimney with foil insulation
Modern material includes two layers: heat insulator and foil. The second one plays a reflective function and can save up to 90% of the thermal energy in the building. Folgoizol is a harmless material compared to other analogues, since the foil is compacted food grade. The material is resistant to ultraviolet radiation and elevated temperatures within the range of -65 to +175 degrees Celsius, a good insulator.
For those who don’t yet know how to insulate a chimney pipe in a sauna, we recommend covering the steam room ceiling, walls and chimney with foil insulation. As a result, you will get a room whose design resembles a thermos. The heat will remain in the sauna, but the bathhouse will quickly gain temperature and then slowly cool down. Sometimes a mesh is installed on the pipe for stones in the bathhouse, which is very convenient and practical.
Construction of a gable roof for a bathhouse
Construction of the rafter system
The roof structure is based on a rafter system, which is a complex of wooden elements:
- Mauerlat - a base that creates support for the entire structure on the walls of the building;
- Rafter trusses are elements in the form of isosceles triangles, the legs of which are the rafter legs. It is the shape of the triangle, as the most stable figure, that allows the gable roof to withstand large external loads;
- Lathing is a sparse or continuous system that allows roofing material to be attached to the rafters.
All wooden elements of the rafter structure are made from dried wood with a moisture content of no more than 20% without knots and cracks. Before installation, the wood is treated with special means to prevent the formation of mold, mildew and pest damage to the wood.
There are two ways to build a truss structure:
- Hanging. Suitable for small buildings. The rafters in this system have only two points of support: the mauerlat and the ridge beam. This type allows you to avoid supports in the center, which allows you to make maximum use of the attic area.
- Layered. Used in large buildings. The rafters have additional support points in the center of the house in the form of load-bearing walls.
When calculating and choosing material for the rafter system, the total load on it is taken into account, which depends on the weight of the structure, snow load, etc. As a rule, rafters are made of wooden beams with a section of 50 * 100 mm.
Let's look at how to properly make a rafter system for a gable roof:
- The Mauerlat is laid on walls insulated with a layer of roofing felt and secured to them with anchor bolts, studs or twisting. In a bathhouse made of timber, the role of the Mauerlat is performed by the upper crowns, fastened with staples;
- The trusses are fastened at the top with a metal plate. First of all, the outer trusses are mounted, and then, according to the level specified by them, the rest are set at a gap of approximately 60 cm. The rafter legs can be attached to the mauerlat by notching or metal elements.
Roof lathing and insulation
An important point in the construction of a roof structure is its vapor and waterproofing. The protective material is spread over the rafters with an overlap of up to 10-15 cm at the joints of the material and fixed with nails or staples
It is important to create ventilation gaps between the waterproofing and the roof. For this purpose, a counter-lattice is created under the lathing system.
Next, the sheathing is filled, the pitch of which depends on the selected roofing material. For soft roofs, a continuous sheathing is made of moisture-resistant plywood; for other materials, the pitch of the system can be increased to 40-50 cm, depending on the slope of the slopes.
If you want to create a warm roof for the bathhouse, insulation is used, which is laid on the attic side between the rafters and covered with a layer of vapor barrier material.
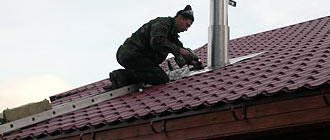
Installation of roofing material and pipe outlet
One of the final types of work is the installation of roofing material on the bathhouse roof. Regardless of the chosen roof, the work order will be as follows:
- Laying the first row of roofing along the eaves, maintaining the level and firmly fastening the first row of material;
- Installation of the next rows of roofing from the eaves up to the ridge. Each next row is laid with an overlap of 10-15 cm with the previous one to avoid roof leaks;
- Lastly, the roof ridge is installed, the options for which vary depending on the chosen roofing material.
An important point when building a roof on a bathhouse is the question: how to make a chimney? It is most advisable to route the pipe in the bathhouse through the roof 30-50 cm from the ridge with an elevation of 50 to 100 cm above the roof. The passage of a pipe through a roofing pie, the materials of which easily and quickly catch fire, must be associated with mandatory insulation of the pipe. To do this, a special hole is made in the constructed roof, the walls of which do not allow the pipe to come into contact with the flammable elements of the roof.
The final work is the installation of a drainage system, covering the roof overhangs and cladding the roof gables.
Choosing an installation location
Before you make a chimney in a bathhouse, you should decide on its location. There are many factors at play here that should be taken into account at the design stage of the structure. Let's look at each of them in more detail.
How to install a chimney in a bathhouse: the need for a foundation
To install a chimney, it is better to choose a place where there is a foundation or the possibility of installing one.
It should be noted that, according to generally accepted standards, it is not allowed to install a chimney over 750 kg without a foundation.
If in your case the structure is lighter, then there is every reason to refuse to build a foundation.
Metal pipe: step by step process
In bathhouses with an installed heater, it is better to use brick chimneys, since refractory brick retains heat for quite a long time.
Many people wonder how to decorate the walls in the bathhouse near the stove, because these places also need protection.
Typically, sheets of asbestos or galvanized steel are used where the chimney comes into contact with the roof and ceiling.
Galvanized steel sheets are also used to protect walls near the stove.
Information.
A metal pipe without a heat-insulating layer is the most fire-hazardous option for arranging a chimney. In this case, there should be a distance of 60 cm, no less, between it and the nearest combustible elements.
Important!
The most popular and simplest option for pipe insulation is the use of heat-resistant insulation for its winding. Basalt wool is most often used as such insulation, which is protected on top with plaster or a metal sheet.
Isolation occurs as follows:
- The first step is to stock up on mineral wool slabs, the thickness of which should be more than 5 mm. Next, the insulation material is used to completely wrap the pipe. The insulation is secured with steel wire, which also needs to be wrapped around the pipe;
- On top of a pipe equipped with a heat-insulating layer, it is necessary to construct a reinforced mesh. Next, a cement-limestone mortar is made, with which the mesh is plastered;
- Instead of plaster, you can use a metal sheet.
To do this, you need to roll it around a pipe with insulation and rivet the edges at the fastening point.
Features of the chimney
Removal of gases through the channel will occur effectively only if the pipe is constructed according to standard dimensions and made of the correct material. These pipe characteristics are selected depending on the type of fuel; the material for the chimney is:
- refractory ceramic bricks;
- asbestos pipes;
- stainless steel;
- sandwich pipes with an inner layer of insulation.
Brick channels are made in the case of a stationary chimney that ensures the removal of gases when heating with wood and coal
To determine the diameter and internal size, the boiler power and the dimensions of the firebox are taken into account. If the calculation is incorrect, reverse draft results or the useful effect of the furnace is significantly reduced. For gas boilers, it is effective to use pipes with two walls, between which insulation is laid
The problem with a chimney for a gas fuel boiler is internal condensation, so insulation will help avoid significant temperature differences
For gas boilers, it is effective to use pipes with two walls, between which insulation is laid. The problem with a chimney for a gas fuel boiler is internal condensation, so insulation will help avoid significant temperature differences.
It is allowed to install one chimney for two operating heating units, if the internal size of the chimney, raised to the required height above the roof ridge, allows combustion products to be easily removed from both stoves. The cutting section pipe is about 0.8 m high.
Dependence of draft on pipe height
The importance of the chimney in the heating system cannot be overestimated. Attempts to save on an extra meter of pipe will lead to cold walls during the heating season and excessive waste of fuel. The danger of carbon monoxide is that it is invisible and undetectable, but can be fatal.
The danger of carbon monoxide is that it is invisible and undetectable, but can be fatal.
A narrow chimney of great height relative to the ridge will accelerate the smoke masses, thus reducing heat transfer. To maintain the desired temperature in the room, you will have to add fuel in excess of the norm. A wide channel of small height will allow smoke and gases to rotate arbitrarily in the pipe, their movement will slow down, and most likely a reverse flow of gases will result. Most often this happens in autumn or spring, when the temperature difference between outside and inside decreases and smoke, without overcoming resistance, is drawn into the room through the firebox.
Chimney location and height
To correctly select the height of the chimney relative to the roof ridge, you need to take into account the location of nearby structures. For an outdoor home, the draft indicators will be good, since there is constant blowing and pick-up of smoke masses. If we talk about a small building surrounded by high-rise buildings, then the length of the pipe should be increased. The height of the chimney depends on several factors:
- slope of the roof plane;
- location of the channel on the roof plan relative to the ridge;
- the location of surrounding buildings and trees;
- estimated thickness of snow cover in a specific area.
When installing a chimney, you should determine:
- elevation of the pipe relative to the roof ridge;
- the total length of the smoke channel from the stove;
- type and dimensions of the head;
- the height of the chimney relative to ventilation and windows of neighboring buildings.
Installation of an internal chimney
The internal chimney is similar to its external counterpart. All connections are made using clamps and sealant. Installation differences include:
The insulation sheet is placed in its place immediately, and the stove is placed on it. A pipe with one wall or an economizer is connected to the branch pipe. A damper, water heating tank, smoke damper, and mesh heater are connected to the direct element. The parts are mounted with the corrugated part down so that the internal element overlaps the wall of the lower compartment
This will protect the insulation from condensation drops. An important stage of installing a chimney is the correct arrangement of passages through the ceilings and roof.
Main stages of work
Installation sequence of the internal chimney:
- A diagram of the future chimney is marked on the ceiling.
- The passage is constructed in accordance with the standards and requirements of SNiP.
- A square hole is made.
- A special dividing box is placed on the straight part.
- About 20 millimeters of free space is left between the vertical walls and the sawn nest.
- The chimney is expanded with an additional vertical segment.
- The box is applied to the ceiling cladding and fixed.
- In the attic, basalt cardboard is laid around the dividing part, and expanded clay or mineral wool is laid in the inside.
Exiting the chimney through the attic to the roof Source uteplovdome.ru
Recommendations from experts
When venting the chimney through the wall, it is recommended to orient it towards the gable side so as not to make additional holes in the roof. If the heating device in the house is located in such a way that the pipe can only be removed from the side where the roof slope is located, then a support stand may be needed. The chimney is fixed to it using sliding fasteners.
Connecting the roof to a round pipe
With roof overhang gt; A 40 cm rack may not be needed, since the chimney passes through a hole cut into the roof. Additional fixation of the pipe is also done here. It must be taken into account that in this place there should be no joints of individual chimney elements. Above the hole it is necessary to equip devices that retain snow. They will protect the chimney from excessive pressure from snow layers that can cause damage.
Vertical and horizontal chimneys
For boilers with forced draft, it is possible to install simply a horizontal pipe, which should be routed through a passage in the wall in the same way as chimneys that also have a vertical part.
During the construction process, you can install a convenient chimney design in the wall, which is a shaft lined with brick. A pipe attached to the heating device is placed here. This scheme saves a lot of space.
If the installation of a universal chimney in the wall is carried out in the partition between rooms, then it becomes an additional source of light, comfortable heat. In order to correctly connect the heating equipment, it is necessary to make a sufficiently spacious passage in the shaft wall and install a pipe, joining its horizontal and vertical parts. Rock wool is usually used for insulation.
The upper cut of the pipe, coming out at a distance of one and a half meters, measured from the ridge, should rise above it by 0.5 meters. If the distance is one and a half meters or more, then the pipe is made at the level of the ridge.
Tags: bathhouse, take out, chimney, wall, through
« Previous entry