Do you want to protect your water supply from freezing in cold weather by installing a heating cable inside the pipe? Agree that preventing a problem is much cheaper and easier than eliminating the disastrous consequences later. Have you decided to do all the work yourself, but don’t know where to start?
We will help you figure out how to install the cable. The article provides detailed instructions on this process, accompanied by step-by-step photos. The nuances of preparing materials for work and the features of placing the system inside the pipeline are discussed.
Thematic videos have been selected containing expert recommendations on the proper preparation and connection of a heating system at home. There are also tips to help you choose the best cable.
Types of heating wire with characteristics
Heating cable for water supply.
Heating wires convert electrical energy into heat due to high internal resistance. These are flexible products that can be laid on surfaces of any configuration. The wire has at least 2 layers of reliable insulation that protects from harmful external influences. The design may include a foil screen or copper braid that prevents short circuits and neutralizes the magnetic field.
There are 2 types of heating wires produced - resistive and self-regulating. The action of the former is based on the ability of metals to heat up when electricity passes through them. In self-regulating designs, heat is generated by a special matrix, and the conductors remain cold.
The main characteristic of all heating cables is the electrical power they consume per 1 linear meter. m. To place a heating product inside the pipeline, 10 W/m is enough. Outdoor installation requires an increase in power density of 20 W/m and more.
When choosing a heating wire, other characteristics are taken into account, including:
- Maximum permissible line length including branches. The parameters are directly influenced by the thickness, resistivity of the conductor, and the number of cores. If the permissible length is exceeded, the entire heating system may fail.
- Limit operating temperature - characterizes the ability of the product to maintain it for a long time. 3 lines are produced, each of which is designed for operation in appropriate conditions.
- Maximum permissible temperature when switched off.
Heating cables are available in round and flat sections. The latter are more suitable for outdoor placement. Sold complete with a wire for connecting to the working part. To save energy consumption, a temperature sensor with automatic control is used. Self-regulating options are used with a compact thermostat, which is installed on the supply wiring.
Resistive - pros and cons
Resistive heating cable.
Resistive cables are characterized by simplicity of design and low price.
They produce 3 types of products:
- single-core;
- two-wire;
- zonal.
They are produced with predetermined characteristics - length and power. The peculiarity is the same heating along the entire length. You cannot shorten it; you should use the entire wire, even if the size is larger than required. When pruning, resistance increases. This leads to an increase in heating temperature, as a result - the insulation melts and the system breaks down.
Installation requires extreme care - if the cable is damaged in any area, the entire system will have to be replaced. The exception is zonal designs with parallel connection of heaters. Resistive products cannot be used for installation inside the pipeline - the head of the temperature sensor gets in the way. It must be located next to the cable, so external installation is also not very convenient. The advantage is a relatively low price compared to a self-regulating wire.
Single-core
The simplest design of a few elements includes:
- heating metal core;
- internal insulation;
- copper braided shielding;
- external insulator.
Heats up to a maximum of +65°C. It is inconvenient for heating pipelines: both opposite ends must be connected to the current source, which are sometimes located at a great distance.
Two-core
The difference from a single-core product is not only in the number of conductors, but also in the design itself:
- 2 heating cores are each in their own insulation;
- the third drainage is located next to them (bare);
- all cores are covered by a foil screen;
- Heat-resistant insulation is used for external protection.
Single-core and double-core products provide equal heating along the entire length.
Zonal
This type of resistive cable has independent heating sections. This is ensured by design features. The conductor consists of 2 cores with insulation, on top of which a heating coil is mounted. After an equal distance, it is alternately connected through contact windows with current-carrying conductors. Parallel independent heating zones with a maximum length of 2 m are formed.
This system has advantages over the previous ones. It has stable power, independent of external temperature. But the main advantage is the ability to cut the cable depending on the required length at the location of the zone contact. Part of the wire - the end section before the first contact - can be used to connect to a power source.
Scope of application
Of course, cable heating can be used not only with plumbing systems.
In the same way, sewers, process pipelines at industrial enterprises, all kinds of containers, and paths are protected from freezing.
Heating cables are also actively used in everyday life, for example, to create “warm floor” systems, which are very popular today.
In this case, the advantages of a self-regulating cable play a particularly important role: through negligence, the user can place furniture in the place where the heating cable is laid inside the floor, and if the latter is unregulated, it can easily burn out. If a self-regulating cable is used, the likelihood of such an event is reduced to zero.
The roof, along with the drainage system, may also need protection from icing. Cable heating also comes to the rescue here. In addition to the temperature sensor, a humidity sensor is installed on the roof, which prevents the cable from being turned on in dry weather.
Self-regulating - pros and cons
The operating principle of a self-regulating cable differs from resistive cables.
This is inherent in the design itself, which consists of the following elements:
- 2 copper cores in a thermoplastic matrix;
- 2 layers of internal insulation;
- copper braid;
- external insulation.
The features of the device result in advantages, including:
- Universal application. Used to heat pipelines from the inside and outside, as well as tanks and roofs.
- Economical energy consumption. Self-regulation is designed so that in the area with the minimum temperature the heating is greatest, warm sections consume less current.
- Convenient installation. The wire can be cut according to special markings and extended without fear of loss of functionality. Not afraid of overlaps.
- There are no overheating or cold spots. Length does not affect heat transfer.
The only drawback is the high cost - the cheapest self-heating cable is 2 times more expensive than a resistive cable. But it has a long service life - up to 10 years.
Operating principle of a self-regulating cable
Thermal regulation is carried out by a polymer matrix including carbon. Under its influence, conductive bonds of varying strengths arise depending on the temperature. When the product is connected, a current passes through the conductors and carbon contacts, which heats the matrix. As the temperature increases, the distance between its graphite components increases, which leads to an increase in resistance. The current drops and cooling occurs. In this way, continuous thermoregulation of the heating cable is carried out.
Cable connection technique for heating pipes
For all types of heating products, during the installation process it is necessary to insulate the end and connect it to the connection wires. To complete this work, you will need a small set of tools and materials. A knife, pliers, a side cutter and a hair dryer are used for construction work.
Preparing the cable for connection.
The set of materials includes insulating tubes and sleeves of various lengths and diameters, which are used as terminals. The insulating material is special, heat-shrinkable, with a layer of glue applied inside, which helps improve the quality of protection of the connection. To insulate the end of the cable, you can purchase a ready-to-use plug instead of heat shrink tubing.
Installation of the end coupling is performed in the following sequence:
- cut off 2 cm of outer insulation;
- remove the braid;
- put on the muff and warm it up with a hairdryer;
- clamped with pliers.
If you are working with a self-regulating product, one wire is cut along with the matrix 10 mm shorter to make 2 wires of different lengths. Instead of an expensive plug, you can use heat shrink tubing. It is put on the prepared wires, heated with a hairdryer, and filled with glue from a hot-melt gun. For reliability, you can wrap it with electrical tape.
The procedure for connecting 2 segments or connecting supply wires is in many ways similar. The step-by-step instructions are simple:
- Using a knife, cut the general insulation and free the cores. One of them is shortened to create a ladder. Do the same with another piece.
- The ends of the wires are stripped and a heat-shrinkable tube is put on each. On one of the conductors - a common long one.
- The stripped ends are inserted into the sleeves and clamped. Start with a shorter wire. On the other side, the cores of the second cable are inserted and crimped. Make sure the connection is strong by pulling in different directions.
- Stretch small thermal tubes, blow them with a hairdryer, and press. The same operation is performed with a common thermal insulating coupling.
Video: how to connect a heating cable
There are some nuances in installation. In particular, there is a braid on the cable, and many people do not know what to do with it. It serves for grounding, which must be followed according to all the rules or abandoned. There are several options for how to proceed in this case, and each requires its own approach. After watching the video, it will become clear how to connect the heating cable and what points to pay special attention to.
How to install and connect a resistive wire with your own hands
For installation, the linear method is most often chosen, in which the wire is placed and fixed outside the pipe. If it is plastic, then the material has low thermal conductivity - it is possible to obtain good heating by following the technology exactly. High heat transfer is achieved using special pipes with a recessed channel for the heating wire.
Linear fastening of the heating element is carried out in the following sequence:
- A strip of aluminum foil is glued from below along the entire length of the polymer pipeline - this increases heat transfer. There is no need to do this with metal pipes. They are cleaned of rust and anything that could damage the insulation.
- They stretch the wire. Every 30 cm it is wrapped with adhesive tape. If the power of one wire is not enough, lay 2 or more in parallel, but with a gap between them.
- Aluminum tape is glued along the top of the pipeline. They try to ensure tight contact between the cable and the pipe. The temperature sensor wires and the sensor itself are attached separately with transverse tapes.
- Additionally, the electrical cable is secured with plastic clamps if dense external thermal insulation is not provided. They will hold the wires in case the aluminum foil peels off.
- Upon completion of installation, a heat insulator is installed and tightened with clamps.
The second method of installing a heating cable for a water supply system is spiral. Its use increases heating along the entire length or in particularly dangerous places at the entrance to the house and the location of taps. The wire is laid carefully, without sharp bending.
Spiral method of installing a heating cable.
The work is performed in this order:
- the plastic pipe is wrapped along its entire length with metallized tape;
- the electrical cable is wound in a spiral;
- secured with adhesive tape all over;
- clamps secure the temperature sensor and its wires;
- install insulation and secure with ties.
It is more convenient to first make the spiral winding of the electrical cable free, with sagging, then gradually tighten it turn by turn, achieving tight contact with the pipe. At the same time, the wire is fixed. The distance between the turns is 4-5 cm. At the entrance of communications to the house, in the places where shut-off valves are installed, they are wound more tightly.
There is a subtlety in installing a temperature sensor - it is isolated from the electrical cable, but it is not necessary from the pipe. The thermostat is mounted indoors next to the electrical panel or in it if the device has a special mount. Connect to the network through a 6 A circuit breaker. It is advisable to install an RCD of the nearest higher rating with a leakage current of 30 mA. The cable and sensor are connected according to the diagram on the thermostat.
Is it possible to make a thermal wire yourself?
In order to make such a heating wire yourself, you need to visit a store. You will need to purchase a telephone power cable, for example. In terms of characteristics, it is very similar to a heating one. It can be used in conditions of high humidity, in addition, it has sufficient strength and an insulating layer. Of course, in this case there will not be such advantages as with self-regulating cables. You will have to regulate the heating strength yourself.
In this case, it is not necessary to expose the wires at the end of the wire. It is enough to separate them, separate 2 wires, take a single wire, fold it in half and twist it again with your own hands. To seal the wire, you can use a flange used in flexible water pipes. Sealing the entry is important. When the fitting is inserted into the wire, it should be filled with epoxy resin, and the connection should be firmly tightened with a nut. This method is relevant for internal systems.
If you plan to install a DIY cable outside, then its wires do not need to be unbraided.
The connection to the power supply is made at the opposite end of the wire, that is, one end is connected to the network, and the other is responsible for heating. In addition, after fastening it requires additional insulation. To do this, just wrap the cable with tape or aluminum foil. It’s better to watch the whole process in the video, and everything will become clear.
Installation of self-regulating cable
Products are sold by the meter, when the required piece is cut from the coil, or as a set of the required length. In the second case, the electrical cable has everything for installation, including couplings for installation inside the pipeline. Polypropylene pipes are covered with foil to achieve uniform heat distribution.
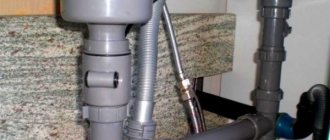
Installation inside the pipe.
Linear and spiral installation methods are used, and only the first is suitable for internal installation. A temperature sensor is not used, but you can use a small-sized thermostat, which is installed on the cold supply wire. When laying linearly, the cable from the outside is placed under the pipe from below, slightly shifted to the side. Then the pipe will protect it when the soil moves. Installation in any way outside is no different from the technology used with a resistance heater.
Be sure to thoroughly insulate the pipelines. They use foam shells, mineral wool, and foam heat insulators. This will prevent heat from dissipating outside.
Video: installation of a self-regulating heating wire inside a pipe
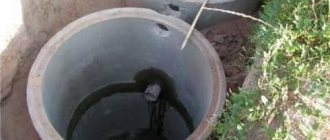
Laying a heating cable inside the pipeline is an effective and economical way to prevent freezing. Taking into account the fact that it takes up some space, it is used in water supply pipes with a cross-section of 1.
On the main line, which is prepared in advance for the installation of the heating wire inside, tees are installed for entering the electrical cable. Fittings with seals are used for sealing.
Details about the features of installing a heating cable inside a pipe are shown in the video.
Scheme
To power the cable heating system from the switchboard, a separate wire is laid, protected by its own circuit breaker and RCD. It is connected to the temperature control unit of the system. On the other hand, a heating cable is connected to it. The thermostat is equipped with a temperature sensor.
Heating cable connection diagram
All contacts of the thermostatic unit usually have symbols. Otherwise, their purpose is specified in the instructions.