Tips and tricks
When planning to create shelves for the garage, you need to know some of the features of the process so that the work is done efficiently and correctly.
If the storage system is mounted in a vertical position, then it is possible to use:
- brackets;
- eye;
- threaded rods;
- bolts with washers;
- anchors;
- furniture canopies.
When choosing the height of shelves that are supposed to be actively used, it is important to take into account the height of the owner of the garage. What is located at chin level will be convenient to work with, and what is above this level can be used to store not very important things
It is convenient to use hanging shelves that do not interfere with walking under them to place things that are rarely used or take up a lot of space.
For suspended structures, the load-bearing elements are located at least 60 or 70 cm apart, otherwise the plywood or board will begin to sag and the strength of the entire structure will be at risk.
If making a storage area will be your first experience in such a matter, then it is best to start working with wood.
The number of racks and shelves should correspond to what will be located on them. A half-empty garage, with all the walls in shelves, will look inappropriate, as will one small rack on which tools, tires, and miscellaneous things fit.
If any repair work is to be carried out in the garage, it is important to set up an area with tools that will always be at hand. A shelf-shield in this case is the best option.
There is space on it for keys of different sizes and purposes, and for pliers, hammers, screwdrivers, nail files and other items that are first needed for any small repair.
Construction layout and drawings
First of all, you need to determine what exactly will be stored in the garage, and then make a preliminary drawing with all the dimensions. The next step is to find a place to install it. To do this, the room must be divided into functional zones.
At the entrance to the garage, you need to store what you may need every day, and place in the far corner what is rarely needed.
Finally, you can draw up a final drawing indicating the location of tools, parts, liquids, oils and other necessary things.
Types of garage shelving
Shelving significantly saves space and expands the space of the garage.
The simplest solution for arranging a garage is to purchase ready-made factory structures. Most of them are collapsible, but there are also monolithic models. The first are assembled from individual parts using bolted connections.
There are several types of garage racks:
- Stationary. Such structures are designed for a specific location and assembled once and for all. Fixed to the wall and/or floor using metal corners and brackets. This rack has a high load-bearing capacity, it is immovable and safe to use.
- Mobile. The structures are mobile due to wheels installed on the legs. Massive racks of this type are installed on a mobile base in the form of a flat cart and equipped with handles that facilitate transportation.
- Collapsible. When manufacturing independently, the most suitable models of collapsible factory structures are often taken as a basis. They consist of many elements, including shelves, crossbars, and support posts.
- Hanging. Such racks are a complex of shelves and drawers. They are attached to walls or ceilings, so they have restrictions on weight load. Ideal for filling empty spaces on garage walls.
- Console or sliding. Optimal for storing long tools and materials. Equipped with a bottom shelf that extends left or right. They require free space next to them.
- Ceiling. The main elements of these suspended structures are traverses, metal frames, shelves, and anchor bolts.
Types of shelving designs
The type of design depends on the availability of free space, the purpose of the rack, the material it is made of and the intended method of storage system. Designs can vary both in the method of assembly and in the type of racks.
Stationary shelving system
It is installed in a specific location on a permanent basis. Such designs are designed for heavy objects - they can withstand heavy loads.
Before installation, it is very important to carefully consider the location of the rack and draw diagrams that take into account all the dimensions and area of the garage itself. Such systems are assembled once, usually using brackets.
Mobile mobile racks
Such a system, if necessary, can be moved or transferred to any place without unloading. This is very convenient if you need the tool outdoors. The rack is equipped with special rubberized wheels with a diameter of 10 cm. If desired, they can be fixed, limiting the possibility of movement.
Collapsible models
The shelves of these racks can be mounted to any height using nut or bolt fastening. Among car owners, such designs are considered the most acceptable option. They can be easily disassembled and adjusted at will, changing the height, and also rearranged to any place in the garage.
Hanging or wall shelves
They are attached to the surface of the ceiling or wall anywhere. They allow you to save space and make the most efficient use of free space. A similar structure can be assembled from a corner and hung on special hooks.
Rotating models
This interesting option can be installed in a room where you want to emphasize a certain style. These racks can rotate, providing access to tools and materials from any side. This setup visually resembles a rack of CDs or postcards.
Closed
Such designs protect against the loss of small items and tools and create the appearance of order. They can accommodate both valuable tools and various unsafe materials. In addition, such structures protect stored items from excessive dust.
Closed shelving is made of plastic, metal or wood. Inside they can be divided into cells.
Open
They allow you to quickly access any parts and objects - everything is in plain sight and there is no need to open and close the doors. The structures can be wall-mounted or suspended. To securely fix them, you need to install anchors in advance.
Separate tool cabinets
They can be made in the form of open cells, hooks, magnets or installations with holes. Heavy spare parts and tools cannot be placed on such panels. But they are ideal for storing small items that you need to always have on hand.
Step-by-step instructions for making wood
First of all, to make a rack with your own hands, you need to decide on its design (appearance). Then you need to understand the features of the technological design (design diagram). The beam system has decent strength. But the manufacture of such racks requires relatively expensive materials. And the skills of the performers are needed much more solidly. It is also worth familiarizing yourself with the main properties and key options:
- modular;
- console;
- bridge and cantilever structures.
No matter how tempting the idea of doing everything simply and quickly, by eye, it is better to prepare drawings and sketches. Ignoring this requirement does not just prevent you from doing everything economically and attractively. There are often very serious additional costs.
Shelves
To store small-sized and light items, it is advisable to abandon a full-fledged wooden or plywood shelf. Instead of these materials, slats can be used.
Frame
The manufacture of a wooden frame will go well if you use the assembly methods familiar to carpenters - “quarter-foot” or “half-foot”. But sometimes parts are simply connected end-to-end if more complex professional methods cause difficulties. In reality it turns out a little worse. The racks are made of timber, and the crossbars are made of ordinary boards. On the floor or on another horizontal surface, everything is pre-connected and tried on.
Once you are sure that all connections are as expected, you can make chalk marks. Thanks to them, you won't need to adjust as much anymore. Using a drill, drill holes at the designated points. Next, using a screwdriver, connect them with self-tapping screws. Connections to the walls, and ideally to the floor and ceiling, will be made using metal plates.
How to make a metal rack from a profile pipe with your own hands
Depending on the capabilities, the profile pipe frame is assembled with bolts or welded. An alternative option made from metal corners will be cheaper, since their price is lower. To simplify installation, make a combined rack with your own hands. Instead of a pipe for the side posts, use a metal corner.
You can make racks of any size and configuration from profile pipes
Preparatory work
To determine the dimensions of a rack made from a profile pipe, you need to measure the location of its installation. When installed along the entire length of the wall, its sides should not reach the corners by 10 - 15 cm. A metal structure for a garage where there is little space is made up to the ceiling. Due to this, you can reduce the length and width without sacrificing capacity. The height and depth of the shelves depend on the size of the items being placed. Having decided on the parameters, drawings are drawn up indicating the general dimensions, dimensions and cross-section of the parts. Even a simple sketch will help you avoid mistakes when cutting workpieces and installation, as well as accurately calculate the amount of materials.
Main technical characteristics of shelves for racks
The main components of any rack are: racks, crossbars, shelves, and, if necessary, transverse ties. Tightenings allow you to strengthen the product and are two metal strips that are welded or screwed to the racks.
For the most convenient use of a metal garage rack, during design and installation you must adhere to a number of rules:
- shelves for any type of structure must withstand a certain load and not be deformed;
- the design should be as functional and compact as possible;
- The overall dimensions of the shelves can vary: width - 1.5 - 2 meters, height - 20 - 100 centimeters, depth - 20 - 20 centimeters.
In addition to choosing the main design, you can also play with the type of shelves themselves, the main ones being:
- open. Can be vertical (for wheels), horizontal. When installing such shelves, all your things will be in the public domain;
- closed. Help prevent the loss of things;
- removable. They make it possible to vary the overall dimensions (length and height) of the structure;
- separated. A distinctive feature of a storage system with such shelves is that the shelves are conventionally divided into cells, allowing you to organize and systematize things.
Which shelves and shelving structures are suitable for the garage ↑
The easiest way to equip your garage with ready-made systems is to choose a stylish option with a simple fastening mechanism. But it’s not always possible to guess with the dimensions of the shelves, and besides, not all purchased options will be as functional and reliable as we would like. It’s more convenient, more profitable and more logical to make a shelf or rack yourself. As a result you will get:
- saving space;
- eliminating clutter;
- convenient storage of tools and other things;
- giving the garage (hangar) a well-groomed, lived-in appearance.
Manufacturing of a stationary storage system ↑
Sometimes it is more practical to make a permanent shelving unit for the garage, that is, an option that is mounted on site, attached to the wall. Let's take a closer look at the assembly diagram of this design:
- Markings are made on the wall for fasteners, holes are drilled and dowels are driven in.
- The metal profile or wooden beams are cut according to the diagram.
- The far racks are fixed to the wall, each measured strictly according to its level.
Each rack must be parallel to adjacent slats
- The frame is connected by horizontal binders from corners along the width (according to the height of future shelves).
- The front pillars are installed and connected to the side strips on which the shelves will lie.
- The front verticals are fastened, after which they form flooring from boards or lay plywood shelves in the prepared grooves.
Making hanging shelves
They can be made from a metal corner. The base can be made of wood, and the side walls will be a special cable or a profile square pipe. Such shelves are hung on hooks driven into the ceiling beams and, if necessary, can be quickly dismantled.
The downside is that they are quite wobbly and can wobble. It is not recommended to store expensive tools and fragile items on such shelves.
To eliminate the instability of the structure, the hanging shelf is mounted on studs.
Stages of manufacturing hanging shelves:
- Cut shelves to the desired size from a sheet of MDF (medium density fiberboard) or plywood. The recommended distance between the supporting studs is 60-70 centimeters.
- To increase strength, the ends of the slabs can be edged with a metal profile.
- Mark holes for pins along the edges of the shelf. It is advisable to drill no closer than five centimeters from the edges of the slab.
- Then the shelf is applied to the ceiling, and the places for fastening are marked on it using a pencil. Holes for anchors are drilled in the ceiling according to the marks, then the fasteners are driven into the concrete and tightened with nuts.
- Long studs need to be connected to anchors that are placed on the ceiling and secured with nuts.
- Once all the studs are secured to the ceiling, you can install the shelves. You need to screw a nut, a washer, and then a shelf onto the stud. Then secure it with a washer and nut. The final adjustment is made by level.
A hanging shelf can significantly save space in your garage.
We fasten with bolts or choose welding
Welding connection
So we’ve decided on the material, now let’s move on to choosing a method for assembling the metal components. One of the assembly options is a welding machine. Such structures are a non-demountable structure with high stability.
Connection with bolts
The second option is to assemble the rack using bolts. It is advisable to make such prefabricated options provided that over time they are planned to be moved to another place, or there is no opportunity (knowledge) to use welding
However, please note that such systems have less rigidity. To strengthen them, they are often fastened to the wall.
Installation of attachments
As with suspended structures, suspended ones can be made exclusively from one material, or combined. Metal options can be bought in stores, but wooden ones are most often made independently. Due to the fact that the building is attached directly to the garage wall, when wood comes into contact with brick, condensation will appear, which over time will lead to rotting and destruction of the shelf. To prevent this process, the walls of the garage room should first be plastered.
As described above, hanging shelves also come in open and closed types.
To mount an open shelf, you will need a plastic plug, screws or dowels. Holes are made in the wall and a plastic plug is inserted there. Finally, the structure itself is attached using dowels (self-tapping screws).
Useful tips
Before planning garage shelves, you need to determine how they will be attached. Bolted technology is usually used for wooden structures, welded - for metal ones. Both technologies allow structures to serve properly for a long time. However, they have some disadvantages.
Welded shelves cannot be disassembled. If you change the layout of the garage, simply dismantling the welded product will not work. The main positive factor of this design is its reliability - welding seams are not at all easy to destroy.
Bolted racks cannot provide sufficient rigidity. For stability, the structure must be additionally attached to the wall. However, it has a significant positive factor - mobility. The shelves are easy to disassemble and assemble, and you can also make different distances between them.
garagehow to make it yourself shelving shelving in the garage
Ideas, drawings and photos of equipment for tools
In addition to furniture, garages have workbenches and stands for storing power tools and keys. The first structures may be a component of the GSH, or they may consist of two separate modules with a table between them.
The location can be changed at the discretion of the garage owner. Places for sedan wheels can be provided at the top of the racks so as not to take up valuable floor space. It is better to leave heavy and large SUV wheels at the bottom so that you do not have to lift heavy objects.
The easiest way to purchase a tool stand is ready-made. It is a perforated metal sheet on which holders are hung.
However, if you don’t want to spend money on such a purchase, you can build the product yourself. Check out a few ideas for DIY garage equipment:
- Drive nails into a board, sheet of particle board or plywood for objects to be hung later. It is recommended to circle each of them with a colored marker. This will allow you to quickly navigate what to hang where.
- Weld wire hooks to the mesh, then securely fix it to the wall. This product can withstand even very heavy objects.
- Make a bar and cut holes in it for lowering tools (see photo).
The stand does not have to be hung on the wall. It can also be put on wheels, making it mobile.
We really hope that the above examples of organizing space in the garage will inspire you and motivate you well for your own creativity, which will bring satisfaction and considerable joy from the results achieved.
What tools and materials are needed?
In order to install a rack quickly and efficiently, you need to stock up on all the necessary tools and materials so that in the future you will not be distracted by searching for what is missing.
To make tool shelves in the garage with your own hands, you may need:
- Chipboard (chipboard) or plywood board up to two centimeters thick;
- fastening anchors;
- shelf material;
- brackets for fixing the product on the wall;
- drill;
- electric jigsaw;
- building level;
- perforator with nozzle;
- tape measure;
- hooks for fastening;
- set of self-tapping screws.
Additional amenities in the garage
A large garage should be equipped with additional elements, and not just places for tools, spare parts, wheels and waste materials. Some devices will make technical work easier. A workbench is very useful in a garage; it is a table with many additional amenities: bedside tables, shelves, drawers, local lighting, sockets, a vice. Another practical and functional device is a sink. It will provide constant access to water. Thanks to this, you can quickly clean and wash the room, car, parts. To carry out car repairs, it is necessary to make an inspection hole if there was none initially. In a cramped room, it is also worth setting aside space for a cellar for storing pickles and vegetables. If the garage is used all year round, you will need to ventilate and install a heating system. You can organize a small closed cabinet in the shelving structure.
Useful tips for organizing your garage space
Since the garage, by its intended purpose, is a home for cars, you should be careful to ensure that the space for tools is well organized. Also, there will probably be several square meters in the room in order to remove some of the items from the apartment, so as not to clutter the living space.
When installing various devices indoors, it is important to consider that all available equipment is at hand. To do this, you can use the following recommendations:
- Regardless of the size of the garage, it is important to have a rack with shelves on which you can put tools, materials and useful items.
- If you want to carry out routine car repairs with your own hands or perform other repair work, then you definitely need to make a workbench in the garage.
- To overhaul a car, you should make your own cellar - it will not only allow you to regularly inspect the mechanism, but also provide additional storage space.
- Finally, it is quite possible for a garage to set up its own small workshop, the accessories for which can also be made with your own hands.
Rational organization of space in the garage creates many tangible advantages:
- it becomes possible to independently carry out short-term repairs of car parts and other mechanisms, due to which you can significantly save money;
- Convenient placement of tools significantly speeds up work and saves time;
- creating additional places for storing tools, old things, clothes makes it possible to relieve the apartment of things that are rarely used in the household;
- Finally, thoughtful internal logistics of the premises allow it to maintain its attractive appearance and avoid clutter.
NOTE. At the project development stage, it is important to take into account the area of the room, and also take into account several mandatory utility compartments - for storing summer and winter tires, cans, jacks, etc.
Video TOP best ideas for decorating a garage with your own hands
Do-it-yourself shelving in the garage: preparation before production
So, you've decided to make your own garage shelving. Before you begin making shelves from any material, you must carry out the necessary preparation for this.
Preparatory stage. Taking measurements and making a drawing.
First of all, decide on the size of the structure and then take all the necessary measurements.
- start by measuring the height and width of your future shelving;
- then consider the required number of shelves and their height;
- decide on the material of the shelves;
- Draw on paper the desired appearance of the finished structure. Having a drawing in front of your eyes will make it easier for you to make a shelving unit.
How to make shelving in the garage with your own hands - photo drawings:
How to make shelving in the garage: metal and wood?
You have decided to make a shelving unit out of steel and have already drawn up a drawing. Now let's move on to the next stage.
Stage 2. Purchase of materials.
Make a list of the quantity of materials you need and their sizes, then feel free to go to any hardware store. To make the frame you will need a steel channel and corners. If you want to make a completely steel structure, then buy the required number of sheets of metal. If your plans are to make wooden shelves on a metal frame, then you will need blocks of wood, plywood or chipboard.
Stage 3. Preparing tools.
To make shelves you need the following tools and equipment:
- electric drill;
- angle grinder (grinder);
- screwdriver;
- if you want to weld rack parts, you will need a welding machine and electrodes;
- hacksaw;
- hammer;
- bubble or laser level;
- screws, bolts, nails, dowels;
- construction tape;
- pencil.
Stage 4. Metal cutting process.
In accordance with the dimensions and drawing, we carefully and slowly cut the metal vertical (supports and sections) and horizontal (shelves) parts of the rack.
Stage 5. Assembly of the structure.
First we secure and install the frame. For greater reliability, you can attach it to the wall and ceiling using dowels or special screws.
After installing the vertical racks, proceed to attaching the shelves. You can bolt them on or weld them to the frame. Don't forget to use a level when doing this.
Stage 6. Painting.
To prevent the rack from becoming rusty over time, it must be primed and coated with special anti-corrosion paint.
If you want to make wooden shelving for your garage for storage and already have a ready-made drawing, then you can move on to the next stage.
Stage 2. Purchase of materials.
The most common wood garage shelving materials are oak and pine. Vertical and transverse racks are made from timber of different sizes, and for shelves you can buy boards, sheets of plywood or chipboard.
Stage 3. Necessary tools and construction equipment:
- electric tools: drill, grinder, screwdriver;
- wood hacksaw;
- hammer;
- tape measure and pencil;
- level;
- nails, screws, self-tapping screws, bolts.
Stage 4. Cutting wooden parts. Adhering to the required dimensions and drawing, we cut all the wooden supports and racks, and then the shelves. We treat all parts with a special antiseptic intended for wood.
Stage 5. Assembly of the structure.
First, we assemble and secure the entire frame, after which we attach the shelves to it using metal corners and M5 bolts. We check the strength of the finished structure and once again measure the evenness of all surfaces and corners with a level.
Stage 6. We carefully and without haste paint the structure to prevent it from rotting and the formation of mold on it. We wait for it to dry completely, and then install it in the chosen place. That's it, your rack is ready!
How to make a garage rack with your own hands from a profile:
So, now you know how to make wooden or metal garage shelving with your own hands. At first glance, this is a rather complex process with many nuances.
But, nevertheless, everyone can make a rack. All you have to do is take all the measurements correctly and without haste and follow the step-by-step instructions. A self-made rack will serve you for many years.
How to make a wooden shelving unit for your garage with your own hands, see below:
Kinds
First, let's figure out what types of racks there are and what materials they can be made from.
By type of design, racks are divided into:
- Not mobile (stationary) shelves. Such shelves are “tightly” attached to the garage wall and can stand for a long time. This is the most stable type of shelving that can support the heaviest items and tools.
- Modular shelving systems. Such shelving systems are sold in many construction and furniture stores. They can be quickly and easily assembled and disassembled. You can also add new segments to them if you wish.
- Mobile (movable) racks on wheels. They are small in size and have limited weight. They are convenient because they can be moved to another place at any time without dismantling the rack.
- Hanging shelves. Mounted on walls or under the ceiling. Not intended for storing heavy items.
- Small rotating racks. They are very convenient for storing small tools, parts, cables and other necessary “trifles”. But you can rarely find them on sale.
Watch a video of what homemade garage shelving looks like:
Garage storage systems can be made from different materials:
- metal. The strongest and most durable type of shelving. They are not afraid of temperature changes, do not burn and can withstand any weight;
- tree. Such racks are cheaper than metal ones and less durable due to frequent changes in temperature and humidity levels inside the garage;
- plastic. Structures with shelves made of this material are the cheapest and lightest in weight. Designed for storing light items;
- combination of several materials. For example, a wooden frame and plastic shelves.
The required type of structure is chosen based on the weight of things and the amount of free space for storing which shelves and racks are made in the garage.
Read about how to make tool shelves with your own hands: here. And also what storage systems are available for the garage.
What do-it-yourself garage shelving looks like - photo :
What should a garage shelving look like?
In order to reasonably talk about selection criteria, it would be a good idea to first understand what requirements a garage rack must meet. It is fair to talk about the following characteristics:
matching the size of the garage. The main task of the rack is to help the car owner properly organize the storage system. If things are scattered around the garage, they will take up a lot of space and interfere with parking and servicing the car. On the other hand, the shelving should also not restrict freedom of movement, so you will have to solve the difficult task of finding a shelving unit that would accommodate everything you need, but at the same time take up a minimum of space. If there are few things, then the task becomes simpler, but you can find a solution in any case. Fortunately, there are a lot of different design options; Topic proposal
manufactures and sells garage racks of different sizes, models are designed for different loads, there are special racks for hardware and tires. The assortment can be found on the page https://region-voronej.ru/stellagi/
stability and reliability. First you need to imagine what you will store on the shelves. It’s one thing if it’s small fasteners and small power tools, another thing if it’s tires, filled large cans and other heavy equipment. In the first case, a design that can withstand up to 60 kg of load is suitable, in the second - 120-170 kg or more
Higher strength will be reflected in the price, and that is why it is so important to decide in advance on the contents of the shelves;
safety. It is advisable that the rack be resistant to fire, since the garage is a high-risk place
If you plan to store liquids, then the shelves should not be slippery, and even better, they should have a side. The design should not have sharp elements so that you do not inadvertently get injured. Metal parts must be well protected from corrosion, since liquid contact with them is not uncommon;
convenience. The dimensions and number of shelves, their location must fully meet the requirements of the garage owner, and without a preliminary analysis of the contents of the rack it is difficult to say which model will be the most convenient.
Drawing an intermediate conclusion, we note that when choosing a rack for the garage, it is very important to understand what size structure will suit you, and where exactly it will stand. To avoid confusion and make mistakes, draw up a plan that will indicate the size of the garage, the space for the car and the area intended for the garage
You may spend a little time, but you will significantly reduce the likelihood of error.
Requirements for racks and shelves
Important design characteristics are reliability and functionality. Special requirements apply to the dimensions of the shelves. They should be convenient for storing parts, tools, spare parts and give the garage a well-groomed and lived-in look.
To prevent a chaotic dump, it is advisable to properly organize the space inside the garage. This can be done using a homemade shelving unit. It will allow you to rationally and neatly place things and create comfortable conditions for car care and solving everyday household problems.
When choosing the type of rack you should consider:
- construction material - you should choose one that can be easily cleaned from dirt;
- strength - shelves should not bend easily under weight and be damaged by impacts and scratches;
- sustainability.
Other options
A variety of materials are suitable for making shelves. The main requirement for them is strength, the ability to withstand the expected load. Craftsmen find original and practical solutions for organizing garage space.
Cable rack shelf
Cable racks make very durable shelves.
Cable racks, trays, profiles are products necessary for electrical installation work. From these parts you can assemble a strong and reliable structure from several shelves and sections. Also, these products are suitable for constructing a frame on which wooden, glass or plastic shelves are installed.
The range of auxiliary materials for electrical installation work includes a full range of fastening elements for assembling structures from cable racks. All these products are affordable and sold in the hardware or electrical materials departments of any construction hypermarket and shopping center.
From canisters
Shelf made of canisters - option for originals
A plastic canister is a real find for those who love original solutions for organizing storage systems in the garage. Entire racks are built from these containers. Canisters act as drawers, one of the side walls of which is neatly cut off. This way you get a hollow box with a handle.
Installation of such racks is simple. In production, it is recommended to focus on the instructions for installing wooden shelves suggested above. First of all, a multi-sectional frame is constructed from boards, in each opening of which a canister laid on its side is installed. Get a comfortable, deep, drawer with a handle.
Optimal dimensions and distance to the car
The dimensions of the storage structure depend on the number of things intended for storage and the size of the garage itself. Small garages often have just a few hanging shelves for storage. In large and spacious garages, it is advisable to make a large shelving unit occupying one of the walls.
Below we present the most optimal dimensions of a garage rack:
- Width. The most common and convenient shelf width: 1 meter.
- Height. Recommended height of each shelf: 30-50 centimeters.
- Depth. 50-60 centimeters will be quite enough to accommodate objects of different sizes.
Place shelves where they will not interfere with the passage or restrict movement. Also be sure to take into account that the minimum distance from the rack to the car is 1 meter.
Which rack is better: welded or bolted
Garage shelving is made of wood and metal. Wooden ones are mostly non-removable - on nails and screws. They are usually installed permanently, attached to the wall. Metal racks can be welded. Then they are inseparable. There are racks with bolted connections. These structures are mobile and can be disassembled if necessary. Their disadvantage is insufficient rigidity, since there is always some play in such a connection. To make the structure more stable, it is attached to the walls. To do this, metal plates with a hole can be welded (bolted) to the outer posts. Drive a crutch into this hole (after drilling a hole of a slightly smaller diameter in the wall).
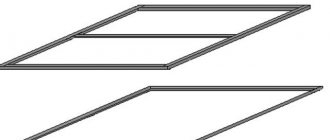
One of the options is a frame made of profile pipe and plywood shelves
Both welded and bolted garage shelving work well, but welded structures are more common. The collapsible option is chosen in two cases. The first is that it is possible to move to another garage and all the equipment will need to be transported, but the structure weighs hundreds of kilograms, so moving it entirely is problematic. The second is that there is no possibility or desire to use welding (if you make the garage racks yourself). The rest usually prefer welded ones - they are more stable and, if you have experience in welding, they can be assembled faster.
There are also metal racks made from perforated corners on sale. They are also mobile and can be disassembled, but they are connected using hooks (on the crossbars) and grooves (on the racks). Such storage systems are convenient - you can rearrange the shelves to the desired height. Their disadvantage is that they are expensive.
Advantages and disadvantages of metal shelving
The advantages of metal structures include:
- Reliability and durability. The shelves can support significant weight without damage.
- Easy to care for.
- Wear resistance. Even with intensive use, metal pipe racks retain their characteristics and appearance unchanged.
- Full compliance with fire safety requirements.
- Storage of items made of any material.
- The metal frame is resistant to moisture and temperature changes.
Disadvantages include:
- It is more difficult to make a rack from a metal profile than from wood;
- the price of metal structures is higher.
Creating an inspection hole in the garage
If your garage does not have a viewing hole, you should decide whether you need such a design. Most often, car owners require an inspection pit for car repairs and maintenance. To create an inspection hole, first of all, you need to find out the groundwater level under the land plot on which the building is located.
Information about the depth of their occurrence can be found in the technical documentation of the site. If there is none, you can dig a hole and see for yourself. On a dry site, it is much easier to equip an inspection hole under the garage.
In the case where groundwater is located close to the surface, the construction of an inspection hole becomes more complicated. Then you need to waterproof the pit, and also make a drainage system that will drain the water into the sewer. Only after this they begin to build walls. A well-designed drainage system in the winter will prevent water from stagnating on the floor when the snow brought into the garage on wheels melts.
Good lighting should be provided in the inspection pit
There are several generally accepted rules for constructing a viewing hole:
- creation of a detailed drawing of the inspection pit;
- organization of waterproofing and drainage system;
- creating niches in the walls of the pit so that there is somewhere to put the tool;
- ventilation system equipment that will help avoid unpleasant odors. It is installed using the basement ventilation method.
A detailed drawing will help you create the ideal inspection hole
What materials are they made from?
Typically, racks are made of wood or metal, less often - of plastic. The most practical are combined wood-metal structures. The vertical load-bearing supports in them are made of metal, and the horizontal ones are made of wood.
Metal
Metal structures are the most expensive, but at the same time the most reliable, having a long service life. Usually stainless steel is used, less often - aluminum and simple iron. Welded shelves can withstand a lot of weight and look attractive and aesthetically pleasing.
The only disadvantage of such structures is their susceptibility to corrosion. However, it can be easily solved by treating the surface with an anti-corrosion compound.
In addition to welding, metal racks can be connected using bolted joints.
Tree
It is much easier to make a garage rack with your own hands from this material. This is determined by the fact that wood is very easy to process, so you can quickly cut out the necessary elements and adjust them to the required dimensions.
The lack of moisture resistance is a disadvantage of the material, because wood products swell when absorbing moisture. In addition, this material is susceptible to fire, mold and rot, so the structure needs to be treated with special solutions.
The nuances of assembling metal shelves
This process has its own characteristics. There are mainly two methods used to assemble shelves: welding and bolting.
In both cases, parallelism is required at the preparatory stage, because the welded flange cannot be corrected without destruction. It is also undesirable to redo the bolted connection, as this may lead to a loss of aesthetic appearance.
Before welding or drilling holes for bolted connections, the shelf must be secured to the vertical posts using clamps and the horizontalness must be checked using a building level in the longitudinal and transverse directions. After this, the shelf is attached to the vertical posts by welding, the clamps are removed and the horizontality is checked again. If everything is normal, then final welding is performed.
With a bolted connection, two holes are drilled on one side, and this side is secured with the help of bolts, and the clamps are removed. They remain on the other side. Then the horizontalness is checked and, if necessary, correction is made. After this, two more holes are drilled and secured with a bolted connection.